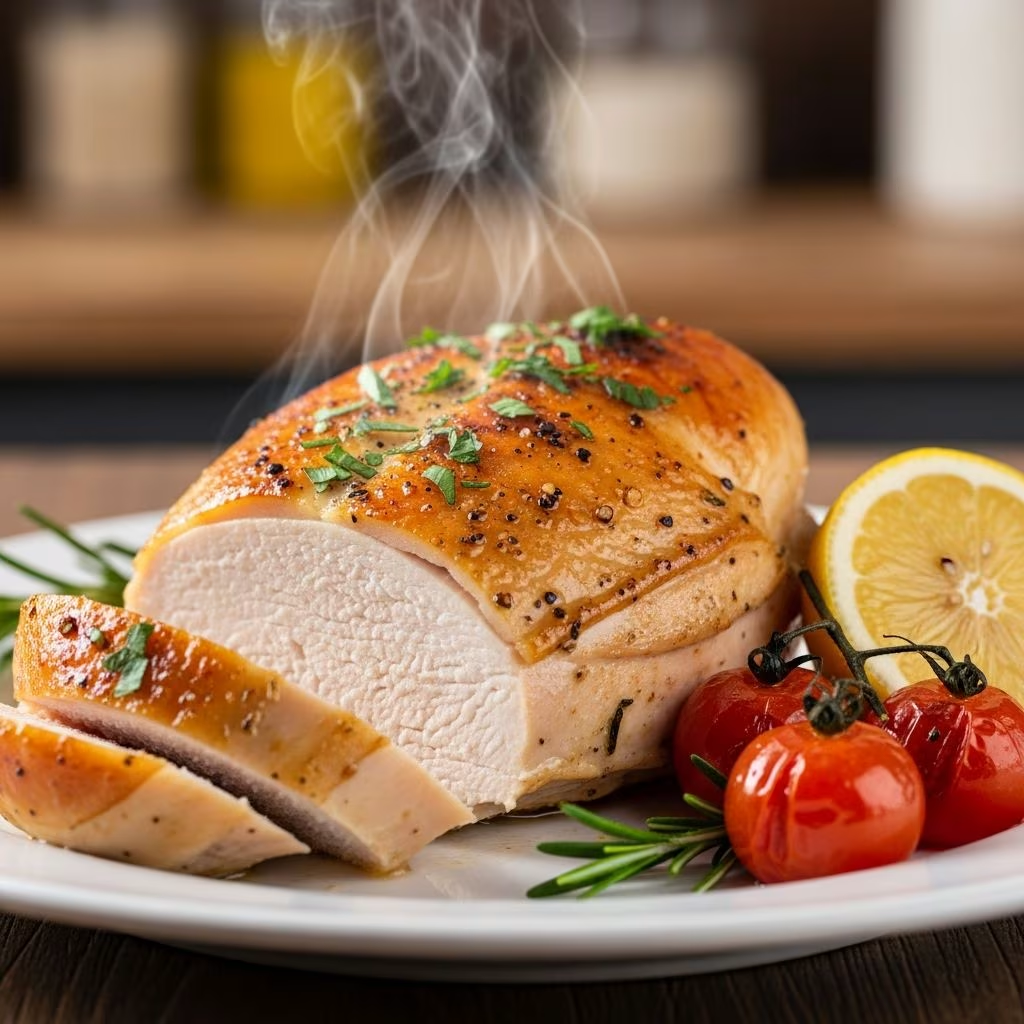
Bone-in split chicken breasts represent one of the most versatile and economical protein options available for home cooks. These cuts deliver remarkable results when prepared correctly, yielding meat that remains remarkably moist and tender while developing a golden, crispy exterior. Whether you’re planning a quick weeknight dinner or preparing a meal for guests, understanding the fundamentals of baking this cut can elevate your cooking repertoire significantly.
Understanding Your Ingredients and Cuts
Split chicken breasts consist of half of the chicken’s breast meat, still attached to the bone and typically including the skin. This particular cut offers several advantages over boneless alternatives. The bone conducts heat more evenly throughout the meat, promoting uniform cooking and preventing dry spots. The skin provides natural protection during the cooking process, maintaining internal moisture while creating opportunities for browning and flavor development.
When selecting chicken at your market, look for pieces that appear plump and have a pale pink color. Avoid any with discoloration or an off odor. For optimal cooking results, choose breasts of similar size—this ensures they will finish cooking at approximately the same time, preventing undercooked or overcooked portions.
Essential Preparation Steps Before Cooking
Proper preparation determines much of your final outcome. Begin by removing your chicken from refrigeration approximately fifteen to twenty minutes before cooking. This allows the meat to reach closer to room temperature, promoting more even cooking throughout the breast.
Examine each piece carefully for excess fat deposits or loose skin edges. Trim these away using a sharp knife or kitchen shears. If you prefer to remove the skin entirely, this step becomes optional, though skin-on preparation typically yields superior moisture retention and browning.
Pat the chicken dry with paper towels before proceeding. Moisture on the surface can interfere with browning and seasoning adhesion. This simple step makes a noticeable difference in the final texture and appearance of your finished dish.
Selecting and Applying Your Seasoning Strategy
The choice between minimal seasoning and complex flavor combinations depends entirely on your preferences and available time. Even the simplest approach—using only salt, pepper, and olive oil—produces excellent results. More elaborate seasoning mixtures can incorporate dried herbs, garlic powder, paprika, or fresh herb-based rubs.
When applying your chosen seasoning, distribute it generously across the top surface of each breast. Since the bone remains on the underside, concentrating flavoring on the exposed meat ensures every bite includes your chosen seasonings. Press the mixture gently into the surface using your fingertips to help it adhere more effectively during the cooking process.
For those preferring skin-on preparation, you can carefully lift the skin and distribute seasonings directly against the meat. This technique requires patience but rewards you with more integrated flavors throughout the dish.
Classic Seasoning Combinations
- Mediterranean Blend: Olive oil, rosemary, basil, garlic, salt, and black pepper
- Simple Herb Mix: Italian seasoning, paprika, salt, and pepper
- Spiced Rub: Paprika, garlic powder, cumin, cayenne pepper, salt, and pepper
- Minimalist Approach: Extra virgin olive oil, kosher salt, and freshly ground black pepper
The Importance of Proper Oven Temperature
Oven temperature significantly impacts both cooking time and final texture. Most recipes utilize temperatures between 350 and 425 degrees Fahrenheit, each producing slightly different results.
Lower temperatures (around 350-375 degrees Fahrenheit) promote gentler, more gradual cooking, reducing the likelihood of exterior browning before the interior reaches proper doneness. This approach works particularly well for larger pieces or when you prioritize moisture retention above all else.
Higher temperatures (400-425 degrees Fahrenheit) accelerate browning and crisping of the skin while still allowing adequate time for thorough cooking of the meat. This range produces that coveted combination of crispy exterior and juicy interior that many home cooks seek.
Cooking Duration and Temperature Monitoring
Cooking time varies based on several factors including the specific thickness of your chicken pieces, your oven’s individual characteristics, and whether the meat began at room temperature or straight from refrigeration. As a general guideline, expect cooking to require approximately forty to sixty minutes for bone-in split breasts.
Never rely solely on cooking time estimates. Instead, invest in a reliable meat thermometer—either an instant-read digital model or an oven-safe version. The internal temperature must reach 165 degrees Fahrenheit at the thickest part of the meat, away from the bone. This temperature ensures all harmful bacteria have been eliminated while maintaining optimal moisture content.
Check the temperature beginning at the forty-minute mark if cooking at higher temperatures, or at the fifty-minute point for lower temperature preparations. This prevents overcooking while ensuring safety.
Choosing Your Cooking Vessel and Liner
Your choice of baking vessel influences heat distribution and cleanup considerations. Shallow roasting pans, standard baking sheets, and ceramic baking dishes all work effectively. Select whichever option fits your available pieces comfortably without excessive crowding.
Lining your vessel with parchment paper or aluminum foil streamlines cleanup significantly. These liners prevent sticking and allow you to dispose of drippings easily. If you prefer direct contact between chicken and pan, simply ensure adequate oil coating to prevent adhesion.
The Critical Resting Period
After removing your chicken from the oven, resist the immediate urge to serve or slice the meat. Allowing the cooked chicken to rest for five to ten minutes serves several important purposes. During this period, the muscle fibers relax and redistribute juices throughout the meat. Cutting into the meat immediately after cooking causes these valuable juices to run out onto your plate rather than remaining within the meat itself.
Use this resting time productively by preparing accompanying sides or setting your table. Your diners will appreciate the superior texture and moisture that this brief pause provides.
Complementary Side Dishes and Serving Suggestions
Baked split chicken breasts pair beautifully with numerous accompaniments. Roasted root vegetables cooked on the same baking sheet create minimal cleanup while developing complementary flavors. Potatoes, carrots, and other hardy vegetables benefit from the chicken’s rendered fat and seasoning.
Fresh salads provide a lighter contrast to the richness of skin-on chicken. Grain-based sides such as rice, quinoa, or farro offer substance while remaining relatively simple to prepare. Steamed green vegetables add color and nutritional balance to your plate.
Consider the sauce possibilities as well. Pan sauces created from the drippings and a splash of broth or wine elevate the dish without requiring extensive additional cooking.
Troubleshooting Common Issues
Dry or Stringy Texture
This typically results from overcooking. Even a few degrees beyond the safe internal temperature of 165 degrees Fahrenheit can begin drying out the meat. Use an accurate thermometer and remove the chicken immediately upon reaching the proper temperature. Additionally, allowing shorter resting periods after cooking can contribute to moisture loss.
Pale or Underbrowned Skin
If your finished chicken appears anemic rather than golden brown, your oven temperature may have been too low. Increase the temperature to at least 400 degrees Fahrenheit in future preparations. Alternatively, apply a thin brush of oil to the skin before cooking to promote browning.
Unevenly Cooked Pieces
When some pieces finish cooking while others remain undercooked, size variation likely caused the problem. Select breasts of similar size, or position larger pieces on the hotter sections of your oven. Rotating the pan halfway through cooking can also promote more uniform results.
Storage and Leftover Applications
Properly stored cooked chicken remains safe in your refrigerator for three to four days when kept in an airtight container. The meat can be served cold in salads, diced into casseroles, shredded for chicken salad sandwiches, or warmed through for quick additions to grain bowls and other prepared dishes.
For longer storage, remove the meat from the bone, cool completely, and freeze in airtight containers or freezer bags for up to three months. This preparation method saves considerable time when you desire quick chicken additions to various recipes throughout the month.
Nutritional Profile and Dietary Considerations
Chicken breast provides an excellent source of lean protein, essential B vitamins, and selenium. The skin contributes additional fat-soluble vitamins and creates the texture many home cooks prefer, though it can be removed to reduce overall fat content if desired.
This preparation method requires minimal added fat when compared to many cooking techniques, making it a heart-healthy option suitable for various dietary approaches including Mediterranean and balanced whole-food diets.
Frequently Asked Questions
Can I marinate the chicken before baking?
Yes, marinating for thirty to forty-five minutes enhances flavor development. Use acidic components like lemon juice or vinegar to tenderize the meat gently. Pat the chicken dry before baking to promote proper browning.
Should I cover the pan with foil during baking?
Covering initially can help prevent excessive browning if cooking at higher temperatures, but uncover during the final fifteen to twenty minutes to allow the skin to crisp properly.
What if my oven temperature runs hot or cold?
Invest in an inexpensive oven thermometer to verify actual temperatures. Adjust your oven’s settings accordingly, or compensate by adjusting cooking times and using your meat thermometer religiously.
Can I use boneless chicken breasts instead?
While possible, boneless breasts cook more quickly and can dry out more easily. Reduce cooking time to fifteen to twenty-five minutes and monitor carefully with a thermometer.
Is skin-on or skin-off better for health?
Both options are nutritious. Skin-on provides superior moisture retention and texture but contains more fat. Skin-off reduces fat content while still delivering excellent protein and nutrients. Choose based on your preferences and dietary goals.
Building Confidence in Your Cooking
Baking split chicken breasts becomes intuitive with practice and attention to detail. Start by following a single approach consistently until you understand how your specific oven behaves. Over time, you’ll develop an instinctive sense for doneness and understand the subtle variations that create different outcomes.
Document your successes—noting oven temperature, cooking time, and any variations you made. This personal record becomes invaluable for future preparations, helping you replicate excellent results repeatedly.
Remember that excellent home cooking rarely depends on complicated techniques or exotic ingredients. Rather, success comes from understanding fundamental principles, respecting the quality of your ingredients, and maintaining consistent attention to the cooking process. By mastering baked split chicken breasts, you develop skills applicable to countless other cooking endeavors.
References
- USDA Food Safety and Inspection Service — United States Department of Agriculture. 2023. https://www.fsis.usda.gov/food-safety/safe-food-handling-and-preparation/chicken-food-safety
- Safe Internal Temperature Chart — Centers for Disease Control and Prevention. 2024. https://www.cdc.gov/foodsafety/communication/poultry-temperature.html
- Chicken Nutritional Information — USDA National Nutrient Database for Standard Reference. 2023. https://fdc.nal.usda.gov/
- Food Storage Guidelines — United States Department of Agriculture. 2024. https://www.usda.gov/our-agency/fsis/food-safety-keep-food-safe