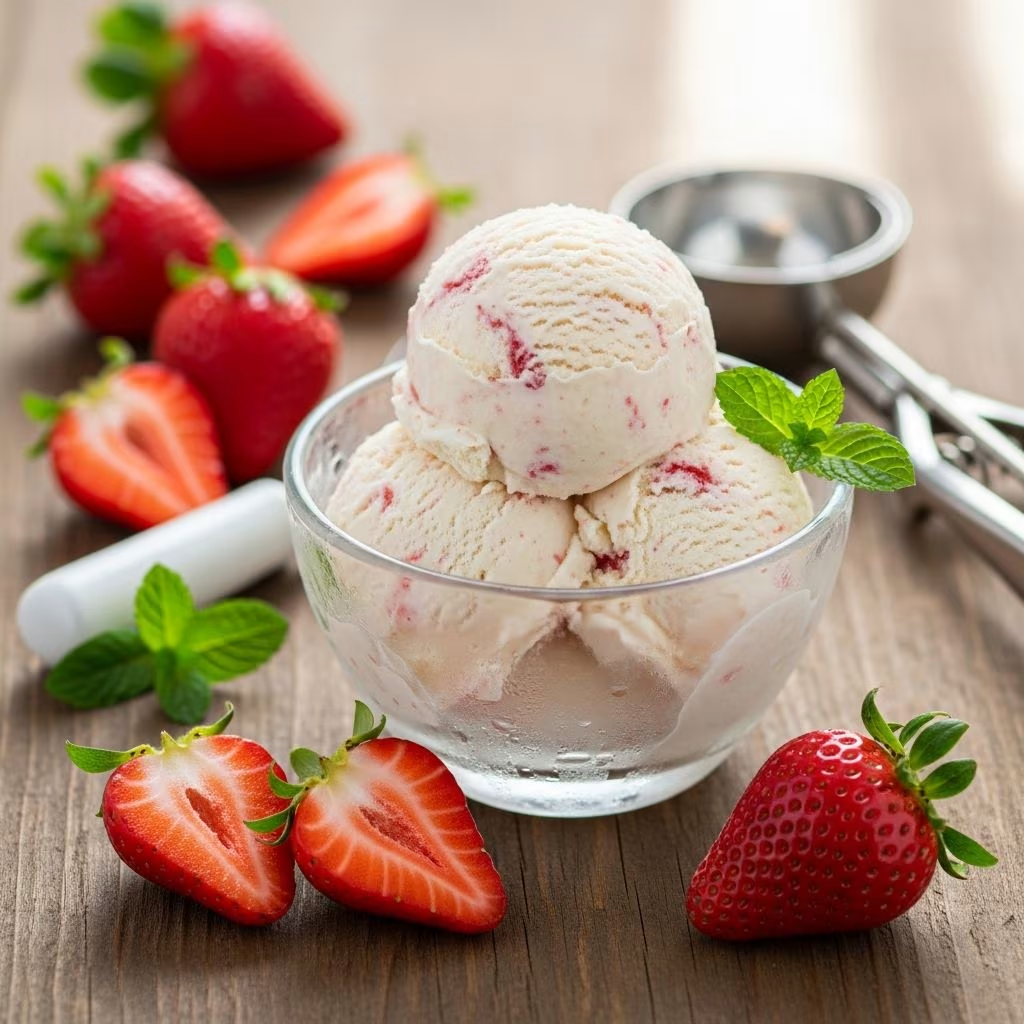
Creating strawberry ice cream at home transforms simple, fresh ingredients into a luxurious frozen dessert that rivals any commercial version. Whether you’re a seasoned home cook or venturing into ice cream making for the first time, this comprehensive guide will walk you through every step of the process, from ingredient selection to churning techniques and serving suggestions.
Understanding the Foundation: Essential Ingredients
The beauty of strawberry ice cream lies in its simplicity. Unlike some frozen desserts that require numerous additives and stabilizers, authentic homemade strawberry ice cream relies on a few quality ingredients that work together to create the perfect texture and flavor profile.
Fresh Strawberries form the backbone of this dessert. The strawberries you select dramatically influence the final outcome. Ripe, in-season strawberries deliver natural sweetness and vibrant flavor that inferior fruit cannot replicate. When purchasing strawberries, look for berries that are uniformly red, firm to the touch, and free from soft spots or mold. If fresh strawberries aren’t available year-round, frozen berries offer an excellent alternative since they’re typically frozen at peak ripeness, preserving their natural flavor compounds.
Cream and Milk create the creamy base that distinguishes ice cream from frozen fruit purees. Heavy cream contributes fat content that produces the luxurious mouthfeel, while whole milk adds liquid volume and subtle sweetness without overwhelming richness. The combination of these dairy components is crucial—using only cream results in an overly heavy product, while too much milk produces an icy texture.
Sugar serves multiple functions beyond sweetness. It lowers the freezing point of the mixture, allowing the ice cream to remain scoopable rather than rock-hard. Sugar also enhances flavor perception and contributes to the smooth, creamy texture. Some recipes incorporate brown sugar alongside granulated sugar to add subtle caramel notes that complement strawberry’s natural tartness.
Flavor Enhancers round out the ingredient list. Vanilla extract adds depth and complexity, while fresh lemon juice brightens strawberry flavor by cutting through richness and making the fruit taste more vibrant. A pinch of salt amplifies sweetness and balances the overall flavor profile.
Ingredient Variations and Substitutions
Different recipes employ various additional ingredients that modify texture and flavor:
- Egg Yolks: Some traditional recipes include tempered egg yolks, which create an ultra-silky custard base. This requires heating the mixture to a safe temperature while slowly incorporating beaten eggs.
- Honey: A natural sweetener that adds subtle floral notes and creates exceptional creaminess without the granular texture that can sometimes develop with sugar alone.
- Coconut Oil: Small quantities of refined coconut oil enhance smoothness and richness while adding minimal coconut flavor.
- Half and Half: This dairy product, which contains less fat than heavy cream, can be mixed with cream to fine-tune the richness level of your final product.
Preparation Techniques for Maximum Flavor
How you prepare strawberries determines whether your ice cream will taste like fresh fruit or a muted approximation. The first critical step involves macerating the berries—combining them with sugar and allowing them to rest. This process draws out natural juices, intensifying flavor while creating a syrupy mixture that incorporates smoothly into the base.
When you macerate strawberries, the sugar begins breaking down cell walls through osmosis, releasing compounds that contain the fruit’s true essence. After macerating for fifteen to twenty minutes, you’ll notice liquid pooling around the berries. This precious liquid should be preserved and incorporated into your ice cream mixture because it contains concentrated strawberry flavor.
The next decision involves texture. Some home cooks prefer completely smooth ice cream achieved by pureeing all the macerated berries in a food processor or blender until no visible fruit pieces remain. Others favor a more textured version by pureeing only half the berries and folding in the remaining fruit chunks. This textured approach provides pleasant berry pieces throughout, though these can develop slight ice crystal formation during freezing.
To minimize iciness in chunky versions, keep fruit pieces relatively small and ensure your ice cream maker operates long enough to properly freeze the mixture.
Building Your Perfect Base Mixture
Once your strawberry puree is ready, combining it with the dairy base requires careful attention. A well-executed base mixture incorporates all components evenly, ensuring consistent flavor and texture throughout the finished product.
In a large bowl, combine your prepared strawberry mixture with the measured heavy cream, whole milk, vanilla extract, lemon juice, and any remaining sugar. Whisk these ingredients thoroughly until sugar dissolves completely and the mixture achieves uniform color. If you’re using heated cream (some recipes recommend warming the cream base to help sugar dissolve and flavors meld), allow it to cool completely before combining with strawberry puree.
At this stage, you might notice the mixture looks fairly thin. This is normal and expected. The ice cream maker’s churning action will incorporate air and create the characteristic creamy texture.
Essential Equipment and Preparation
Success with homemade ice cream depends significantly on proper equipment preparation. The single most important step—often overlooked by beginners—involves thoroughly freezing your ice cream maker’s bowl.
Most electric ice cream makers feature a freezable bowl that must be placed in a standard freezer for a minimum of twelve to twenty-four hours before use, depending on the manufacturer’s specifications. This pre-freezing step is non-negotiable. Without a properly frozen bowl, your machine cannot remove enough heat from the mixture to create the churning action necessary for ice cream development.
Plan ahead accordingly. If you want to make ice cream on Saturday, place your bowl in the freezer by Friday evening. Some cooks maintain a permanently frozen ice cream maker bowl in their freezer, eliminating scheduling concerns.
Before beginning the churning process, verify that your ice cream maker bowl is solid frozen by touching the bottom. It should feel intensely cold, not merely cool.
The Churning Process and What to Expect
Pour your prepared mixture into the frozen bowl and activate the machine according to the manufacturer’s instructions. During the first few minutes, you’ll observe no visible changes as the mixture begins cooling. Gradually, the mixture will thicken as the churning motion incorporates air and freezing begins at the bowl’s edges.
Most electric ice cream makers require twenty-five to forty minutes of churning, though this timeframe varies by machine capacity and design. The process is complete when the mixture reaches a soft-serve consistency—thick enough to hold its shape but still spoonable without freezing rock-hard.
Resist the temptation to stop early. Under-churned ice cream will develop an overly icy texture after hardening in the freezer. Similarly, over-churning can begin incorporating too much air or break down fat globules excessively.
Storage and Hardening Techniques
Once churning completes, your ice cream remains in a soft-serve state. To achieve the firm texture associated with traditional ice cream, transfer the mixture to an airtight container and place it in your freezer for several hours or overnight.
When selecting storage containers, choose airtight options that prevent freezer burn and minimize ice crystal formation. Glass containers with tight-fitting lids or plastic ice cream containers designed specifically for frozen desserts work well. Avoid aluminum containers, which can cause metallic flavor transfer.
Homemade ice cream stores well for up to two weeks when properly sealed, though it’s generally best consumed within one week while flavor remains bright and texture optimal.
Flavor Enhancement Strategies
| Enhancement Method | Effect on Ice Cream | Best Practices |
|---|---|---|
| Increased Lemon Juice | Brightens strawberry flavor, cuts through richness | Add gradually; too much creates sour taste |
| Brown Sugar Addition | Adds caramel notes, enhances complexity | Use alongside granulated sugar for balance |
| Vanilla Extract Reduction | Allows strawberry to dominate flavor profile | Consider using half the typical amount |
| Fresh Mint Infusion | Creates refreshing, summery variation | Muddle mint gently into macerated berries |
Troubleshooting Common Issues
Even experienced home cooks encounter occasional challenges when making ice cream. Understanding common problems and their solutions ensures better results.
Grainy or Icy Texture: This typically results from either inadequate churning time or ice crystal formation during storage. Ensure your ice cream maker bowl is thoroughly frozen and allow adequate churning time. Additionally, remove ice cream from the freezer five minutes before serving to allow slight softening.
Weak Strawberry Flavor: Using lower-quality or out-of-season strawberries produces this problem. Always select the ripest, most fragrant berries available. If fresh berries lack flavor, consider using frozen berries frozen at peak freshness instead.
Overly Dense or Heavy Texture: Adding excessive cream or insufficient milk creates this issue. Follow recipe proportions carefully, and ensure thorough whisking to incorporate air into your base mixture.
Mixture Won’t Freeze: Verify your ice cream maker bowl achieved proper freezing temperature. Some freezers struggle to reach sufficiently cold temperatures, particularly in warm climates. Consider keeping your bowl in the freezer permanently between uses.
Variations and Creative Adaptations
Once you master the basic technique, numerous creative variations become possible. Consider these adaptations:
- Strawberry Cheesecake: Swirl in cream cheese mixture or top finished ice cream with crushed cheesecake pieces
- Strawberry Balsamic: Add a small quantity of aged balsamic vinegar for sophisticated flavor complexity
- Strawberry Shortcake: Layer homemade strawberry ice cream with pound cake pieces and whipped cream
- Frozen Strawberry Bars: Spread soft-serve ice cream in a baking dish, freeze solid, then cut into bars
- Dairy-Free Adaptation: Substitute heavy cream with coconut cream and milk with coconut milk for a plant-based version
Serving Suggestions and Presentation
Homemade strawberry ice cream deserves presentation that honors its fresh, homemade quality. Serve in chilled bowls or cones to minimize melting. Consider topping with fresh strawberries, whipped cream, or a drizzle of honey. For special occasions, pair with pound cake, shortbread cookies, or warm berry compote.
Frequently Asked Questions
Can I make strawberry ice cream without an ice cream maker?
While an ice cream maker produces superior texture, you can create a simplified version using the freezer method. Pour your mixture into a shallow container and freeze, stirring vigorously every thirty minutes for three to four hours until thickened. This method produces grainier texture but remains satisfactory.
How do I prevent strawberry ice cream from freezing rock-hard?
Ensure adequate sugar content, which lowers freezing point and maintains scoopability. Adding a small amount of alcohol (such as vodka) also prevents excessive hardening without affecting flavor. Store in airtight containers and remove from freezer five minutes before serving.
Is it necessary to use fresh strawberries?
Fresh, ripe strawberries produce superior results, but frozen berries work excellently, particularly when fresh berries lack flavor seasonally. Avoid canned or heavily processed strawberries, which contain additives that compromise taste.
How long can I store homemade strawberry ice cream?
Properly stored in airtight containers, homemade ice cream lasts up to two weeks in the freezer, though consumption within one week typically provides optimal flavor and texture.
Can I make eggless strawberry ice cream?
Yes, many excellent eggless recipes exist using only cream, milk, and strawberries. These produce creamy results without the custard-like texture of egg-based versions. Both approaches create delicious ice cream.
References
- Easy Strawberry Ice Cream — Like Mother, Like Daughter. 2024. https://lmld.org/strawberry-ice-cream/
- Homemade Strawberry Ice Cream Recipe — Eat Move Make. 2024. https://eatmovemake.com/fresh-strawberry-ice-cream-recipe/
- Strawberry Ice Cream – Beyond Frosting — Beyond Frosting. 2024. https://beyondfrosting.com/homemade-strawberry-ice-cream/