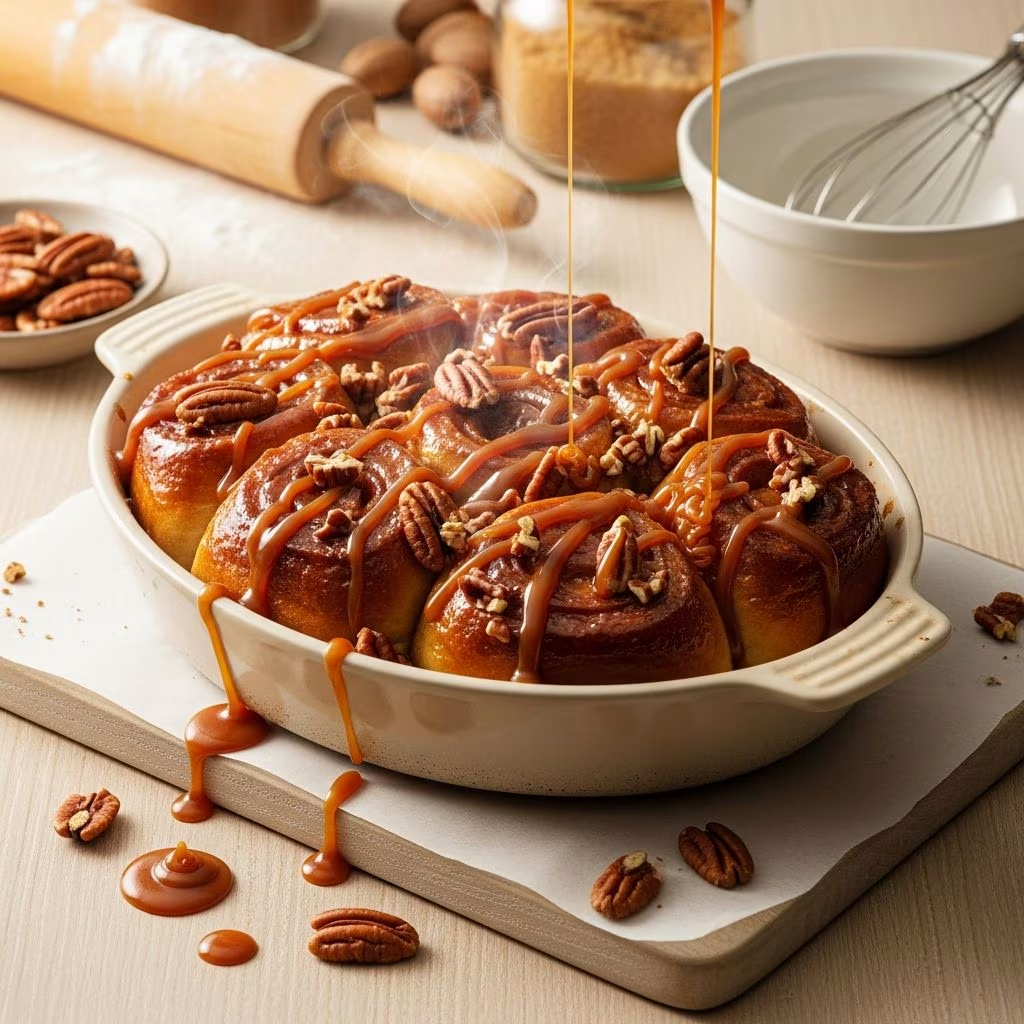
Sticky buns represent one of the most indulgent breakfast treats available to home bakers. These delectable pastries combine soft, pillowy dough with a caramelized topping and crunchy nuts, creating a combination that satisfies both texture and flavor preferences. Whether you’re preparing breakfast for a special occasion or simply craving a homemade treat, understanding the fundamentals of sticky bun preparation will help you achieve bakery-quality results in your own kitchen.
Understanding the Three Essential Components
Every successful sticky bun recipe relies on three distinct but equally important elements that work together to create the final product. Each component requires specific techniques and ingredients to achieve optimal texture and flavor. Mastering these individual components separately will make the overall assembly process more manageable.
The Foundation: Enriched Yeast Dough
The base of sticky buns differs significantly from simple bread doughs. This enriched dough incorporates butter, eggs, and milk alongside traditional yeast bread ingredients. The addition of these fat and protein sources creates a remarkably soft, tender crumb that distinguishes sticky buns from ordinary rolls. The dough should feel moist and slightly sticky when properly developed, though not so wet that it becomes impossible to work with.
The enriched formula typically includes:
- Warm milk to activate the yeast
- Active dry yeast or instant yeast
- Granulated sugar to feed the yeast and add sweetness
- Melted or softened butter for richness and tenderness
- Eggs or egg yolks to add structure and create a luxurious crumb
- All-purpose flour as the primary structure builder
- Salt to enhance flavor and control yeast fermentation
- Optional vanilla extract or citrus zest for additional flavor complexity
The Filling: Cinnamon-Sugar Mixture
Between the layers of rolled dough sits a sweet filling that provides flavor contrast and texture variation. This filling typically combines granulated sugar, brown sugar, and ground cinnamon, distributed evenly across the surface of the rolled dough. Some variations incorporate softened butter spread across the dough before adding the spiced sugar mixture, which creates additional richness and helps the filling adhere to the dough.
The Topping: Caramelized Pecans and Syrup
The crown jewel of any sticky bun is its glossy, caramelized topping. This component combines butter, brown sugar, and a binding agent such as honey or maple syrup to create a thick, gooey sauce. Chopped or halved pecans are pressed into this base before the dough is added, ensuring they remain attached to the finished rolls. When the buns bake, the filling and surrounding dough allow the topping to caramelize further, creating those signature sticky, indulgent qualities.
Preparing the Dough: Step-by-Step Instructions
Successful dough preparation begins with understanding how yeast fermentation works. Yeast requires warmth, moisture, and food to activate and multiply. The initial blooming stage confirms that your yeast is alive and ready to leaven the dough.
Activating the Yeast
Pour warm milk (approximately 110 degrees Fahrenheit) into the bowl of a stand mixer. Add a portion of the granulated sugar and the active yeast. Stir gently and allow the mixture to sit undisturbed for five to seven minutes. During this time, the yeast will consume the sugar and produce carbon dioxide, creating visible foam or bubbles on the surface. This foamy layer indicates that your yeast is viable and ready for the next steps.
Building the Dough Structure
Once the yeast shows signs of activity, add melted butter, eggs or egg yolks, vanilla extract, and the remaining sugar to the yeast mixture. Whisk these ingredients together thoroughly to combine. Then add half of the measured flour and whisk to incorporate, creating a thick batter-like mixture.
Switch to a dough hook attachment and add the remaining flour gradually. Mix on medium speed for approximately five minutes, allowing the gluten network to develop. The dough should come together into a cohesive mass that feels moist and slightly tacky but not excessively wet. If the dough appears too wet after mixing, add small amounts of flour one tablespoon at a time until the texture improves.
Achieving Proper Dough Elasticity
Transfer the dough to a lightly floured work surface and knead by hand for approximately two minutes. This final kneading step ensures even gluten development and allows you to assess the dough’s elasticity through physical manipulation. When pressed gently with a finger, properly developed dough should bounce back rather than remaining indented. This responsiveness indicates sufficient gluten development for excellent rise and texture.
The First Rise: Creating Volume and Flavor
Place the kneaded dough into a lightly greased bowl and cover with a damp towel or plastic wrap. Allow the dough to rise in a warm location until it approximately doubles in size. The time required for this fermentation varies based on room temperature; expect this stage to take anywhere from forty-five minutes to two hours depending on environmental conditions.
A warm kitchen accelerates fermentation, while cooler rooms require extended rising times. Some bakers place dough in an oven with just the light turned on, creating a warm, draft-free environment ideal for yeast activity. Others use a proofing box or simply allow the dough to rise at room temperature. The key consideration is consistency; choose a method that allows you to maintain the dough at a temperature between 75 and 80 degrees Fahrenheit for optimal results.
Crafting the Caramelized Topping
While the dough rises, prepare the caramelized pecan mixture that will line the bottom of your baking pan. This preparation step ensures the topping is ready for assembly without causing unnecessary delays.
Combining the Topping Ingredients
In a small saucepan, combine unsalted butter, packed light brown sugar, honey or maple syrup, and a pinch of salt. Cook this mixture over medium-low heat, stirring occasionally, until the butter completely melts and the sugar dissolves into the liquid. This process typically requires about five minutes. The resulting sauce should appear smooth, glossy, and fragrant, with no visible sugar crystals remaining.
Lining the Baking Pan
Lightly grease a nine-by-thirteen-inch baking pan with butter to prevent sticking. Immediately pour the hot caramel mixture into the prepared pan, spreading it evenly across the bottom. Distribute coarsely chopped pecans evenly over the caramel layer. The nuts will rest partially in the syrup, creating an adhesive surface that holds them in place during baking. Arrange the pecans so they cover the pan’s bottom relatively evenly, avoiding excessive clustering in any single area.
Shaping and Filling the Rolls
After the first rise, transfer the dough to a lightly floured work surface. Using a rolling pin, gently flatten the dough into a rectangle approximately one-quarter inch thick. The exact dimensions depend on your desired bun size and yield, but a common target is a twelve-by-eight-inch rectangle.
Adding the Spiced Filling
Spread softened butter thinly across the entire surface of the rolled dough. In a small bowl, combine granulated sugar, packed brown sugar, and ground cinnamon, stirring together until evenly distributed. Sprinkle this mixture across the buttered dough surface, again ensuring relatively even coverage. A slightly generous hand with the filling is appropriate, as you want each bun to contain noticeable amounts of this flavorful mixture.
Rolling and Cutting
Beginning at one long edge, roll the dough tightly toward the opposite edge, creating a log shape. Seal the edge by pinching it against the rolled dough to prevent unraveling during the second rise and baking. Trim any uneven ends from the log using a sharp knife or serrated knife.
Cut the log into equal-sized pieces using a sharp knife dipped in water, unflavored dental floss, or a bench scraper. Cutting with dental floss creates exceptionally clean divisions without compressing the dough, which can sometimes occur with knife cuts. The size of your cut pieces determines the final yield; aim for pieces approximately one and one-quarter inches thick, which typically yields nine to twelve rolls depending on log length.
The Second Rise and Baking Process
Carefully arrange the cut rolls over the pecan and caramel mixture in the prepared pan, placing them cut-side up. Cover the pan with plastic wrap or a damp towel and allow the rolls to rise in a warm location until they noticeably increase in size and crowd together slightly. This second rise typically requires thirty to forty-five minutes, though timing varies based on room temperature and dough temperature.
Baking to Golden Perfection
Preheat your oven to 350 degrees Fahrenheit approximately fifteen minutes before the rolls finish their second rise. Place the pan on the center oven rack and bake for twenty-five to thirty-two minutes, depending on your oven’s characteristics. The rolls should achieve a light golden-brown color on top and feel firm to the touch when properly baked. The edges and top should appear set while the rolls still feel slightly soft, indicating they retain internal moisture and tenderness.
Cooling and Inverting
Remove the baked rolls from the oven and allow them to cool for exactly five minutes. This brief cooling period allows the caramel to set slightly, preventing excessive flow while remaining pliable enough to adhere the rolls to the topping. After five minutes, place a serving platter or large sheet pan over the top of the baking pan and invert the entire assembly in one confident motion. The rolls should release from the pan, with the sticky caramel and pecans now adorning the top of each bun.
Make-Ahead and Storage Strategies
Sticky buns offer excellent flexibility for advance preparation, making them ideal for entertaining or busy mornings.
Overnight Preparation Method
After shaping and placing the rolls in the prepared pan, cover tightly with plastic wrap and refrigerate for up to sixteen hours. The following morning, remove the pan from the refrigerator and allow the rolls to come to room temperature and rise until noticeably puffy, typically requiring one to two hours depending on kitchen temperature. Then proceed with baking according to standard instructions.
Freezing for Future Enjoyment
Completely cooled sticky buns freeze exceptionally well for up to three months. Wrap individual buns in plastic wrap, then place them in a freezer-safe container or bag. Thaw frozen buns at room temperature for approximately one hour before reheating in a three-hundred-fifty-degree oven for ten to fifteen minutes, covering with foil if browning too quickly.
Flavor Variations and Creative Modifications
While the classic cinnamon pecan combination remains perennially popular, numerous variations allow for personalization based on individual preferences.
Nut Substitutions
Walnuts, almonds, or hazelnuts provide appealing alternatives to pecans, each contributing distinct flavor profiles. For those with nut allergies, roasted pumpkin seeds or sunflower seeds offer viable replacements that maintain textural contrast without compromising the overall experience.
Syrup Variations
Pure maple syrup creates a distinctive topping that many find preferable to honey, contributing earthy sweetness and subtle complexity. Molasses can be incorporated for deeper, more robust flavor characteristics suitable for those who appreciate bolder tastes.
Filling Enhancements
The addition of orange, lemon, or lime zest to the enriched dough contributes subtle citrus notes that complement both the cinnamon filling and caramelized topping beautifully. Cardamom can replace or supplement cinnamon for those seeking more exotic flavor profiles.
Troubleshooting Common Challenges
Understanding how to identify and address common baking issues ensures consistently successful results.
| Issue | Likely Cause | Solution |
|---|---|---|
| Dense, Heavy Crumb | Insufficient rise time or dead yeast | Allow longer fermentation; verify yeast viability before using |
| Dry, Tough Texture | Overbaking or insufficient butter/eggs in dough | Reduce baking time; ensure accurate ingredient measurements |
| Topping Doesn’t Caramelize | Oven temperature too low; insufficient baking time | Use oven thermometer to verify temperature; extend baking if necessary |
| Rolls Slide Around in Pan | Insufficient caramel adhesive or excessive spacing between rolls | Arrange rolls closer together; ensure ample caramel on pan bottom |
Frequently Asked Questions
Can sticky buns be prepared completely in advance?
Yes, the dough can be prepared through the first rise, shaped, and refrigerated overnight. Bake the following morning after allowing the rolls to reach room temperature and rise sufficiently. Alternatively, baked sticky buns freeze beautifully for up to three months and can be reheated as needed.
What is the ideal oven temperature for baking sticky buns?
Most recipes recommend three hundred fifty degrees Fahrenheit, though some variations call for four hundred degrees for a quicker bake with darker exteriors. Use an oven thermometer to verify your oven’s actual temperature, as many domestic ovens display incorrect readings.
How long do sticky buns remain fresh at room temperature?
Properly stored sticky buns remain fresh and enjoyable for two to three days when kept in an airtight container at room temperature. Extended storage beyond this period may result in drying or unwanted fermentation.
Is all-purpose flour required, or can alternatives be used?
All-purpose flour works best for sticky buns, providing the optimal balance of protein for structure and tender crumb. Bread flour may produce slightly chewier results, while cake flour creates an excessively delicate crumb unsuitable for these pastries.
What causes the caramel topping to become grainy or crystallized?
Granulation typically results from inadequate stirring when melting sugar and butter, or from allowing the mixture to sit too long without being used. Stir occasionally during cooking, and use the topping immediately after preparation.
Conclusion: Mastering Your Baking Skills
Creating homemade sticky buns demands patience, attention to detail, and willingness to practice, but the rewards far exceed the effort invested. Understanding the role of each component, mastering proper dough development and fermentation, and executing precise timing all contribute to exceptional results. Whether you’re a novice baker taking on yeasted doughs for the first time or an experienced pastry enthusiast seeking to refine your techniques, sticky buns offer meaningful challenges and tangible rewards that justify the investment of time and ingredient resources.
References
- Martha Stewart’s Pecan Sticky Buns — Martha Stewart. Video Recipe. https://www.marthastewart.com/318769/brown-sugar-and-pecan-sticky-buns
- Gooey Homemade Sticky Buns — Preppy Kitchen. Recipe Guide. https://preppykitchen.com/sticky-buns/
- Small Batch Maple Pecan Sticky Buns — Fresh April Flours. Recipe and Instructions. https://freshaprilflours.com/sticky-buns/
- Small-Batch Sticky Buns with Overnight Option — Baking with Butter. Recipe Development. https://bakingwithbutter.com/small-batch-sticky-buns-recipe/
- Easy Sticky Buns (Updated) — Barefoot Contessa Recipes. Recipe Collection. https://barefootcontessa.com/recipes/easy-sticky-buns