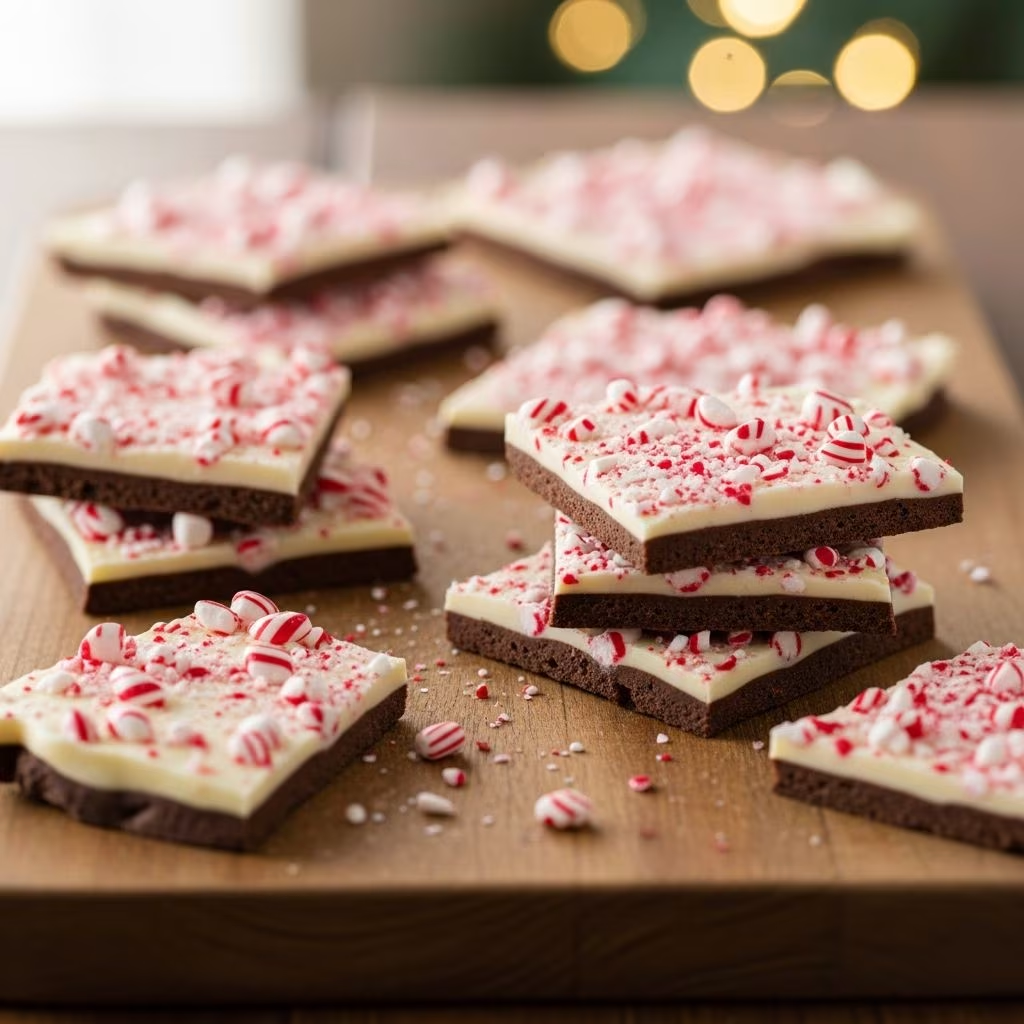
Crafting Your Own Festive Peppermint Bark at Home
Peppermint bark stands as one of the most beloved seasonal treats, combining the luxurious creaminess of white chocolate with the refreshing zing of peppermint and the satisfying crunch of candy cane pieces. This confection has earned its place at holiday gatherings, gift baskets, and cozy winter gatherings due to its irresistible flavor profile and impressive appearance despite requiring minimal effort to prepare. The beauty of this treat lies in its simplicity—with just a handful of quality ingredients and basic kitchen equipment, anyone can create bakery-quality peppermint bark in their own kitchen.
Understanding the Core Components
The foundation of exceptional peppermint bark rests upon three essential elements that work together to create a memorable treat. Understanding each component and how they interact ensures success with your homemade creation.
White Chocolate as Your Base
The primary ingredient in this confection is white chocolate, which serves as the creamy foundation upon which all other flavors build. Quality matters significantly when selecting white chocolate, as inferior products contain fewer cocoa solids and rely on excessive sugar for sweetness. Professional candy makers recommend using white chocolate melting wafers or almond bark rather than traditional chocolate chips, as these products are specifically formulated for melting and achieving a smooth, pourable consistency. Approximately 16 to 24 ounces of white chocolate provides an appropriate amount for a standard batch that yields numerous pieces suitable for sharing or gift-giving.
When melting white chocolate, temperature control proves crucial. White chocolate contains cocoa butter, which has a lower melting point than dark chocolate varieties. Overheating causes the chocolate to seize—transforming from a smooth liquid into a grainy, unusable mass. The safest approach involves using a microwave at reduced power settings or a double boiler method that gently surrounds the chocolate with warmth rather than direct heat.
Peppermint Elements for Flavor Intensity
Peppermint flavoring can be incorporated in multiple forms, each offering slightly different advantages. Crushed candy canes provide both flavor and decorative texture, breaking down into fragments that distribute throughout the bark and crown the finished surface. A typical batch incorporates between 10 to 12 candy canes, yielding approximately three-quarters to one cup of crushed pieces when finely chopped. Alternatively, peppermint-flavored candies or starlight mints offer a more subtle aesthetic while still delivering the characteristic minty taste.
For those seeking a more concentrated peppermint flavor without added sweetness, food-grade peppermint extract provides an option. Just 3 to 4 drops stirred into melted white chocolate creates noticeable peppermint essence without requiring the texture of crushed candies. This approach works particularly well when you wish to reserve crushed candy pieces exclusively for garnishing the finished bark.
Optional Chocolate Layering
While traditional white chocolate peppermint bark stands perfectly well on its own, introducing a chocolate layer beneath creates visual contrast and added complexity. Semi-sweet or dark chocolate serves as an effective base layer that creates an appealing contrast when the bark is broken apart. This layering technique requires melting chocolate separately and allowing it to partially set before applying the white chocolate mixture on top.
Essential Equipment and Preparation
Creating peppermint bark requires minimal specialized equipment, making it accessible to home cooks of all experience levels. Gather the following items before beginning:
- One or more microwave-safe mixing bowls for melting chocolate
- A baking sheet or rimmed cookie pan to serve as your base
- Parchment paper or a silicone baking mat to prevent sticking
- An offset spatula or silicone scraper for spreading chocolate evenly
- A sharp knife or candy crusher for breaking down peppermint candies
- A refrigerator or freezer for setting the finished product
Begin by preparing your work surface. Line your baking sheet with parchment paper, ensuring the paper lies flat without wrinkles that might create uneven surfaces. If working with a silicone baking mat instead, ensure it’s clean and dry. Having your workspace organized before melting chocolate streamlines the process since white chocolate sets quickly once poured and you’ll want to work efficiently.
The Step-by-Step Preparation Process
Melting Chocolate Successfully
Begin by chopping your white chocolate into smaller, uniform pieces if using large blocks or bark rather than melting wafers. Smaller pieces melt more quickly and evenly, reducing the risk of overheating. Place the chopped chocolate in a microwave-safe bowl and microwave at 50 percent power in 30-second intervals. After each interval, remove the bowl and stir the chocolate vigorously, even if it still contains some lumps. Continue this process until the chocolate becomes smooth and completely melted. This patient approach prevents the grainy texture that results from overheating white chocolate.
Should you prefer the double boiler method, fill a saucepan with a few inches of water and bring it to a simmer over low heat. Place a heatproof bowl over the saucepan, ensuring the bowl’s bottom doesn’t touch the water. Add your chopped chocolate to the bowl and stir frequently until melted, which typically requires about 3 to 5 minutes. Remove from heat and stir until completely smooth.
Adding Peppermint Flavor
Once your white chocolate reaches a smooth, pourable consistency, incorporate peppermint flavoring. If using peppermint extract, add 3 to 4 drops and stir thoroughly to distribute evenly. If incorporating crushed candy canes or peppermint candies directly into the mixture, reserve approximately one-third of your crushed pieces for garnishing purposes. Add the remaining two-thirds to the melted chocolate and fold gently using your spatula until the peppermint pieces distribute uniformly throughout the mixture.
Spreading and Setting
Pour your peppermint-infused white chocolate mixture onto the center of your prepared baking sheet. Using an offset spatula, spread the chocolate into an even, uniform layer approximately one-quarter inch thick. Work quickly but gently to avoid incorporating air bubbles. For layered varieties, first pour and spread dark or semi-sweet chocolate, refrigerate for 5 to 7 minutes until partially set, then apply the white chocolate layer on top.
Once spread to your desired thickness and evenness, immediately sprinkle your reserved crushed peppermint pieces across the surface. Lightly tap or jiggle the pan a few times to help the peppermint pieces settle into the chocolate before it hardens. This step ensures better adhesion and more visually appealing distribution.
Hardening and Breaking
Transfer your baking sheet to the refrigerator and allow the chocolate to set completely. Depending on temperature and thickness, this process typically requires 1 to 2 hours, though you can accelerate hardening to approximately 30 minutes by using a freezer. Avoid opening the refrigerator door frequently, as temperature fluctuations may cause the chocolate surface to become dull or streaky.
Once the bark has completely hardened and feels solid to the touch, remove it from the refrigerator and allow it to sit at room temperature for 2 to 3 minutes. This brief warming period makes breaking the bark easier and helps prevent cracking. Gently peel the parchment paper away from the back and break the bark into irregular, bite-sized pieces by hand or using a sharp knife to score it into sections before breaking apart.
Creative Variations and Customizations
Chocolate Combinations
Explore different chocolate pairings to create unique flavor profiles. A combination of dark chocolate and white chocolate creates an elegant visual presentation with balanced sweetness. Layer dark chocolate as your base, allow it to set slightly, then add white chocolate infused with peppermint on top. The resulting cross-section shows beautiful striping when broken into pieces. Semi-sweet chocolate pairs wonderfully with white chocolate, offering a middle ground between dark intensity and light creaminess.
Textural Additions
Beyond traditional candy cane pieces, consider incorporating additional textures. Holiday-themed sprinkles create festive visual appeal, while nonpareils add delicate crunchiness. Crushed nuts such as pistachios or almonds provide an unexpected textural contrast. Some creative variations include adding a thin layer of crushed ginger snaps or a sprinkle of sea salt to enhance the chocolate’s richness and provide slight savory complexity against the sweetness.
Extract Variations
Experiment with different extract additions to the white chocolate base. A quarter teaspoon of vanilla extract complements peppermint beautifully, adding subtle depth. For those enjoying stronger peppermint profiles, combine both peppermint extract and crushed candy canes. Some bakers add a tiny amount of food-grade pine or wintergreen extract for complexity, though these should be used sparingly to avoid overwhelming the peppermint flavor.
Storage and Shelf Life Considerations
Properly stored peppermint bark maintains its quality and flavor for extended periods. Once completely hardened, store pieces in an airtight container at room temperature in a cool location away from direct sunlight. Kept this way, your homemade bark remains fresh and delicious for up to two weeks. For longer storage, place pieces in an airtight container and refrigerate for up to one month or freeze for up to three months. When removing from refrigeration or freezer, allow the bark to reach room temperature before opening the container to prevent condensation from forming on the chocolate surface.
Troubleshooting Common Challenges
White Chocolate Seizing
If your white chocolate becomes grainy or thick during melting, it has likely seized. This occurs when moisture contacts the chocolate or when it overheats. Prevention proves easier than correction—use dry equipment and low heat settings. Should seizure occur, some bakers attempt rescue by stirring in a small amount of cocoa butter or vegetable oil, though success isn’t guaranteed.
Uneven Hardening
If your bark sets unevenly with some areas remaining soft while others harden, temperature variation likely caused the issue. Ensure your refrigerator maintains consistent temperature and place the baking sheet on a level surface. Avoid opening the refrigerator door during the setting process.
Candy Cane Sinking
If crushed peppermint pieces sink to the bottom of your bark rather than remaining visible on top, allow the chocolate to cool slightly longer before sprinkling the candies. The chocolate should be warm but no longer actively flowing before adding the garnish.
Frequently Asked Questions
Can I use regular chocolate chips instead of melting wafers?
While possible, this isn’t recommended as chocolate chips contain stabilizers that prevent smooth melting. If using chips, add a small amount of coconut oil or shortening to help achieve a smoother consistency. Quality matters significantly when taking this approach.
How thick should my bark be?
Approximately one-quarter inch thickness provides an ideal balance between structural integrity and enjoyable bite. Thinner bark becomes too fragile, while thicker pieces become overwhelming in a single bite.
What’s the best way to package homemade peppermint bark for gifting?
Layer pieces between parchment paper in an airtight container or decorative box. Include a handwritten note indicating storage instructions. The homemade nature and presentation make this treat an impressive gift requiring minimal expense.
Can I make this recipe sugar-free?
Yes, using sugar-free white chocolate and sugar-free peppermint candies accommodates dietary restrictions. Results may vary slightly in texture and flavor compared to traditional versions.
Conclusion
Homemade peppermint bark represents the perfect intersection of simplicity and elegance, requiring minimal ingredients and basic techniques while producing results that rival professional confections. Whether you’re preparing treats for holiday gatherings, creating gifts for loved ones, or simply satisfying seasonal cravings, this versatile recipe accommodates endless customization options. The straightforward preparation process makes it an excellent project for cooks of all skill levels, while its impressive appearance and delicious flavor create memorable impressions. By mastering the fundamental techniques outlined in this guide and experimenting with creative variations, you’ll develop the confidence to create peppermint bark variations that reflect your personal taste preferences and impress anyone fortunate enough to enjoy your homemade confections.
References
- Easy White Chocolate Peppermint Bark — Edwards Farmstead. Accessed April 2026. https://edwardsfarmstead.com/easy-white-chocolate-peppermint-bark/
- Best Peppermint Bark Recipe — The Pioneer Woman. Accessed April 2026. https://www.thepioneerwoman.com/food-cooking/recipes/a41534277/peppermint-bark-recipe/
- Easy White Chocolate Peppermint Bark (2 Ingredients + 10 Minutes) — Rose Bakes. Accessed April 2026. https://rosebakes.com/how-to-make-easy-peppermint-bark-two-ingredients-10-minutes/
- White Chocolate Peppermint Bark — The First Year Blog. Accessed April 2026. https://thefirstyearblog.com/white-chocolate-peppermint-bark/
- White Chocolate Peppermint Bark — Jessica in the Kitchen. Accessed April 2026. https://jessicainthekitchen.com/white-chocolate-peppermint-bark/