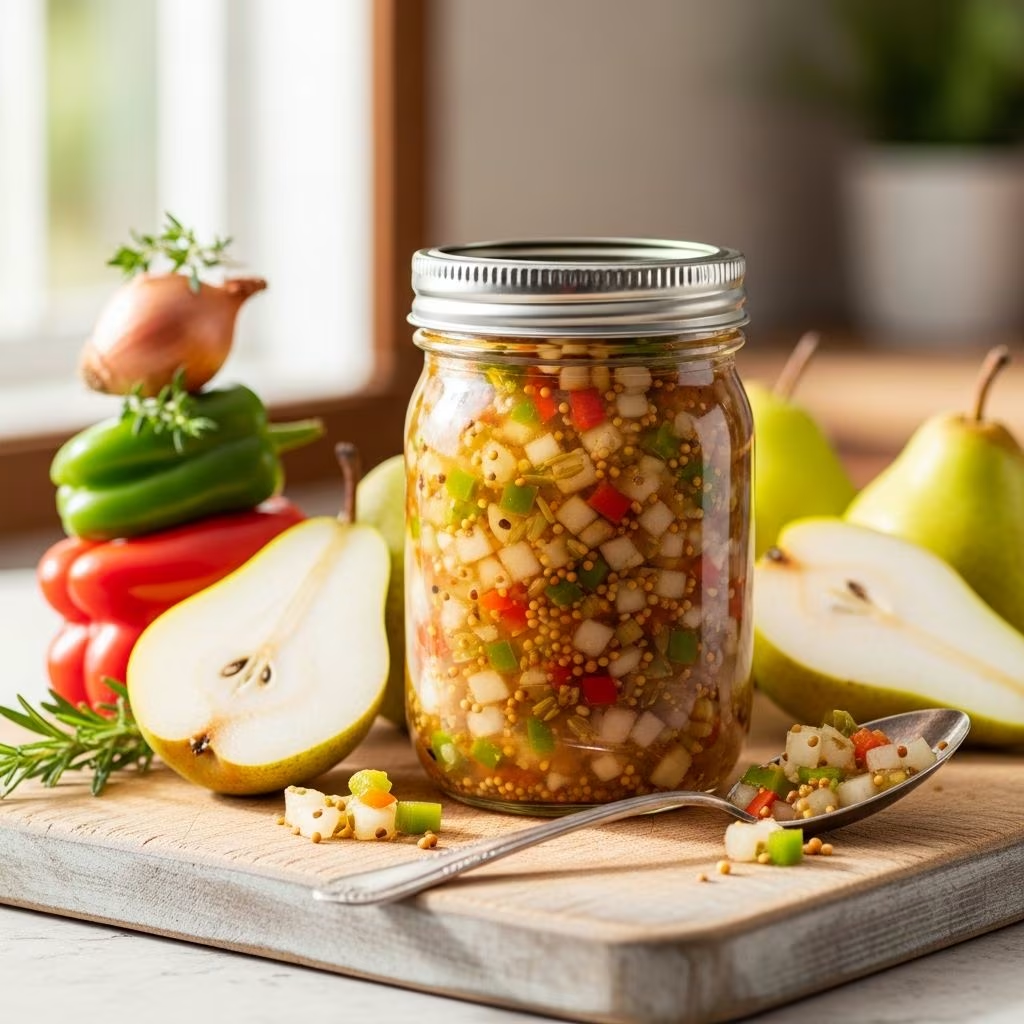
Pear relish stands as one of the most rewarding condiments to prepare in your own kitchen. This sweet and tangy creation transforms fresh pears into a versatile accompaniment that enhances everything from grilled meats to cheese boards. Whether you’re a seasoned home cook or exploring food preservation for the first time, crafting pear relish offers both simplicity and satisfaction. The process requires minimal special equipment while delivering impressive results that rival store-bought alternatives.
Understanding the Essence of Pear Relish
At its core, pear relish combines the natural sweetness of fruit with savory vegetable elements and acidic vinegar, creating a complex flavor profile that balances all fundamental taste dimensions. Unlike jams or jellies that focus primarily on fruit, relish incorporates textured pieces of complementary ingredients that add visual interest and depth to your dishes. The beauty of this condiment lies in its versatility—it works equally well as a topping for sandwiches, a glaze for roasted vegetables, or an accompaniment to holiday cheese platters.
Essential Ingredients for Your Pear Relish Base
Creating authentic pear relish begins with selecting high-quality ingredients that will work harmoniously together. The foundation starts with fresh pears that are ripe yet firm enough to maintain their structure through cooking and processing.
Primary Components
- Fresh Pears: The star ingredient, typically requiring 3 to 12 pounds depending on your batch size. Choose varieties that hold their shape during cooking rather than becoming mushy.
- Onions: Yellow or sweet onions provide a subtle depth that balances the fruit’s natural sweetness while adding savory notes.
- Bell Peppers: Both red and green varieties contribute color contrast and a mild, slightly sweet vegetable flavor that complements pears.
- Fresh Jalapeños: These peppers introduce controlled heat, though they’re optional for those preferring milder condiments.
- White Vinegar: The acidic backbone that preserves the relish and brightens all other flavors.
- Sugar: Enhances the pears’ natural sweetness while aiding in proper setting and preservation.
- Prepared Mustard: Adds complexity and a subtle tang that ties all elements together.
Preparing Your Ingredients for Processing
Proper preparation ensures consistent texture and even flavor distribution throughout your finished relish. Begin by washing all produce thoroughly under cold running water to remove any surface debris or residue. For the pears, carefully peel away the skin using a vegetable peeler, then quarter each fruit. Remove all seeds and core material to prevent any unwanted bitterness.
Seed the bell peppers and remove the white interior membranes, which can contribute undesirable flavor and texture. Peel your onions and cut them into manageable chunks. If using jalapeños, remove the seeds unless you prefer maximum heat in your final product. Many cooks recommend wearing gloves when handling jalapeños to prevent skin irritation.
Processing Techniques
The texture of your finished relish depends largely on how you process these prepared ingredients. A food chopper produces a rustic, chunky consistency that many prefer for its visual appeal and textural variety. A food processor offers faster processing but requires careful attention to avoid creating an unwanted purée. When using a food processor, pulse the ingredients in short bursts rather than continuous operation, checking frequently to achieve your desired consistency. Some traditional recipes called for manual food mills, though modern electric equipment has largely replaced these labor-intensive tools.
The Cooking Process: Building Flavor Through Heat
Once your ingredients are processed, the cooking phase transforms individual components into a cohesive, flavorful condiment. Transfer your processed ingredients into a large stock pot—selecting the right size prevents overflow during cooking while ensuring adequate surface area for proper reduction.
Initial Heating Phase
Combine all ingredients in your pot, including the vinegar, sugar, mustard, salt, and any spices your chosen recipe calls for. Bring the mixture to a rolling boil over medium-high heat. During this phase, frequent stirring becomes essential to prevent the mixture from sticking to the pot’s bottom, which would create burnt flavors and uneven cooking. The mixture will initially appear quite liquid, with visible chunks of fruit and vegetables suspended throughout.
Simmering to Perfection
Once boiling, reduce the heat to maintain a gentle simmer. Continue cooking for approximately 15 to 20 minutes, depending on your batch size and the moisture content of your ingredients. During this critical simmering phase, the mixture undergoes significant transformation. Excess liquid evaporates gradually, the flavors meld and develop, and the consistency thickens to achieve that characteristic syrupy texture. You’ll notice the volume reducing noticeably as water content diminishes. Continue stirring occasionally to ensure even heat distribution and to prevent sticking.
The relish reaches optimal consistency when a wooden spoon drawn through the mixture leaves a brief trail before the relish flows back together. This visual cue indicates proper thickening without overcooking, which would result in an overly dense, jam-like product.
Canning and Preservation Methods
Preserving your homemade relish ensures you can enjoy your efforts throughout the year. The process requires sterilized containers and proper technique to achieve safe, long-lasting results.
Jar Selection and Preparation
Half-pint jars work well for smaller batches, while pint jars accommodate larger yields. Sterilize all jars, lids, and rings by submerging them in boiling water for at least 10 minutes before use. This eliminates any bacteria or microorganisms that could compromise your preservation.
Hot-Fill Method
Fill hot, sterilized jars with the relish while both the condiment and containers remain hot. This temperature contrast creates a vacuum seal as the relish cools. Leave appropriate headspace—typically half an inch—between the relish and the jar rim. Remove any trapped air bubbles by running a clean knife around the jar’s interior, then adjust headspace if necessary.
Water Bath Processing
For shelf-stable preservation, process filled jars in a boiling water bath. Half-pint jars typically require 15 minutes of processing, while pint jars need 20 minutes. This heating process destroys any remaining microorganisms and creates an additional safety margin for long-term storage.
Batch Size Variations
Different recipes accommodate various production scales, from small household batches to larger preserving sessions.
| Batch Size | Pear Quantity | Yield | Cooking Time |
|---|---|---|---|
| Small Batch | 3 lbs | 2-3 half-pint jars | 15 minutes |
| Medium Batch | 6-8 lbs | 4 half-pint jars | 20 minutes |
| Large Batch | 12 lbs | 8-10 pint jars | 20-25 minutes |
| Commercial Scale | 24 lbs (2 gallons) | 10+ pint jars | 25-30 minutes |
Flavor Variations and Customization
While the basic pear relish recipe provides excellent results, creative cooks often experiment with additional seasonings to create personalized versions.
Spice Enhancements
- Allspice: Introduces warm, complex notes reminiscent of cinnamon, nutmeg, and clove combined.
- Pickling Spice: A traditional blend of whole spices that adds rustic character without overpowering the pear base.
- Turmeric: Contributes both color and a subtle earthiness while offering additional preservation benefits.
Texture Modifications
Some cooks prefer a smoother consistency by processing ingredients more thoroughly, while others embrace a rustic chunky texture with minimal processing. Experimenting with processing duration allows you to discover your preferred final texture.
Storage and Usage Guidelines
Properly processed and sealed pear relish maintains quality for up to one year in cool, dark storage conditions. Unopened jars develop even richer flavors as the relish ages. Once opened, refrigerate remaining relish and consume within three to four weeks. The relish pairs beautifully with grilled chicken or pork, complements cheese selections on charcuterie boards, and enhances pulled pork sandwiches with its sweet-savory profile.
Common Questions About Pear Relish
Why does my relish remain too watery after cooking?
Continue simmering longer to allow more evaporation. Very juicy pear varieties may require extended cooking times beyond the standard 20 minutes. Some recipes recommend letting the mixture stand overnight in the refrigerator before final cooking, which allows initial liquid separation.
Can I make pear relish without processing equipment?
Yes, though it requires more labor. Finely chop all ingredients by hand using a sharp knife, then proceed with cooking as usual. The resulting texture will be slightly more uniform due to the consistent hand-chopping size.
What’s the difference between pear relish and pear preserves?
Relish emphasizes textured vegetables mixed with fruit, creating a chunky condiment, while preserves focus primarily on fruit with a smooth or semi-smooth consistency.
How do I know when my relish has achieved proper consistency?
The spoon test provides reliable results—draw a spoon through the mixture, and it should leave a brief path before flowing back together. The mixture should coat the spoon but still move slightly.
Can I adjust the sweetness in my finished relish?
The sugar content is carefully calibrated for preservation and flavor balance. For future batches, reduce sugar slightly if you prefer less sweetness, but avoid reducing it by more than 20 percent, as this affects both flavor and preservation properties.
Troubleshooting Your Pear Relish Project
Understanding potential issues helps you achieve consistent success with repeated batches. If your relish fails to gel properly despite adequate cooking, the pear variety you selected may contain less pectin than expected. Some recipes include powdered pectin or lemon juice to ensure reliable setting. If the flavor seems bland, ensure you’re tasting it while warm—flavors often seem more muted when cold and develop fully as the relish reaches room temperature.
Advanced Preservation Techniques
Beyond traditional water bath canning, some cooks explore alternative storage methods. Freezing works well for relish intended for near-term use—freeze in small containers and use within six months. Some adventurous cooks prepare their relish in smaller quantities without processing, storing it directly in the refrigerator for consumption within several weeks. This approach sacrifices long-term shelf stability but produces exceptionally fresh-tasting results.
References
- Pear Relish Recipe — Texas Homesteader. Accessed 2026. https://texashomesteader.com/pear-relish-recipe/
- How to Make Pear Relish — YouTube/Rustic Recipes. Accessed 2026. https://www.youtube.com/watch?v=0SCup3IlCns
- Spiced Pear Relish — Town & Country Markets Recipes. Accessed 2026. https://townandcountrymarkets.com/recipes/spiced-pear-relish
- Pear Relish — National Center for Home Food Preservation, University of Georgia. Accessed 2026. https://nchfp.uga.edu/how/pickle/relishes-salads/pear-relish/