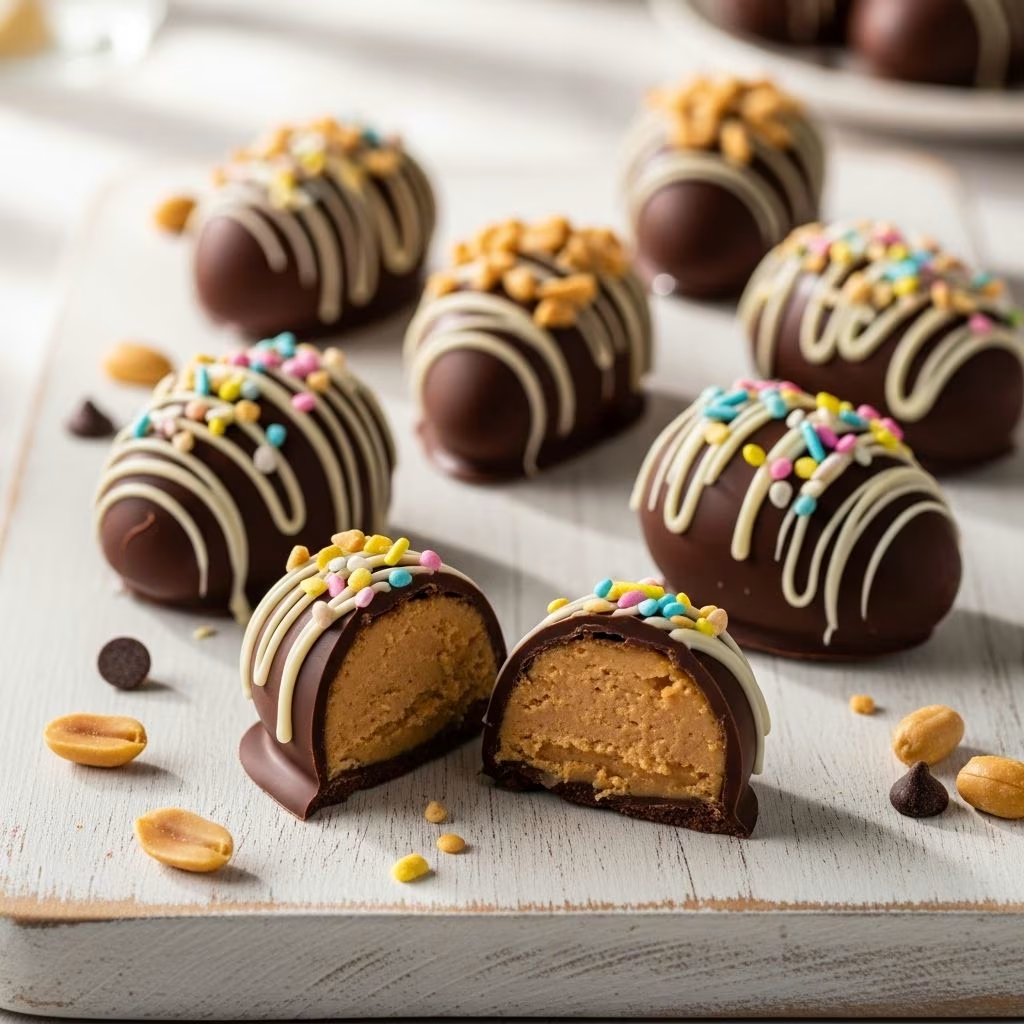
Homemade peanut butter Easter eggs represent a cherished confectionery tradition that combines simplicity with indulgence. These delightful treats feature a smooth, creamy peanut butter center enrobed in rich chocolate coating, making them an ideal addition to Easter baskets or festive celebrations. Unlike store-bought versions, homemade versions allow complete control over ingredients, sweetness levels, and portion sizes while delivering professional-quality results from your own kitchen.
Understanding the Basic Components
Peanut butter Easter eggs consist of three primary elements working in harmony. The foundation begins with a peanut butter filling crafted from a blend of creamy peanut butter, butter, powdered sugar, and complementary flavorings. This mixture creates a firm yet creamy texture that holds its shape during handling and coating. The second component involves the chocolate exterior, typically made from melted chocolate chips or chocolate bars combined with a small amount of coconut oil or paraffin wax to achieve optimal dipping consistency. Finally, optional decorative elements and flavor enhancers complete the creation, allowing for personalization and creative expression.
Essential Ingredients for the Filling
- Creamy Peanut Butter: Select a smooth, high-quality peanut butter as the primary ingredient. Traditional creamy varieties work best, while natural peanut butter with minimal added sugars offers a healthier alternative for those monitoring sugar intake.
- Unsalted Butter: Room temperature butter blends seamlessly into the peanut butter, creating a luxurious texture and enhancing overall creaminess without overwhelming the peanut flavor.
- Powdered Sugar: This ingredient provides sweetness and contributes to the filling’s structural integrity, allowing it to hold its egg shape during freezing and dipping.
- Vanilla Extract: A small amount of pure vanilla extract adds subtle depth and complexity to the flavor profile without dominating the peanut butter taste.
- Salt: A pinch of salt heightens and balances flavors, bringing out the natural peanut character while reducing excessive sweetness.
Chocolate Coating Requirements
The chocolate coating serves both functional and aesthetic purposes. Quality milk chocolate, dark chocolate, or semi-sweet varieties all work effectively depending on personal preference. Approximately 24 ounces of chocolate chips or chocolate bars proves sufficient for coating a standard batch. To achieve proper dipping consistency without chocolate becoming too thick, incorporate food-grade paraffin wax or coconut oil in a ratio of approximately one part oil to four parts chocolate. This addition ensures smooth coating without compromising flavor or texture.
Step-by-Step Filling Preparation
Combining Your Base Ingredients: Begin by measuring peanut butter and softened butter into a large mixing bowl. Using either a stand mixer with paddle attachment or an electric hand mixer, beat these ingredients together for approximately one to two minutes until the mixture achieves a creamy, well-blended consistency. Small lumps of butter may remain initially, and this requires no concern as they incorporate during subsequent mixing stages.
Incorporating Dry Components: Add powdered sugar gradually in three separate additions, mixing thoroughly after each incorporation. This methodical approach prevents powdered sugar from dispersing throughout your kitchen while ensuring even distribution. Continue beating until all ingredients fully combine, resulting in a mixture that holds together yet remains workable for shaping purposes.
Fine-Tuning the Texture: If your filling appears too dry or crumbly, incorporate a small amount of evaporated milk or water one teaspoon at a time while mixing continuously. The goal involves achieving a consistency that shapes easily without becoming overly soft or sticky. Excessive moisture causes difficulty during freezing and chocolate dipping, so exercise restraint when adding liquids.
Shaping Your Peanut Butter Centers
Once your filling achieves the desired consistency, prepare a parchment paper-lined baking sheet for receiving the shaped candies. Using a cookie scoop or measuring tablespoon, portion approximately two tablespoons of filling into individual portions. Hand-shape each portion into a smooth ball by rolling between your palms with gentle pressure. To achieve an authentic egg appearance, flatten the ball slightly and shape it into an oval configuration with a subtle point at one end and a broader base at the other.
For consistent sizing and appearance, consider wearing disposable food-service gloves to prevent the warm filling from sticking to bare hands. This practice also reduces temperature transfer that can soften the filling excessively during handling. If the mixture becomes too soft to work with, return it to the freezer for ten to fifteen minutes before continuing your shaping process.
Freezing for Optimal Coating Results
After shaping all peanut butter centers, arrange them on your prepared baking sheet and transfer to the freezer. Allow the eggs to freeze for a minimum of thirty minutes to one hour. This chilling period firms the filling, preventing it from melting into your chocolate coating and ensuring a distinct, defined layer between the creamy center and chocolate exterior. Some recipes suggest freezing for several hours or overnight for maximum firmness, particularly if your kitchen maintains warm temperatures.
Preparing Your Chocolate Coating
While peanut butter eggs freeze, prepare the chocolate coating in a microwave-safe bowl or double boiler. If using a microwave, heat chocolate chips in thirty-second intervals, stirring between each heating cycle to ensure even melting and prevent scorching. A double boiler provides gentler, more controlled heating ideal for delicate chocolate work. Once chocolate reaches a smooth, pourable consistency, stir in your chosen oil component at a ratio of approximately one tablespoon of coconut oil or paraffin wax per six ounces of chocolate.
Proper chocolate temperature proves critical for successful coating. If chocolate becomes too thick, gently reheat in short intervals. Conversely, chocolate that cools too much becomes difficult to work with and produces a dull, thick coating rather than a smooth, glossy finish. Maintain a temperature of approximately ninety to one hundred degrees Fahrenheit for optimal results.
Dipping and Coating Techniques
Remove frozen peanut butter eggs from the freezer in small batches to prevent them from warming excessively. Using a fork or specialized dipping tool, submerge each egg into the melted chocolate, ensuring complete coverage. Gently tap the fork against the bowl’s rim to remove excess chocolate before transferring the coated egg to a fresh parchment paper-lined baking sheet. Work efficiently to prevent the coating from dripping excessively or the filling from softening.
For a thicker, more substantial chocolate shell, allow the initial coating to set for a few minutes before applying a second layer of chocolate. This technique creates a more satisfying chocolate-to-filling ratio and enhances the luxurious mouthfeel of your finished candies.
Finishing and Storage Considerations
After coating all eggs, return them to the refrigerator or freezer to allow the chocolate to set completely. This process typically requires thirty minutes to one hour depending on temperature conditions and desired firmness. Once the chocolate hardens, your peanut butter eggs are ready for enjoyment or presentation in Easter baskets.
Proper storage extends the shelf life of your homemade confections. Keep finished eggs in an airtight container in the refrigerator for up to two weeks or in the freezer for several months. Room temperature storage reduces shelf life to approximately one week, particularly in warm environments where the chocolate coating may soften or bloom.
Customization and Variation Ideas
| Variation | Description | Key Modifications |
|---|---|---|
| Almond Flour Alternative | Lower carbohydrate version using almond flour instead of additional powdered sugar | Substitute one-third cup almond flour for half the powdered sugar amount |
| Maple Syrup Enhancement | Adds subtle sweetness and depth to the filling flavor | Replace one quarter cup of powdered sugar with maple syrup, adjusting texture as needed |
| White Chocolate Coating | Creates elegant contrast with the peanut butter filling | Use white chocolate chips or bars following standard coating procedures |
| Dark Chocolate Version | Provides sophisticated, less-sweet flavor profile | Substitute dark chocolate chips for milk chocolate in coating step |
Common Questions About Peanut Butter Easter Eggs
Why does my chocolate coating appear dull or grainy? Dull chocolate typically results from overheating or insufficient oil addition to thin the coating. Ensure chocolate temperatures remain moderate and increase oil ratio slightly for smoother consistency. Chocolate that has been overheated may require discarding and starting fresh with new chocolate.
What should I do if my peanut butter filling is too soft to shape? Overly soft filling indicates either excessive moisture incorporation or insufficient chilling time. Return the mixture to the refrigerator for twenty to thirty minutes before attempting to shape. Alternatively, add additional powdered sugar in small increments to firm the texture.
Can I prepare these eggs in advance? Yes, peanut butter eggs represent excellent make-ahead candies. Prepare and freeze them several days or weeks before gift-giving or serving. This extended timeline reduces last-minute preparation stress and allows flavors to develop and meld beautifully.
How can I achieve perfectly uniform egg shapes? Cookie scoops produce consistent portion sizes, while ceramic egg molds specifically designed for candy-making create identical shapes effortlessly. Alternatively, roll filling into uniform balls first, then shape into eggs by hand once you achieve proficiency with the technique.
What alternatives exist for traditional chocolate coating? Peanut butter eggs can be finished with white chocolate, dark chocolate, milk chocolate, or even candy melts in various colors. Some creative variations incorporate decorative drizzles, sprinkles, or contrasting chocolate stripes applied before the coating fully sets.
Tips for Professional-Quality Results
- Temperature Control: Maintain consistent cool temperatures throughout the process. Warm kitchens make filling management difficult and chocolate coating challenging. Consider working early in the morning or in air-conditioned spaces during warm seasons.
- Quality Ingredients: Premium peanut butter and chocolate produce noticeably superior results compared to budget alternatives. Invest in quality ingredients for this special treat.
- Proper Equipment: An electric mixer streamlines the filling preparation process and produces superior texture compared to hand-mixing. A digital thermometer helps achieve ideal chocolate temperatures for optimal coating results.
- Patience and Practice: Your first batch may not achieve perfection, and this proves completely normal. Each attempt teaches valuable lessons about temperature, timing, and technique. By your second or third batch, you’ll develop the muscle memory and intuition necessary for consistently excellent results.
References
- Peanut Butter Easter Eggs Recipe — Crowded Kitchen. Accessed 2026. https://www.crowdedkitchen.com/peanut-butter-easter-eggs/
- Healthier Peanut Butter Easter Eggs — Scientifically Sweet. Accessed 2026. https://scientificallysweet.com/peanut-butter-easter-eggs/
- Homemade Peanut Butter Eggs — Live Well Bake Often. Accessed 2026. https://www.livewellbakeoften.com/homemade-peanut-butter-eggs/
- Easter Peanut Butter Eggs (Like Reese’s) — Sally’s Baking Addiction. Accessed 2026. https://sallysbakingaddiction.com/peanut-butter-eggs/
- Peanut Butter Egg Recipe — Sugar Geek Show. Accessed 2026. https://sugargeekshow.com/peanut-butter-egg-recipe/