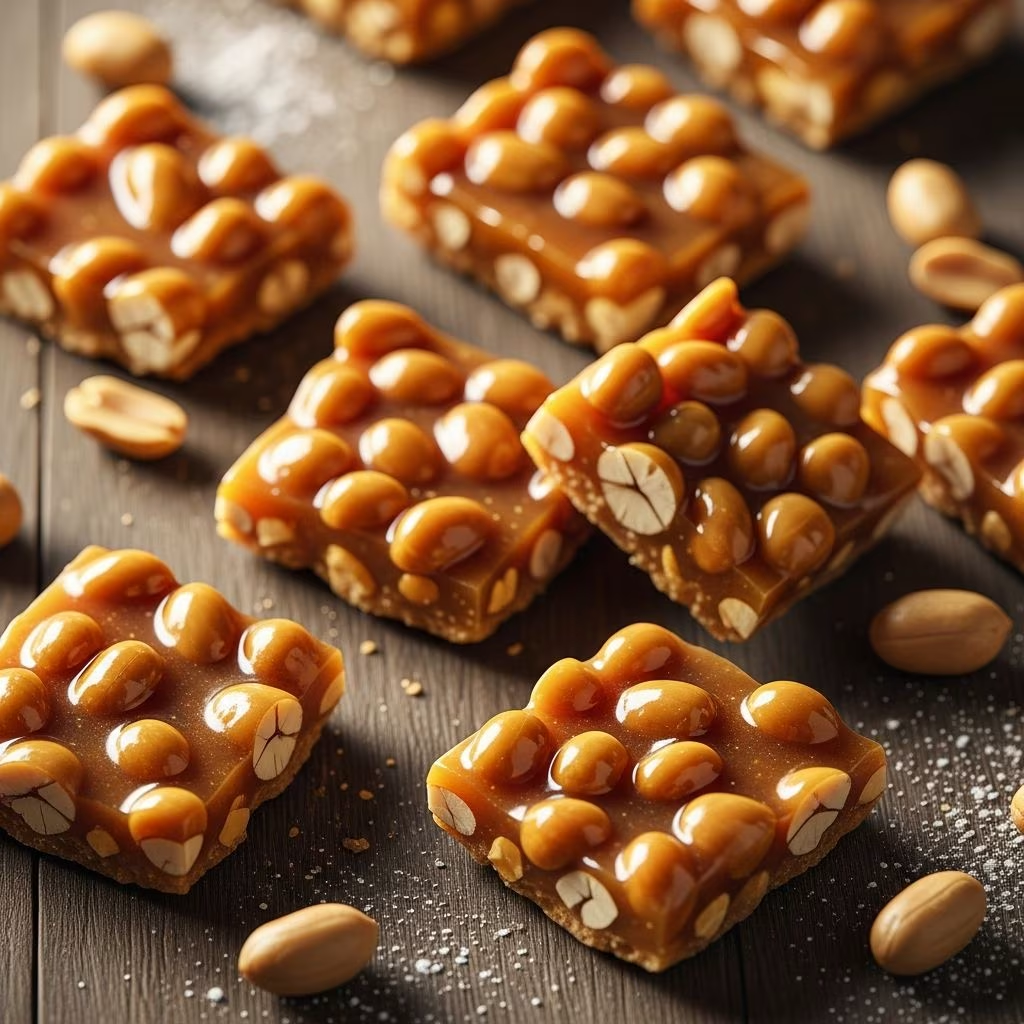
Peanut brittle stands as one of the most beloved homemade candies in American households. This hard candy confection combines the satisfying crunch of roasted peanuts with a caramelized sugar shell, creating a treat that delights generations of families. Whether you’re preparing gifts for the holidays, seeking a nostalgic dessert, or simply craving something sweet and crunchy, homemade peanut brittle offers an accessible entry point into candy-making that doesn’t require specialized equipment or advanced culinary skills.
Understanding Peanut Brittle Fundamentals
Peanut brittle is fundamentally a combination of caramelized sugar, roasted peanuts, and butter, bound together through precise temperature control and chemical reaction. The magic occurs when baking soda is introduced to the hot candy mixture, causing it to foam and create countless tiny air pockets that give brittle its characteristic light, airy texture. This transformation from a dense syrup to a brittle candy is what makes the confection so appealing—the contrast between the hard candy shell and the tender peanuts creates an irresistible texture profile.
The history of peanut brittle traces back to colonial America, where molasses and later corn syrup became staple sweeteners in home kitchens. Over generations, families developed their own variations, with many recipes becoming cherished heirlooms passed down through maternal lines. What makes each family’s recipe unique isn’t just the ingredient ratios but also the techniques and timing preferences that experience teaches.
Essential Ingredients for Success
Creating authentic peanut brittle requires understanding each ingredient’s role in the final product:
- Granulated Sugar (2 cups): Forms the primary base of the candy, providing sweetness and structure through caramelization
- Light Corn Syrup (1 cup): Prevents crystallization of the sugar and contributes to the smooth texture of the candy base
- Water (½ to 1 cup): Initial liquid medium that allows sugar to dissolve evenly before cooking begins
- Raw Peanuts (2 cups): The featured ingredient that provides texture, nutrition, and flavor to the finished candy
- Butter (2 to 4 tablespoons): Adds richness and slightly improves the texture of the final product
- Baking Soda (1 to 1½ teaspoons): Creates the characteristic airy texture through a chemical reaction with the hot candy
- Vanilla Extract (1 teaspoon): Enhances flavor complexity and adds subtle aromatic notes
The quality of these ingredients matters significantly. Using raw peanuts rather than pre-roasted ensures better flavor development as they toast during the cooking process. Light corn syrup works better than dark varieties because it doesn’t compete with the caramel flavors you want to develop. The type of vanilla—pure extract versus imitation—will subtly influence the final taste profile.
Equipment and Preparation
Success in peanut brittle-making depends partly on having appropriate tools. A candy thermometer remains one of the most valuable investments, allowing precise temperature monitoring throughout the cooking process. While some traditional recipes rely on visual cues and the cold water test, a thermometer removes guesswork and significantly improves consistency.
Additional essential equipment includes:
- Heavy-bottomed saucepan (at least 3-4 quarts) to distribute heat evenly
- Baking sheet lined with parchment paper or silicone mat
- Wooden spoon or candy stirring spoon for mixing
- Two forks for spreading the hot mixture
- Measuring cups and spoons for accurate proportions
- Small bowl for combining baking soda and butter components
Preparation proves critical for peanut brittle success. Have all ingredients measured and arranged before you begin cooking. This mise en place approach prevents frantic searching for ingredients when reactions happen quickly. Preheat your baking sheet by applying a thin butter coating or ensuring your parchment paper is properly secured. Environmental factors matter too—low humidity days produce superior results compared to humid conditions, which can affect the candy’s final texture and brittleness.
The Cooking Process Explained
Stage One: Creating the Sugar Foundation
Begin by combining sugar, water, and corn syrup in your heavy-bottomed saucepan over medium heat. This initial stage requires patience—resist the temptation to increase heat, as rapid boiling can cause crystallization and ruin your batch. Stir the mixture occasionally until the sugar completely dissolves and the mixture begins to boil gently. At this point, some recipes suggest covering the pan for three minutes; this traps steam that helps dissolve any sugar crystals clinging to the pan’s sides.
Cook this foundation mixture until a candy thermometer reaches 250°F (121°C), known as the hard ball stage. At this temperature, the mixture has enough structural integrity to later incorporate the other ingredients. The color remains relatively clear to pale yellow—you’re not yet caramelizing, simply dissolving and cooking the sugar mixture to the proper concentration.
Stage Two: Peanut Integration and Caramelization
Once the mixture reaches 250°F, add your peanuts and begin constant, vigorous stirring. This action is crucial—you’re not simply mixing but actively cooking the peanuts while allowing the sugar to continue caramelizing. The peanuts will gradually toast from their raw white color through golden and into deeper brown tones. Continue cooking and stirring until the mixture reaches 300°F (149°C), the hard crack stage.
This temperature range typically requires 5-10 additional minutes of cooking, though the exact time varies based on your specific stove, pot size, and starting temperature. The color transformation provides a visual checkpoint—the mixture should develop a golden-brown hue reminiscent of a paper bag or honey. This color indicates proper caramelization of the sugars, creating depth and complexity beyond simple sweetness. Stop cooking before the mixture turns dark brown, as excessive caramelization can produce bitter flavors and compromise the candy’s structure.
Stage Three: The Critical Finish
Remove the saucepan from heat immediately upon reaching 300°F. Working quickly is essential, as the mixture continues to cook from residual heat. Immediately add the pre-measured butter, baking soda, and vanilla to your hot candy mixture. The reaction is dramatic—the mixture foams vigorously as the baking soda reacts with the acidic components and hot sugar, incorporating thousands of tiny air bubbles throughout.
Stir this mixture rapidly until the baking soda is fully incorporated and the bubbling subsides slightly. This is the moment where your brittle develops its characteristic light, airy texture. The timing here matters—stir enough to incorporate the baking soda thoroughly but avoid overdoing it once the foam has fully developed, as excessive stirring at this stage can cause the mixture to become dense rather than airy.
Stage Four: Spreading and Cooling
Immediately pour the mixture onto your prepared baking sheet. Using two forks or a butter knife and spoon, quickly spread the hot candy into an even layer approximately ¼ inch thick. Work with confidence but carefully—the mixture is extremely hot and can cause serious burns. Resist the urge to spread too thin, as overly thin brittle becomes too fragile and shatters excessively; too thick, and it becomes chewy rather than brittle.
Allow the candy to cool completely at room temperature, which typically requires 30 minutes to an hour depending on room temperature. Resist opening windows or using fans, as rapid cooling can cause cracking. Once fully cooled, break the brittle into pieces using a butter knife or your hands. Store in an airtight container with parchment paper between layers to prevent sticking.
Alternative Techniques and Variations
Traditional recipes sometimes employ slightly different approaches worth exploring. Some cooks prefer adding peanuts at the soft ball stage (240°F) rather than hard ball stage, cooking them longer in the sugar mixture. This alternative method allows more thorough peanut toasting but requires longer cooking time and more careful temperature monitoring.
For those without candy thermometers, the cold water test provides a reliable alternative. Drop a small amount of hot mixture into cold water—at hard crack stage, it will form hard, brittle threads that snap cleanly when bent. This tactile test, while requiring some practice, becomes increasingly reliable with experience.
Regional and family variations might include:
- Using unsalted versus salted peanuts (affecting overall flavor balance)
- Substituting honey or golden syrup for corn syrup
- Adding different nuts or seeds alongside peanuts
- Incorporating spices like cinnamon or cayenne for flavor complexity
Troubleshooting Common Issues
| Problem | Likely Cause | Solution |
|---|---|---|
| Sticky or chewy texture | Mixture not cooked to proper temperature or humidity interference | Ensure thermometer reaches 300°F; make on low-humidity days |
| Grainy or crystalline texture | Sugar crystallization during cooking | Avoid stirring constantly early on; cover pan initially; use corn syrup |
| Too hard or brittle (shatters excessively) | Cooked too long or temperature exceeded 300°F | Remove from heat at exactly 300°F; avoid dark brown color |
| Flat or dense candy | Insufficient baking soda or over-stirring after adding it | Measure baking soda accurately; stir only until foam develops |
| Doesn’t harden properly | Inadequate cooling time or environmental humidity too high | Allow full cooling time; avoid humid conditions; store in airtight container |
Storage and Shelf Life
Properly made and stored peanut brittle remains fresh for several weeks. Store in an airtight container at room temperature, separated by parchment paper or wax paper to prevent pieces from sticking together. Avoid refrigeration, which can introduce moisture and cause the candy to become sticky. In humid climates, consider adding silica gel packets to your storage container to absorb excess moisture.
For gift-giving, individually wrap pieces in cellophane bags or place in decorative tins. Homemade peanut brittle makes an appreciated gift that demonstrates care and effort, particularly during holiday seasons. Label containers with the date and include storage instructions for recipients.
Frequently Asked Questions
Can I make peanut brittle without a candy thermometer?
Yes, the cold water test provides a reliable alternative. Drop a small sample of the mixture into cold water and observe its behavior—at hard crack stage, it forms hard, brittle threads that snap when bent. However, a thermometer provides more consistency and reduces the learning curve.
Why did my peanut brittle turn out sticky?
Sticky brittle typically results from either insufficient cooking (mixture not reaching 300°F) or high humidity in your environment. Humidity attracts moisture, which softens the candy. Avoid making peanut brittle on humid or rainy days when possible.
Can I use roasted peanuts instead of raw?
Raw peanuts are preferred because they toast during cooking, developing richer flavor. Pre-roasted peanuts can burn or develop bitter flavors. If you must use roasted peanuts, add them later in the process when the mixture is closer to 300°F.
What causes grainy texture in peanut brittle?
Sugar crystallization during cooking causes graininess. Prevent this by avoiding constant stirring during the initial cooking stage, covering the pan for the first three minutes, and ensuring your corn syrup is fresh (old corn syrup can promote crystallization).
How long does homemade peanut brittle stay fresh?
Properly stored peanut brittle remains fresh for 2-3 weeks in an airtight container at room temperature. Store in cool, dry conditions away from humidity sources for maximum shelf life.
Conclusion
Homemade peanut brittle represents a timeless candy-making project that combines simplicity with the satisfaction of creating something special from basic ingredients. By understanding temperature control, ingredient roles, and proper technique, anyone can master this classic confection. The key to success lies in precise temperature monitoring, quick reactions during critical stages, and respecting environmental conditions. With practice, you’ll develop the intuition that transforms a recipe into a cherished family tradition, creating memories and treats that span generations.
References
- Easy Homemade Peanut Brittle — Tastes Better from Scratch. Accessed 2026. https://tastesbetterfromscratch.com/peanut-brittle/
- Mom’s Best Peanut Brittle Recipe — Real Life Dinner. Accessed 2026. https://reallifedinner.com/moms-best-peanut-brittle-recipe/
- Mom’s Peanut Brittle Recipe – Making Life Delicious — Andrea’s Recipes. Updated 2009. https://andreasrecipes.com/shf-26-moms-peanut-brittle/