Creating marshmallows from scratch transforms a simple candy into a luxurious treat with unparalleled texture and flavor. Unlike store-bought versions, homemade ones boast a light, airy quality that melts in your mouth, making them ideal for s’mores, hot chocolate, or standalone snacking. This guide breaks down every aspect of the process, ensuring even beginners achieve professional results.
Understanding Marshmallow Science
Marshmallows rely on a delicate balance of ingredients and precise temperatures. Gelatin provides structure, sugar syrup adds sweetness and stability, and vigorous whipping incorporates air for fluffiness. The process mimics making meringue but with a hot syrup instead of eggs, creating a stable foam that sets into chewy pillows.
Key to success is temperature control: the sugar syrup must reach the soft-ball stage (235–240°F or 113–116°C) to ensure proper aeration without crystallization.Gelatin blooming is crucial, as it allows the protein to hydrate fully, preventing a gritty texture.
Essential Ingredients Breakdown
Selecting high-quality components guarantees superior marshmallows. Here’s a comprehensive list for a standard 9×13-inch pan batch:
- Gelatin: 3/4 ounce (21g) unflavored, about 3 packets. Use powdered for reliability; sheet gelatin works but requires adjustment.
- Sugar: 1 1/2–2 cups granulated for the syrup base.
- Corn syrup or alternatives: 1 cup light corn syrup prevents crystallization; honey or agave can substitute but may alter flavor and firmness.
- Water: 1 cup total, divided for blooming and syrup.
- Salt: 1/4 teaspoon kosher for balance.
- Vanilla: 1–2 teaspoons extract or paste for classic flavor.
- Dusting mix: 1/3 cup confectioners’ sugar + 3 tablespoons cornstarch to prevent sticking.
Variations include cane sugar for deeper flavor or glucose syrup for professional results. Avoid introducing fats early, as they inhibit aeration.Pro tip: Weigh ingredients for precision, as volume measures can vary.
Step-by-Step Preparation Process
Follow these steps meticulously for foolproof marshmallows. Total active time is about 30 minutes, plus 6–8 hours setting.
1. Prep Your Workspace
Grease a 9×13-inch glass or ceramic pan with neutral oil or butter. Avoid metal pans, as they can impart a metallic taste. Line with parchment for easy removal. Sift together confectioners’ sugar and cornstarch, then dust the pan generously, reserving the rest. Clean all tools to avoid fat contamination.
2. Bloom the Gelatin
In your stand mixer’s bowl, combine 1/2 cup cold water and gelatin. Stir gently with a fork to saturate, then let sit 10–15 minutes. It will form a thick, rubbery mass—perfectly normal.
3. Cook the Sugar Syrup
In a heavy saucepan, mix remaining 1/2 cup water, granulated sugar, corn syrup, and salt. Stir over medium heat until dissolved. Attach a candy thermometer and boil without stirring, brushing sides with a water-dampened pastry brush to prevent crystals. Cook to 235–240°F (soft-ball stage). Remove from heat and rest 5 minutes.
4. Whip the Mixture
With the whisk attachment, beat bloomed gelatin on low to loosen. Slowly stream hot syrup down the bowl’s side while mixing on medium-low—caution: it’s scorching! Ramp to high speed and whip 10–15 minutes until tripled in volume, glossy, and cooled to lukewarm. Add vanilla in the last minute.
5. Pour and Set
Quickly scrape into the pan with an oiled spatula. Smooth the top, dust lightly, and let set uncovered at room temperature for 6–48 hours. Humidity affects setting time; drier conditions speed it up.
Common Pitfalls and Fixes
Even seasoned bakers encounter issues. Here’s how to troubleshoot:
| Problem | Cause | Solution |
|---|---|---|
| Weepy or sticky marshmallows | Undercooked syrup or high humidity | Cook to exact temp; store in airtight container with desiccant. |
| Grainy texture | Crystallized sugar | Brush pan sides; use corn syrup. |
| Flat or dense | Insufficient whipping or fat contamination | Whip fully (holds stiff peaks); clean tools thoroughly. |
| Rubbery | Overcooked syrup or old gelatin | Check freshness; hit precise temp. |
For high-altitude baking, reduce max temp by 2°F per 1,000 feet above sea level.
Flavor Innovations and Variations
Vanilla is timeless, but experimentation elevates marshmallows. Add extracts during whipping:
- Chocolate: 1/4 cup cocoa powder + melted chocolate.
- Fruits: Purees like raspberry (reduce water accordingly).
- Herbs: Peppermint, lavender, or coffee for sophistication.
- Spiced: Cinnamon, pumpkin pie spice for seasonal twists.
For colored marshmallows, add gel food coloring post-whipping. Swirl for marbled effects. Layer flavors by pouring in stages.
Perfect Cutting and Storage
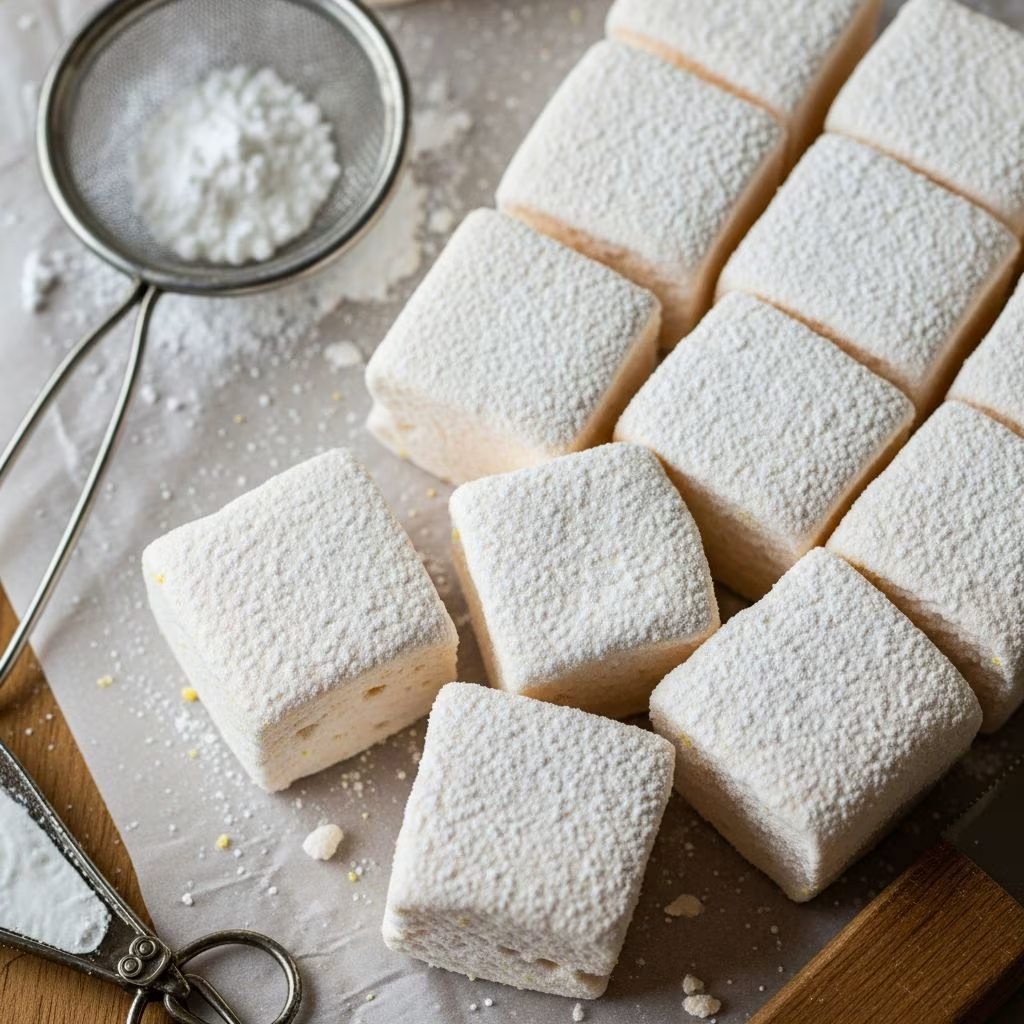
Once set, lift out using parchment. Dust a cutting board and knife with the sugar-cornstarch mix. Use a hot, oiled knife for clean cuts: run under hot water, dry, and slice into 1–2 inch squares. Toss pieces in dusting mix to coat all sides.
Store in an airtight container at room temperature for up to 2 weeks. Freeze for 2 months; thaw without condensation. Avoid refrigeration, as it causes weeping.
Advanced Techniques for Pros
Elevate your game with these tips:
- Corn syrup-free: Use 2/3 cup extra water + honey/agave, but expect softer texture.
- Large batches: Scale up but cook syrup in batches to maintain temp control.
- Shapes: Use cookie cutters dusted heavily; ideal for holidays.
- Vegan option: Aquafaba replaces gelatin, but stability varies—whip to stiff peaks before adding syrup.
Experiment with inverted sugar methods for chewier results, cooking syrup to 250°F.
Pairing and Serving Ideas
Homemade marshmallows shine in:
- S’mores with gourmet chocolate and graham crackers.
- Hot cocoa toppers that dissolve luxuriously.
- Gifts in tins, layered with flavors.
- Desserts like marshmallow fluff in pies or ice cream mix-ins.
Frequently Asked Questions
Can I use a hand mixer?
Yes, but it takes longer (20+ minutes). Ensure it’s powerful to avoid burnout.
What if I don’t have a candy thermometer?
Test soft-ball stage: drop syrup in ice water; it forms a soft, pliable ball.
Are these gluten-free?
Yes, naturally, if using certified GF cornstarch.
How do I fix runny batter?
Whip longer; if needed, add more gelatin next time.
Can I halve the recipe?
Yes, use an 8×8 pan; temps remain the same.
Nutritional Considerations
Marshmallows are indulgent: per 2-piece serving, about 100 calories, mostly sugar. Use in moderation; opt for natural flavors to avoid artificial additives.
References
- How To Make Homemade Marshmallows (Foolproof Guide) — The Flavor Bender. 2023-05-15. https://www.theflavorbender.com/how-to-make-marshmallows-tips-and-tricks-for-homemade-marshmallows/
- How to Make Homemade Marshmallows — Sally’s Baking Addiction. 2024-11-20. https://sallysbakingaddiction.com/homemade-marshmallows/
- Homemade Vanilla Marshmallows Recipe — Alton Brown. 2022-12-01. https://altonbrown.com/recipes/homemade-vanilla-marshmallows/
- Easy Marshmallow Recipe — Mean Green Chef. 2023-08-10. https://meangreenchef.com/easy-marshmallow-recipe/
- The Easiest Homemade Marshmallow Recipe Ever — Borderlands Bakery. 2024-02-14. https://blog.borderlandsbakery.com/recipes/the-easiest-homemade-marshmallow-recipe-ever/