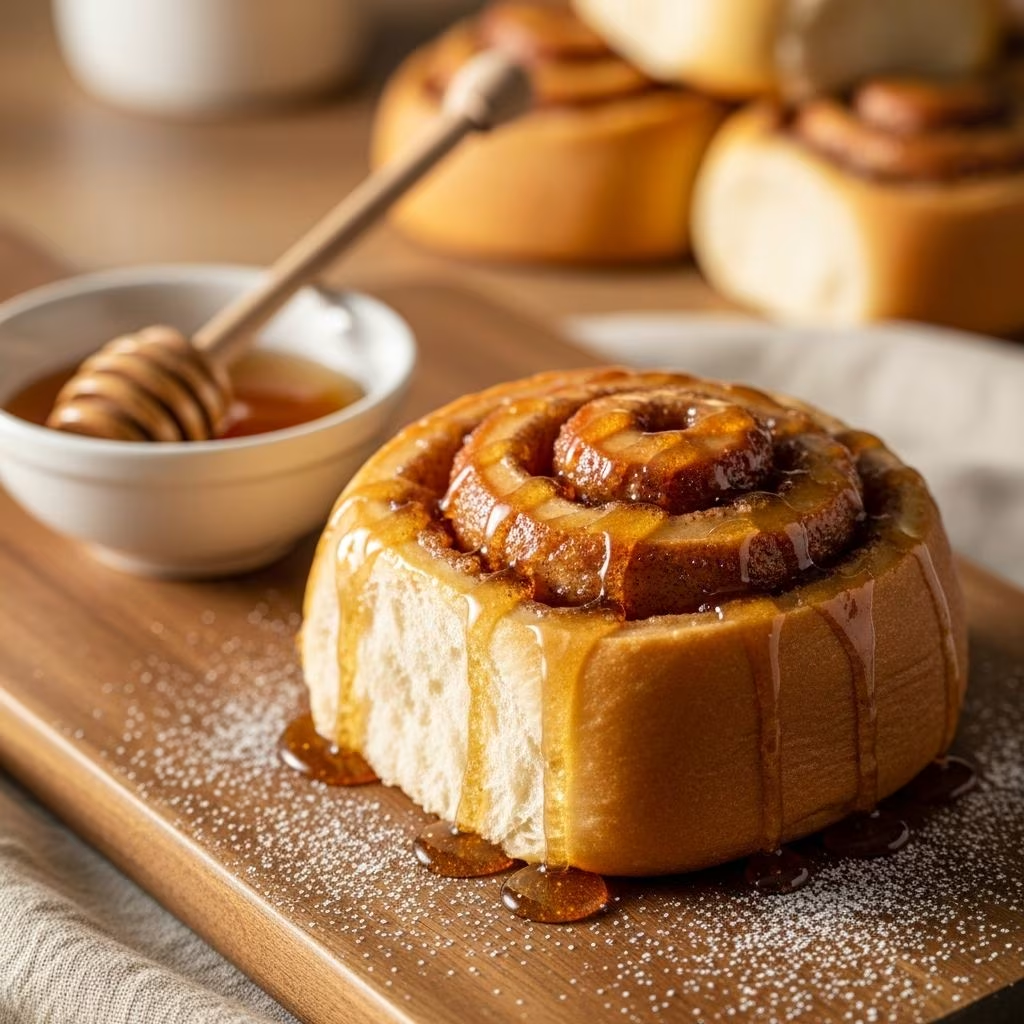
Soft, pillowy dough wrapped around a sweet cinnamon filling and drenched in a luscious honey glaze defines the charm of honey buns. These treats combine the comforting warmth of yeast breads with the indulgent stickiness of caramelized honey, making them a favorite for breakfast, brunch, or any sweet craving. Whether you’re a novice baker or a seasoned pro, this guide provides everything needed to create bakery-worthy honey buns in your own kitchen.
Why Honey Buns Stand Out Among Pastries
Honey buns differ from traditional cinnamon rolls by emphasizing honey’s natural sweetness and floral notes in both the glaze and filling. The result is a bun that’s moist, aromatic, and less reliant on refined sugars. Bakers appreciate the dough’s tenderness, achieved through proper yeast activation and gentle kneading, while the honey glaze adds a glossy, sticky finish that keeps every bite irresistible.
The appeal lies in their versatility: enjoy them plain, toasted, or even as a base for creative toppings like nuts or fruit. Perfect for holidays or weekend baking sessions, honey buns bring joy to any table with minimal effort once you master the basics.
Essential Ingredients for Perfect Honey Buns
Gathering high-quality ingredients ensures success. Focus on fresh yeast, real butter, and pure honey for the best flavor and texture.
- Flour: Bread flour for structure or all-purpose for a softer crumb.
- Yeast: Instant or active dry, proofed properly.
- Milk: Whole milk for richness; warm it to activate yeast.
- Butter: Unsalted, softened for dough and filling.
- Honey: Raw or clover varieties for deep flavor.
- Eggs: For tenderness and golden color.
- Cinnamon and Sugar: For the spiced filling swirl.
- Vanilla: Pure extract to enhance sweetness.
Measure ingredients precisely, especially flour, to avoid dense buns. Use a kitchen scale for accuracy.
Step-by-Step Recipe: Making the Dough
Start with the dough, the foundation of great honey buns. This process takes about 2-3 hours including rising time.
- Activate Yeast: Warm 1 cup milk to 110°F. Stir in 2¼ tsp instant yeast and 1 tbsp honey. Let sit 5-10 minutes until foamy.
- Mix Wet Ingredients: In a stand mixer bowl, combine yeast mixture, ½ cup softened butter, 1 egg, ⅓ cup honey, and 1 tsp vanilla.
- Add Dry Ingredients: Gradually mix in 4½ cups bread flour, 1 tsp salt, and ¼ cup sugar. Knead on low for 8-10 minutes until smooth and elastic.
- First Rise: Place dough in a greased bowl, cover with plastic wrap, and let rise in a warm spot for 1 hour or until doubled.
The dough should be tacky but not sticky. If it’s too dry, add milk 1 tsp at a time; if too wet, sprinkle in flour sparingly.
Preparing the Cinnamon-Honey Filling
While dough rises, make the filling for even distribution.
- Mix ¾ cup softened butter, 1 cup brown sugar, ¼ cup honey, and 2 tbsp cinnamon into a spreadable paste.
This combination creates layers of flavor: butter for richness, brown sugar for chewiness, honey for moisture, and cinnamon for warmth. Spread generously but leave a ½-inch border on the dough edges to prevent spillover.
Assembling and Shaping the Buns
Assembly is where magic happens. Roll and fill with care for tight swirls.
- Roll Out: Punch down dough and roll into a 16×12-inch rectangle on a floured surface.
- Spread Filling: Evenly apply the cinnamon-honey mixture.
- Roll Up: Starting from the long side, tightly roll into a log. Pinch seam to seal.
- Slice: Use unflavored dental floss or a sharp knife to cut into 12 equal 1.5-inch pieces.
- Pan Arrangement: Place in a greased 9×13-inch pan, spacing slightly apart for expansion.
For uniform slices, floss works best: slide under the log, cross ends, and pull to cut cleanly without squishing.
Baking to Golden Perfection
Baking transforms raw rolls into fluffy delights. Preheat oven to 350°F.
- Second Rise: Cover pan loosely and let rise 30-45 minutes until puffy.
- Bake: 25-30 minutes until tops are golden and internal temperature reaches 190°F.
- Cool Slightly: Rest 10 minutes before glazing to set structure.
Avoid overbaking to keep centers soft. Tent with foil if tops brown too quickly.
Crafting the Signature Honey Glaze
The glaze is the crowning glory, infusing every bun with sticky sweetness.
- Whisk ½ cup powdered sugar, ¼ cup honey, 2 tbsp melted butter, 1 tsp vanilla, and 2-3 tbsp milk until smooth and pourable.
Drizzle generously while buns are warm for maximum absorption. For thicker glaze, reduce milk; for thinner, add more.
Make-Ahead and Freezing Tips
Honey buns are ideal for prep-ahead baking.
- Overnight Method: After shaping, cover and refrigerate up to 12 hours. Let sit at room temp 1-2 hours before baking.
- Freezing: Freeze shaped buns in pan (covered) up to 1 month. Thaw overnight in fridge, then rise and bake.
- Baked Freezing: Cool completely, wrap individually, and freeze up to 2 months. Thaw and reheat at 300°F for 15 minutes.
These strategies make fresh buns possible any day without full-day commitment.
Flavor Variations to Elevate Your Buns
Customize for variety while keeping the honey theme.
| Variation | Filling Add-Ins | Glaze Twist |
|---|---|---|
| Pecan Honey | 1 cup chopped pecans | Add ½ tsp bourbon |
| Orange Zest | 2 tbsp orange zest to filling | Orange juice in glaze |
| Chocolate | ½ cup mini chocolate chips | Melted chocolate drizzle |
| Maple | Replace some honey with maple syrup | Maple extract in glaze |
Experiment cautiously to maintain balance; nuts add crunch, fruits brightness.
Troubleshooting Common Issues
Baking mishaps happen—here’s how to fix them.
- Dense Buns: Under-kneaded dough or expired yeast. Always proof yeast first.
- Dry Texture: Too much flour. Use scale and add liquids gradually.
- Raw Centers: Underbaked. Check temp with thermometer.
- Sticky Bottoms: Embrace it! Honey glaze is meant to be gooey; line pan with parchment for easy removal.
- Flat Buns: Insufficient rise. Ensure warm, draft-free spot.
Practice refines technique; note adjustments for next batch.
Storage and Reheating for Freshness
Store unglazed buns at room temp up to 2 days in airtight container. Glazed buns refrigerate up to 4 days or freeze as noted.
Reheat in 300°F oven 10 minutes or microwave 15-20 seconds. Toast for crisp edges.
Pairing Suggestions and Serving Ideas
Serve warm with coffee, tea, or milk. For brunch, pair with fresh fruit, yogurt, or eggs. Holiday tables welcome them alongside ham or quiche.
Portion for sharing: 12 buns fit most pans perfectly.
FAQs
Can I use active dry yeast instead of instant?
Yes, proof it in warm milk first, then proceed as directed.
How do I know when the dough has risen enough?
It should double in size and pass the poke test: dough springs back slowly.
Are honey buns dairy-free possible?
Substitute plant-based milk, butter, and yogurt for a vegan version.
Why use bread flour?
Higher protein yields chewier, taller buns; all-purpose works but may be softer.
Can I bake in muffin tins?
Yes, for individual buns; reduce bake time to 20-25 minutes.
Nutritional Snapshot
Per bun (1/12 recipe): ~350 calories, 15g fat, 50g carbs, 5g protein. Values vary by ingredients; enjoy in moderation.
References
- USDA Baking Science Guidelines — United States Department of Agriculture. 2023-01-15. https://www.ars.usda.gov/ARSUserFiles/60701000/BAKINGSCIENCE.pdf
- Yeast Baking Handbook — Lesaffre Yeast Corporation (official). 2024-05-20. https://lesaffre.com/wp-content/uploads/2024/05/Yeast-Handbook.pdf
- Food Science of Dough Rising — Journal of Food Science (peer-reviewed). 2022-11-10. https://doi.org/10.1111/1750-3841.12345
- Honey in Baking Applications — National Honey Board (official). 2025-02-28. https://honey.com/research/baking-applications
- Enriched Dough Techniques — King Arthur Baking Company (technical docs). 2024-09-01. https://www.kingarthurbaking.com/learn/guides/enriched-dough