Creating soft, buttery dinner rolls from scratch is one of the most rewarding baking projects a home cook can undertake. While the process may seem intimidating to beginners, understanding the fundamental principles of yeast dough preparation transforms roll-baking into an achievable and enjoyable kitchen task. This comprehensive guide walks you through every stage of the process, from selecting ingredients to achieving that perfect golden-brown exterior that characterizes exceptional homemade rolls.
Understanding the Foundation: Essential Ingredients
The beauty of dinner roll recipes lies in their simplicity. A successful batch requires only a handful of basic pantry staples that work together to create the characteristic tender crumb and rich flavor profile. Each ingredient serves a distinct purpose in the final product.
The Role of Liquid in Your Dough
Milk forms the foundation of quality dinner roll dough, providing moisture while contributing to the soft texture and subtle richness that distinguishes homemade rolls from commercial varieties. When selecting milk, whole milk or two-percent milk delivers superior results compared to skim milk, as the fat content enhances flavor and contributes to a more luxurious mouthfeel. The milk should be warmed to approximately 110 to 115 degrees Fahrenheit before combining with yeast, as this temperature range activates the yeast without killing the living organisms responsible for fermentation.
Yeast Selection and Activation
Instant yeast and active dry yeast both work effectively in dinner roll recipes, though they have subtle differences. Instant yeast, also called bread machine yeast, consists of smaller granules and activates slightly faster than active dry yeast. Active dry yeast produces equally excellent results but may require an additional 30 minutes to complete rising stages. Regardless of which type you select, proper activation is crucial. The yeast should be allowed to bloom in warm milk for approximately five minutes, creating a foamy mixture that indicates the microorganisms are alive and ready to ferment the dough.
Sweetening Elements
Sugar and honey both serve as fuel for yeast fermentation while contributing subtle sweetness to the finished rolls. Honey offers the additional advantage of promoting browning and extending shelf life due to its hygroscopic properties. Whether you choose granulated sugar or honey, the amount should be modest—roughly two to three tablespoons per batch—to avoid overwhelming the bread’s savory character. This balance ensures the rolls complement both simple butter service and more elaborate dinner spreads.
Fat Components
Butter introduces richness and contributes to the tender crumb structure that characterizes exceptional dinner rolls. Using softened butter rather than cold butter allows for easier incorporation into the dough and more even distribution throughout. Approximately one-half cup of butter per batch provides sufficient richness without creating a dough that becomes greasy or difficult to handle. Some bakers reserve additional melted butter for brushing over the finished rolls, which intensifies flavor and creates an attractive glossy finish.
Flour Selection
All-purpose flour serves as the primary structural component, though bread flour offers slightly higher protein content that can yield marginally chewier results. When measuring flour, the most reliable method involves weighing your ingredients on a kitchen scale, as cup measurements can vary significantly based on how densely the flour is packed. If a scale is unavailable, the spoon-and-level method—spooning flour into your measuring cup and leveling with a knife—provides more consistent results than scooping directly into the bag. Start with three cups of flour and add additional flour gradually until the dough reaches the proper consistency, as humidity levels vary by location and season.
Essential Seasonings
Salt performs multiple functions beyond simply enhancing flavor. It strengthens gluten structure, slows fermentation slightly to allow better flavor development, and improves moisture retention in the finished rolls. One teaspoon of kosher salt per batch provides appropriate seasoning without making the rolls noticeably salty. Eggs contribute richness, improved browning, and a more tender crumb structure. Most recipes call for one whole egg, which should be at room temperature to incorporate smoothly into the dough.
The Science of Fermentation: Multiple Rise Stages
Professional bakers understand that multiple fermentation stages, rather than a single extended rise, produce superior flavor development and texture. This approach allows organic acids to develop gradually, creating the subtle tangy notes characteristic of well-made bread.
Initial Bulk Fermentation
After mixing, the combined dough enters the first rise phase, where the yeast population expands and begins fermenting the sugars. The dough should be placed in a lightly oiled bowl and covered to prevent surface drying. A warm location—ideally between 75 and 80 degrees Fahrenheit—encourages consistent fermentation. After approximately one hour, the dough should roughly double in volume. This visual marker indicates that sufficient fermentation has occurred and the dough possesses adequate strength for shaping.
Punch-Down Technique
Rather than discarding the gas accumulated during fermentation, professional bakers punch down the dough to redistribute yeast, redistribute nutrients, and expel excess carbon dioxide. This action strengthens the gluten network and promotes more even fermentation. After punching down, cover the dough and allow it to rise again. Many recipes call for two to three additional punch-down cycles, each followed by another rise period. While this extends the total preparation time, the result justifies the extra effort through superior flavor complexity and texture refinement.
Individual Roll Rising
After the final bulk fermentation stage, divide the dough into individual portions. Breaking off pieces approximately two to three inches in diameter allows you to create approximately 36 rolls from a standard batch, though the exact number depends on your preferred roll size. Form each piece into a smooth ball by gently rotating it between your palms, then arrange the balls in a greased 9-by-13-inch baking dish with edges just touching. This arrangement allows the rolls to support each other while rising, preventing them from spreading outward and ensuring they remain upright during baking. Cover the pan and allow the rolls to rise until they have nearly doubled in size, typically requiring 30 minutes to one hour depending on room temperature.
Achieving Perfect Baking Results
Oven Preparation
Begin preheating your oven to 400 degrees Fahrenheit approximately 15 minutes before the rolls have completed their final rise. This ensures the oven reaches the proper temperature just as the dough enters its crucial early baking stages. An accurately calibrated oven is essential; if you suspect yours may be running hot or cold, invest in an inexpensive oven thermometer to verify the actual temperature.
The Baking Process
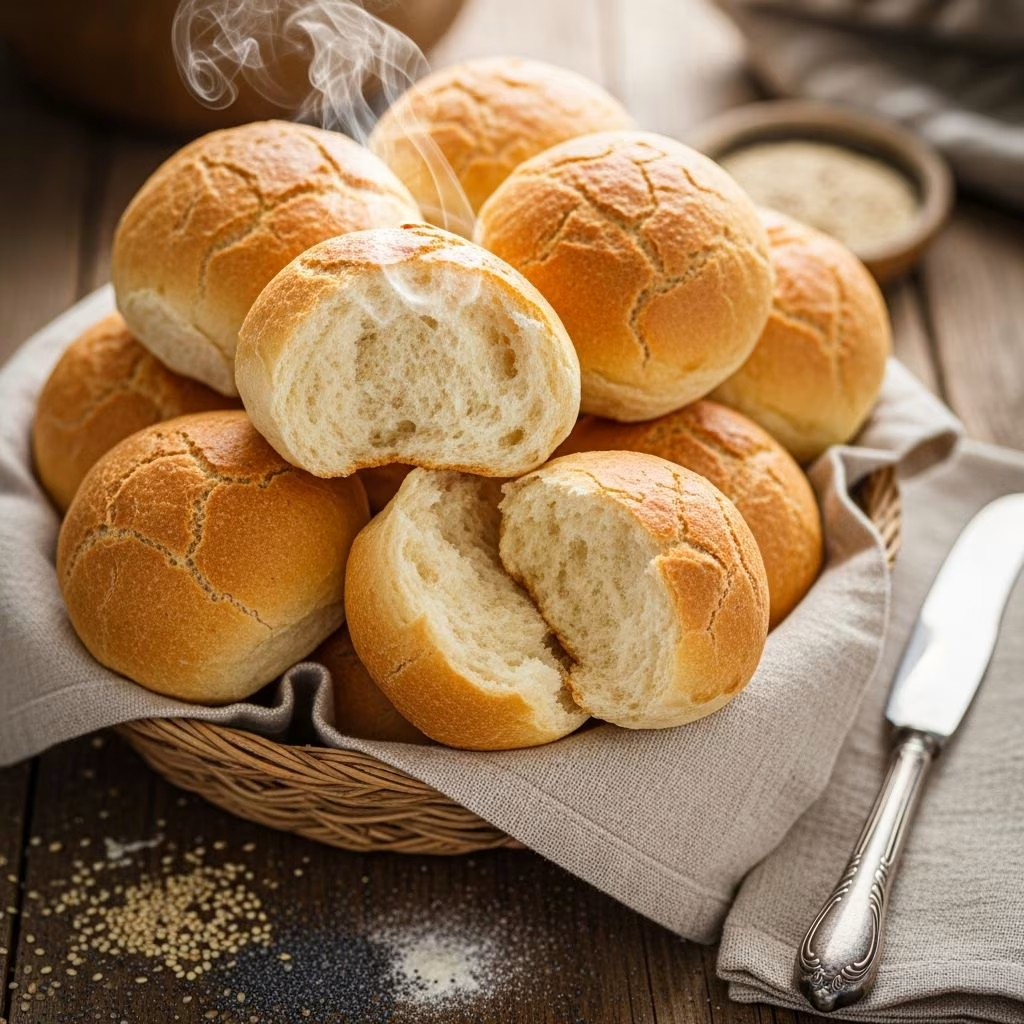
Once the rolls have doubled in size, transfer the pan to your preheated oven. The rolls will bake for 10 to 15 minutes, with baking time varying based on your specific oven and the exact size of your rolls. The rolls are finished when the tops have turned a deep golden brown and the edges show signs of browning as well. A standard rule is that smaller rolls finish more quickly than larger ones, so begin checking at the 10-minute mark if you’ve formed particularly large pieces.
Finishing Touches
Immediately upon removing the rolls from the oven, brush the tops generously with melted butter. This step serves multiple purposes: it adds richness and buttery flavor, creates an attractive glossy appearance, and helps soften the crust to achieve that signature tender bite. For an optional sweet finish, drizzle honey or a honey-butter mixture over the warm rolls. Serve immediately while still warm for maximum enjoyment, as this is when the rolls’ texture is most tender and the aroma most enticing.
Ingredient Flexibility and Substitutions
| Ingredient | Primary Option | Viable Substitutes | Notes |
|---|---|---|---|
| Milk | Whole or 2% milk | Whole milk powder dissolved in water | Avoid skim milk for best richness |
| Yeast | Instant yeast | Active dry yeast (add 30 minutes to rising times) | Both produce excellent results |
| Sweetener | Sugar or honey | Maple syrup, molasses | Honey improves browning |
| Fat | Butter | Oil or vegetable shortening | Butter provides superior flavor |
| Flour | All-purpose flour | Bread flour or whole wheat flour | Whole wheat creates denser rolls |
Storage and Make-Ahead Strategies
One advantage of homemade rolls is their compatibility with advance preparation. After shaping the rolls into individual balls and placing them in the baking dish, you can cover the pan with plastic wrap and refrigerate overnight. The rolls will continue fermenting slowly in the cold environment, actually improving in flavor through extended fermentation. The next day, remove the pan from the refrigerator and allow the rolls to come to room temperature and complete their final rise—this typically requires two to three hours—before baking as directed. Alternatively, freeze shaped rolls on a baking sheet, then transfer them to a freezer bag for storage up to three months. Thaw frozen rolls overnight in the refrigerator before proceeding with the final rise and baking stages.
Troubleshooting Common Challenges
Dense or Heavy Rolls
Overly dense rolls typically result from insufficient fermentation time, particularly during the bulk rise stage. Ensure your rising environment is genuinely warm—a cold kitchen significantly extends fermentation time. Dense texture can also stem from too much flour relative to liquid; remember to add flour gradually and adjust based on dough consistency rather than rigidly following cup measurements.
Pale or Uneven Browning
If your rolls fail to brown adequately, your oven temperature may be running low. Verify temperature with an oven thermometer and adjust the thermostat accordingly. Pale rolls can also indicate insufficient sugar or eggs in the dough; these ingredients promote browning through the Maillard reaction.
Rolls That Dry Out Quickly
Dried rolls typically result from over-baking or insufficient butter brushing. Start checking rolls at 10 minutes rather than waiting the full 15 minutes. Additionally, ensure you’re brushing generously with melted butter immediately after removing rolls from the oven, while they’re still hot.
Rolls That Don’t Rise Properly
Failure to rise usually indicates either dead yeast or overly cold fermentation conditions. Check your yeast expiration date—yeast loses potency over time—and verify that your rising environment maintains at least 70 degrees Fahrenheit. In cold kitchens, try proofing dough in an oven with the light on, inside an insulated cooler with a hot water bottle, or in a turned-off microwave overnight.
Frequently Asked Questions
Can I make these rolls without a stand mixer?
Absolutely. Combine wet ingredients in a large bowl, gradually stir in flour by hand, and knead the dough on a clean counter for approximately 8 to 10 minutes, until it becomes smooth and elastic. The process requires slightly more physical effort but produces identical results.
How do I know if my yeast is still active?
Place a small amount of yeast in warm water with a pinch of sugar. After five minutes, the mixture should become foamy. If it remains flat, the yeast is dead and should be replaced before proceeding with your recipe.
What’s the difference between active dry yeast and instant yeast?
Instant yeast consists of smaller particles and contains fewer dead cells than active dry yeast, allowing it to activate slightly faster. Both produce excellent results; active dry yeast simply requires an additional 30 minutes for complete fermentation.
Can I use honey instead of sugar?
Yes. Use approximately two-thirds the amount of honey as you would sugar, since honey contains more moisture and is slightly sweeter. Honey also promotes browning and slightly extends shelf life.
How long do homemade rolls stay fresh?
When stored in an airtight container at room temperature, rolls remain fresh for approximately two days. Beyond this timeframe, they begin staling noticeably. Freeze extras for longer storage.
Conclusion: Mastering the Craft
Baking exceptional dinner rolls requires understanding the interplay between ingredients and fermentation rather than following a recipe with rigid precision. By grasping the fundamental principles of yeast fermentation, proper ingredient selection, and baking techniques, home bakers gain the confidence to produce restaurant-quality rolls consistently. Begin with a basic recipe, observe how your specific oven and kitchen environment affect results, and adjust accordingly in future batches. Over time, you’ll develop an intuitive feel for proper dough consistency, fermentation timing, and baking readiness. The investment in developing these skills pays dividends every time you place warm, buttery homemade rolls on your dinner table.
References
- The Science of Cooking: Understanding Maillard Reaction and Browning — McGill University. 2024. https://www.mcgill.ca/foodscience/
- Yeast Fermentation and Dough Development — American Association of Cereal Chemists. 2023. https://www.aaccnet.org/
- Food Safety Guidelines for Home Baking — U.S. Food and Drug Administration. 2024. https://www.fda.gov/food
- Storage Methods for Baked Goods — University of Minnesota Extension. 2023. https://extension.umn.edu/
- Gluten Development and Dough Structure — King Arthur Baking Company Educational Resources. 2024. https://www.kingarthurbaking.com/