Creating cinnamon rolls from scratch offers home bakers the opportunity to craft a beloved pastry that rivals professional bakeries. The combination of buttery dough, aromatic cinnamon filling, and creamy frosting makes these rolls a centerpiece of any breakfast or brunch spread. Whether you’re a seasoned baker or someone attempting yeast dough for the first time, understanding the fundamental techniques and ingredient interactions will elevate your results significantly.
Understanding the Foundation: Dough Composition
The quality of your cinnamon rolls begins with the dough itself. A well-developed yeast dough requires the proper balance of flour, liquid, fat, and leavening agents to achieve the signature soft, pillowy texture that distinguishes excellent cinnamon rolls from mediocre ones.
The primary components of cinnamon roll dough include all-purpose flour, which provides structure, warm milk and water for hydration, unsalted butter for richness and tenderness, granulated sugar to feed the yeast and add subtle sweetness, active dry or instant yeast for leavening, salt to control fermentation, and sometimes eggs for added richness and improved crumb structure.
Temperature control during the initial mixing phase proves crucial. The liquid ingredients should reach approximately 110 to 115 degrees Fahrenheit—warm enough to activate the yeast but not so hot that it damages the delicate microorganisms. Many bakers discover that combining melted butter with room-temperature milk creates the ideal temperature range without requiring precision thermometer work.
The Kneading Process and Dough Development
Proper kneading develops the gluten network essential for trapping gas bubbles and creating an airy crumb structure. Whether mixing by hand or using a stand mixer, the dough transformation signals successful development. Initially, the mixture appears shaggy and rough, but after 5 to 10 minutes of kneading, the dough becomes smooth, elastic, and springs back when poked—indicating adequate gluten development.
The “windowpane test” offers a reliable method to assess readiness. Pinch a small piece of dough and gently stretch it between your fingers. If it creates a thin, translucent membrane without tearing, gluten development is complete. This stage typically takes 8 to 10 minutes by hand or 5 to 7 minutes in a stand mixer equipped with a dough hook.
After kneading, a brief 10 to 15-minute rest allows the gluten to relax, making the dough easier to shape without excessive resistance. During this time, cover the dough with a towel to prevent surface drying.
Shaping and Filling: Building Layers of Flavor
Rolling and filling technique directly impacts the final texture and appearance of your cinnamon rolls. Begin by rolling the rested dough into a rectangle approximately 14 to 15 inches long and 9 to 10 inches wide on a lightly floured surface. Consistent thickness throughout ensures even baking and uniform roll sizes.
The filling mixture—composed of softened butter, brown sugar, cinnamon, and salt—should be spread evenly across the dough surface, leaving a thin margin around the edges. This prevents filling from squeezing out during rolling and baking. The brown sugar provides deeper molasses notes compared to white granulated sugar, creating a more complex flavor profile.
Rolling technique significantly influences the final appearance and texture. Starting from the long edge and rolling tightly creates compact rolls with multiple concentric layers of filling. Many experienced bakers roll tightly while working from top to bottom, then gently pinch the seam to seal the log. This method prevents the filling from escaping during the rise and baking stages.
Cutting the log into 12 equal pieces requires a sharp knife or unflavored dental floss. A serrated bread knife works well, but dental floss often produces cleaner cuts without compressing the soft dough. To use floss, slide it horizontally under the log, cross the ends over the top, and pull—the floss cuts cleanly through without crushing.
Rising and Proofing: Timing for Optimal Results
The second rise, also called proofing, develops flavor and volume. After arranging the cut rolls in a greased baking pan (9×13 inches or a 9-inch round cake pan work equally well), cover them loosely with plastic wrap or a damp towel to prevent surface drying. Most recipes call for a 30-minute rise at room temperature until the rolls increase in volume by about 50 percent. Some bakers prefer refrigerating the assembled rolls overnight, which allows the dough to rise slowly and develop deeper flavor complexity.
Determining when rolls have risen sufficiently requires visual assessment rather than strict timing. The dough should feel puffy and offer slight resistance when gently poked with a floured finger. Underproofed rolls will bake up dense, while overproofed rolls may collapse during baking. Room temperature typically ranges between 70 and 75 degrees Fahrenheit, affecting rise duration. Warmer kitchens require shorter times, while cooler environments need extended proofing.
Baking Temperature and Technique
Most cinnamon roll recipes call for baking at 350 degrees Fahrenheit for 20 to 25 minutes until the rolls achieve a light golden brown exterior. The lower baking temperature compared to many other bread products allows the dough interior to cook through without excessive browning.
Positioning the baking pan in the center of the oven ensures even heat circulation. If the rolls brown too quickly during baking, loosely tent them with foil to protect the exterior while the interior continues cooking. Rolls are fully baked when the internal temperature reaches approximately 190 degrees Fahrenheit at the center of the thickest roll.
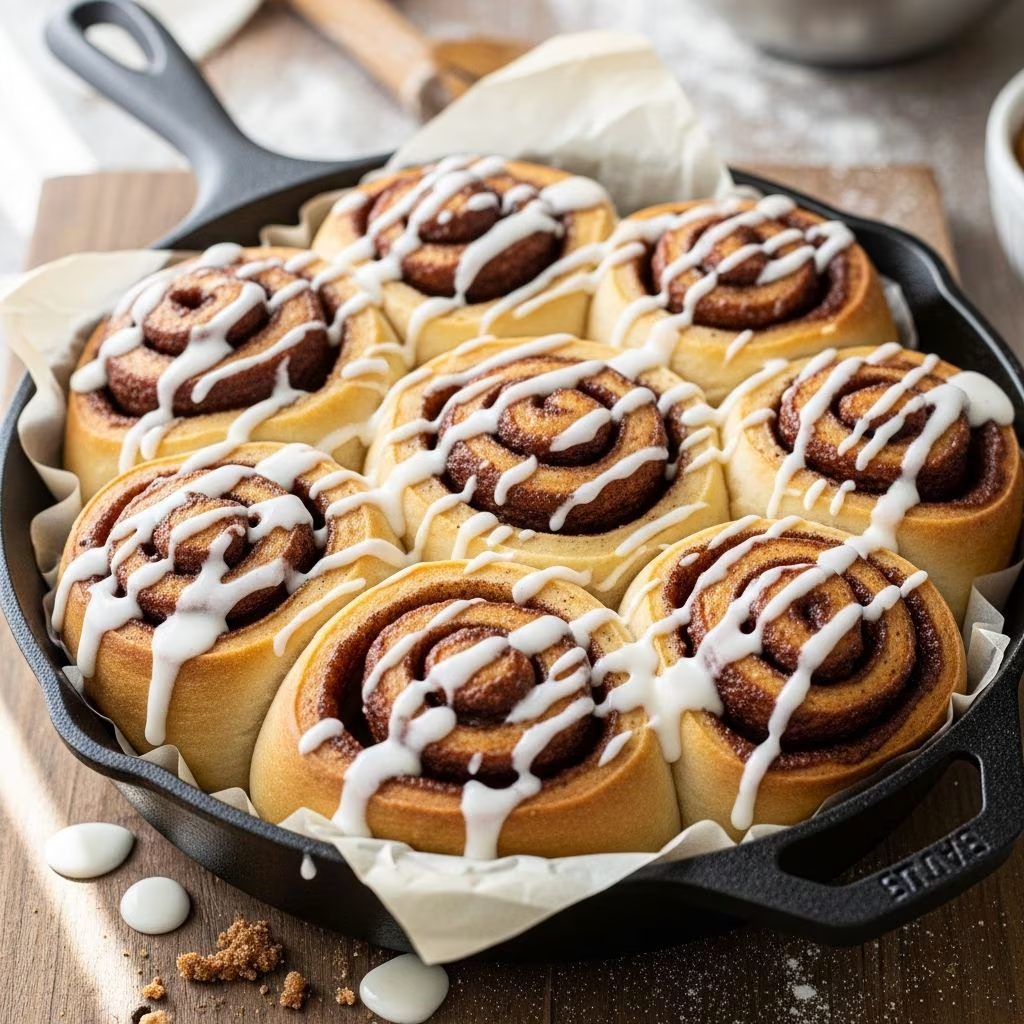
Immediately after removing from the oven, the rolls should be drizzled or frosted while still warm. This allows the frosting to melt slightly and seep into the warm dough, creating a luxurious texture and seamless flavor integration.
Frosting Variations and Toppings
Cream cheese frosting represents the classic choice, combining softened cream cheese, butter, powdered sugar, and vanilla extract into a smooth, spreadable consistency. The tangy notes of cream cheese balance the sweetness and richness of the rolls perfectly.
Alternative frosting options accommodate different preferences and dietary considerations. A simple glaze made from powdered sugar, milk, and butter offers a lighter coating. Honey icing combines honey with softened butter and vanilla for a naturally sweet topping with floral notes. Some bakers prefer cinnamon cream cheese frosting, incorporating additional cinnamon into the traditional recipe for enhanced spice presence.
For the most luxurious texture, apply frosting immediately after baking while the rolls remain warm. The residual heat slightly melts the frosting, allowing it to flow into crevices and coat the rolls evenly. However, if preparing rolls in advance, cooling them to room temperature before frosting extends shelf life, as warm frosting accelerates spoilage.
Ingredient Quality and Selection
| Ingredient | Selection Criteria | Impact on Results |
|---|---|---|
| Flour | All-purpose, unbleached preferred | Provides consistent gluten development and structure |
| Yeast | Active dry or instant, within expiration date | Ensures reliable fermentation and rise |
| Butter | Unsalted for flavor control | Creates tender crumb and rich flavor |
| Milk | Whole milk or 2% (avoid skim) | Enhances browning and adds richness |
| Cinnamon | Ceylon or cassia, freshly purchased | Provides aromatic spice profile |
The quality of individual ingredients significantly influences the final product. Fresh, high-quality yeast ensures consistent fermentation without off-flavors or sluggish rising. Whole or 2% milk contains sufficient fat and milk solids to enhance browning and add richness, while skim milk produces less satisfactory results. Unsalted butter allows precise control over total salt content, preventing an overly salty finished product.
Cinnamon quality often gets overlooked despite its starring role in these rolls. Purchasing fresh cinnamon from reputable spice suppliers rather than relying on aged pantry staples dramatically improves the aromatic intensity and flavor complexity. Cassia cinnamon offers a bolder, slightly spicier profile, while Ceylon cinnamon provides a more delicate, nuanced sweetness.
Storage and Make-Ahead Strategies
Assembling cinnamon rolls the evening before baking offers significant convenience without compromising quality. After cutting and arranging the rolls in the baking pan, cover tightly with plastic wrap and refrigerate overnight. The cold temperature slows yeast activity, allowing the dough to rise slowly while developing deeper, more complex flavors through extended fermentation. In the morning, remove from the refrigerator and allow 15 to 30 minutes at room temperature before baking, depending on how much the rolls have risen overnight.
Fully baked rolls remain fresh at room temperature for two days when stored in an airtight container. The frosting layer helps retain moisture, maintaining softness and preventing drying. Freezing baked rolls extends storage life up to three months—wrap individually in plastic wrap and aluminum foil, then place in freezer bags. To reheat, thaw at room temperature for 2 to 3 hours or warm gently in a 300-degree oven for 10 to 15 minutes until heated through.
Troubleshooting Common Challenges
Dense rolls typically result from underproofing (insufficient rise time) or overworking the dough during shaping. Allow adequate time for the dough to rise between kneading and shaping, and handle it gently when rolling to avoid degassing. Rolls that bake up dry often indicate over-baking or using low-fat milk. Check for doneness slightly earlier than recipe instructions suggest, and consider using whole milk for added richness.
Uneven browning frequently occurs when rolls are positioned unevenly in the baking pan or when oven temperature hotspots exist. Arrange rolls so they don’t touch one another, allowing consistent heat circulation. If one side browns significantly faster than others, rotate the pan halfway through baking.
Filling leakage during baking suggests inadequate sealing or filling spreading too close to the dough edges. Pinch the seam firmly after rolling, and ensure the filling mixture stays at least half an inch from the edges. If rolls still leak, check that the filling isn’t too wet—brown sugar should be thoroughly mixed with butter and cinnamon to create a paste rather than a loose mixture.
Frequently Asked Questions
Can I use instant yeast instead of active dry yeast?
Yes, instant yeast (also called rapid-rise yeast) works directly as a substitute in equal quantities. Instant yeast has slightly smaller granules that hydrate more quickly, potentially reducing fermentation time by 10 to 15 percent. Adjust timing based on observation rather than strict clock-watching.
What’s the difference between a quick-rise recipe and a traditional overnight roll?
Quick-rise recipes, completed in 60 to 90 minutes, rely on warmer temperatures and minimal rising time to achieve volume quickly. Traditional overnight rolls develop flavor through slow fermentation and extended rising periods, typically producing a more complex, less yeasty taste. Both methods produce delicious results with different flavor profiles.
Why does my dough feel sticky during shaping?
Slightly sticky dough indicates sufficient hydration for a tender crumb. If stickiness interferes with handling, dust the work surface and dough lightly with flour rather than adding flour to the dough, which toughens the final product. A bench scraper helps manage tacky dough without adding excess flour.
Can I make rolls ahead and bake them later?
Absolutely. Refrigerated unbaked rolls rise slowly overnight, developing enhanced flavor. Remove from the refrigerator, allow partial room-temperature rise for 15 to 30 minutes, then bake as directed. This method offers significant convenience for entertaining or morning service situations.
Elevating Your Cinnamon Roll Game
Mastering homemade cinnamon rolls opens possibilities for creative variations and flavor explorations. Adding a tablespoon of honey to the dough enhances browning and adds subtle sweetness. Incorporating finely grated orange zest into the filling creates brightness that contrasts beautifully with cinnamon warmth. Toasting nuts and adding them to the filling provides textural contrast and additional flavor complexity.
Understanding the fundamental techniques—dough development, proper proofing, accurate baking temperature, and quality ingredient selection—provides the foundation for consistent, bakery-quality results. Each component builds upon the others, creating a cohesive system that transforms simple ingredients into an exceptional pastry worthy of any occasion.
References
- Quick and Easy Cinnamon Roll Recipe – Coley Cooks — Coley Cooks. 2024. https://coleycooks.com/cinnamon-rolls/
- Soft & Gooey Homemade Cinnamon Rolls – Butternut Bakery — Butternut Bakery Blog. 2024. https://butternutbakeryblog.com/easy-homemade-cinnamon-rolls/