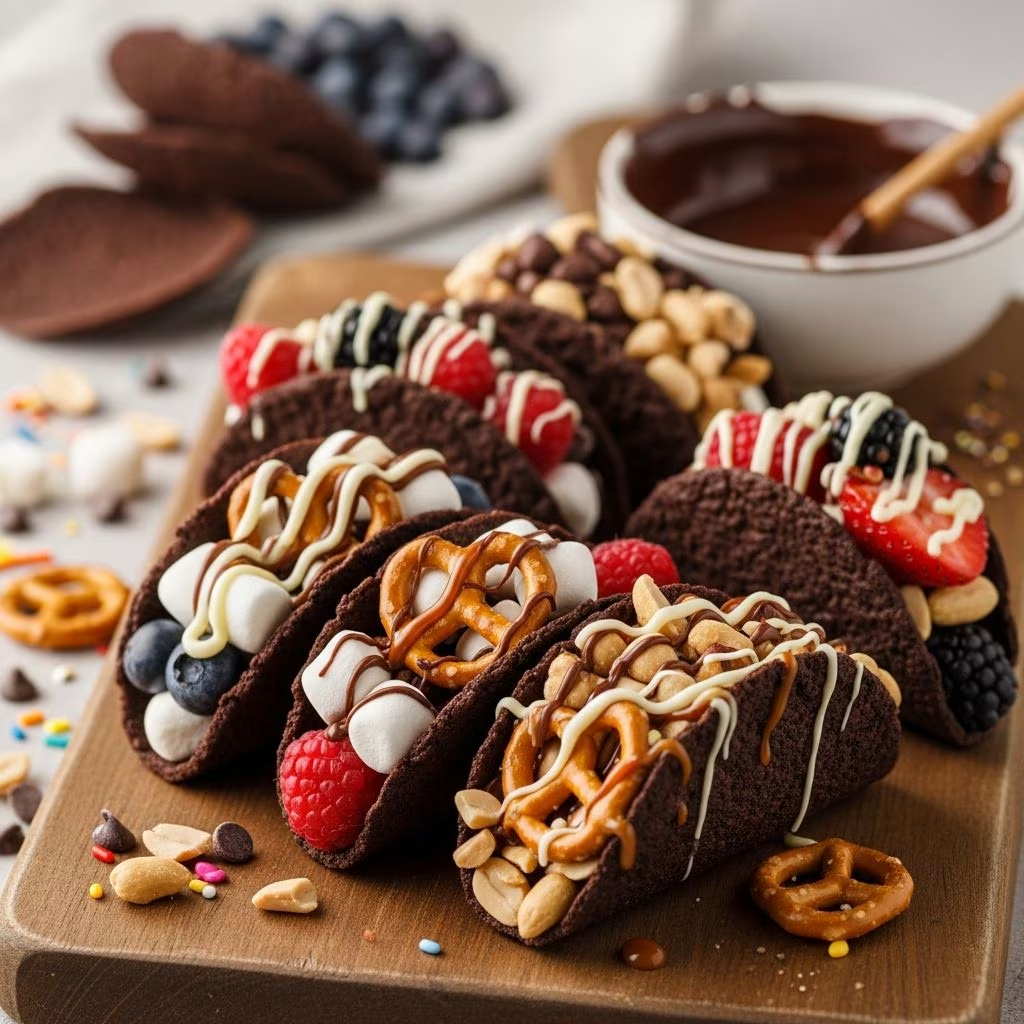
Chocolate tacos represent one of the most creative and indulgent frozen desserts available, combining crispy waffle cone shells with creamy ice cream and a chocolate coating. While commercial versions have been beloved by families for decades, creating these delightful treats at home offers superior flavor, customization options, and the satisfaction of homemade craftsmanship. This comprehensive guide walks you through every stage of the process, from preparing the waffle cone shells to the final chocolate dipping, ensuring you can replicate this classic dessert in your own kitchen.
Understanding the Fundamental Components
A chocolate taco consists of three essential layers working together in harmony. The foundation begins with a crispy waffle cone shell that provides structural support and textural contrast. This shell cradles a generous portion of frozen ice cream that serves as the creamy center. Finally, a thin chocolate coating seals the top and adds richness to every bite. Understanding how these components interact helps you appreciate the engineering behind this seemingly simple treat.
The waffle cone shell must possess specific qualities to succeed. It needs sufficient rigidity to hold the ice cream without cracking, yet enough pliability during the molding phase to shape into a taco form. The ice cream filling should maintain its frozen state while remaining soft enough to scoop easily before freezing. The chocolate coating should harden quickly upon contact with the cold ice cream, creating a satisfying shell that contrasts beautifully with the creamy interior.
Selecting and Preparing Your Ingredients
The Waffle Cone Shell Base
Creating waffle cone shells from scratch requires precision and attention to detail. Begin by gathering your dry ingredients: all-purpose flour, granulated sugar, kosher salt, and optionally, cocoa powder for chocolate-flavored shells. Your wet ingredients should include egg whites, whole eggs, vanilla extract, and melted unsalted butter. Some recipes incorporate almond extract or cinnamon for additional flavor complexity.
The ratio of ingredients significantly impacts your final product. Too much flour creates dense, brittle shells prone to cracking during the molding process. Insufficient flour results in shells that tear easily and lack structural integrity. The ideal batter achieves a smooth, thick consistency that pipes easily but holds shape during cooking.
Ice Cream Selection and Preparation
You have two primary options: store-bought vanilla ice cream or homemade versions featuring creative flavors and mix-ins. Store-bought ice cream offers convenience and consistency, requiring minimal preparation beyond scooping. Homemade ice cream allows for flavor customization, from traditional vanilla to fudge-swirled varieties or non-dairy alternatives.
If preparing homemade ice cream, consider making a no-churn version by combining heavy cream with sweetened condensed milk, then whipping to soft peaks. Add fudge sauce, cookie pieces, or fruit swirls for visual interest and enhanced flavor. Allow homemade ice cream to reach room temperature before filling the shells, as this improves workability without compromising the final frozen texture.
Chocolate Coating Specifications
The chocolate coating transforms your creation into a complete dessert experience. You can use chocolate chips, chocolate wafers, or bittersweet chocolate bars melted to a smooth, pourable consistency. Pair your chocolate with coconut oil or butter to achieve the ideal viscosity—chocolate that flows smoothly without being overly thin. The ratio should maintain the chocolate’s flavor integrity while allowing it to coat easily and harden quickly.
Essential Equipment and Setup
A waffle cone maker forms the backbone of shell production. Standard cone makers available in most kitchens work adequately, though dedicated waffle cone machines provide more consistent results. Beyond the cone maker, you’ll need:
- Mixing bowls in various sizes
- Electric mixer or vigorous whisking capability
- Taco molds or makeshift forms (small books, pot handles, or cutting board edges)
- Paper towels for immediate post-cooking handling
- Baking sheets lined with parchment paper
- Microwave-safe bowls for chocolate melting
- Freezer space for multiple stages of preparation
Preparation matters enormously. Preheat your waffle cone maker thoroughly before beginning, ensuring even cooking and optimal texture development. Arrange paper towels nearby for immediate shell removal and molding. Set up your molding station with taco holders or improvised forms ready to receive hot waffle shells within seconds of removal from the cooking surface.
Step-by-Step Shell Preparation
Batter Creation and Consistency
Begin by combining your egg whites, whole eggs, and granulated sugar in a mixing bowl. Beat these ingredients for approximately thirty seconds until the sugar begins dissolving and the mixture becomes slightly foamy. Add vanilla extract, salt, and any optional flavorings like cinnamon or almond extract.
Gently fold in your all-purpose flour, mixing until no white streaks remain but avoiding overmixing, which develops gluten and creates tough shells. Pour in your melted, cooled butter and incorporate with a final series of gentle stirring motions until the batter achieves a smooth, thick consistency resembling cake batter.
Cooking Individual Shells
Deposit approximately one to two tablespoons of batter onto the preheated waffle cone maker’s center. Close the maker and cook for one to two minutes until the shell achieves a golden-brown color. Cooking time varies based on your specific appliance, so monitor the first few shells closely to determine optimal timing.
Remove the cooked shell immediately upon opening the waffle cone maker. The shell will be pliable and hot, requiring careful but quick handling. Place the shell on a paper towel-lined surface within seconds of removal.
Molding Into Taco Shape
While the shell remains warm and flexible, position it over your taco mold. Press the edge of a small book, wrapped with paper towels, against the shell’s center, folding it into a taco configuration. Hold this position for approximately one minute, allowing the shell to set into its new shape. Maintain gentle but firm pressure to prevent the shell from resuming its cone shape as it cools.
Remove the mold and allow the shell to cool completely before handling further. This cooling period typically requires ten to fifteen minutes. Repeat this process with each batch of batter until you’ve prepared your desired quantity of shells, typically yielding twelve to twenty completed tacos depending on batter amounts.
Filling and Assembly Techniques
Preparing Your Workspace
Organization streamlines the filling process significantly. Arrange your cooled taco shells upright in a loaf pan or similar container, maintaining their open ends facing upward. Position your ice cream nearby, allowing it to soften slightly if it’s directly from the freezer. Prepare a baking sheet lined with parchment paper as your staging area for filled tacos.
Filling Process
Using a teaspoon, scoop ice cream into the bottom of each shell, pressing gently to create a compressed base layer. Add additional ice cream layers if desired, creating height and ensuring each shell reaches maximum capacity. Some recipes recommend filling shells completely to the brim for generous servings, while others prefer moderate filling to prevent spillage during chocolate coating.
Work methodically, transferring each filled shell to your prepared baking sheet as you complete it. This staged approach prevents ice cream from melting excessively before the crucial freezing stage.
Intermediate Freezing
Transfer your filled shells to the freezer for thirty to sixty minutes, allowing the ice cream to firm sufficiently for chocolate coating without refreezing solid. This intermediate freezing creates the ideal texture for the final dipping process. If using homemade ice cream, which tends toward softer consistency, allow extended freezing time, potentially reaching the full hour mark.
Chocolate Coating and Finishing
Preparing the Chocolate Mixture
Melt your chocolate chips or wafers using a double boiler method or microwave. For microwave preparation, combine chocolate and coconut oil in thirty-second increments on fifty percent power, stirring thoroughly between intervals until complete melting occurs. This gentle approach prevents scorching and maintains smooth texture.
Allow the chocolate to cool to room temperature before dipping, approximately five to ten minutes. Chocolate that’s too hot will melt through the ice cream layer, while overly cooled chocolate becomes thick and difficult to apply smoothly.
Dipping Application
Remove your intermediate-frozen tacos from the freezer. Working with one taco at a time, dip the open top edge into your melted chocolate, ensuring complete coverage of the exposed ice cream. Allow excess chocolate to drip off before removing the taco from the chocolate mixture.
Work efficiently during this stage, as ice cream begins softening immediately upon removal from the freezer. Complete the dipping and topping process for each taco before moving to the next one, maintaining cold surface temperatures throughout.
Topping Application
While the chocolate remains tacky and before it hardens completely, apply your chosen toppings. Crushed peanuts provide traditional flavor and textural contrast, though almonds, sprinkles, cookie crumbles, or coconut offer creative alternatives. Press toppings gently into the chocolate coating to ensure they adhere properly.
Final Freezing and Storage
Immediately return topped tacos to the freezer, arranging them on a parchment-lined baking sheet in a single layer. Allow the chocolate coating to harden completely, typically requiring thirty to forty-five minutes. Once hardened, you can transfer tacos to airtight freezer containers for extended storage, lasting up to two weeks.
For optimal flavor and texture, consume homemade chocolate tacos within one week of completion. Over extended storage periods, ice cream may develop ice crystals and flavor can diminish slightly.
Customization Possibilities
| Component | Traditional Option | Creative Alternatives |
|---|---|---|
| Ice Cream Flavor | Vanilla | Chocolate, strawberry, cookie dough, mint chocolate chip, salted caramel |
| Shell Variety | Traditional waffle cone | Chocolate-flavored shells, churro-style shells, cinnamon sugar shells |
| Chocolate Type | Milk chocolate | Dark chocolate, white chocolate, specialty chocolate, magic shell |
| Toppings | Peanuts | Almonds, pistachios, sprinkles, cookies, coconut, caramel sauce, hot fudge |
Common Challenges and Solutions
Shell Cracking or Breaking
Shells that crack during molding typically indicate either excessive flour in the batter or insufficient cooling time before handling. Adjust your flour ratio downward slightly and ensure shells remain warm during molding but sufficiently set to hold their shape. Some cracks are cosmetic and won’t impact your finished product.
Ice Cream Leaking
Leaking occurs when ice cream hasn’t frozen sufficiently or when too much ice cream has been packed into each shell. Ensure your intermediate freezing stage lasts the full recommended time. Consider reducing filling amounts slightly if leaking persists despite adequate freezing.
Chocolate Not Adhering
Chocolate that slides off the ice cream suggests it’s either too thin or too warm. Ensure your chocolate-to-oil ratio maintains proper viscosity, and allow melted chocolate to cool to room temperature before dipping. Additionally, verify that your taco tops are sufficiently frozen to support the chocolate coating.
Frequently Asked Questions
Can I prepare shells in advance?
Yes, completely cooled shells can be stored in an airtight container at room temperature for up to three days. This allows you to prepare shells ahead and assemble tacos at your convenience.
What’s the advantage of homemade over store-bought?
Homemade versions offer superior freshness, complete flavor customization, better control over ingredient quality, and the personal satisfaction of creating a beloved treat from scratch. Homemade tacos often feature more vibrant flavors and superior texture compared to commercial alternatives.
Are there egg-free options available?
Yes, you can substitute eggs with appropriate egg replacers or aquafaba in many shell recipes. Consult specialized vegan baking resources for precise ratios, as egg functionality in waffle batters is complex.
How far in advance can I prepare these?
Completed tacos maintain peak quality for approximately one week in the freezer. While they’ll remain edible longer, extended storage may result in ice crystal development and subtle flavor changes.
References
- Homemade Choco Tacos Recipe — A Cozy Kitchen. Accessed April 2026. https://www.acozykitchen.com/homemade-choco-tacos
- Homemade Choco Tacos Recipe — Stress Baking. Accessed April 2026. https://stressbaking.com/homemade-choco-tacos/
- Homemade Choco Tacos — Heinen’s Grocery Store. Accessed April 2026. https://www.heinens.com/recipes/homemade-choco-tacos/
- Choco Tacos (Copycat) — Pudge Factor. Accessed April 2026. https://pudgefactor.com/choco-tacos-copycat/
- Homemade Choco Taco Recipe — The Slow Roasted Italian. Accessed April 2026. https://www.theslowroasteditalian.com/homemade-choco-taco-recipe/