Creating beautifully decorated sugar cookies requires more than just baking—the frosting plays an equally crucial role in achieving that bakery-quality appearance and taste. Many home bakers hesitate to decorate cookies because they believe it requires specialized ingredients or advanced techniques, but the truth is that exceptional sugar cookie frosting can be made with items you likely already have in your kitchen. Understanding the fundamentals of frosting preparation transforms cookie decorating from an intimidating task into an enjoyable creative process.
The Foundation: Understanding Your Ingredients
Quality sugar cookie frosting starts with selecting the right components. Each ingredient serves a specific purpose in creating the ideal consistency, appearance, and flavor profile. Rather than relying on complicated recipes with numerous additives, the most reliable approach uses a streamlined ingredient list focused on proven components.
Powdered Sugar: The Backbone of Your Frosting
Also referred to as confectioners’ sugar or icing sugar, this finely ground sugar serves as the foundation of your frosting mixture. The powder form dissolves smoothly when combined with liquid, eliminating the grittiness that would occur with granulated sugar. For optimal results, always sift your powdered sugar before mixing to remove lumps and ensure a silky-smooth final product. A typical batch begins with approximately four cups of powdered sugar, though smaller batches can use proportionally less. The quality of your powdered sugar directly impacts the final texture, making it worthwhile to choose a reliable brand.
Liquid Component: Achieving the Right Consistency
The liquid element in frosting controls its thickness and workability. Whole milk generally produces superior results compared to lower-fat varieties, as the slight fat content creates a richer taste and easier-to-manipulate consistency. However, any type of milk works adequately, including skim, reduced-fat, or even non-dairy alternatives like almond milk. In situations where milk is unavailable, water serves as an effective substitute in equal proportions. The amount of liquid needed depends on your desired final consistency—thinner mixtures require more liquid, while thicker applications need less.
Corn Syrup: The Secret to Professional Appearance
Light corn syrup plays an often-overlooked but essential role in achieving professional-looking results. This ingredient serves dual purposes: it accelerates the setting process and creates a beautiful glossy shine on dried frosting. The syrup also provides subtle sticking power that helps the frosting adhere better to cookies. While corn syrup can technically be omitted, the resulting frosting will take longer to set and will lack the signature shine that distinguishes bakery-quality cookies. A small amount—typically around four teaspoons per batch—delivers noticeable improvements.
Vanilla Extract: Building Flavor Complexity
Pure vanilla extract adds depth and complexity to your frosting’s flavor profile. For those desiring stark white frosting, clear vanilla extract maintains the pristine appearance while preserving taste benefits. Regular pure vanilla extract works equally well if you plan to color your frosting or don’t require pure whiteness. The extract proportion remains minimal—typically around one teaspoon—but creates a substantial difference in the final taste. Alternative extracts such as almond, peppermint, or citrus varieties can substitute for vanilla to create different flavor profiles suited to specific themes or preferences.
Preparation Techniques for Superior Results
The method of combining ingredients significantly impacts the outcome. Rushing through preparation or skipping key steps often results in lumpy, difficult-to-work-with frosting that frustrates decorators.
The Initial Mixing Process
Begin by adding sifted powdered sugar to a large mixing bowl. This ensures you’re starting without clumps that would compromise smoothness. Add approximately five to six tablespoons of your chosen milk, along with the corn syrup and vanilla extract. Using a whisk, vigorously combine these ingredients until no lumps remain. This initial mixture will appear quite thick—this is correct and expected at this stage. The thickness at this point serves an important purpose: it creates the ideal consistency for outline work, which requires a stiffer frosting that maintains sharp edges and defined lines.
Color Integration Without Affecting Consistency
If incorporating food coloring, add it after the base frosting reaches the correct texture. Mix thoroughly until the color distributes evenly throughout. Gel food coloring generally produces more vibrant results than liquid varieties and requires less quantity to achieve desired hues. This matters because adding large volumes of liquid food coloring can thin your frosting unintentionally. When planning multiple colors, divide the frosting into separate bowls before adding color, allowing you to maintain each shade without cross-contamination.
Creating Two Essential Consistencies
Professional cookie decorators employ two distinct frosting consistencies, each serving different decorative purposes. Understanding the differences and how to achieve each transforms your decorating capabilities.
Outline Frosting: Precision and Definition
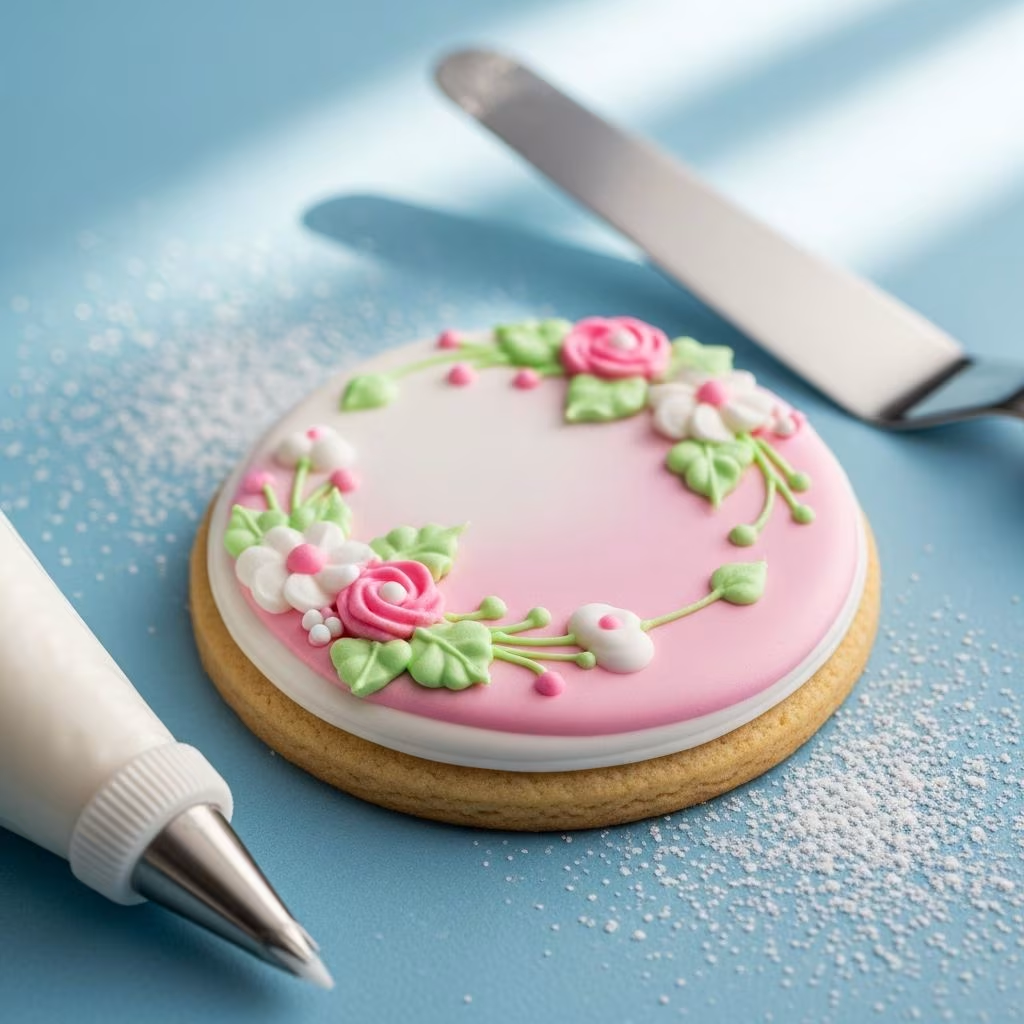
The thicker mixture reserved after initial preparation becomes your outline frosting. This consistency is thick enough to pipe clean, defined lines that maintain their shape. Use it to create borders, write messages, or outline sections of your design. The outline frosting holds its form on the cookie without running or spreading, giving you complete control over placement. Transfer this frosting to a piping bag fitted with a fine tip for best results. Working with outline frosting requires a steady hand, but the payoff is professional-looking cookie borders that frame your overall design.
Flood Frosting: Coverage and Fill
The flood consistency frosting handles the interior filling and coverage work. This thinner mixture requires additional liquid—typically one-half to one teaspoon of milk added gradually to the remaining two-thirds of your base frosting. The correct flood consistency is demonstrated by lifting a spoon or whisk from the bowl; the frosting should quickly flow back into itself, similar to lava, rather than holding its shape or spreading across the entire bowl. This consistency allows you to fill large areas quickly and evenly without creating peaks or ridges. For optimal application, transfer flood frosting to squeeze bottles or pastry bags with larger tips, allowing faster coverage of cookie surfaces.
Advanced Decorating Strategies
Layering Techniques for Dimension
Creating multi-dimensional cookie designs involves strategic layering. Apply outline frosting first, allowing it to set slightly before flooding the interior with thinner frosting. This prevents colors from bleeding into each other and creates clearly defined sections. The partial setting of outline frosting—typically requiring ten to fifteen minutes—provides a barrier that guide flood frosting to its intended area.
Color Blending and Gradient Effects
Advanced decorators create gradients by carefully applying multiple frosting shades to adjacent areas before they dry. Using flood frosting in different colors on nearby sections allows the edges to slightly blend where they meet, creating soft transitions. A toothpick or small brush can feather these edges for even smoother gradients. This technique requires confidence but yields impressive visual results that appear more complex than the actual execution.
Texture and Pattern Application
Beyond smooth coverage, various textures add visual interest. Dabbing frosting with a damp sponge creates a stippled effect. Dragging a toothpick through wet frosting generates wave or feather patterns. Brushing frosting with a small brush can create stroke-like effects resembling watercolor painting. These techniques allow artistic expression while requiring minimal additional tools or skills.
Storage and Longevity
Properly stored frosted cookies maintain quality for extended periods. Once completely dry—typically requiring twelve to twenty-four hours depending on frosting thickness—decorated cookies can be stacked in airtight containers. The corn syrup in the frosting helps it set firmly, allowing stacking without smudging. Store containers in cool, dry locations away from direct sunlight, which can fade colors over time. Properly stored cookies remain fresh for up to two weeks, making advance preparation for events feasible.
Troubleshooting Common Frosting Issues
| Problem | Cause | Solution |
|---|---|---|
| Lumpy frosting | Insufficient mixing or unsifted powdered sugar | Sift powdered sugar before use; whisk vigorously for at least two minutes |
| Frosting too thick | Insufficient liquid ratio | Add milk one-half teaspoon at a time until desired consistency |
| Frosting too thin | Excessive liquid added | Add sifted powdered sugar gradually to thicken |
| Dull appearance when dry | Missing corn syrup or insufficient quantity | Ensure recipe includes corn syrup; increase slightly for more shine |
| Slow setting time | High humidity or excess liquid | Use less milk; allow extended drying time in low-humidity environment |
| Color appears muted | Using liquid food coloring or insufficient color | Switch to gel food coloring; use clear vanilla extract with bright colors |
Scaling Recipes for Different Batch Sizes
The standard recipe yields sufficient frosting for approximately twenty-four cookies, making it ideal for typical baking projects. For smaller batches, divide all ingredient quantities by two. For larger quantities, double or triple the recipe proportionally. Maintaining correct ratios remains essential even when scaling; adding random amounts without calculating proportions typically results in frosting that fails to set properly or reaches incorrect consistency.
Frequently Asked Questions
Can I make frosting ahead of time?
Yes, frosting can be prepared up to twenty-four hours in advance. Store it in an airtight container at room temperature. Before using, whisk briefly to restore proper consistency and smooth any texture that may have developed during storage.
What’s the difference between this frosting and royal icing?
Royal icing traditionally contains egg whites or meringue powder, which creates an extremely hard shell when dried. This frosting creates a firm but less brittle finish, remaining slightly softer and more pleasant to bite through. The choice depends on personal preference and intended use.
How long does frosting take to dry?
Thin applications typically dry within four to six hours in normal conditions. Thicker applications or humid environments may require up to twenty-four hours. The corn syrup accelerates drying compared to frosting without this ingredient.
Can I use dairy-free milk?
Yes, though results may vary slightly. Almond milk and other plant-based alternatives work adequately, though whole milk consistently produces superior texture and taste. Experiment with your preferred variety to determine if results meet your standards.
Is clear vanilla necessary?
Clear vanilla is optional and only necessary if creating bright white frosting. For colored frosting, regular vanilla extract works perfectly fine and offers no visual disadvantage.
Conclusion
Mastering sugar cookie frosting removes a significant barrier to home cookie decoration. With quality ingredients and proper technique, anyone can create professional-appearing decorated cookies. The beauty of this approach lies in its simplicity—no specialized equipment or advanced skills required, just understanding how basic ingredients interact to create the desired result. Start with a single batch to develop familiarity with consistency indicators, then experiment with colors and decorating techniques. Each batch improves your intuition about how the frosting behaves, gradually building confidence and artistic capabilities. The satisfaction of presenting beautifully decorated homemade cookies far exceeds the minimal time investment required to master these fundamental techniques.
References
- Easy Sugar Cookie Icing — Live Well Bake Often. 2024. https://www.livewellbakeoften.com/easy-sugar-cookie-icing/
- Easy Sugar Cookie Icing Recipe — Handle the Heat. 2024. https://handletheheat.com/easy-cookie-icing/
- Christmas Sugar Cookies Recipe with Easy Icing — Sally’s Baking Addiction. 2024. https://sallysbakingaddiction.com/christmas-sugar-cookies/
- Simplest Sugar Cookie Icing That Hardens (Shiny) – Easy Recipe — Mama Gourmand. 2024. https://www.mamagourmand.com/how-to-make-sugar-cookie-icing/
- Easy Sugar Cookie Icing — Beyond Frosting. 2024. https://beyondfrosting.com/sugar-cookie-icing-recipe/
- Sugar Cookie Icing — Preppy Kitchen. 2024. https://preppykitchen.com/sugar-cookie-icing/