When it comes to creating impressive desserts without complicated procedures, few options rival the simplicity and satisfaction of a dump cake. This particular fruit-based creation has gained popularity among home cooks seeking quick results without sacrificing flavor or presentation. The strawberry variation represents an ideal entry point for novice bakers while remaining appealing to experienced cooks searching for time-saving solutions.
Understanding the Dump Cake Concept
A dump cake represents a departure from traditional baking methods that require precise mixing, measuring, and technique refinement. Instead of following conventional cake-preparation procedures, this approach simplifies the entire process into its most basic components. The name itself describes the cooking methodology—you literally dump prepared ingredients into a baking vessel without extensive stirring or blending.
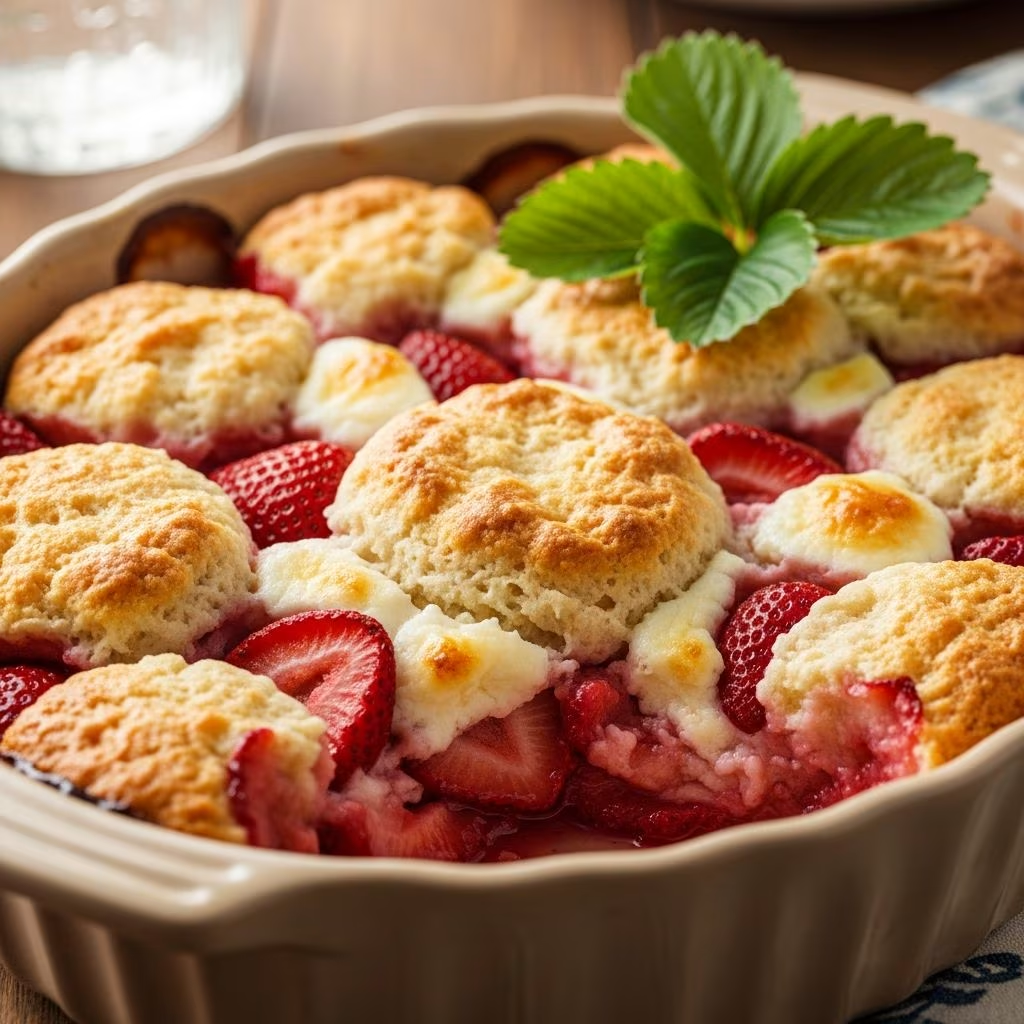
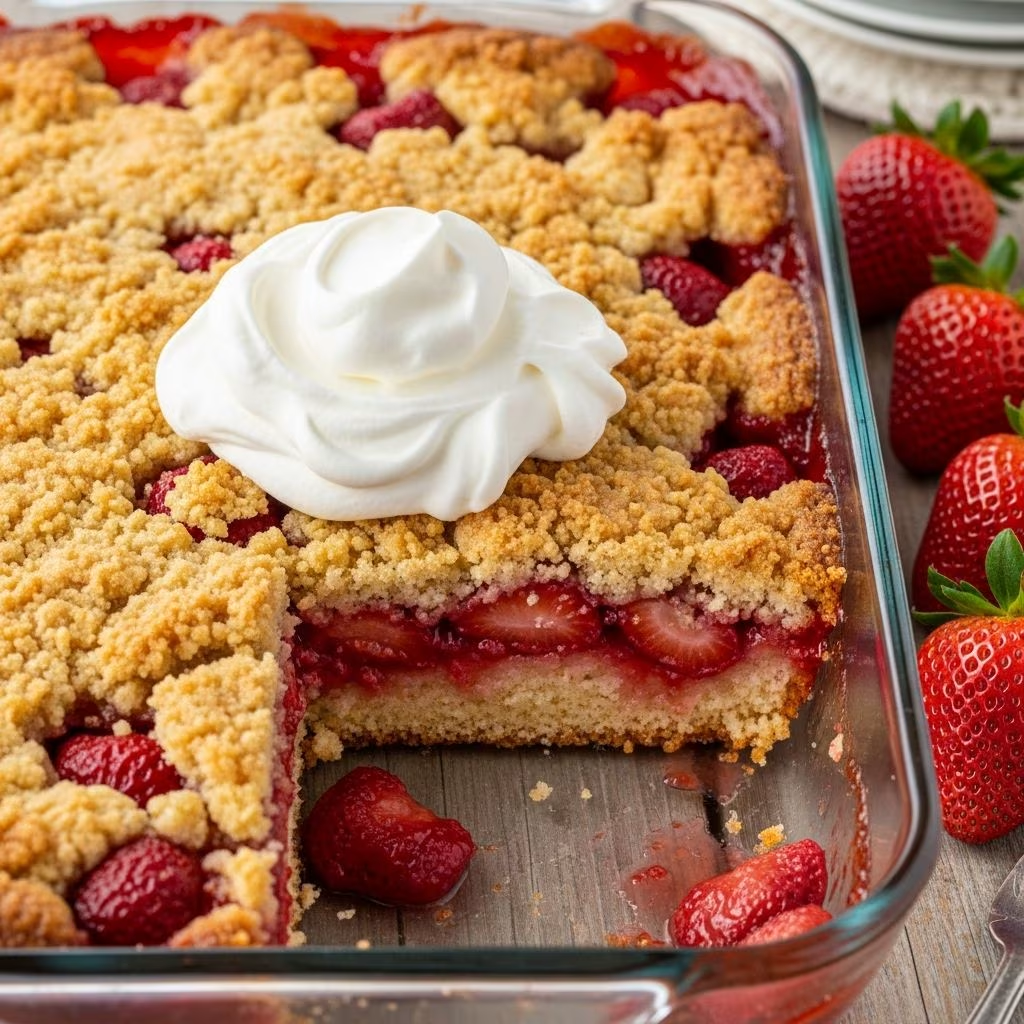
The strawberry rendition delivers a texture remarkably similar to a cobbler or fruit crisp rather than a conventional cake. The combination of fruit filling, dry cake mix, and melted butter creates layers that bake together into a unified dessert with distinct textural elements. The top develops a golden-brown crust while the fruit remains moist beneath, and the cake mix disperses throughout to create pockets of tender crumb.
Essential Components You’ll Need
This particular dessert requires remarkably few ingredients, making it an economical choice for households of any size. Each component serves a specific purpose in creating the final product’s texture and flavor profile.
- Canned Strawberry Pie Filling: A 21-ounce container provides the fruit base and acts as the moisture foundation for the entire dessert. This pre-prepared filling eliminates the need for fresh fruit processing and ensures consistent results. The filling’s sweetness and pectin content help bind the layers together during baking.
- Cake Mix: A standard 15-ounce box of cake mix serves as the primary structural element. While strawberry cake mix enhances the berry flavor throughout, white or vanilla cake mix offers a neutral backdrop that allows the fruit to shine. The dry mix absorbs moisture from both the filling and melted butter, creating the characteristic crumbly-yet-moist texture.
- Butter: Three-quarters cup of unsalted butter, roughly equivalent to one and a half sticks, provides richness and encourages browning of the top layer. The butter’s fat content creates a tender crumb structure and contributes to the appetizing golden appearance.
Equipment Requirements
Preparation demands minimal equipment beyond what most kitchens already contain. A 9-by-13-inch baking dish represents the standard vessel, though slightly smaller or larger pans can accommodate the recipe with minor adjustments to baking time. Non-stick cooking spray or parchment paper facilitates removal and cleanup. A simple means of melting butter and a method for distributing it evenly completes the equipment list.
Step-by-Step Preparation Method
Preparation Phase
Begin by preheating your oven to 350 degrees Fahrenheit approximately 15 minutes before you plan to assemble the dessert. This temperature provides sufficient heat for proper browning without risking burning of the topping or incomplete cooking of the filling. While the oven reaches temperature, prepare your baking vessel by spraying it thoroughly with non-stick cooking spray, paying special attention to corners and edges.
Assembly Process
Pour the entire contents of the strawberry pie filling into the prepared dish and spread it into an even layer covering the bottom surface. This foundation requires attention to ensure relatively uniform distribution, though perfect evenness proves unnecessary since the filling will bubble and redistribute during baking.
Next, distribute the dry cake mix across the pie filling surface. Rather than stirring or mixing, simply sprinkle the dry ingredients to create an even coating. Some recipes suggest using a spatula to spread the mixture gently if clumps form, but avoid any actual blending with the filling beneath. The dry cake mix should create a visible layer covering most or all of the filling.
Melt the butter—either in a microwave-safe container or small saucepan—and drizzle it across the cake mix layer as evenly as possible. The melted butter will partially absorb into the dry mix while also creating a golden topping layer. This step represents the final assembly component; do not stir or combine the layers at any point.
Baking and Completion
Transfer the assembled dessert to the preheated oven and bake for 35 to 45 minutes, depending on your specific oven’s characteristics and the exact amount of filling used. The dessert achieves doneness when the top develops a light golden-brown color and you observe bubbling around the dish’s edges, indicating the filling has heated thoroughly.
Remove from the oven and allow to cool for several minutes before serving. This brief resting period allows the structure to set slightly, making serving easier while the dessert remains warm. Serve as-is or topped with vanilla ice cream, whipped cream, or both.
Important Preparation Considerations
Several factors influence the final outcome and deserve attention during preparation. First, avoid the temptation to stir or mix the components together. The unmixed nature of this dessert creates its characteristic texture and appearance. As baking progresses, the ingredients naturally combine through the application of heat and moisture distribution.
Second, ensure even distribution of both the cake mix and butter across the surface. Uneven distribution may result in some areas developing a thick crust while others remain relatively bare. Using a spatula to gently spread cake mix and pouring melted butter in a circular pattern helps achieve uniformity.
Third, monitor baking time carefully, as oven variations significantly affect results. Most ovens require approximately 40 minutes, but checking at the 35-minute mark allows you to avoid over-browning. The top should appear light golden rather than dark brown.
Adaptations and Variations
While the basic recipe requires only three ingredients, numerous modifications accommodate different preferences and ingredient availability.
Using Fresh Strawberries
Fresh strawberries can replace or supplement canned filling. When using fresh fruit, wash, hull, and slice approximately 6 cups of berries. Place them in the baking dish and sprinkle with a 3-ounce box of strawberry-flavored gelatin mix to provide sweetness and binding properties. Add 1 cup of water to prevent excessive drying. Proceed with cake mix and butter layers as directed, though baking time may extend slightly due to additional moisture.
Cake Mix Alternatives
Different cake mix varieties produce distinct flavor profiles. Strawberry cake mix intensifies the berry emphasis, creating a doubly fruity result. Vanilla or white cake mix provides a neutral canvas showcasing the fruit filling’s natural flavor. Butter-flavored cake mix adds richness, while lemon or almond varieties create interesting complementary notes.
Topping Combinations
Beyond traditional vanilla ice cream and whipped cream, consider topping with Greek yogurt for a tangier contrast, sweetened sour cream for richness, or a simple dusting of powdered sugar. Some cooks drizzle additional caramel or chocolate sauce over individual servings for enhanced decadence.
Storage and Make-Ahead Strategies
This dessert stores well for several days when covered and refrigerated. The flavors actually improve slightly as the components meld together over time. Reheat individual portions in the microwave for 20 to 30 seconds before serving with ice cream or whipped cream.
The dessert can be assembled in the baking dish, covered, and refrigerated for up to 24 hours before baking. Add 5 to 10 minutes to the total baking time if baking from a cold state. This make-ahead capability makes the recipe particularly valuable for busy schedules or entertaining situations requiring advance preparation.
Nutritional Considerations
Each serving provides approximately 297 to 481 calories depending on portion size and specific ingredients used. The dessert contains minimal protein and significant carbohydrates from both the cake mix and pie filling. Fat content reflects the butter content, making this an indulgent treat best consumed in moderate portions as part of a balanced diet.
Serving Suggestions and Occasions
This uncomplicated yet elegant-appearing dessert suits numerous occasions. Valentine’s Day celebrations benefit from the pink color and strawberry flavor. Summer gatherings appreciate the refreshing fruit element, while year-round entertaining benefits from the minimal effort required. The dessert works equally well for casual family dinners, potluck contributions, or informal entertaining with friends.
Frequently Asked Questions
Can this dessert be made in a smaller baking dish?
Yes, though adjustments are necessary. Using an 8-by-8-inch or 9-by-9-inch dish requires reducing all ingredients by approximately one-third to one-half, depending on desired thickness. Baking time may decrease slightly due to reduced volume.
What causes a soggy or overly wet result?
Excessive liquid typically results from using too much pie filling or adding extra ingredients without compensating elsewhere. Some runoff around the edges is normal and expected; however, if the cake mix remains soggy rather than firm on top, reduce the filling quantity in future attempts.
Is it necessary to use unsalted butter?
While unsalted butter provides more control over the final salt level, salted butter works equally well. Adjust salt content in other dishes if using salted butter to avoid over-salting your daily diet.
Can frozen strawberries replace fresh ones in variations?
Absolutely. Thaw frozen berries completely and drain excess liquid before using to prevent the dessert from becoming overly wet.
What temperature should the dessert cool to before serving?
Serve warm from the oven or at room temperature according to preference. Both presentations work wonderfully with ice cream toppings.
Why This Recipe Succeeds
The popularity of dump cake recipes stems from their remarkable reliability and minimal skill requirements. The unmixed nature prevents common baking errors like overmixing, which typically toughens cakes. The simple ingredient list eliminates concerns about ingredient interactions or unusual substitutions. The forgiving nature of the recipe means that minor variations rarely result in failure.
This particular strawberry version appeals across demographic lines because strawberry represents a universally appreciated flavor. The visual appeal of the golden-brown topping and pink-hued filling creates an attractive presentation worthy of serving to guests despite the simplicity of preparation.
Conclusion
The strawberry dump cake represents an ideal solution for cooks seeking impressive results with minimal effort investment. By combining just three basic ingredients through an unmixed assembly method, home cooks produce a dessert that rivals more complicated recipes in both flavor and presentation. Whether preparing this for family gatherings, entertaining guests, or satisfying personal cravings, this straightforward approach delivers consistent, delicious results every time.
References
- USDA Food Data Central — United States Department of Agriculture. 2024. https://fdc.nal.usda.gov/
- FDA Food Safety Guidelines for Home Canning — U.S. Food and Drug Administration. 2023. https://www.fda.gov/food/foodborneillnesscontaminants/ucm376921.htm
- Baking Science and Technology: Formulation and Production of Baked Products — American Society of Baking. 2023. Academic reference on cake mix interactions and baking chemistry.