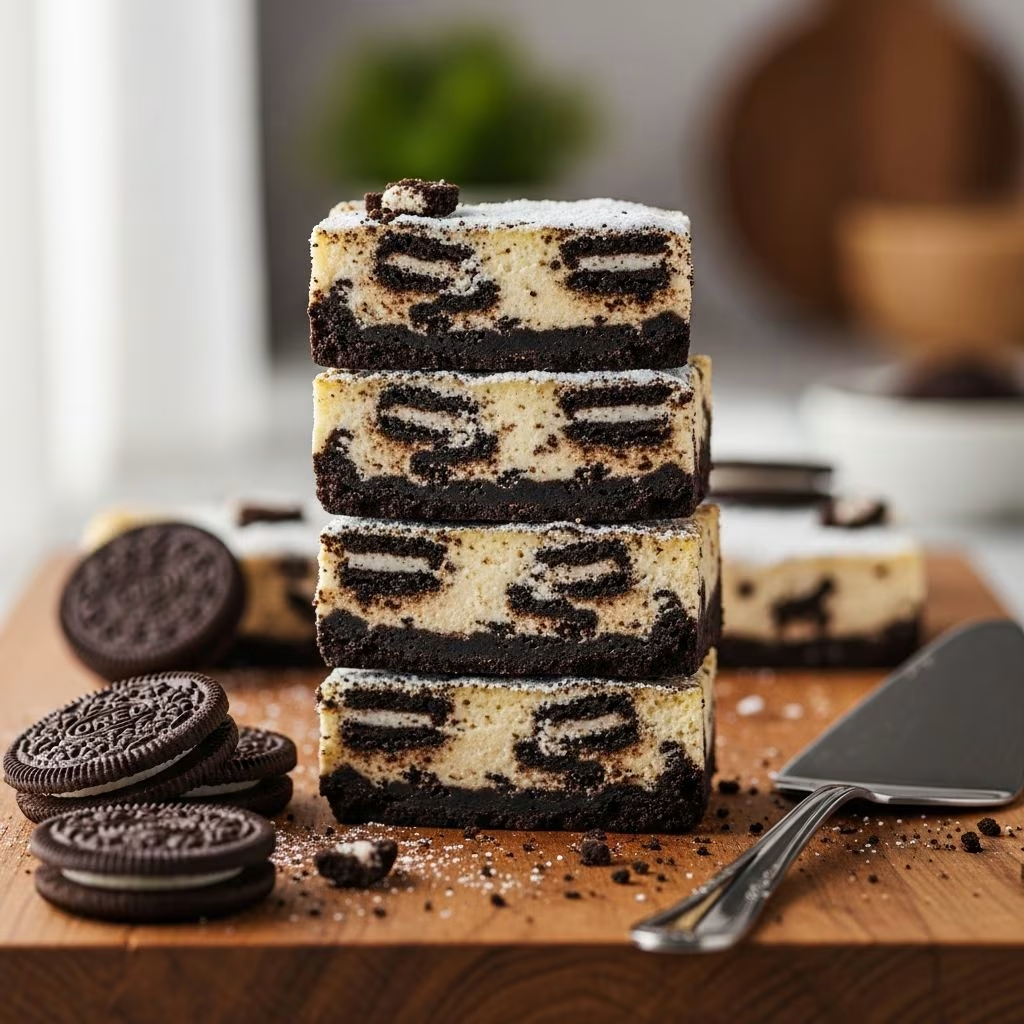
Oreo cheesecake bars represent a perfect marriage of textures and flavors that appeals to dessert enthusiasts across all age groups. These delightful treats combine the satisfying crunch of cookie crumbs with the smooth, creamy richness of cheesecake filling, all bound together in an easily shareable bar format. Unlike traditional cheesecake that requires careful portioning and plating, these bars offer convenience without sacrificing elegance or taste. The structural composition of layered elements creates a complex sensory experience that keeps people reaching for second servings.
The beauty of this dessert lies in its versatility. Whether you’re preparing for a casual family gathering, an elegant dinner party, or simply indulging a sweet craving on a regular Tuesday evening, these bars adapt to any occasion. The individual portions make them ideal for entertaining, and their make-ahead nature means less stress during event preparation.
Gathering Your Ingredients: Building Blocks of Success
Creating exceptional Oreo cheesecake bars begins with understanding each ingredient’s role in the final product. The ingredient list may appear straightforward, but the quality and proper preparation of each component significantly impacts results.
The Foundation: Your Cookie Crust
The crust serves as the structural base and flavor anchor for your entire dessert. Traditional recipes call for approximately 25 to 30 Oreo cookies, depending on your specific pan size and desired crust thickness. For a 9×13-inch pan, use around 30 cookies, while an 8×8-inch square pan requires closer to 25 cookies. The cookie choice matters—regular chocolate Oreos work wonderfully, though you might experiment with other varieties available in your market.
Processing these cookies into fine crumbs is essential. Whether using a food processor, blender, or the old-fashioned rolling pin method in a sealed plastic bag, aim for uniform crumb size resembling wet sand. This consistency ensures even pressing and proper binding with the butter. Melted salted butter, typically ranging from 4 to 5 tablespoons depending on quantity, binds the crumbs into a cohesive mass that adheres to your baking vessel.
The Heart: Cheesecake Filling Essentials
Cream cheese forms the foundation of your filling and should always be softened to room temperature before mixing. Cold cream cheese creates lumps and resists proper incorporation, resulting in an uneven texture. Depending on your pan size, you’ll need 16 to 32 ounces of cream cheese. A standard 9×13-inch pan typically calls for 32 ounces (four 8-ounce packages), while smaller 8×8-inch pans use 12 to 16 ounces.
Granulated sugar sweetens the filling and also influences texture. Most recipes call for 3/4 cup to 1 cup of sugar, which dissolves during mixing and creates a smooth consistency. Sour cream, usually 3/4 cup, adds tanginess and richness while slightly loosening the filling’s density, preventing it from becoming too dense or developing cracks during baking.
Eggs bind everything together and provide structure during baking. Recipes typically use 2 to 4 large eggs, depending on filling volume. Room-temperature eggs incorporate more smoothly and evenly distribute throughout the mixture. Vanilla extract, typically 1 to 2 teaspoons, adds subtle flavor depth that complements both chocolate and cream elements.
Optional Additions and Variations
While not strictly necessary, some recipes include cornstarch or additional ingredients that modify texture. A tablespoon of cornstarch helps stabilize the filling, creating a firmer final product. Salt, usually 1/4 to 1/2 teaspoon, balances sweetness and enhances overall flavor complexity. Some variations incorporate heavy cream for added richness, though this remains optional depending on preference.
Preparation Phase: Setting Yourself Up for Success
Proper preparation determines much of your success before any mixing occurs. Begin by preheating your oven to 325 degrees Fahrenheit. This moderate temperature prevents the cheesecake from baking too quickly on the outside while remaining underbaked inside. The lower temperature compared to standard baking allows the filling to set evenly and gently.
Line your baking pan with parchment paper, allowing excess paper to hang over the sides. This simple step transforms removal from frustrating to effortless. If using a 9×13-inch pan, this becomes especially important given the size. For 8×8-inch pans, foil works equally well. The overhang lets you lift the entire baked creation from the pan rather than struggling with traditional removal methods.
Assembling your ingredients in advance streamlines the mixing process. Arrange all components within arm’s reach of your mixing station. This practice, known as mise en place in professional kitchens, prevents mid-recipe scrambling and ensures nothing gets forgotten. Having room-temperature cream cheese, eggs, and sour cream ready makes the actual mixing phase much smoother.
Building Your Crust: The First Layer
After crushing your Oreos into fine crumbs, combine them with melted butter in a large mixing bowl. Stir thoroughly until the mixture resembles moist sand with every crumb evenly coated in butter. This prevents dry spots that would create an uneven texture.
Transfer the mixture to your prepared pan and press it firmly and evenly across the bottom. Many bakers find using the bottom of a measuring cup or glass helpful for achieving uniform, compact pressure. Corners especially need attention—use your fingers to firmly pack the mixture into edges and crevices, creating a solid foundation that won’t crumble when the cheesecake layer is added.
Bake the crust for 8 to 10 minutes. This brief baking sets the structure and helps it withstand the weight of the filling. Allow the crust to cool while you prepare the cheesecake mixture. This step prevents the warm crust from pre-cooking the filling bottom layer.
Creating the Cheesecake Layer: Mixing Technique Matters
Using an electric mixer—whether a handheld model or stand mixer—beats the room-temperature cream cheese on medium speed for approximately 2 minutes until completely smooth. Scrape the bowl’s sides and bottom with a spatula occasionally to ensure all lumps disappear. This initial step creates the proper texture foundation for adding subsequent ingredients.
Gradually add sugar while continuing to mix on medium speed for about 2 minutes. This slow incorporation and extended mixing time prevents overmixing while ensuring even distribution. Add beaten eggs slowly, incorporating one at a time and mixing after each addition until fully combined. Slow addition prevents the mixture from becoming overworked, which can introduce excess air and create potential cracking during baking.
Finally, add sour cream and vanilla extract, mixing on low speed just until combined. Once the basic mixture achieves uniform consistency, fold in sour cream gently, being careful not to overmix. Overmixing at this stage can develop unwanted air pockets that expand during baking and deflate upon cooling, creating an uneven surface.
Assembly and Optional Embellishments
Pour the prepared cheesecake filling over your cooled crust, smoothing the top with a spatula for even distribution. At this point, some recipes call for adding additional Oreo cookie pieces—either 7 to 8 cookies roughly chopped or simply scattered across the top. These remaining Oreos provide textural contrast and visual appeal while reinforcing the signature flavor.
If adding embellishing cookies, sprinkle them across the cheesecake surface before baking. Some bakers prefer pushing these pieces partially into the filling to anchor them during baking, preventing migration during the cooking process. Others leave them sitting atop the surface for more pronounced chocolate cookie presence in the final product.
Baking: Achieving Perfect Doneness
Place your prepared pan in the preheated 325-degree oven and bake for 30 to 40 minutes, depending on pan size and oven characteristics. The bars are adequately baked when the center still shows a slight jiggle when gently moved but the outer portions appear fully set. This precise endpoint prevents overdrying while ensuring structural integrity.
To test doneness, gently touch the center top with a fingertip. The surface should feel slightly tacky rather than wet or completely firm. Some bakers prefer the gentle pan-tilt method—holding hot pads and slowly rocking the pan side to side. The center should show minimal movement while the edges remain completely stationary.
Avoid opening the oven door frequently, as temperature fluctuations can cause uneven baking and cracking. The cheesecake is forgiving within a narrow window—slightly underbaked yields a creamier texture, while slightly overbaked creates a denser, more cake-like consistency. Most people prefer the slightly underbaked state for maximum richness.
Cooling and Storage Strategies
After removing from the oven, allow the bars to cool completely at room temperature for at least 2 hours. Rushing this process by refrigerating immediately can cause structural shock and cracking. Once cooled, cover and refrigerate for a minimum of 5 to 7 hours, ideally overnight. This extended chilling time allows the cheesecake to set properly, making cutting clean portions possible.
For cutting, use a hot knife—dip a long, sharp knife in hot water and wipe the blade between cuts. This simple technique prevents drag marks and creates clean edges. Refrigerated bars cut more cleanly than those at room temperature.
Troubleshooting Common Issues
Cracking Surface: This typically results from overbaking, rapid cooling, or moisture loss. Prevent by not opening the oven door during baking, allowing complete room-temperature cooling, and covering the bars during storage to maintain moisture.
Dense, Cake-Like Texture: Overmixing or excessive egg incorporation causes this. Mix gently on low speeds and incorporate eggs gradually. Ensure you’re not exceeding recommended oven temperatures or baking times.
Underbaked Center: The bars may need additional baking time. If the center remains liquid after the recommended time, return to the oven for 5-minute intervals until proper doneness achieves. Oven temperature variations between appliances cause the most common timing discrepancies.
Soggy Crust: Prevent by pre-baking the crust before adding filling. Allow adequate cooling time between these stages so the crust maintains structure.
Flavor Variations and Creative Adaptations
While the classic version stands on its own merit, several variations appeal to different preferences. Chocolate lovers might add melted chocolate to the filling or incorporate cocoa powder. Caramel drizzle creates additional flavor complexity and visual interest. Some recipes layer brownie batter beneath the cheesecake for a triple-threat dessert experience.
Fruit enthusiasts might swirl in raspberry or strawberry preserves before baking, creating color variation and subtle flavor shifts. Salted caramel versions appeal to those who enjoy sweet-salty balance. Each adaptation maintains the essential bar format while expanding flavor possibilities.
Serving Suggestions and Presentation Ideas
Serve bars at room temperature or chilled, depending on personal preference. Room-temperature bars showcase creamier texture, while chilled versions provide refreshing desserts on warm days. Dust with Oreo crumbs before serving for visual appeal. Drizzle with chocolate ganache or caramel sauce for elegant presentation.
Individual servings plate beautifully with fresh berries, whipped cream, or chocolate shavings. These bars work equally well as casual family desserts or dressed-up additions to formal dining occasions.
Frequently Asked Questions
Can I use a different type of chocolate cookie?
While Oreos provide the signature flavor, similar chocolate sandwich cookies work adequately. However, they may affect the final taste and texture slightly, so traditional Oreos remain the recommended choice.
What if I don’t have sour cream?
Greek yogurt substitutes reasonably well, though it slightly alters flavor. Whipped cream or additional cream cheese might replace some sour cream, though this changes the final texture.
Can these bars be made dairy-free?
Vegan cream cheese and non-dairy sour cream alternatives exist, though they produce noticeably different results. Experimentation with these substitutes is recommended before serving to guests.
How should I cut perfect portions?
A hot knife dipped in water between cuts produces the cleanest results. Clean, straight cuts create neat portions suitable for serving or storage.
Are these bars suitable for freezing?
Yes, properly wrapped bars freeze for up to three months. Thaw overnight in the refrigerator before serving for best texture and flavor.
References
- Delish: Best Oreo Cheesecake Bars Recipe — Hearst Digital Media. 2024. https://www.delish.com/cooking/recipe-ideas/a49102/oreo-cheesecake-bars-recipe/
- Confessions of a Baking Queen: Oreo Cheesecake Bars — Confessions of a Baking Queen. 2024. https://confessionsofabakingqueen.com/oreo-cheesecake-bars/
- Brown Eyed Baker: Oreo Cheesecake Bars — Brown Eyed Baker. 2024. https://www.browneyedbaker.com/oreo-cheesecake-bars/
- High Heels and Grills: Oreo Cheesecake Bars – So Easy! — High Heels and Grills. 2024. https://www.highheelsandgrills.com/oreo-cheesecake-bars/
- Sugar Spun Run: Oreo Cheesecake Bars — Sugar Spun Run. 2024. https://sugarspunrun.com/oreo-cheesecake-bars/