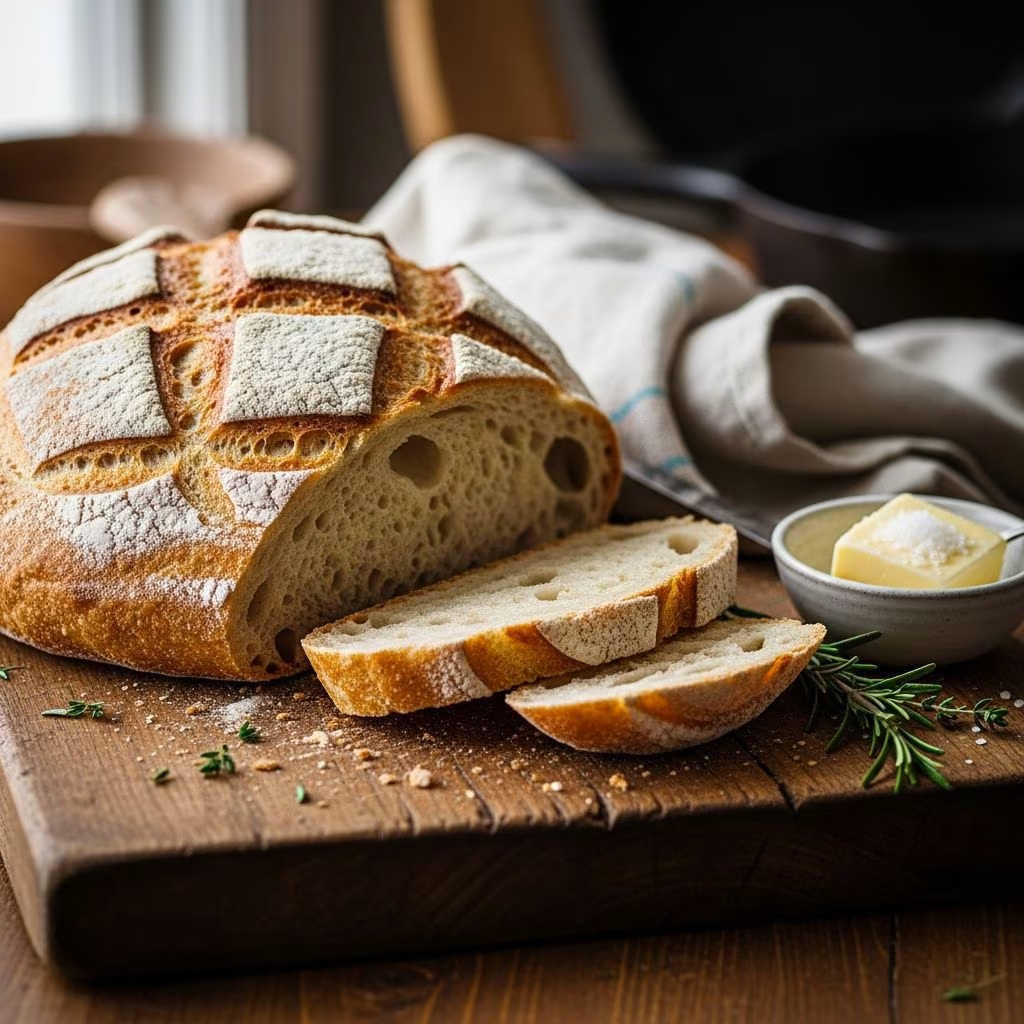
Creating bakery-fresh bread doesn’t require advanced skills or equipment. This straightforward no-knead method yields a loaf with a crackling crust and soft, flavorful crumb using pantry staples. Home bakers appreciate its forgiving nature, allowing flexibility in timing and technique.
Why Choose No-Knead Rustic Bread?
No-knead recipes revolutionized home baking by minimizing effort while maximizing results. The long fermentation develops gluten naturally, producing complex flavors akin to professional artisan loaves. Unlike traditional methods demanding hours of kneading, this approach lets natural processes do the work, making it accessible for novices and time-strapped cooks alike.
- Minimal hands-on time: Just 5-10 minutes of mixing.
- High success rate: Forgiving dough adjusts to minor variations in measurements or conditions.
- Versatile uses: Slice for sandwiches, toast, or serve alongside soups and stews.
- Cost-effective: Basic ingredients cost pennies per loaf compared to store-bought.
Essential Ingredients Explained
The beauty lies in simplicity: flour, yeast, salt, and water form the foundation. Each plays a critical role in texture and taste.
| Ingredient | Amount | Purpose | Tips |
|---|---|---|---|
| All-purpose or bread flour | 3-3.5 cups | Structure and chewiness | Bread flour yields chewier crumb; start with less and add as needed |
| Active dry or instant yeast | 1/4-1/2 tsp (less for long rise) | Leavening and flavor | Instant yeast mixes directly; active needs proofing in warm water |
| Salt (kosher or sea) | 1.5 tsp | Flavor enhancement, dough control | Use coarse for even distribution; avoid fine table salt |
| Warm water (100-110°F) | 1.5-1.75 cups | Hydration for gluten development | Too hot kills yeast; measure temperature for consistency |
Optional additions like olive oil or sugar tweak moisture and subtle sweetness, but the core four suffice for authentic rustic character.
Step-by-Step Baking Guide
Follow these steps for reliable results. Total time: 12-18 hours, mostly passive.
- Combine dry ingredients: In a large bowl, whisk flour, yeast, and salt. This ensures even distribution before hydration.
- Add water: Pour in warm water gradually, stirring with a wooden spoon or spatula until a shaggy, sticky dough forms. No dry patches remain, but resist overmixing—about 30-60 seconds suffices.
- First rise (bulk fermentation): Cover bowl loosely with plastic wrap or a damp towel. Let sit at room temperature (68-75°F) for 12-18 hours. Dough doubles, bubbles appear on surface, indicating active fermentation.
- Preheat oven and equipment: Place Dutch oven or heavy lidded pot in oven; heat to 450°F for 45-60 minutes. This creates steam for crust formation.
- Shape the dough: Flour counter and hands generously. Turn out dough, fold edges toward center 4-6 times to form a loose ball. No kneading needed—handle gently to preserve air pockets.
- Second rise: Place on floured parchment or proofing basket; cover and rest 30-45 minutes while oven preheats.
- Bake covered: Transfer dough (with parchment) to hot pot. Cover and bake 30 minutes.
- Finish uncovered: Remove lid; bake 10-15 more minutes until deep golden brown (internal temp 200-210°F).
- Cool completely: At least 1 hour on wire rack to set crumb structure.
Mastering the Perfect Crust and Crumb
Achieving that signature crackle comes from steam and high heat. The Dutch oven traps moisture initially, mimicking professional steam-injected ovens. For alternatives without one, use a baking stone with a pan of ice cubes or lava rocks spritzed with water.
- Crust troubleshooting: Pale? Extend uncovered bake. Too thick? Reduce total time by 5 minutes.
- Crumb issues: Dense loaf signals under-risen dough—extend fermentation. Gummy interior means insufficient cooling.
Experiment with hydration: Wetter dough (80%+) yields open crumb; drier suits sandwiches.
Recipe Variations for Every Taste
Customize without complicating the base method.
- Herbed loaf: Mix 2 tbsp chopped rosemary or thyme into dry ingredients.
- Olive bread: Fold in 1/2 cup chopped olives post-fermentation.
- Whole grain twist: Substitute 1 cup flour with whole wheat or rye for nutty flavor (add extra water).
- Sweet version: Add 1 tbsp honey or sugar; ideal for breakfast toast.
- Longer rise (3 days): Refrigerate after initial mix for deeper sourdough-like tang.
Storage and Freezing Tips
Fresh bread lasts 2-3 days at room temperature in a paper bag. For longer storage:
- Freezing whole: Wrap tightly in plastic and foil; thaw overnight, refresh in 350°F oven 10 minutes.
- Sliced: Freeze portions for quick toast access.
- Reviving: Sprinkle with water, bake 5 minutes at 375°F.
Avoid plastic bags to prevent sogginess; linen or beeswax wraps work best.
Common Questions Answered
FAQs
Can I use active dry yeast instead of instant?
Yes—dissolve in warm water first for 5 minutes until foamy.
What if my dough is too sticky?
That’s normal for high-hydration dough. Use ample flour on hands and surface during shaping.
No Dutch oven? What now?
Bake on a preheated pizza stone; place a pan of hot water below for steam.
How do I know it’s done baking?
Tap bottom for hollow sound; crust should be mahogany. Internal temp: 205°F.
Can I halve the recipe?
Yes, but maintain proportions. Smaller loaves bake faster—check at 25 minutes covered.
Scaling Up for Family or Gifting
Double the recipe for two loaves, dividing dough post-fermentation. Gift warm loaves wrapped in cloth—neighbors love homemade bread. For crowds, shape into baguettes on a baguette pan or freeform rolls (bake 20-25 minutes).
Nutritional perks: One slice (1/16 loaf) offers ~150 calories, complex carbs, and minimal additives versus commercial bread.
Advanced Techniques for Pros
Once mastered, try cold retardation: Ferment 24 hours room temp, then 24-48 hours fridge for enhanced flavor. Score tops with a lame or sharp knife pre-bake for artistic blooms. Autolyse—mix flour/water first, rest 30 minutes before yeast/salt—for superior gluten.
Track variables in a baking journal: flour type, water temp, ambient humidity. Consistency breeds perfection.
References
- Rustic Artisan Bread: No Knead and So Easy to Make! — Citrine Living. 2023. https://citrineliving.com/rustic-artisan-bread/
- Easy Homemade Rustic Bread — MegUnprocessed. 2022-07. https://megunprocessed.com/2022/07/easy-homemade-rustic-bread/
- Rustic Crusty Bread Recipe {With Tutorial} — Mel’s Kitchen Cafe. 2023. https://www.melskitchencafe.com/rustic-crusty-bread-a-simple-how-to/
- Rustic Italian Crusty Bread Recipe Video — Ciao Florentina. 2023. https://ciaoflorentina.com/rustic-crusty-bread-recipe/
- No-Knead Rustic Bread Loaf — Simply Scratch. 2023. https://www.simplyscratch.com/no-knead-rustic-bread-loaf/
- Easy Crusty French Bread (VIDEO) — Life As A Strawberry. 2023. https://www.lifeasastrawberry.com/easy-crusty-french-bread/
- World’s Easiest Yeast Bread recipe – Artisan, NO KNEAD crusty bread — RecipeTin Eats. 2023. https://www.recipetineats.com/easy-yeast-bread-recipe-no-knead/