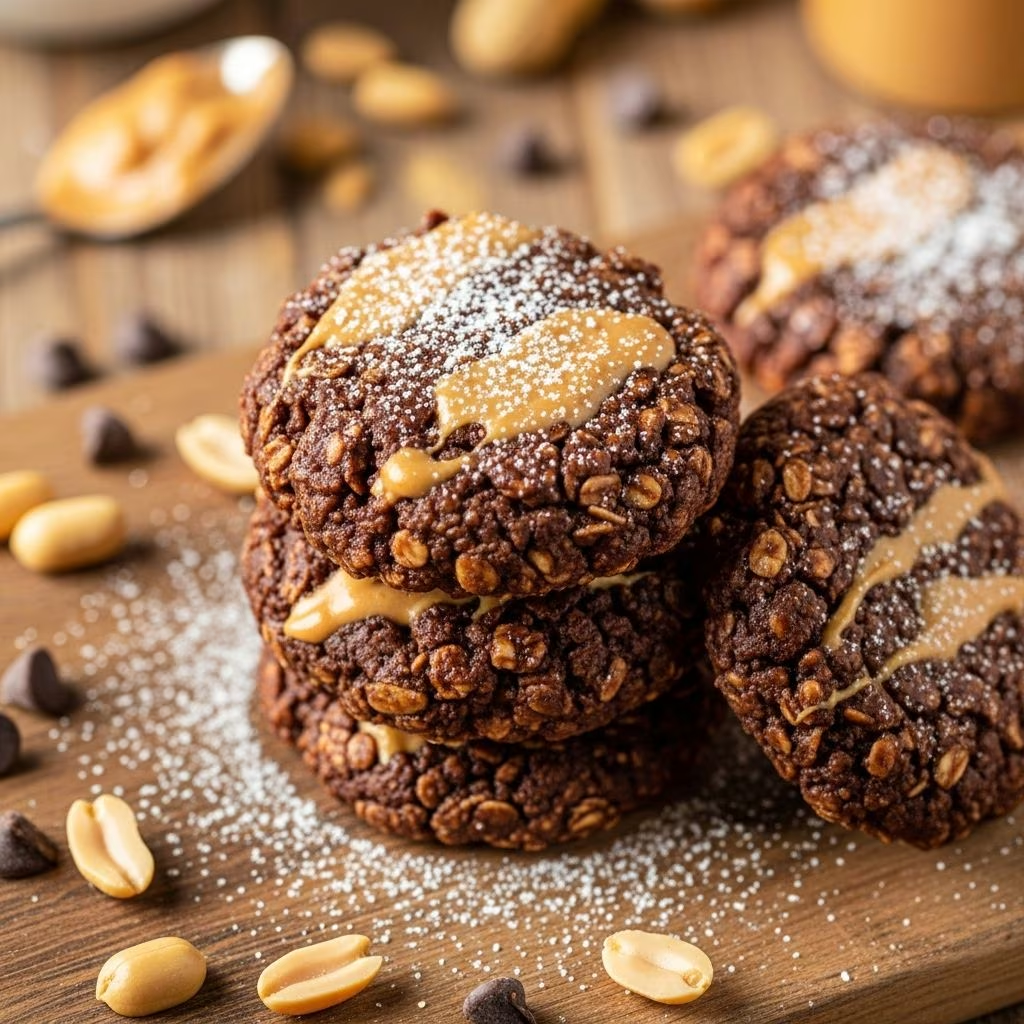
No-bake cookies represent a timeless dessert category that has remained popular across generations due to their simplicity and satisfying flavor profile. These treats combine the rich taste of chocolate with creamy peanut butter and the wholesome texture of oats, creating a confection that appeals to both children and adults. Unlike traditional baked goods that require precise oven temperatures and timing, no-bake cookies offer a forgiving preparation method that makes them ideal for novice cooks and experienced bakers alike.
The beauty of this particular cookie style lies in its accessibility. No special equipment beyond basic kitchen tools is necessary, and the ingredient list remains remarkably short. Most households already stock the fundamental components needed, making spontaneous sweet treat preparation possible without a trip to the grocery store. The total preparation time typically spans fifteen to twenty minutes, from initial ingredient combination through final cooling, making this recipe perfect for busy individuals seeking immediate dessert gratification.
Understanding the Core Ingredients
The foundation of no-bake cookies relies on a carefully balanced combination of four primary components that work together to create the desired texture and flavor.
Butter as the Base
Butter serves as the primary fat component, providing richness and helping bind the other ingredients together. Using unsalted butter offers greater control over the final salt content, though salted butter works equally well with minor recipe adjustments. The typical quantity ranges from half a cup to slightly less, depending on the specific recipe variation being followed. Slicing the butter into smaller pieces before adding it to the saucepan accelerates the melting process, ensuring even heat distribution and preventing any scorching on the pan bottom.
Sugar’s Role in Structure and Sweetness
Granulated sugar comprises the bulk of the sweetening agent and dramatically influences the cookies’ final texture. Most recipes call for approximately two cups of granulated white sugar, though brown sugar can replace half of this amount to create a deeper molasses flavor profile. The sugar dissolves during the boiling process, creating a syrup-like mixture that eventually solidifies as the cookies cool. Achieving complete sugar dissolution before removing the mixture from heat proves essential; inadequate boiling results in gritty cookies with an unpleasant grainy texture that detracts from the eating experience.
Cocoa Powder’s Flavor Foundation
Unsweetened cocoa powder delivers the characteristic chocolate flavor that makes these cookies instantly recognizable. A quarter cup of cocoa powder typically suffices for standard-sized batches, providing robust chocolate notes without overwhelming other flavors. Common grocery store brands like Hershey’s cocoa powder work perfectly well, eliminating any need for premium or specialty options. The cocoa powder mixes directly into the liquid ingredients during the heating phase, ensuring even flavor distribution throughout the finished cookies.
Milk as the Binding Agent
Whole milk functions as the primary liquid component, helping dissolve the sugar and creating the proper consistency for the final mixture. A half cup of milk typically provides adequate moisture; however, variations including two-percent, one-percent, or even non-dairy alternatives like almond milk work successfully. The milk choice influences the final cookie texture slightly, with whole milk producing richer results compared to lower-fat options.
Secondary Ingredients That Add Character
Peanut Butter Selection and Application
Creamy peanut butter introduces protein and additional depth to the flavor profile while contributing to the cookies’ binding structure. A half cup of smooth, no-stir varieties like Jif or Skippy integrates seamlessly into the warm mixture. Crunchy peanut butter represents a valid alternative for those preferring textural variety, adding small nutty fragments throughout each cookie. Adding peanut butter after removing the pan from heat prevents the heat from breaking down the proteins and ensures a smooth, well-combined final product.
Oats as the Primary Texture Component
Quick-cooking oats or rolled oats form the bulk of the finished cookies, providing substantial texture and binding all components together. Three cups of oats represent the standard measurement, though the specific oat type influences the final result. Quick-cooking oats produce a more cohesive, uniform texture, while rolled oats create a coarser, more rustic appearance. The choice between varieties depends on personal preference and desired cookie appearance.
Vanilla Extract for Subtle Enhancement
Vanilla extract, typically one teaspoon, adds subtle flavor complexity that complements the chocolate and peanut butter without creating an overly vanilla-forward taste. This ingredient enhances overall flavor depth without drawing attention to itself.
Step-by-Step Preparation Process
Pre-Cooking Preparation
Begin by lining two large baking sheets with parchment paper or wax paper, creating a non-stick surface for cooling cookies. This preparation prevents sticking and facilitates easy cookie removal once they’ve solidified. Setting up this space before beginning the cooking process streamlines workflow and prevents scrambling for materials while managing hot ingredients.
The Heating and Boiling Phase
Combine butter, sugar, milk, and cocoa powder in a large saucepan placed over medium heat. Stir this mixture frequently while the butter melts, ensuring even heat application and preventing scorching. Once the butter has completely melted and all ingredients appear well-combined, increase the heat slightly to bring the mixture to a rolling boil. This boiling phase represents a critical step in the process; the mixture must boil for exactly one minute, with timing precision proving essential for proper texture development. Using a kitchen timer removes guesswork and ensures consistent results.
The boiling duration serves a specific purpose: adequate heating allows the sugar to fully dissolve and the mixture to reach the proper consistency for setting. Insufficient boiling results in cookies that remain sticky or fail to firm up properly, while excessive boiling may create a mixture that becomes too firm upon cooling.
Post-Heat Addition and Mixing
Remove the saucepan from heat and immediately stir in the peanut butter and vanilla extract until fully combined. The residual heat from the mixture allows the peanut butter to melt smoothly without requiring additional cooking. Add the oats next, stirring with a wooden spoon or silicone spatula until every oat piece receives coating from the chocolate-peanut butter mixture. This thorough mixing ensures uniform flavor and texture distribution throughout all cookies.
Forming and Cooling
Using a cookie scoop or tablespoon, drop portions of the mixture onto the prepared baking sheets, spacing them approximately one inch apart. A one-and-a-half tablespoon cookie scoop produces consistent, appropriately sized portions. Allow cookies to cool at room temperature for twenty to thirty minutes, during which time they gradually firm up and develop their characteristic texture. For expedited cooling, placing the baking sheets in the refrigerator reduces cooling time to approximately thirty minutes.
Texture Variations and Customization Options
| Variable | Effect on Final Product |
|---|---|
| Oat Type (Rolled vs. Quick-Cooking) | Rolled oats create texture variation; quick-cooking produce uniformity |
| Sugar Ratio (Brown vs. White) | Brown sugar adds molasses depth; white provides straightforward sweetness |
| Peanut Butter Style (Creamy vs. Crunchy) | Crunchy adds nutty texture; creamy ensures smooth consistency |
| Milk Type (Whole vs. Non-Dairy) | Whole milk adds richness; alternatives work but affect subtle flavor |
Storage and Shelf Life Considerations
Properly cooled no-bake cookies store effectively in airtight containers at room temperature for up to one week. The cool, dry environment prevents moisture absorption and maintains cookie texture. For extended storage, refrigeration can preserve cookies for two weeks, while freezing extends viability to three months. Allow frozen cookies to reach room temperature before serving for optimal texture and flavor experience.
Troubleshooting Common Issues
Cookies Remain Too Soft
If cookies fail to firm up adequately after cooling, the mixture likely didn’t boil for the full required minute. Ensure strict timing adherence during the boiling phase to achieve proper texture.
Grainy or Gritty Texture
Graininess indicates incomplete sugar dissolution, typically resulting from insufficient boiling time or heat. Always maintain a rolling boil and adhere to the one-minute timing requirement.
Oil Separation
If oil pools on top of cookies after cooling, the mixture likely incorporated too much peanut butter or the peanut butter variety contained excessive oil. Select no-stir varieties specifically formulated to minimize separation.
Frequently Asked Questions
Can I Substitute Ingredients?
Yes, substitutions work with variable success rates. Almond butter replaces peanut butter for nut-free alternatives, though flavor profiles shift noticeably. Powdered sugar can replace granulated white sugar but may alter texture slightly.
What Causes Cookies to Remain Sticky?
Inadequate boiling represents the primary culprit behind sticky cookies. Always boil for the full one minute duration. Additionally, excess humidity in the environment may prevent proper setting.
Are These Cookies Suitable for Dietary Restrictions?
Traditional recipes contain dairy and peanuts, making them unsuitable for those with corresponding allergies. However, numerous adaptations exist using alternative milk types and nut butters.
How Large Should Finished Cookies Be?
Cookies typically measure one to one-and-a-half inches in diameter when dropped using standard scoops or tablespoons. Flatten slightly with the back of the scoop if faster cooling is desired.
Why These Cookies Endure Through Generations
No-bake cookies remain beloved across decades because they successfully balance simplicity with satisfaction. The minimal ingredient list eliminates intimidation factors for beginning cooks, while the straightforward technique requires no specialized baking knowledge. The combination of chocolate, peanut butter, and oats appeals to virtually all taste preferences, creating universal appeal that transcends age groups.
Beyond flavor and accessibility, these cookies offer practical advantages that modern busy households appreciate. No oven usage means the kitchen stays cool during warm months, and no additional cleaning of baking pans or cookie sheets reduces post-preparation workload. The speed of preparation makes these cookies perfect for unexpected guests, last-minute dessert needs, or spontaneous family activities.
The no-bake cookie recipe represents more than simply another treat option; it embodies a cooking philosophy that prioritizes accessibility, efficiency, and genuine enjoyment. Whether prepared by nostalgic adults recreating childhood memories or introduced to children experiencing them for the first time, these cookies create moments of simple pleasure that transcend culinary technique to become genuine memories.
References
- Classic No-Bake Cookies Recipe — Live Well Bake Often. Accessed April 2026. https://www.livewellbakeoften.com/classic-no-bake-cookies/