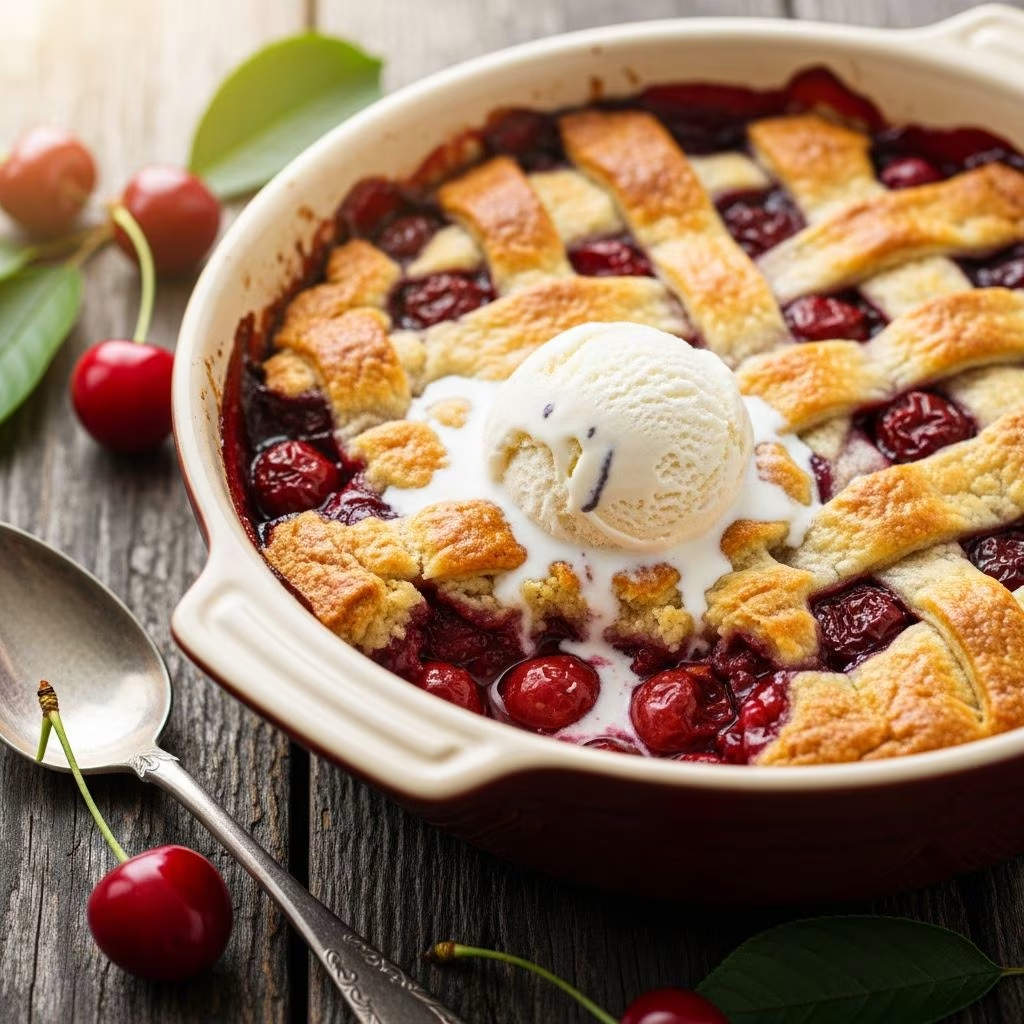
Cherry cobbler stands as a timeless dessert that captures the essence of summer with its juicy fruit filling and tender, golden topping. This treat combines the natural sweetness of cherries with a simple batter that rises to perfection during baking, creating layers of flavor and texture in every bite. Whether you’re using ripe fresh cherries from the market, convenient frozen ones, or pantry-stocked canned varieties, mastering cherry cobbler is straightforward and rewarding.
Why Cherry Cobbler Captivates Home Bakers
The appeal of cherry cobbler lies in its versatility and ease. Unlike pies that demand intricate crusts, cobbler relies on a drop-biscuit or cake-like topping spooned or poured over simmering fruit. The cherries release their juices, mingling with sugar and thickeners to form a glossy filling that bubbles up through the batter as it bakes. This self-saucing magic results in a dessert that’s part cake, part fruit compote, ideal for serving warm with scoops of vanilla ice cream or fresh whipped cream.
Home cooks love it for its short prep time—often under 20 minutes—and forgiving nature. No mixer needed; just whisk together pantry staples for the batter. It’s also forgiving with cherry types: tart varieties like Montmorency offer a bright contrast to the sweet topping, while sweeter Bing cherries provide lush indulgence.
Selecting the Best Cherries for Your Cobbler
Choosing cherries impacts flavor and texture profoundly. Fresh cherries peak in late spring through summer, boasting vibrant color and firm flesh. Look for plump, glossy fruits without blemishes; pit and halve about 4 cups (roughly 1 pound) for a standard recipe.
- Fresh Cherries: Pit by hand or with a cherry pitter. Halve for even cooking and sauce distribution.
- Frozen Cherries: No pitting required; thaw slightly and increase cornstarch by 1 tablespoon to combat extra moisture.
- Canned Cherries: Opt for those in water or light syrup, not pie filling. Drain, reserving some juice for thickening—about 1/4 cup per two 14.5-oz cans.
Avoid heavy syrup-packed cans to prevent an overly sweet result. For tartness, add a squeeze of lemon juice, which brightens flavors and aids thickening.
Essential Ingredients Breakdown
A classic cherry cobbler uses two main components: the fruit filling and the batter. Here’s a synthesized list from proven recipes, scaled for a 9×13-inch dish serving 8-12.
| Component | Ingredients | Quantity | Purpose |
|---|---|---|---|
| Filling | Pitted cherries (fresh, frozen, or drained canned) | 4 cups | Flavor base |
| Granulated sugar | 2/3 to 3/4 cup | Sweetens and thickens | |
| Cornstarch | 2 Tbsp (add 1 more for frozen) | Thickener | |
| Lemon juice | 2 Tbsp | Acidity balance | |
| Vanilla extract | 1 tsp | Aroma enhancer | |
| Almond extract | 1/4 tsp (optional) | Nutty depth | |
| Batter | Unsalted butter | 1/4 to 1/2 cup, melted | Richness and crisp edges |
| All-purpose flour | 1 cup | Structure | |
| Granulated sugar | 3/4 to 1 cup | Sweetness | |
| Baking powder | 1 to 2 tsp | Leavening | |
| Salt | 1/2 tsp | Flavor enhancer | |
| Milk (whole preferred) | 1 cup | Moisture | |
| Vanilla extract | 1 tsp | Flavor |
These proportions yield a tender, cake-like topping that rises over the fruit. Use cake flour for extra softness if desired.
Step-by-Step Cobbler Preparation
Preheat your oven to 350°F (175°C) for even baking. Follow these steps for foolproof results.
- Prepare the Filling: In a saucepan over medium heat, combine sugar, cornstarch, lemon juice, vanilla, and almond extract. Stir in cherries. Cook 5-10 minutes until thickened and bubbly. For canned: thicken reserved juice first, then add cherries.
- Melt the Butter: Place butter in a 9×13-inch baking dish and into the oven until fully melted, about 5 minutes. This creates crispy edges.
- Mix the Batter: Whisk flour, sugar, baking powder, and salt. Stir in milk and vanilla until just combined—no overmixing to keep it light.
- Assemble: Pour batter over melted butter (don’t stir!). Spoon hot filling evenly on top. The batter will bubble up during baking.
- Bake: 40-50 minutes until topping is golden and toothpick in batter comes out clean. Filling should be bubbly.
Cool 10-15 minutes; it sets as it rests.
Pro Tips for Cobbler Perfection
- Texture Control: Too watery? Cook filling longer or add extra cornstarch. For dump-style with pie filling, skip cooking the fruit.
- Flavor Boosts: Almond extract elevates cherry’s natural notes. A pinch of cinnamon on top adds warmth.
- Baking Vessel: Cast iron skillet for rustic appeal; glass for even heat.
- Make-Ahead: Prep filling up to 2 days ahead; assemble and bake fresh.
- Scaling: Halve for 8×8-inch pan, reduce bake time to 30-35 minutes.
Creative Variations to Try
Elevate your cobbler beyond basics.
- Mixed Berry Cobbler: Swap half the cherries for blueberries or blackberries for tart-sweet balance.
- Gluten-Free Version: Use 1:1 gluten-free flour blend and xanthan gum if needed.
- Vegan Adaptation: Substitute plant-based milk and vegan butter; use cornstarch slurry for filling.
- Drop Biscuit Topping: Cut cold butter into flour for biscuit-style chunks instead of cake batter.
- Spiced Cobbler: Add cardamom or ginger to filling for autumn twist.
Perfect Pairings and Serving Suggestions
Serve warm for optimal enjoyment. Classics include vanilla ice cream—its chill contrasts the heat—or homemade whipped cream. For elegance, add a dusting of powdered sugar or lemon zest. Pair with coffee for breakfast cobbler or bourbon for adult dessert.
Portion into bowls; the filling thickens upon cooling, making leftovers sublime reheated.
Storing and Freezing Your Cobbler
Room temperature: Up to 2 days covered. Refrigerate up to 5 days; reheat at 350°F for 10 minutes.
Freeze baked cobbler (cooled) in airtight container up to 3 months. Thaw overnight, reheat. Filling may weep slightly but tastes great. Assemble unbaked and freeze; add 10 minutes to bake time from frozen.
Common Mistakes and Fixes
| Mistake | Symptom | Fix |
|---|---|---|
| Overmixing batter | Tough topping | Stir until just combined |
| Undercooked filling | Runny dessert | Cook filling 5+ minutes pre-bake |
| Too much sugar | Cloying sweetness | Adjust based on cherry tartness |
| High oven temp | Burnt edges | Stick to 350°F |
Frequently Asked Questions
Can I use cherry pie filling?
Yes, for a quick dump cobbler: Melt butter in dish, top with batter, dollop pie filling, bake 40 minutes.
Fresh vs. frozen cherries?
Both work; frozen needs extra thickener due to ice crystals.
Is almond extract necessary?
Optional but recommended—it mimics cherry pits’ flavor.
How do I pit cherries efficiently?
Use a sturdy straw or pitter; halve with knife for small batches.
Vegetarian/vegan friendly?
Yes, inherently vegetarian; veganize with dairy subs.
This guide equips you to bake cobbler confidently year-round. Experiment with seasonal fruits for endless variations on this beloved dessert.
References
- Cherry Cobbler – Tastes Better From Scratch — Tastes Better From Scratch. 2023. https://tastesbetterfromscratch.com/cherry-cobbler/
- Homemade Cherry Cobbler recipe – Sugar Maple Farmhouse — Sugar Maple Farmhouse. 2023. https://www.sugarmaplefarmhouse.com/homemade-cherry-cobbler-recipe/
- Easy Cherry Cobbler | Sally’s Baking – YouTube — Sally’s Baking Addiction. 2023. https://www.youtube.com/watch?v=Bxp2I_GHPSs
- Mom’s Best Ever Southern Cherry Cobbler Recipe — Biting at the Bits. 2023. https://bitingatthebits.com/moms-best-ever-southern-cherry-cobbler-recipe/
- Easy Cherry Cobbler – Sally’s Baking Addiction — Sally’s Baking Addiction. 2023. https://sallysbakingaddiction.com/easy-cherry-cobbler/