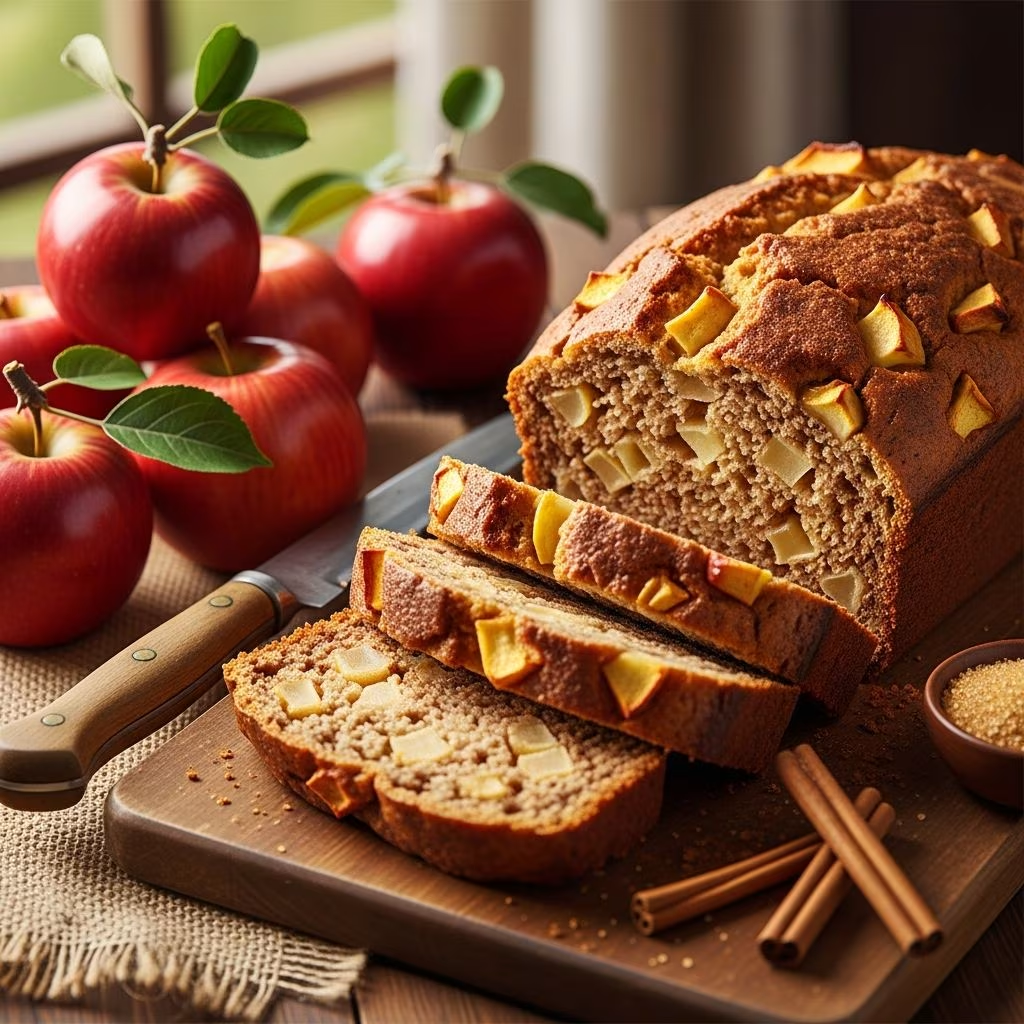
Few baked goods evoke the warmth and comfort of home quite like apple bread. This classic quick bread combines the natural sweetness of fresh apples with warm spices and simple pantry ingredients to create a moist, tender loaf that appeals to bakers of all skill levels. Whether you’re looking for a straightforward weekday treat or a gift-worthy baked good, understanding the fundamentals of apple bread baking will help you achieve consistent, delicious results every time.
Understanding the Essential Ingredients
Creating a successful apple bread starts with understanding what each ingredient contributes to the final product. The foundation of this recipe relies on a balanced combination of wet and dry components that work together to produce the desired texture and flavor profile.
Wet Ingredients and Their Roles
The wet base typically includes two eggs, which serve as both a binder and a leavening agent. Eggs help create structure in the bread while allowing it to rise slightly during baking. The incorporation of vegetable oil adds moisture and tenderness to the crumb, distinguishing apple bread from drier cake varieties. Vegetable oil’s neutral flavor allows the apple and cinnamon notes to shine through without competing. Vanilla extract enhances the overall flavor complexity without adding any discernible vanilla taste when used in appropriate quantities. Fresh apples, peeled and diced into small, uniform pieces, are the star ingredient. These contribute natural moisture, fiber, and subtle sweetness that balances the added sugar.
Dry Ingredients and Structure
All-purpose flour provides the structural framework for your bread. The gluten development in flour gives apple bread its characteristic tender crumb when handled correctly. Baking powder acts as a leavening agent, creating lift throughout the batter and resulting in a lighter texture rather than a dense loaf. Salt enhances all the flavors in the recipe while regulating gluten development and yeast activity. Ground cinnamon serves as the primary spice, lending warmth and depth to the apple flavor.
Ingredient Quality and Selection Tips
The quality of your ingredients directly influences the final result. When selecting apples, choose varieties that offer a balance of tartness and sweetness. Granny Smith apples provide natural acidity and hold their shape during baking. Fuji and Gala apples contribute natural sweetness and moisture. A combination of varieties often yields the most interesting flavor profile. Always peel apples before dicing to ensure consistent texture throughout the bread. Avoid using a food processor or blender for apple preparation, as this creates an overly fine pulp that compromises the bread’s texture and can make it soggy.
For flour selection, standard all-purpose flour works reliably in this recipe. If you prefer alternatives, whole wheat flour can replace up to half the all-purpose flour, though this will result in a denser crumb. Baking soda should be fresh and stored properly to maintain its effectiveness. Check the expiration date on your baking powder and baking soda before using them, as old leavening agents may not provide adequate lift.
Step-by-Step Preparation Process
Preparing Your Workspace and Equipment
Success begins before you combine any ingredients. Preheat your oven to 350 degrees Fahrenheit (175 degrees Celsius) to ensure even baking from the moment the batter enters the oven. A standard 9-by-5-inch loaf pan works best for this recipe. Grease every corner and edge of your loaf pan thoroughly with butter, cooking spray, or oil. This prevents sticking and ensures clean release after cooling. Some bakers prefer lining the pan with parchment paper as additional insurance against sticking.
Combining Wet Ingredients
Begin by beating together the eggs, sugar, vegetable oil, and vanilla extract in a large mixing bowl. A hand mixer or stand mixer works well, though vigorous whisking with a sturdy spoon is equally effective. Beat this mixture until well combined and slightly lighter in color, which typically takes 2-3 minutes. The goal is to incorporate air into the mixture, which contributes to a lighter final texture. Gently fold in the diced apples until they’re evenly distributed throughout the wet mixture. At this stage, avoid aggressive stirring, which can break down the apple pieces.
Incorporating Dry Ingredients
In a separate bowl, whisk together flour, salt, baking powder, and cinnamon. This preliminary mixing ensures even distribution of leavening agent and spices throughout the flour, preventing clumping or uneven baking. Add the dry mixture to the wet ingredients gradually, folding gently with a spatula until just combined. This step is crucial: overmixing develops gluten excessively, resulting in a tough, dense bread rather than the tender crumb you’re seeking. The batter should appear thick but pourable, with visible apple pieces throughout.
Filling and Initial Baking
Transfer the batter to your prepared loaf pan, spreading it evenly to ensure uniform baking. Place the pan in the preheated 350-degree oven on the center rack. Bake for 45 minutes without opening the oven door, as this allows the interior to set properly. After 45 minutes, cover the top of the loaf pan with aluminum foil. This simple step prevents the top from browning too quickly or burning while the interior continues cooking. Continue baking for an additional 12-15 minutes.
Testing for Doneness and Cooling
The toothpick test is your most reliable indicator of doneness. Insert a wooden toothpick into the center of the loaf. If it emerges clean or with just a few moist crumbs clinging to it, your bread is finished. If batter comes out on the toothpick, return the pan to the oven for 2-3 additional minutes and test again. Allow the bread to cool in the pan for exactly 10 minutes before attempting removal. This resting period allows the structure to set adequately without cooling so much that removal becomes difficult. After 10 minutes, carefully turn the loaf out onto a wire cooling rack, where it can cool completely.
Storage and Preservation Techniques
Short-Term Storage
Once completely cooled, apple bread stores well at room temperature in an airtight container for 2-3 days. Wrap individual slices in plastic wrap or place the entire loaf in a sealed container to prevent it from drying out. The bread actually improves slightly the day after baking, as flavors meld and the crumb continues to set.
Freezing for Extended Storage
Apple bread freezes exceptionally well for up to three months. Wrap the cooled loaf tightly in plastic wrap, then place it in a freezer bag to prevent freezer burn. Label the package with the baking date. To thaw, remove from the freezer and allow it to come to room temperature in its wrapping, which takes approximately 3-4 hours. Individual slices can be toasted directly from frozen.
Flavor Enhancement and Variations
While the classic recipe stands on its own, numerous variations allow for personalization. Increase the cinnamon to ¾ teaspoon for a more pronounced spice flavor. Add ½ teaspoon of nutmeg or ¼ teaspoon of allspice for additional warmth. A tablespoon of honey or maple syrup can replace some of the white sugar for added complexity. Some bakers incorporate ½ cup of chopped nuts, such as walnuts or pecans, for textural contrast. A ½ teaspoon of cardamom introduces an unexpected sophisticated note that complements apple beautifully.
Troubleshooting Common Baking Issues
| Problem | Likely Cause | Solution |
|---|---|---|
| Dense, Heavy Crumb | Overmixing of batter or expired leavening agents | Mix until just combined; check baking powder freshness |
| Dry Texture | Overbaking or insufficient oil | Check oven temperature accuracy; reduce baking time by 5 minutes |
| Soggy Center | Underbaking or excess apple juice | Drain diced apples before adding; bake longer |
| Uneven Browning | Oven temperature inconsistency | Use oven thermometer; rotate pan halfway through baking |
Serving Suggestions and Pairing Ideas
Apple bread is remarkably versatile. Serve slices warm with a pat of softened butter for a classic presentation. Cold slices work beautifully with morning coffee or as an afternoon snack. Toast day-old slices and top with jam, nut butter, or cream cheese for elevated breakfast options. A light dusting of cinnamon sugar on warm slices adds extra appeal. For dessert applications, serve with vanilla ice cream or whipped cream. Apple bread also makes an excellent gift when wrapped attractively and accompanied by serving suggestions.
Frequently Asked Questions
Can I substitute the apples with other fruits?
While this changes the character of the bread, pears or peaches can substitute apples in equal quantities. The baking time may adjust slightly depending on the moisture content of your chosen fruit.
What if I don’t have vegetable oil?
Melted butter or coconut oil can replace vegetable oil. These substitutions may slightly alter the flavor profile but work effectively.
How do I prevent the top from cracking?
Covering with foil as directed prevents excessive top browning. Ensure your oven temperature is accurate, as excessive heat can cause splitting.
Can I make this in a different pan shape?
This recipe adapts to muffin tins, requiring reduced baking time of 18-22 minutes. Mini loaf pans also work, requiring approximately 30-35 minutes.
Is this recipe naturally gluten-free?
No, but you can substitute gluten-free all-purpose flour in a 1:1 ratio. Gluten-free flour may result in a slightly different texture but produces acceptable results.
Baking Science Behind Apple Bread
Understanding the science enhances your baking confidence. Eggs denature and coagulate during heating, forming a protein network that traps moisture and creates structure. Oil distributes throughout the batter, coating flour particles and limiting gluten development, which maintains tenderness. Sugar absorbs water, keeping the crumb moist while also promoting browning through the Maillard reaction. Baking powder releases carbon dioxide when heated, creating air pockets that lighten the final texture. The pectin in apples releases during heating, contributing to the bread’s moisture retention. Cinnamon and other spices enhance perceived sweetness without adding sugar, allowing for balanced flavor development.
Nutritional Considerations
This apple bread provides nutritional benefits alongside its delicious flavor. Apples contribute dietary fiber, particularly when included with the skin, though this recipe removes the peel. The bread offers energy from carbohydrates and fat, with protein from eggs. Portion sizes matter; individual slices typically range from 200-250 calories depending on thickness. Substituting half the all-purpose flour with whole wheat flour increases fiber content and adds nutritional complexity.
Conclusion
Baking apple bread successfully requires understanding ingredient interactions, following precise techniques, and avoiding common pitfalls. By mastering this classic recipe, you develop fundamental baking skills applicable to numerous other quick breads and baked goods. The result—a moist, flavorful loaf with the natural goodness of apples and warmth of cinnamon—justifies the modest effort required. Whether baking for personal enjoyment, family gatherings, or as thoughtful gifts, this timeless recipe delivers satisfying results that improve with practice.
References
- The Science of Baking: How Each Ingredient Works — America’s Test Kitchen. 2024. https://www.americastestkitchen.com
- Quick Bread and Muffin Baking Guide — King Arthur Baking Company. 2025. https://www.kingarthurbaking.com
- Fruit Variety Selection for Baking Applications — United States Department of Agriculture. 2024. https://www.usda.gov
- Home Baking and Food Safety Standards — FDA Food Safety Modernization Act. 2023. https://www.fda.gov