Cooking a large cut of beef like brisket might seem challenging, but using a Dutch oven transforms this intimidating task into a manageable and rewarding culinary experience. Unlike traditional smoking methods that require specialized equipment, oven-braising delivers equally impressive results through gentle, moist heat that breaks down connective tissue and infuses the meat with deep, savory flavors. This cooking method is particularly appealing because it requires minimal active participation once the initial preparation is complete, making it ideal for feeding a crowd or preparing meals ahead.
Understanding Beef Brisket Cuts and Selection
Beef brisket comes from the lower chest of the animal and consists of two primary sections: the flat cut and the point cut. The flat cut, also called the first cut, is leaner with a thinner fat cap and presents a more uniform shape, making it easier to slice evenly. The point cut, sometimes referred to as the deckle, contains more intramuscular fat and marbling, which contributes to enhanced flavor and tenderness during the braising process.
When selecting brisket for Dutch oven cooking, choose a piece weighing between 3 to 6 pounds, depending on your serving requirements and oven size. Look for meat with visible marbling throughout—those white streaks of fat distributed within the muscle—as these elements render during cooking to create a moist, flavorful finished dish. The fat cap on top should be approximately a quarter-inch thick; thicker caps can be trimmed slightly, but some fat should remain to baste the meat as it cooks.
Preparation Techniques for Maximum Flavor Development
The foundation of exceptional oven-braised brisket begins with proper seasoning and preparation. A dry rub applied to the meat hours or even overnight before cooking allows flavors to penetrate deeply into the tissue. Effective dry rub components typically include:
- Brown sugar or regular sugar for caramelization and slight sweetness
- Salt to enhance natural meat flavors and aid in moisture retention
- Smoked paprika for depth and subtle smokiness
- Garlic powder and onion powder for aromatic complexity
- Ground cumin for earthy undertones
- Cayenne pepper for gentle heat
- Black pepper for sharp spice
After coating the brisket generously with the dry rub and pressing the mixture into the surface, wrap the meat tightly in foil or plastic wrap and refrigerate for at least 12 hours. This resting period allows the seasonings to absorb into the meat fibers, creating a more cohesive and flavorful crust once the meat is seared.
Before cooking, remove the brisket from the refrigerator and allow it to sit at room temperature for 30 minutes. This step is crucial because it ensures more even cooking throughout the meat; cold meat placed directly into heat cooks unevenly with a gray band developing between the browned exterior and the interior.
The Searing Step: Building Flavor Through Browning
Searing the brisket before braising is not merely a cosmetic step—it is a fundamental technique that creates depth through the Maillard reaction, a chemical process where proteins and sugars interact under high heat to form hundreds of new flavor compounds. This caramelized crust locks in juices and provides textural contrast against the tender braised interior.
To achieve optimal searing results, use a large cast iron skillet heated over medium-high heat with approximately 2 tablespoons of oil with a high smoke point, such as avocado oil or refined vegetable oil. Once the oil shimmers and just begins to smoke, carefully place the seasoned brisket fat-side-down into the skillet. Sear without moving the meat for approximately 4 to 5 minutes, allowing a rich brown crust to develop. Flip the brisket and sear the opposite side for an equal duration. If time allows, briefly sear the edges and ends as well to maximize surface area exposure to heat.
Upon completion of searing, the brisket will have developed a deep mahogany-colored crust that signals successful caramelization. This crust should appear dry and textured rather than wet or greasy.
Building the Braising Liquid: Layering Flavors
The braising liquid serves dual purposes: it maintains the moisture environment necessary for the long cooking process and infuses the meat with complementary flavors. A basic braising liquid combines beef broth with acidic elements and umami-rich components.
A foundational braising liquid typically includes:
- 2 cups beef broth (or a combination of beef and chicken broth for lighter flavor)
- 2 tablespoons red wine vinegar or apple cider vinegar for acidity that tenderizes and brightens flavor
- 2 tablespoons Worcestershire sauce for umami depth and subtle sweetness
- Optional: 1/2 cup red wine for additional depth and complexity
Beyond the base liquid, aromatics play a critical supporting role. Quartered onions, smashed garlic cloves, bay leaves, and fresh thyme sprigs create an aromatic foundation. Some preparations incorporate additional vegetables like carrots or mushrooms that both flavor the braising liquid and provide textural variety in the finished dish.
Combine the broth components in a bowl and stir thoroughly before pouring into the Dutch oven. The liquid should partially submerge the brisket; it will not cover the meat entirely, and this is appropriate for the oven-braising method.
The Braising Process: Temperature and Timing
Braising requires low, steady heat to transform tough muscle fibers into tender, succulent strands. Preheat your oven to 300°F, which provides gentle, even heat distribution throughout the Dutch oven’s interior. Some cooks prefer 275°F for an even slower cook, which can yield marginally more tender results but requires an additional 1 to 1.5 hours of cooking time.
Place the seared brisket fat-side-up into the Dutch oven containing the braising liquid and aromatics. Positioning the fat cap upward allows rendered fat to gradually baste the meat throughout the cooking process, enhancing moisture and flavor distribution. Cover the Dutch oven with a tight-fitting lid and transfer it to the preheated oven.
Cooking time depends on the brisket’s size and thickness, but plan for approximately 30 minutes to 1 hour per pound. A 4-pound brisket typically requires 2 to 2.5 hours, while a 5 or 6-pound piece may need 3 to 4 hours. The meat is finished when a meat fork inserted into the thickest section pierces the tissue with minimal resistance, or when an instant-read thermometer reaches an internal temperature of 200 to 205°F.
While the brisket braises, periodically check the pot every 30 to 45 minutes. Every other check, ladle some of the braising liquid over the exposed top of the meat to ensure even moisture distribution and flavor absorption. If the liquid appears to be reducing significantly, add additional broth to maintain adequate braising environment.
Resting and Carving for Optimal Texture
Upon reaching desired tenderness, carefully remove the Dutch oven from the oven and transfer the brisket to a clean cutting board. Resist the urge to slice immediately. Instead, allow the meat to rest for 15 to 20 minutes. During this crucial resting period, muscle fibers relax and reabsorb rendered juices, resulting in slices that remain moist rather than weeping liquid when cut.
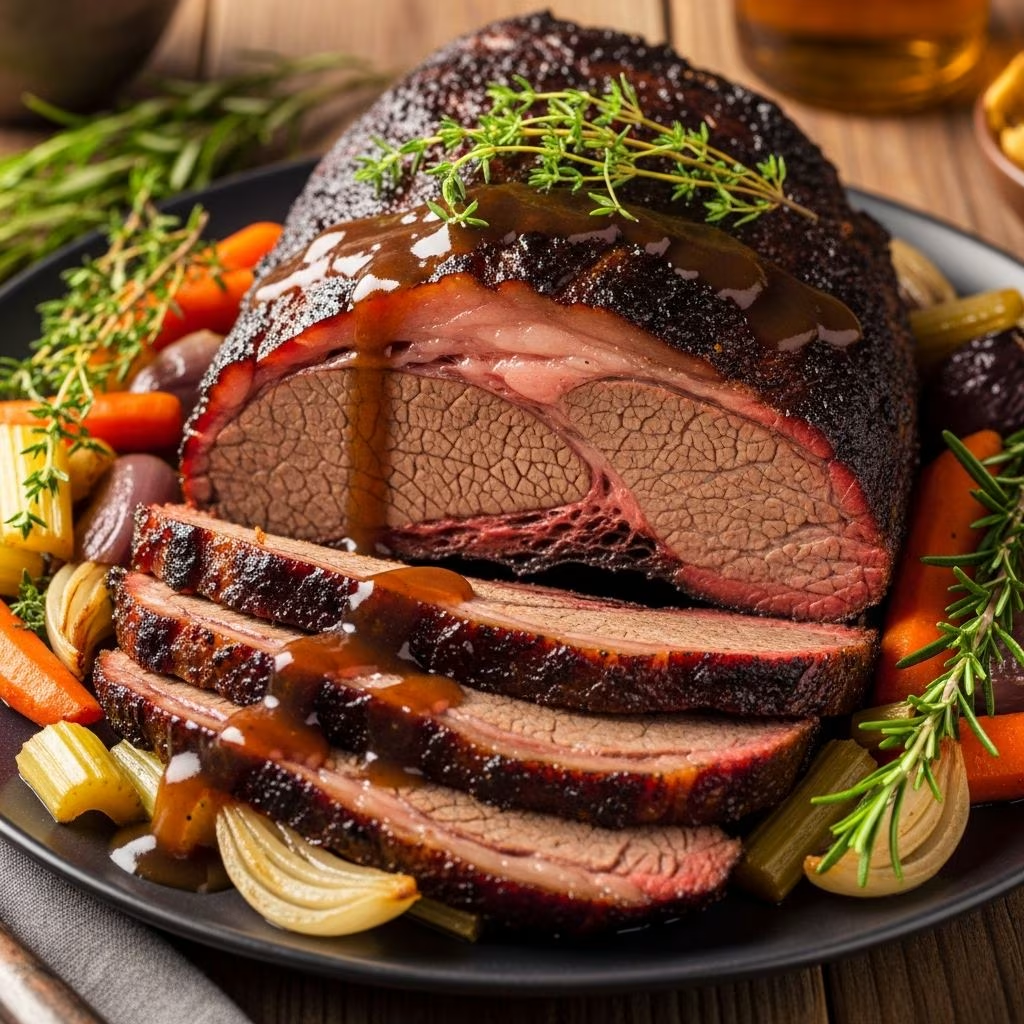
To carve the brisket, identify the grain direction—the visible lines running through the meat. Using a sharp carving knife, slice against the grain in approximately 1/4-inch-thick pieces. Slicing against the grain shortens the muscle fibers in each piece, making the finished dish more tender and easier to chew.
Finishing Touches and Service Options
The braising liquid remaining in the Dutch oven becomes a flavorful sauce to accompany the sliced brisket. Skim any excess fat from the surface if desired, then either serve the liquid as-is for a more rustic presentation, or thicken it slightly using a cornstarch slurry (1 tablespoon cornstarch mixed with 1 tablespoon water). Return the thickening agent to the pot over medium heat and simmer for 2 to 3 minutes, stirring frequently, until the liquid reaches desired consistency.
Traditional serving options include spooning the warm braising liquid over individual portions of sliced brisket or offering barbecue sauce on the side. For those preferring drier preparations, serve the meat with crusty bread for soaking up flavorful juices. Leftover braised brisket refrigerates well for up to 4 days and can be reheated gently in the oven or on the stovetop, making it an excellent candidate for advance preparation.
Recipe Variations and Customization
While the foundational oven-braised brisket recipe remains consistent, numerous variations allow for personalization based on taste preferences and ingredient availability.
| Variation Type | Key Ingredients | Flavor Profile |
|---|---|---|
| Asian-Inspired | Soy sauce, ginger, star anise, rice vinegar | Umami-forward with ginger warmth |
| Mediterranean | Tomato paste, olives, capers, oregano | Tangy, herbaceous, slightly briny |
| Spicy BBQ | Bourbon, smoked paprika, chili powder, cayenne | Smoky, hot, and slightly sweet |
| Root Vegetable Braise | Potatoes, carrots, parsnips, thyme | Earthy, vegetable-forward comfort food |
For Asian-inspired variations, substitute half the beef broth with low-sodium soy sauce and add 1 tablespoon grated fresh ginger, 2 crushed garlic cloves, and 1 star anise to the braising liquid. Mediterranean versions benefit from 3 tablespoons tomato paste mixed into the braising liquid along with 1/2 cup pitted olives and 1 tablespoon capers. Spicy BBQ preparations incorporate 1/2 cup bourbon and increase smoked paprika to 2 tablespoons while adding 1 tablespoon chili powder and 1/2 teaspoon cayenne to the dry rub.
Equipment Considerations and Dutch Oven Selection
Dutch oven quality directly impacts cooking results. Cast iron models with enameled interiors offer superior heat retention and distribution compared to stainless steel alternatives. A 5 to 7-quart Dutch oven provides adequate capacity for briskets up to 6 pounds while maintaining proper braising liquid levels. Ensure the lid fits snugly to prevent excessive moisture loss during the extended cooking process.
Troubleshooting Common Issues
If the finished brisket appears dry despite proper cooking time and temperature, the issue likely stems from excessive evaporation or insufficient initial braising liquid. In future preparations, add more broth initially or check the pot more frequently to maintain adequate liquid levels.
Tough, chewy brisket typically indicates insufficient cooking time. Most home cooks underestimate the duration required for connective tissue to fully break down; allow additional cooking time and check for the 200 to 205°F internal temperature threshold rather than relying solely on time estimates.
Excessively fatty results can be managed by skimming fat from the braising liquid after cooking or, for future preparations, trimming more of the fat cap before searing, though some fat should remain for moisture and flavor.
Make-Ahead and Storage Strategies
Braised brisket improves in flavor when prepared 1 to 2 days in advance. After cooking and allowing the meat to rest, transfer the brisket and braising liquid to an airtight container and refrigerate. The fat will solidify on the surface, making it easy to remove before reheating. Simply reheat gently in a 325°F oven for 20 to 30 minutes until warmed through, or reheat on the stovetop over medium-low heat with occasional stirring.
Frozen brisket keeps for up to 3 months. Thaw completely in the refrigerator before reheating to ensure even warming throughout.
Frequently Asked Questions
Can I cook brisket at a higher temperature to reduce cooking time?
While higher temperatures reduce cooking duration, they produce tougher, less tender results. The low 300°F temperature allows collagen to gradually convert to gelatin, creating the desired tender texture. Attempting to rush this process sacrifices quality for speed.
Should I trim all visible fat from the brisket before cooking?
No. While excessive fat can be trimmed, leaving approximately 1/4-inch of fat on top and some marbling throughout contributes essential flavor and moisture. The fat renders during cooking to naturally baste the meat.
Can I cook brisket on the stovetop instead of in the oven?
Yes, though oven braising provides more even heat distribution. Stovetop cooking requires more frequent attention and careful temperature management to prevent excessive evaporation.
What should the internal temperature reach for properly cooked brisket?
Insert a meat thermometer into the thickest section away from bone. The brisket is finished at 200 to 205°F, when collagen has adequately converted to gelatin and the meat is tender throughout.
How do I prevent the brisket from drying out?
Maintain adequate braising liquid throughout cooking, baste the meat every 30 to 45 minutes with the braising liquid, allow proper resting time after cooking, and slice against the grain to shorten muscle fibers and enhance perceived tenderness and moisture.
Conclusion: Mastering This Classic Preparation
Oven-braised brisket represents an accessible entry point into sophisticated meat cookery. By understanding the fundamental principles—proper seasoning, effective searing, maintained braising environment, and appropriate resting—home cooks consistently achieve restaurant-quality results. Whether preparing for holiday gatherings, casual family dinners, or meal preparation for the week ahead, mastering this technique provides a foundation for countless satisfying meals.
References
- Dutch Oven Brisket (Tender Braised Beef) — Happy Honey Kitchen. Accessed April 2026. https://happyhoneykitchen.com/dutch-oven-brisket/
- Dutch Oven BBQ Brisket — Wendy Polisi. Accessed April 2026. https://wendypolisi.com/dutch-oven-brisket/
- Dutch Oven Beef Brisket — Urban Bliss Life. Accessed April 2026. https://urbanblisslife.com/dutch-oven-brisket/
- Tender & Succulent Dutch Oven Braised Beef Brisket — EatFoodlicious. Accessed April 2026. https://eatfoodlicious.com/dutch-oven-braised-brisket/
- Dutch Oven BBQ Brisket — Well Fed Baker. Accessed April 2026. https://wellfedbaker.com/dutch-oven-bbq-brisket/