The Dubai chocolate phenomenon has captivated dessert enthusiasts worldwide, with its distinctive combination of creamy pistachio filling, crispy phyllo pastry, and rich chocolate coating. What began as a regional specialty has transformed into a global culinary trend, inspiring home bakers to recreate this indulgent treat in their own kitchens. This guide provides everything you need to craft these exquisite confections from scratch, whether you’re a seasoned baker or attempting your first batch of homemade truffles.
Understanding the Dubai Chocolate Revolution
The original Dubai chocolate bar emerged from innovative pastry makers who sought to combine Middle Eastern flavors with European chocolate-making traditions. The result was a harmonious blend of textures and tastes that quickly gained international recognition. The fundamental components include white or milk chocolate as the base, pistachio butter for creaminess, shredded phyllo pastry (known as kadayif or kataifi) for textural contrast, and a dark chocolate exterior that provides sophisticated balance to the sweetness of the filling.
The viral popularity of this confection has inspired countless variations, from minimalist interpretations using just a handful of ingredients to elaborate creations incorporating exotic spices and gourmet additions. The versatility of the Dubai truffle format makes it accessible to home cooks of all skill levels, while still offering room for creative experimentation and personalization.
Essential Ingredients for Your Truffle Base
Creating authentic-tasting Dubai truffles begins with understanding the role each ingredient plays. The foundation typically consists of:
- Phyllo Pastry (Kadayif/Kataifi): This shredded pastry provides the essential crispy, textural element that distinguishes Dubai truffles from ordinary chocolate confections. It should be toasted before incorporation to enhance its flavor and achieve optimal crunchiness.
- Pistachio Butter or Cream: The filling’s rich, nutty foundation comes from high-quality pistachio butter. Some recipes call for a blend of pistachio cream and mawa (evaporated milk solids) for enhanced creaminess and complexity.
- White or Milk Chocolate: This component binds the filling ingredients together while contributing sweetness and richness. The cocoa butter content determines how well it combines with other elements.
- Dark Chocolate for Coating: A 70% or higher cocoa content chocolate provides crucial balance to the sweet filling, preventing the overall flavor profile from becoming cloying. This darker variety must be tempered or made with melting chocolate wafers to ensure a smooth, snappy shell.
- Complementary Flavors: Optional additions such as cardamom, saffron, sea salt, or coconut oil can elevate your truffles with nuanced complexity and personal flair.
Step-by-Step Truffle Creation Process
Preparing Your Filling Mixture
The foundation of exceptional truffles lies in achieving the correct consistency and flavor balance in your filling. Begin by melting your white chocolate with a small amount of coconut oil using a double boiler method or microwave in short intervals to prevent burning. The chocolate should reach a smooth, pourable consistency without becoming scorched or grainy.
While your chocolate cools slightly, prepare your phyllo pastry by toasting it in a dry skillet until it turns golden and releases its aromas. This crucial step intensifies the flavor and ensures crispness within the finished truffle. Allow the pastry to cool completely before breaking it into small, manageable pieces.
Combine your melted chocolate with high-quality pistachio butter, stirring until completely incorporated. At this stage, introduce any flavor enhancements such as finely ground cardamom, crushed saffron strands, or a pinch of sea salt to balance the sweetness. The salt serves the important function of amplifying flavors and preventing palatal fatigue from excessive sweetness.
Gently fold in your cooled, toasted phyllo pastry pieces, distributing them evenly throughout the mixture. This distribution ensures that every truffle will contain the signature textural contrast that makes Dubai truffles distinctive.
Setting and Shaping
Transfer your completed filling mixture to a shallow dish and refrigerate for at least two to three hours until it reaches a firm but workable consistency. This patience is essential—premature shaping results in truffles that lose their form during chocolate coating.
Using a melon baller, cookie scoop, or small spoon, portion your mixture into 20 to 24 equal-sized balls, approximately 15 to 20 grams each. Roll each ball between your palms to create a smooth, symmetrical shape. Place these formed truffles on a parchment-lined tray and return them to the refrigerator for an additional hour to firm up before chocolate coating.
Mastering the Chocolate Coating Technique
The chocolate coating represents the final, crucial layer that encases your filling and determines the truffle’s visual appeal and eating experience. Success requires attention to temperature, consistency, and technique.
Melting Methods
You have two primary options for melting your dark chocolate. The traditional double boiler method involves placing a heatproof bowl above (but not touching) gently simmering water. This indirect heat prevents the chocolate from reaching temperatures that might cause blooming or graininess. Alternatively, use chocolate melting wafers specifically designed to remain stable at room temperature without tempering, which simplifies the home baker’s process considerably.
When using a microwave, heat your chocolate in 15 to 20-second intervals, stirring between each interval to ensure even heating and prevent hot spots. This patience prevents overheating and maintains the chocolate’s smooth, glossy appearance.
Dipping and Finishing
Once your chocolate has reached the ideal consistency—fluid enough to coat smoothly but not so hot that it threatens the filling—begin dipping your chilled truffle balls. Using a fork or dipping fork, carefully lower each truffle into the melted chocolate, rotating it gently to ensure complete coverage. Lift the truffle from the chocolate, tapping gently on the fork’s edge to remove excess coating.
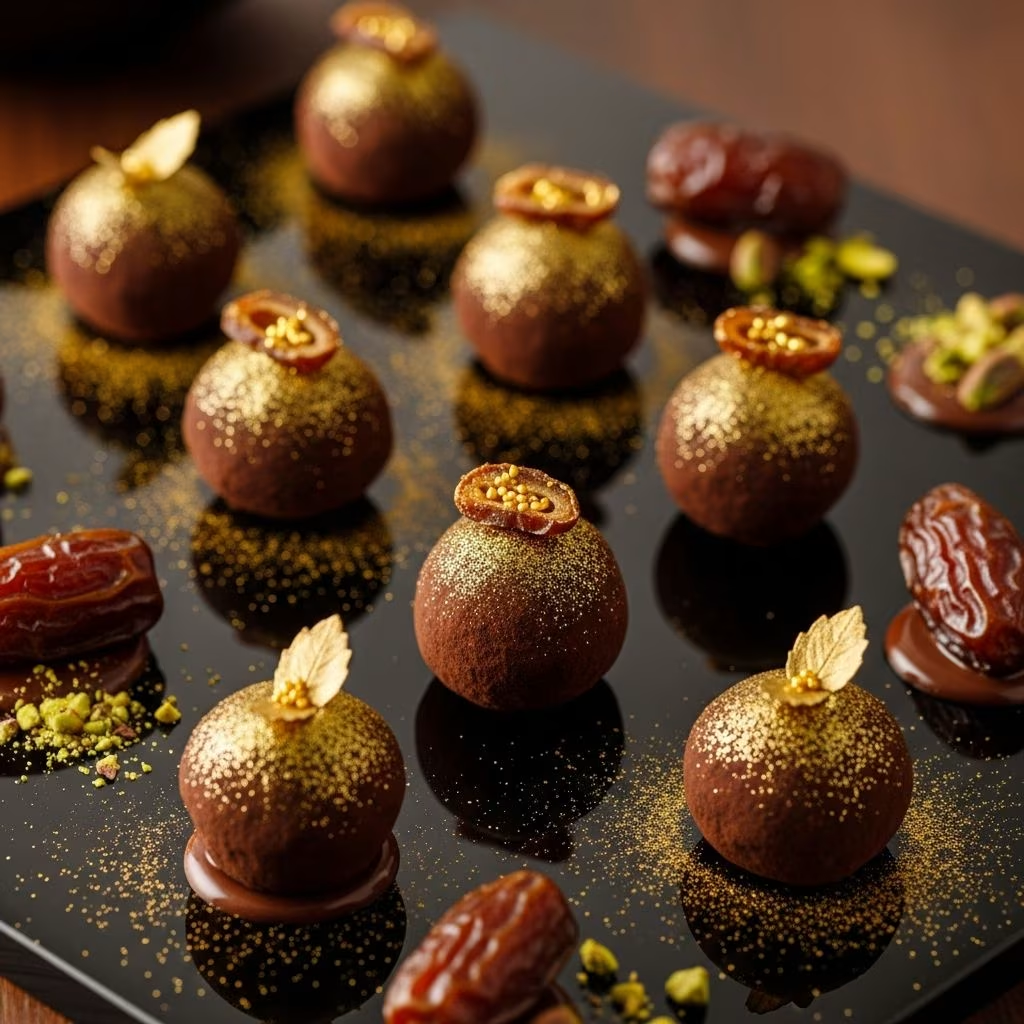
Transfer each chocolate-coated truffle to a fresh parchment-lined baking sheet. While the chocolate remains soft, immediately garnish with finely chopped pistachios, toasted phyllo fragments, edible gold dust, or other decorative elements. These finishing touches add visual sophistication and reinforce the flavor profile.
Allow the chocolate to set completely at room temperature or in the refrigerator, depending on your chosen coating method and your kitchen’s ambient temperature. This final setting period typically requires 30 minutes to an hour.
Ingredient Quality and Selection Guidelines
The caliber of your finished truffles depends directly on the quality of ingredients you select. Invest in high-cocoa-percentage dark chocolate from reputable manufacturers known for consistent texture and flavor. For pistachio butter, choose versions without added sugars or unnecessary oils to maintain purity and control the final sweetness level.
Authentic phyllo pastry, whether fresh or frozen, provides superior results compared to alternative crispy elements. If sourcing traditional kadayif proves difficult in your region, carefully frozen phyllo from reputable sources serves as an acceptable substitute, though the texture may vary slightly.
Consider sourcing organic or premium coconut oil to avoid off-flavors that might compromise your delicate balance of tastes. Each ingredient contributes to the final profile, so thoughtful selection pays dividends in the finished product.
Creative Variations and Flavor Adaptations
While the classic combination of pistachio, phyllo, and dark chocolate remains iconic, this truffle format welcomes creative exploration. Consider these imaginative directions:
- Spiced Variations: Introduce warm spices like cardamom, cinnamon, or a whisper of clove to evoke Middle Eastern influences more prominently.
- Floral Additions: Rose water or saffron can add delicate, sophisticated notes that elevate your truffles to a refined confection suitable for special occasions.
- Alternative Nuts: While pistachio remains traditional, carefully balanced proportions of almond butter or cashew cream offer interesting variations on the theme.
- Textural Enhancements: Toasted coconut, crushed freeze-dried berries, or candied citrus peel can replace or supplement the traditional phyllo pastry coating.
- Chocolate Options: Experimenting with milk chocolate coatings, white chocolate variants, or tri-colored coatings can create visually striking presentations.
Storage and Shelf Life Considerations
Properly stored Dubai truffles maintain their quality and appeal for extended periods. Keep your finished confections in an airtight container in the refrigerator for up to two weeks, or in the freezer for up to three months. This cool storage prevents the chocolate coating from softening and helps preserve the crispy texture of the phyllo pastry filling.
Before serving refrigerated truffles, remove them from cold storage 10 to 15 minutes ahead to allow the chocolate to soften slightly and flavors to warm, enhancing the eating experience. This brief tempering period prevents that cold, waxy sensation that can mute the delicate balance of flavors in a freshly refrigerated treat.
Common Challenges and Troubleshooting Solutions
| Problem | Cause | Solution |
|---|---|---|
| Filling too soft to shape | Insufficient chilling time or warm kitchen temperature | Extend refrigeration to 3-4 hours; freeze for 1 hour before shaping if needed |
| Chocolate coating cracks or appears dull | Chocolate overheated or tempered incorrectly | Use melting wafers designed for room-temperature stability; avoid excessive heat |
| Phyllo pastry becomes soggy | Insufficient toasting or moisture from filling | Toast pastry longer until deeply golden; use less cream or liquid in filling |
| Truffles too sweet | Excessive white chocolate or pistachio butter | Reduce proportions; increase dark chocolate coating percentage; add pinch of sea salt |
| Uneven chocolate coating | Chocolate too thick or truffles not sufficiently chilled | Thin chocolate with coconut oil; ensure truffles are properly firmed before dipping |
Packaging and Presentation for Gifting
These elegant confections make exceptional gifts for the food enthusiast in your life. Present them in elegant boxes with parchment paper separators to prevent sticking and maintain their visual pristine appearance. Include a small information card detailing the flavor profile and noting that the truffles should be consumed within two weeks or stored frozen for extended shelf life.
For added sophistication, arrange truffles on a decorative serving platter and surround them with edible gold leaf, fresh mint, or complementary garnishes. The visual appeal of these confections makes them worthy of prominent display at festive gatherings, dinner parties, or as a centerpiece for dessert presentations.
Frequently Asked Questions
Can I make Dubai truffles without phyllo pastry?
While phyllo pastry provides the signature textural element, alternatives such as crushed pistachios, toasted coconut, or finely chopped candied fruit can create variations, though the result differs from traditional Dubai truffles.
How do I prevent blooming on the chocolate coating?
Blooming occurs from temperature fluctuations. Use melting wafers formulated for stability, or properly temper traditional chocolate. Store finished truffles in consistent, cool conditions away from humidity and temperature variations.
What’s the difference between melting wafers and regular chocolate?
Melting wafers contain stabilizers that allow them to set smoothly at room temperature without tempering. Regular chocolate requires tempering to achieve a glossy finish and proper snap, making melting wafers more convenient for home bakers.
Can I use different types of pistachio products?
Pistachio butter, pistachio paste, and crushed pistachios work in these recipes. Pure products without added sugars offer better flavor control and prevent excessive sweetness in the finished truffles.
How many truffles does a typical batch yield?
Most recipes produce between 18 and 24 truffles, depending on portion size and specific ingredient ratios. Larger truffles create fewer pieces while smaller ones extend your yield.
Conclusion
Creating homemade Dubai chocolate truffles represents an accessible yet sophisticated culinary endeavor that combines traditional confectionery techniques with contemporary flavor trends. By understanding ingredient functions, mastering fundamental techniques, and personalizing your approach, you can craft professional-quality confections that rival commercial offerings. Whether you’re seeking an elegant gift, a festive treat, or a satisfying creative outlet, these luxurious truffles deliver exceptional results that justify the modest effort required. Begin with the classic formulation before exploring variations that reflect your unique palate and preferences.
References
- Navitas Organics Dubai-inspired Chocolate Truffles Recipe — Navitas Organics. Accessed April 9, 2026. https://navitasorganics.com/blogs/recipes/dubai-inspired-chocolate-truffles
- Dubai Chocolate Truffles — Heinstirred. Accessed April 9, 2026. https://heinstirred.com/dubai-chocolate-truffles/
- Kataifi Pistachio Burfi Truffles — Cook With Manali. Accessed April 9, 2026. https://www.cookwithmanali.com/kataifi-pistachio-burfi-truffles/
- 4 Ingredient Dubai Truffles — Kirbie’s Cravings. Accessed April 9, 2026. https://kirbiecravings.com/4-ingredient-dubai-truffles/
- How to Make Dubai Style Pistachio Oreo Truffles — Epicuricloud. Accessed April 9, 2026. https://www.epicuricloud.com/recipe/how-to-make-dubai-style-pistachio-oreo-truffles/