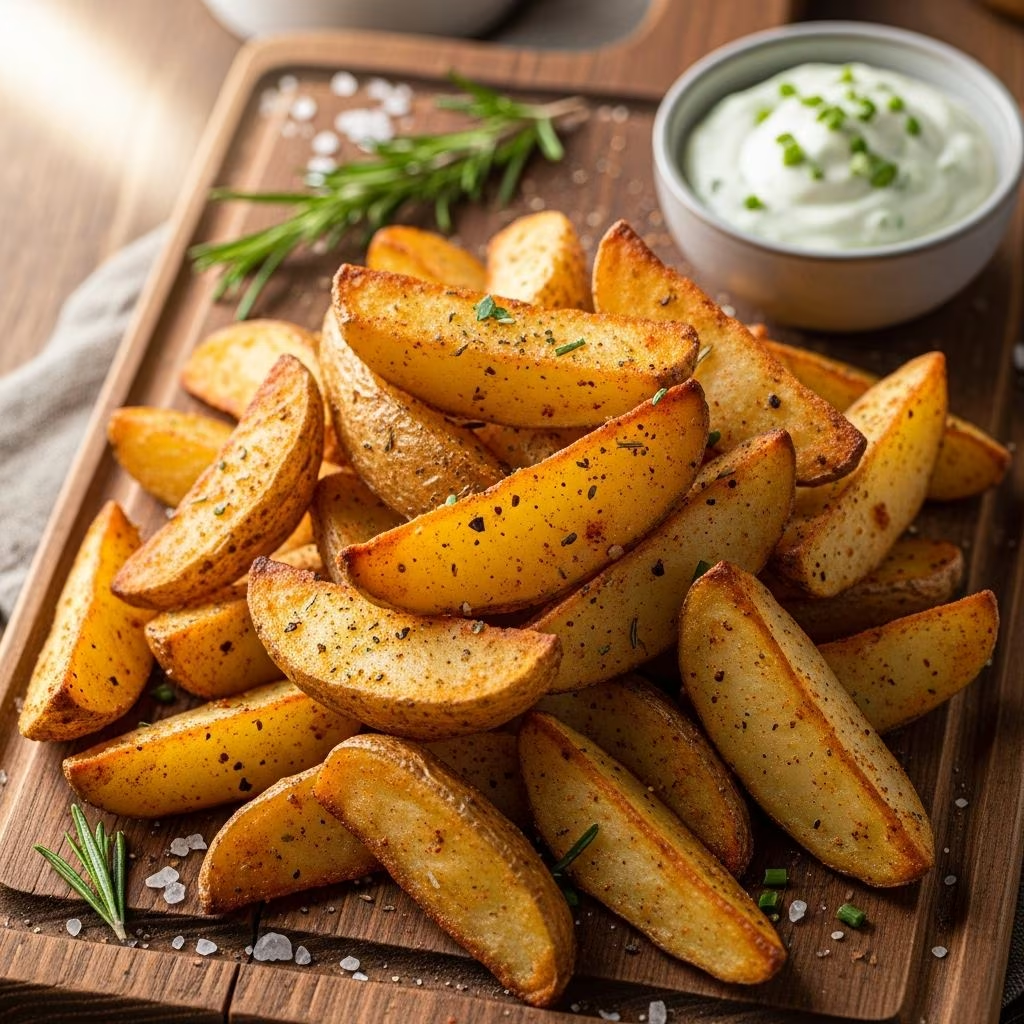
Potato wedges represent one of the most versatile and satisfying side dishes that can elevate any meal. Whether you’re preparing a weeknight dinner or hosting guests, mastering the technique of creating wedges with a crispy exterior and a creamy, tender interior transforms this humble ingredient into something extraordinary. The beauty of this dish lies in its simplicity—requiring only basic pantry staples and straightforward preparation methods that yield impressive results.
Understanding the Foundation: What Makes Perfect Potato Wedges
The foundation of exceptional potato wedges begins with selecting the right potato variety. Russet potatoes stand as the gold standard for this preparation due to their high starch content and lower moisture levels. This starch composition creates the ideal texture—crispy on the outside while maintaining a fluffy, soft center. Alternative options include Yukon Gold potatoes, which offer a slightly waxy texture and buttery flavor, or red potatoes, though these require slightly adjusted cooking times due to their different moisture content.
Understanding the science behind wedge preparation helps explain why certain techniques work better than others. The exterior of the potato wedge needs sufficient heat to develop a golden-brown crust through the Maillard reaction—a chemical process that creates complex flavors and appealing color when proteins and sugars interact with high temperatures. Meanwhile, the interior must remain moist and tender, requiring careful timing and often preliminary cooking methods.
Essential Ingredients and Flavor Building
While potato wedges can be as simple as potatoes and oil, building layers of flavor transforms them from basic to memorable. The seasoning profile typically includes:
- Garlic granules or fresh minced garlic for aromatic depth
- Onion powder or finely diced fresh onion for savory complexity
- Paprika for color, subtle sweetness, and smokiness
- Salt and freshly cracked pepper for foundational seasoning
- Optional additions like grated Parmesan cheese, cayenne pepper for heat, or Italian herbs for Mediterranean flair
The choice between dried granules and fresh ingredients offers flexibility based on your preferences and kitchen pantry. Dry garlic and onion granules provide convenience and consistent flavor distribution, while fresh alternatives deliver more vibrant, immediate flavors. If substituting fresh for dry, use approximately three minced cloves of fresh garlic or a half peeled and small-diced yellow onion to replace the dried versions.
The Cutting Technique: Achieving Uniform Wedges
Proper cutting technique ensures even cooking throughout your batch. Begin with thoroughly rinsed and scrubbed potatoes to remove surface dirt. The standard cutting method involves:
- Cutting each potato in half lengthwise
- Taking each half and cutting it in half again
- Cutting each quarter in half one final time
- Resulting in eight uniform wedges per potato
This systematic approach creates consistent pieces that cook at the same rate, eliminating the frustration of some wedges burning while others remain undercooked. The flat surfaces created by this cutting method are crucial—they allow direct contact with the hot baking sheet, enabling proper browning and crisping.
Preliminary Preparation Methods
The technique you choose for initial potato preparation significantly impacts your final results. Two primary approaches dominate professional and home kitchens:
The Direct Baking Method: After cutting and seasoning, place wedges directly on a baking sheet lined with parchment paper, cut-side down. This approach works well when you want maximum simplicity and minimal preparation time.
The Parboiling Method: This technique involves partially cooking potatoes in boiling water before final baking. Place whole potatoes in a large pot, cover with cold water, bring to a boil, and maintain a rolling boil for approximately 10 minutes until potatoes are fork-tender but not completely cooked. This method creates the textural difference between crispy exterior and creamy interior, as the parboiling begins the gelatinization of starches on the surface while the interior remains firm. After cooling slightly, cut into wedges and proceed with seasoning and final baking.
Coating and Seasoning Process
Achieving an even seasoning distribution requires a systematic approach. After cutting your potatoes, transfer them to a large mixing bowl and drizzle with olive oil—typically about one-quarter cup for three pounds of potatoes. The oil serves multiple purposes: it carries fat-soluble flavor compounds, helps seasonings adhere to the potato surface, and contributes to browning through the Maillard reaction.
Toss the oiled potatoes thoroughly, ensuring every piece receives a light coating. In a separate bowl, combine all dry seasonings including flour (if using), paprika, garlic granules, onion granules, salt, and pepper. Add this mixture to the potatoes and stir vigorously for at least one minute. A helpful technique involves using a large zip-lock storage bag—add potatoes and seasonings, seal, and shake vigorously for even distribution while containing the mess.
Baking Techniques for Optimal Results
Temperature and timing represent the critical variables in baking potato wedges. Most recipes recommend preheating your oven to between 400°F and 450°F, depending on your specific oven and desired browning level.
Arrange seasoned wedges on baking sheets lined with parchment paper in a single layer, ensuring they rest cut-side down initially. Critical spacing between wedges—approximately one inch—allows hot air to circulate around each piece, promoting even browning and preventing steaming. If your batch is too large for a single baking sheet, use multiple sheets rather than crowding the pan.
Bake for the initial phase—typically 12 to 15 minutes depending on temperature and oven characteristics—until the cut surface facing the sheet begins to turn golden brown. Using a spatula or tongs, carefully flip each wedge to expose the opposite cut surface to direct heat. Return to the oven for another 12 to 15 minutes until both cut surfaces achieve a deep golden-brown color and the edges display light charring.
Finishing Touches and Flavor Enhancement
The final moments of preparation separate ordinary wedges from exceptional ones. Upon removing from the oven, while the wedges remain hot and the exterior is still crispy, drizzle melted unsalted butter over the entire batch. The residual heat allows the butter to absorb into the surface layers while the crust remains crispy.
Fresh garnishes add visual appeal and flavor complexity. Finely minced fresh parsley provides a bright, herbaceous contrast to the rich, savory potatoes. Toss the wedges gently to distribute the butter and parsley evenly, then transfer to a serving dish with additional parsley sprinkled on top for presentation.
Storage and Reheating Strategies
Potato wedges are best consumed immediately after preparation when the contrast between crispy exterior and tender interior is most pronounced. However, leftovers can be preserved for several days.
Store cooled wedges in an airtight container in the refrigerator for up to three days. To reheat while maintaining texture, place wedges on a baking sheet lined with parchment paper and warm in a 350°F oven for 8 to 10 minutes until they reach your desired temperature and the exterior recrisps. Avoid microwave reheating, which creates steam and softens the crispy exterior.
Creative Variations and Serving Suggestions
The versatility of potato wedges allows for numerous flavor variations. Consider these approaches:
- Mediterranean Style: Add dried oregano, thyme, and rosemary to your seasoning blend
- Spicy Version: Incorporate cayenne pepper, smoked paprika, and chili powder
- Loaded Wedges: Top finished wedges with grated cheese, bacon bits, sour cream, and chives
- Herb-Infused: Use fresh herbs like cilantro or basil mixed with lime zest
- Everything Bagel Style: Combine sesame seeds, poppy seeds, onion, and garlic
Potato wedges complement numerous main courses—from grilled meats and fish to vegetarian entrees. They also serve as excellent party appetizers, particularly when accompanied by various dipping sauces like ranch dressing, aioli, or sriracha mayo.
Troubleshooting Common Issues
Several problems may arise during preparation, each with straightforward solutions:
Soggy Texture: This typically results from overcrowding the baking sheet or excessive moisture on the potatoes. Ensure potatoes are thoroughly dried after washing and maintain adequate spacing on the sheet.
Uneven Browning: Rotate your baking sheets halfway through cooking, moving the top sheet to the bottom position. This compensates for oven hot spots.
Overly Floury Taste: This occurs when too much flour coating remains on the wedges. After seasoning in your zip-lock bag, shake off excess flour before placing on the baking sheet.
Raw Interior: This suggests insufficient initial cooking or inadequate baking time. If using the parboiling method, ensure potatoes reach true fork-tenderness before cutting. Alternatively, increase baking temperature or time slightly.
Frequently Asked Questions
Can I prepare potato wedges in advance? Yes, you can cut and season potatoes several hours ahead, storing them covered in the refrigerator until ready to bake. The flavors actually develop further during this resting period.
What potato variety works best? Russet potatoes are ideal due to their starch content and texture. Yukon Gold potatoes offer a creamier interior, while red potatoes are more waxy and hold their shape better.
Can I freeze potato wedges? Freezing raw wedges is not recommended as ice crystal formation damages cellular structure, creating mushy results when thawed. However, fully cooked wedges freeze well and can be reheated in the oven.
What oil works best for this recipe? Olive oil provides excellent flavor and a relatively high smoke point suitable for this cooking temperature. Vegetable, canola, or avocado oil also work effectively.
How do I achieve extra crispy wedges? Increase your oven temperature to 450°F, reduce initial cooking time, and ensure adequate spacing between wedges. The parboiling method also significantly improves crispiness.
Mastering potato wedges transforms a simple side dish into a culinary highlight of any meal. With practice and attention to these techniques, you’ll consistently produce wedges that rival restaurant quality while enjoying the satisfaction of homemade preparation.
References
- Potato Wedges Recipe (JoJo Potatoes) — Chef Billy Parisi. Accessed 2026-04-09. https://www.billyparisi.com/potato-wedges/
- Baked Copycat Jojo Potatoes — A Mind Full Mom. Accessed 2026-04-09. https://amindfullmom.com/jojo-potatoes-sundaysupper/
- Baked Potato Wedges (JoJo Potatoes) — Taste and Tell Blog. Accessed 2026-04-09. https://www.tasteandtellblog.com/jojo-potatoes-and-a-giveaway/