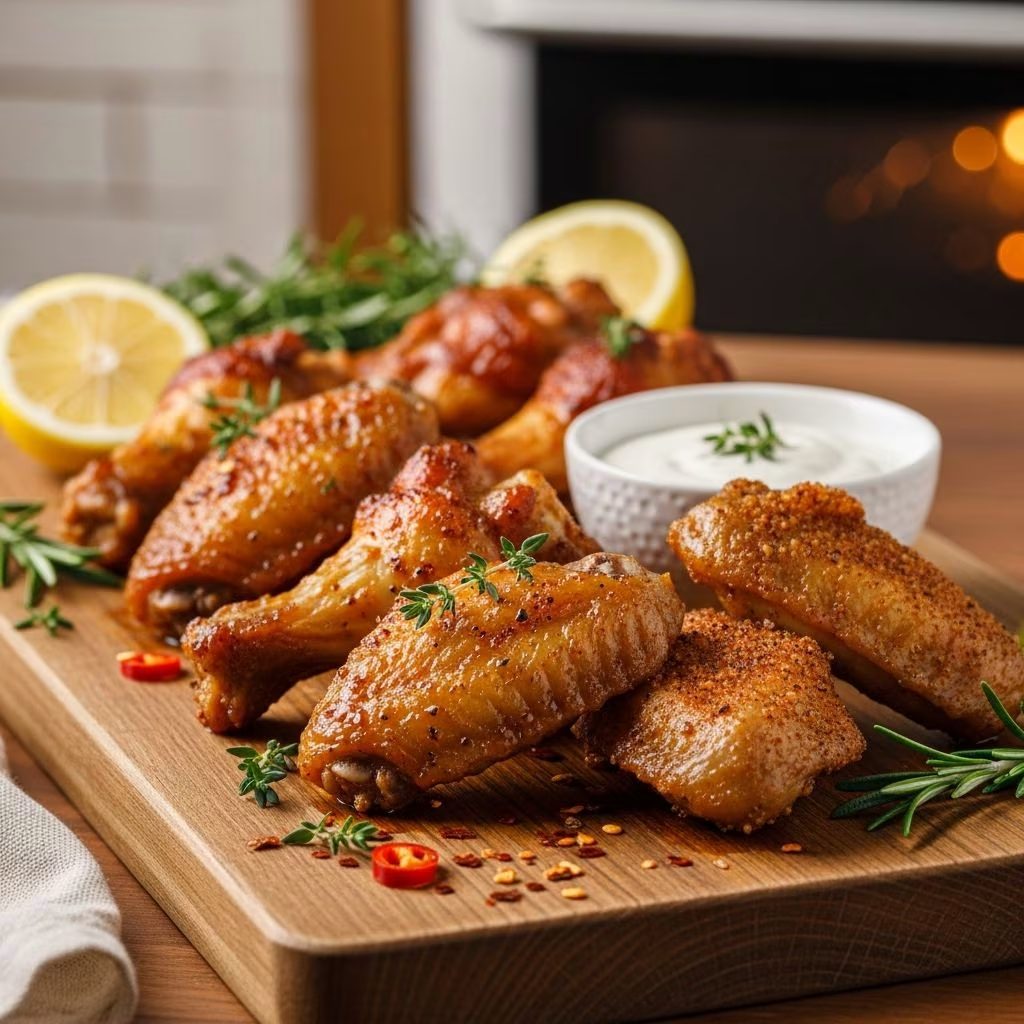
Creating restaurant-quality chicken wings in your home kitchen doesn’t require specialized equipment or complicated techniques. With the right preparation methods and an understanding of how heat affects the cooking process, anyone can produce wings that rival those served at sports bars and restaurants. The key to success lies in mastering a few fundamental principles that transform ordinary wings into crispy, flavorful appetizers that work equally well for casual family dinners or large gatherings.
Understanding the Foundation of Wing Preparation
The journey toward exceptional baked wings begins well before the oven reaches its target temperature. The initial preparation phase determines whether your final product will emerge golden and crispy or disappointing and soggy. This preparation process forms the critical foundation upon which all subsequent cooking steps depend, making it impossible to skip or rush.
Moisture represents the primary enemy when attempting to achieve crispiness through oven baking. Unlike deep fryers that use intense, immediate heat to seal the exterior, ovens work differently. Excess moisture on the wing surface creates steam during cooking, which prevents the skin from crisping properly. This is why the most successful recipes emphasize a thorough drying step before any seasoning or cooking occurs.
To properly prepare your wings, remove them from their packaging and place them in a large colander. Rinse them thoroughly under cool running water to remove any residual packaging liquid or debris. Pat them completely dry using multiple paper towels, paying special attention to the crevices and underside of each wing. Some experienced cooks suggest allowing the wings to rest uncovered in the refrigerator for several hours after patting them dry, as this additional air exposure further reduces surface moisture.
Creating Your Perfect Seasoning Blend
The seasoning approach you select dramatically influences the final flavor profile and texture of your baked wings. Unlike wet marinades that add moisture, dry seasoning blends offer the advantage of promoting crispiness while still delivering robust flavor. This approach has become increasingly popular among home cooks seeking that elusive restaurant-quality texture.
A basic seasoning foundation typically includes garlic powder, paprika, salt, and black pepper. These four ingredients create a well-rounded flavor base that complements the natural taste of chicken without overwhelming it. However, the true secret to achieving exceptional crispiness involves adding an unexpected ingredient: baking powder. Baking powder, specifically aluminum-free varieties, chemically reacts with the chicken skin during cooking to create the desired crispy exterior. This ingredient works through alkaline action on the skin’s surface, facilitating browning and promoting texture changes that result in that coveted crunch.
To assemble your seasoning mixture, combine the following ingredients in a small bowl:
- 2 tablespoons baking powder (aluminum-free)
- 2 teaspoons garlic powder
- 2 teaspoons paprika (regular or smoked)
- 1.5 teaspoons kosher salt
- 1 teaspoon ground black pepper
- 1 teaspoon onion powder (optional but recommended)
Once you have mixed these ingredients thoroughly, the blend becomes ready to apply to your prepared wings. The beauty of this approach lies in its flexibility—you can adjust quantities to match your personal taste preferences, increase or decrease heat by modifying paprika or adding cayenne pepper, or introduce entirely different flavor profiles through additional spices.
The Coating Application Process
After drying your wings thoroughly and preparing your seasoning blend, the next step involves coating each wing evenly. This process requires more care than simply sprinkling seasoning over the batch and hoping for the best. Proper technique ensures every surface receives adequate flavoring while the baking powder works efficiently across the entire wing.
Place your dried wings in a large mixing bowl. Sprinkle your seasoning blend over the wings gradually, tossing continuously with your hands or using a large spoon. The goal involves reaching a point where every wing surface appears visibly coated with the spice mixture. This typically requires more tossing than most people initially anticipate—you’re not simply combining ingredients but rather methodically ensuring complete coverage.
For those concerned about uneven coating, some recipes suggest adding a light coating of melted butter or oil before applying the dry rub. The butter serves dual purposes: it helps the spices adhere more effectively and contributes additional flavor complexity. If you choose this approach, use approximately 2 tablespoons of butter melted in a microwave, then toss your wings gently in the butter before proceeding with the seasoning application.
Preparing Your Cooking Equipment
The baking surface you select influences both cooking results and cleanup requirements. Your equipment preparation should occur before you begin coating your wings, ensuring you’re ready to place seasoned wings into the oven without delay.
For optimal results, line your baking sheets with either parchment paper or aluminum foil. Some recipes recommend elevating the wings on wire racks placed above the prepared baking sheets. This elevated approach allows hot air to circulate completely around each wing, promoting even cooking and superior crispiness compared to placing wings directly on the sheet surface. If you don’t own wire racks, the parchment or foil-lined approach still produces excellent results—it simply requires more frequent turning during cooking to ensure even browning.
Arrange your seasoned wings on the prepared surface in a single layer, ensuring they don’t overlap or touch one another. Crowding the baking sheet creates steam pockets that prevent proper crisping, so resist the temptation to fit more wings than reasonably fit in a single layer with space between each piece.
Mastering Oven Temperature and Timing
Oven temperature selection represents one of the most critical decisions in the baking process. Different recipes recommend temperatures ranging from 400°F to 425°F, with each temperature offering distinct advantages. Higher temperatures (425°F) produce faster cooking times and can yield superior crispiness, while lower temperatures (400°F) offer more forgiving cooking windows and reduce the risk of burning the seasonings.
Most home cooks achieve excellent results using 425°F as their target temperature, with total cooking times ranging from 35 to 60 minutes depending on wing size and your specific oven’s characteristics. Preheat your oven thoroughly before placing wings inside—this ensures consistent cooking from the moment your wings enter the oven.
The turning schedule significantly impacts your final results. Turning wings every 15 to 20 minutes ensures even browning on all surfaces and promotes consistent crispiness. During these turning intervals, flip the wings so that the side previously facing up now faces down, allowing the other side to receive direct heat exposure.
Several visual and textural signs indicate when your wings have reached the desired doneness point:
- Skin has transformed from pale to deep golden-brown across all surfaces
- The outer coating appears visibly crispy and slightly darker than the base color
- Wings show no pink near the bone when cut or pierced
- The meat has pulled away slightly from the bone tips
Alternative Flavor Approaches
While dry seasoning blends represent the most effective method for achieving crispiness, alternative preparations offer different flavor experiences. Understanding these options allows you to vary your approach based on your audience and the occasion.
For those preferring sauced wings, bake your wings using the dry rub method first, then toss them with your chosen sauce during the final minutes of cooking or immediately after removal from the oven. This approach maintains crispiness while adding the flavors and textures associated with glazed wings. Popular sauce options include combinations of soy sauce and barbecue sauce, creating sweet and umami-forward flavor profiles.
Another approach involves creating compound butters infused with garlic, herbs, and spices. After your wings achieve the desired crispiness in the oven, toss them in warm garlic butter, allowing the residual heat to meld the flavors while maintaining the crispy exterior texture.
Serving Suggestions and Storage
Freshly baked wings deserve accompaniments that complement their flavor and texture. Traditional serving approaches include offering a selection of dipping sauces alongside the wings, allowing guests to select their preferred flavoring. Consider offering both creamy options (like ranch or blue cheese) and vinegar-based or hot sauce options for variety.
Nutritionally, baked wings offer advantages over their fried counterparts due to the absence of deep-frying oil. Baking reduces overall fat content while preserving the protein benefits that make chicken wings an appealing protein source for various dietary approaches.
Leftover wings can be refrigerated in an airtight container for up to four days. Reheating in a 350°F oven for 12 to 17 minutes restores crispiness more effectively than microwave reheating, which tends to result in soggy textures. Alternatively, if you own an air fryer, reheating wings for 7 to 8 minutes at 390°F produces excellent results comparable to fresh-baked preparation.
Troubleshooting Common Issues
Wings aren’t crisping properly: Ensure you’re using aluminum-free baking powder and that your wings were thoroughly dried before cooking. Consider increasing your oven temperature by 25 degrees or extending cooking time by 5-10 minutes. Also verify you’re not crowding the baking sheet, as this creates steam that prevents crispiness.
Wings are burning while the interior remains undercooked: Your oven temperature may be running hot. Reduce the temperature by 25 degrees and extend cooking time accordingly. Use the lower or lower-middle oven rack positioning to move wings slightly farther from the heating element.
Seasoning tastes too strong or too bland: When adjusting your seasoning blend for future batches, modify quantities gradually—reduce by quarter teaspoons when decreasing intensity, or add new spices in teaspoon increments when experimenting with additional flavors.
Frequently Asked Questions
Can I prepare wings ahead of time?
Yes. You can season wings up to 24 hours in advance and refrigerate them uncovered or loosely covered. This advance preparation allows flavors to penetrate more deeply. Bring wings to room temperature for approximately 15 minutes before baking to ensure more even cooking.
What if I don’t have aluminum-free baking powder?
Aluminum-free baking powder is preferable but not absolutely essential. Regular baking powder still produces crispiness, though some people detect a slight metallic aftertaste. Many stores now stock aluminum-free varieties in the baking aisle, making substitution relatively easy.
Can I use chicken wing drummettes or should I buy whole wings?
Both options work well. Whole wings require separating the drumettes, flats, and tips—a 10-minute task with a sharp knife. Some prefer pre-separated wingettes for convenience, while others find purchasing whole wings more economical.
How many wings should I plan per person?
Most people consume 4 to 8 wings per serving, depending on whether wings constitute the main dish or serve as appetizers alongside other foods. For game day gatherings, plan approximately 6 to 8 wings per person.
Conclusion: Achieving Wings Worth Serving
Mastering the technique of oven-baked chicken wings transforms this humble appetizer into a dish worthy of your dining table regardless of the occasion. Through proper preparation, strategic seasoning choices, and careful attention to cooking conditions, you can reliably produce wings that satisfy even the most critical palate. The techniques outlined here eliminate guesswork and provide the foundation for experimenting with different flavor profiles while maintaining the textural integrity that defines exceptional wings. Whether you’re preparing wings for casual weeknight snacking or hosting a significant gathering, these methods ensure consistent, delicious results.
References
- 3 Ingredient Chicken Wings Recipe — Momma Chef. https://mommachef.com/quick-easy-chicken-wings-three-ingredients-recipe/
- Crispy Baked Chicken Wings — Tastes Better From Scratch. https://tastesbetterfromscratch.com/crispy-baked-chicken-wings/
- Baked Chicken Wings Recipe — The Cookie Rookie®. https://www.thecookierookie.com/simple-spiced-baked-chicken-wings/
- Crispy Baked Chicken Wings — Natasha’s Kitchen. https://natashaskitchen.com/baked-chicken-wings/
- Crispy Baked Chicken Wings — Healthy Recipes Blog. https://healthyrecipesblogs.com/baked-chicken-wings/
- Easy Chicken Wings Recipe — Preppy Kitchen. https://preppykitchen.com/chicken-wings/
- The Crispiest Garlic Butter Chicken Wings — Sunday Table. https://sundaytable.co/garlic-butter-chicken-wings/