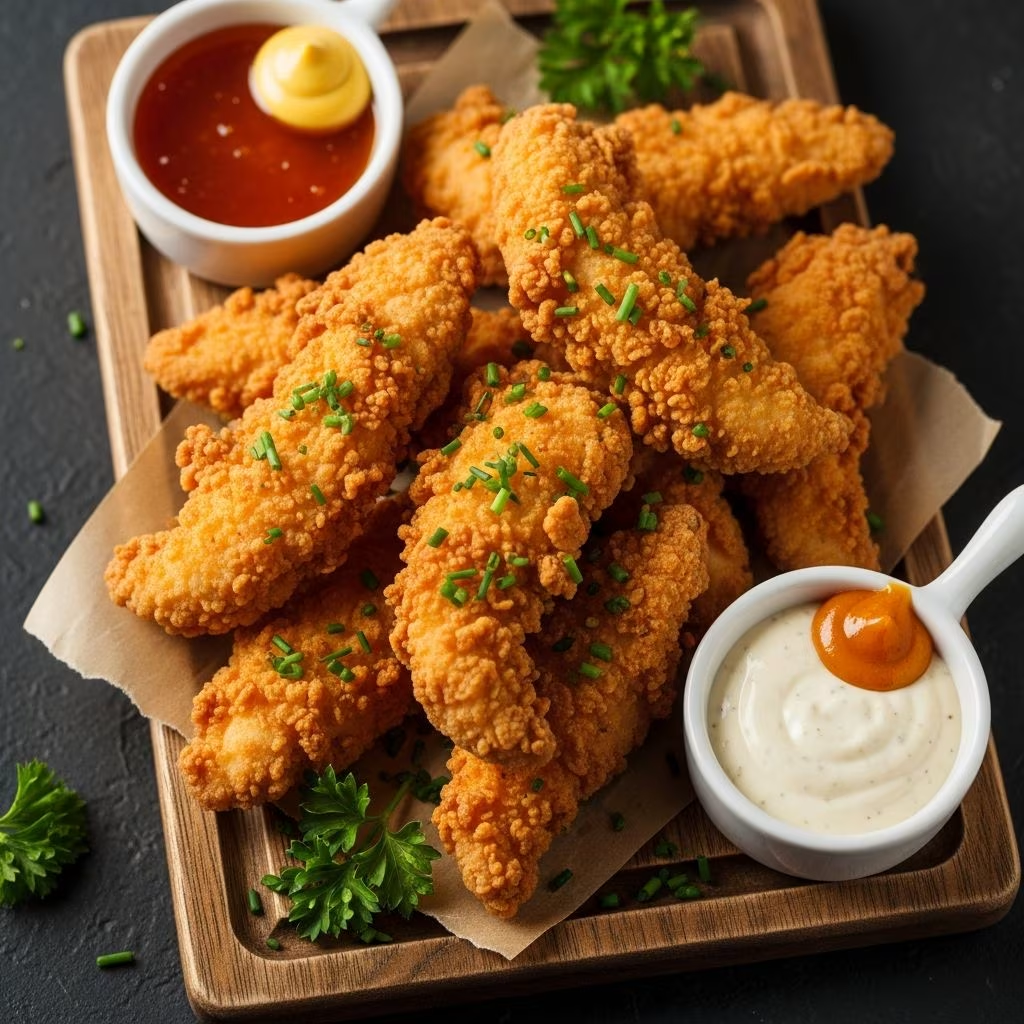
Creating crispy, golden fried chicken tenders that rival restaurant quality is entirely achievable in your own kitchen. The process combines straightforward techniques with careful attention to temperature and breading methods. This guide walks you through everything needed to prepare this beloved comfort food that appeals to both children and adults alike.
Understanding the Foundation of Exceptional Fried Chicken Tenders
The transformation of simple chicken into a crispy, satisfying dish relies on mastering several key principles. The breading must adhere properly to the meat, the oil temperature must remain consistent, and the cooking time must be precisely calculated. When these elements align, the result is a tender interior enclosed in a golden, crunchy exterior that delivers the textural contrast people crave.
Success begins with selecting the right cut of poultry and preparing it correctly before any seasoning is applied. The quality of your base ingredients and your preparation methods directly influence the final outcome, making this first step critically important.
Selecting and Preparing Your Chicken
Boneless, skinless chicken tenderloins serve as the ideal starting point for this recipe. These cuts are naturally tender and cook quickly, reducing the risk of overcooking. A typical batch uses between 1.5 to 2 pounds of chicken, providing enough for a family meal with potential leftovers.
Before breading begins, pat the chicken completely dry using paper towels. Moisture on the surface interferes with breading adhesion and can create a soggy coating rather than a crispy shell. This simple step makes a substantial difference in your final results.
If using larger chicken breasts instead of pre-cut tenderloins, slice them horizontally into strips approximately one inch thick. Uniform thickness ensures even cooking throughout your batch, preventing some pieces from being undercooked while others become overdone.
Constructing Your Seasoning Blend
The flavor profile of your chicken tenders depends entirely on the seasonings you choose. A foundational blend typically includes all-purpose flour as the base, combined with garlic salt, black pepper, and paprika. These ingredients create a classic savory flavor that complements the poultry without overwhelming it.
For enhanced texture and crispiness, incorporating cornstarch into your flour mixture yields superior results. The ratio of approximately three tablespoons of cornstarch per cup of flour creates a lighter, crunchier coating than flour alone would provide.
Additional seasoning options expand your flavor possibilities:
- Smoked paprika adds depth and a subtle smoky note
- Cayenne pepper introduces gentle heat for those preferring spiced versions
- Onion powder enhances savory characteristics
- Garlic powder intensifies aromatic qualities
- Baking powder contributes to coating crispness through light puffiness
Mix all dry ingredients thoroughly in a shallow bowl, ensuring even distribution of seasonings throughout the flour mixture. Uneven seasoning creates inconsistent flavor across your batch, so adequate mixing deserves careful attention.
The Role of Liquid Binding Agents
Creating a proper egg wash represents a critical step in the breading process. A standard egg wash combines beaten eggs with water or milk, creating a medium that helps the seasoned flour adhere to the chicken surface.
Some recipes incorporate buttermilk as an alternative or additional binding agent. Buttermilk-based washes offer advantages beyond simple adhesion. The acidity in buttermilk slightly tenderizes the chicken while contributing subtle tanginess to the final flavor. When using buttermilk, mix it with beaten eggs and a pinch of salt for optimal results.
For those seeking more pronounced flavor, combining buttermilk with hot sauce creates an inspired variation. The heat from the sauce penetrates through the breading to season the interior meat, while the buttermilk’s lactic acid works to enhance tenderness through enzymatic action.
Mastering the Double-Dredging Technique
The breading process determines whether your chicken tenders achieve that coveted crispy exterior. Rather than a single coating, professional techniques employ a double-dredging method that creates superior texture and crispiness.
First coating: Dip each prepared chicken piece into the flour mixture, ensuring complete coverage. Shake off excess flour gently, as thick flour buildup prevents proper browning and creates a pasty rather than crispy coating.
Binding layer: Transfer the floured chicken to your egg wash, coating completely. Allow excess liquid to drip away, as pooled egg creates soggy spots during frying.
Second coating: Return the egg-coated chicken to the flour mixture for a final dusting. This additional layer creates the signature craggy texture that becomes exceptionally crispy when exposed to hot oil.
For ultra-crispy results, some recipes recommend repeating this entire dredging sequence a second time, creating a triple-coated effect. This technique produces exceptionally crunchy chicken but requires more breading mixture and careful handling to prevent coating separation during frying.
Oil Selection and Temperature Management
The cooking medium profoundly affects both flavor and texture. Neutral-flavored oils work best for this application, allowing the chicken and seasonings to shine without competitive flavors. Common options include vegetable oil, canola oil, and peanut oil. Peanut oil offers the advantage of a higher smoke point, allowing slightly higher temperatures and more stable cooking conditions.
Oil quantity deserves careful consideration. A Dutch oven or heavy stock pot should be filled with approximately 4 to 6 inches of oil, providing adequate depth for proper submersion without overflow risk. For skillet cooking, maintain about 2 inches of oil depth.
Temperature is paramount. Oil heated to 350-375°F provides the ideal range for cooking chicken tenders. At these temperatures, the exterior browns and crisps while the interior cooks through without becoming dry.
Several methods exist for determining oil temperature. A reliable instant-read thermometer eliminates guesswork and ensures consistency across batches. Alternatively, the visual method involves dropping a small piece of bread into the oil; properly heated oil will bubble vigorously around the bread and brown it within approximately 60 seconds.
Allowing adequate preheating time is essential. Most recipes recommend heating oil for 10-15 minutes before beginning the frying process. This permits thermal stabilization, ensuring that adding room-temperature chicken won’t cause dramatic temperature drops that result in grease absorption rather than proper cooking.
The Frying Process: Technique and Timing
Once oil reaches proper temperature, carefully lower prepared chicken tenders into the hot liquid using tongs or a slotted spoon. Never drop chicken from height, as this causes dangerous oil splattering and can fracture the breading.
Fry only a few pieces at a time, maintaining adequate spacing between items. Crowding the pan causes temperature fluctuations and creates steam that undermines the crisping process. The oil should maintain its temperature throughout cooking, so batch size should be small enough that oil temperature doesn’t drop significantly.
Cooking duration typically ranges from 5 to 7 minutes total, though thickness variations affect exact timing. The chicken should develop a deep golden-brown color on both sides. Flip pieces approximately halfway through cooking, using tongs to turn gently without disrupting the breading.
Doneness is confirmed through internal temperature measurement. A meat thermometer inserted into the thickest part of a tender should register 165°F, the food safety standard for poultry. This temperature ensures harmful bacteria are eliminated while maintaining optimal moisture in the meat.
Post-Cooking Finishing Touches
Immediately after frying, transfer cooked chicken tenders to a plate lined with paper towels or wire rack. Paper towels absorb residual surface oil, while wire racks allow air circulation beneath the chicken, preventing steam accumulation that would soften the crispy coating.
For prolonged crispiness, transfer finished tenders to a preheated 200°F oven while you complete cooking remaining batches. This holding method maintains warmth and crispiness without overcooking, allowing you to serve all pieces simultaneously at their peak.
Light salting immediately after frying, while the exterior is still hot, enhances flavor perception and allows salt crystals to adhere to the coating rather than sliding off cooled surfaces.
Flavor Variations and Creative Applications
Beyond the classic preparation, numerous variations provide opportunities for culinary creativity. Consider these approaches:
| Variation | Key Modifications | Best For |
|---|---|---|
| Cajun-Style | Increase cayenne, add paprika and garlic powder | Those preferring bold, spiced flavors |
| Herb-Infused | Incorporate dried oregano, thyme, and basil | Mediterranean flavor preferences |
| Garlic Lovers | Double garlic powder and add garlic salt | Garlic enthusiasts seeking pronounced savor |
| Buttermilk-Marinated | Soak chicken overnight in seasoned buttermilk | Maximum tenderness and flavor penetration |
Storage and Reheating Strategies
Leftover fried chicken tenders maintain quality for three to four days when stored properly in an airtight container in the refrigerator. For longer-term storage, they freeze successfully for up to three months when wrapped individually in plastic wrap before freezing.
Reheating presents challenges for maintaining crispiness. Rather than microwaving, which produces rubbery results, place refrigerated or frozen tenders directly into a 375°F oven for approximately 10-12 minutes. This gentle reheating restores crispiness without excessive drying.
Alternatively, briefly pan-fry thawed tenders in a small amount of oil to restore surface crispness before serving.
Frequently Asked Questions
What’s the difference between chicken tenders and chicken fingers?
Chicken tenders are the naturally tender strip of meat found on the underside of chicken breasts, offering consistent thickness and uniform cooking. Chicken fingers are typically cut from larger chicken breasts sliced into uniform strips. Both work similarly in recipes, though true tenders require minimal trimming.
Can I bake these instead of deep-frying?
While baking produces acceptable results, it cannot replicate the crispy exterior that deep-frying creates. For a compromise between healthfulness and texture, air-frying at 375°F for 10-12 minutes yields significantly crispier results than oven-baking while using minimal oil.
How do I prevent the coating from separating during frying?
Ensure chicken is completely dry before breading, allow the double-dredged coating to set for a few minutes before frying, and avoid excess egg wash that creates slippery surfaces. Proper oil temperature also prevents the breading from separating.
What oil temperature is too high or too low?
Oil below 325°F allows excessive oil absorption, creating greasy results. Above 400°F, exteriors brown before interiors cook. The 350-375°F range provides the optimal balance between browning speed and interior cooking rate.
Can I use bone-in chicken for this recipe?
Yes, though cooking time increases by 2-3 minutes due to greater thickness. Ensure internal temperature reaches 165°F, and be aware that the breading may separate more readily from bone-in pieces during cooking.
References
- Food Safety Guidelines for Poultry — United States Department of Agriculture Food Safety and Inspection Service. 2024. https://www.fsis.usda.gov/food-safety/safe-food-handling-and-preparation/meat-poultry-seafood-and-egg-safety/poultry
- Cooking Temperatures and Food Safety — Centers for Disease Control and Prevention. 2024. https://www.cdc.gov/foodsafety/communication/safe-internal-temperatures.html
- Oil Smoke Points and Cooking Methods — McGee, Harold. “On Food and Cooking: The Science and Lore of the Kitchen.” Scribner. 2004.
- Protein Cookery and Meat Science — American Meat Science Association. 2023. https://www.meatscience.org
- Breading and Coating Techniques in Commercial Food Production — Institute of Food Technologists. 2023. https://www.ift.org