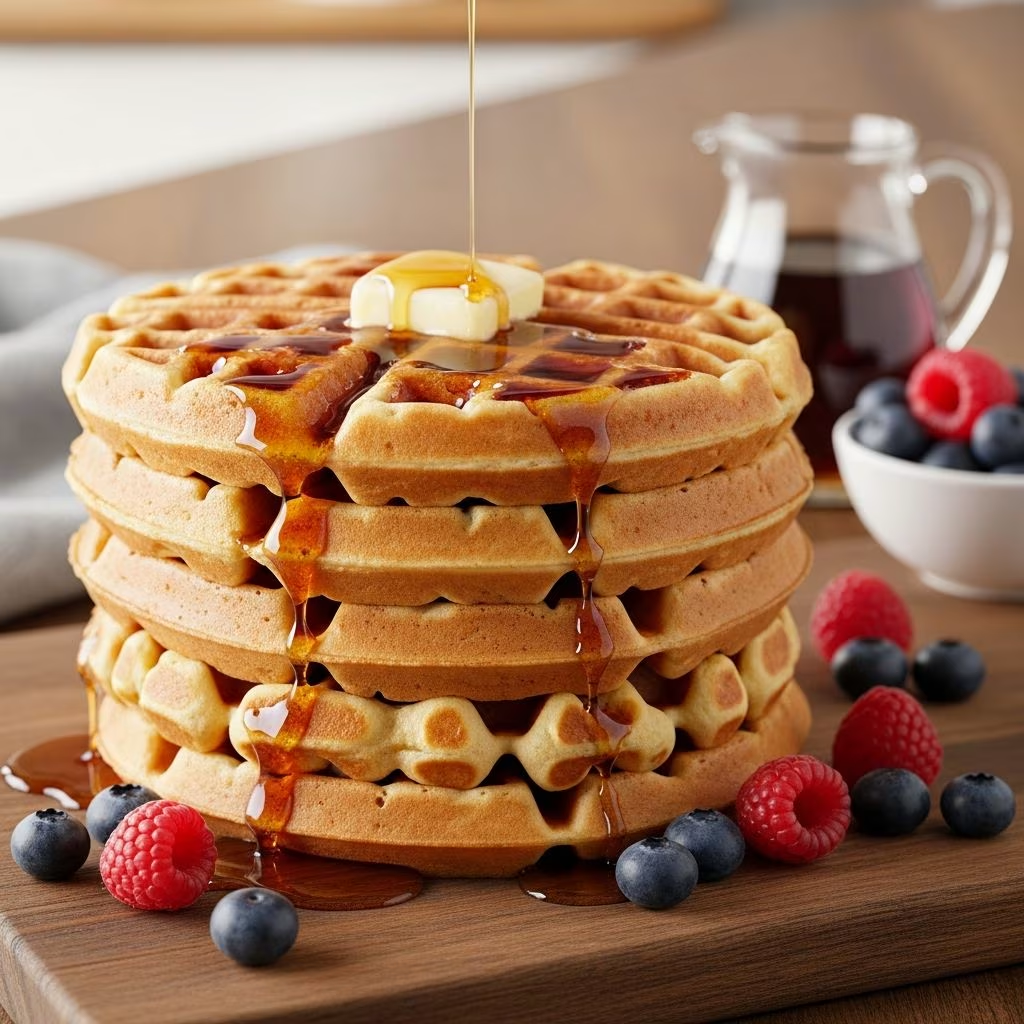
Buttermilk waffles stand out as a breakfast staple thanks to their delightful contrast of crispy golden exteriors and soft, airy interiors. This recipe delivers tender results with minimal effort, using everyday ingredients like flour, buttermilk, eggs, and a touch of leavening agents for optimal lift and flavor. Ideal for family mornings or special brunches, these waffles elevate simple batter into something extraordinary.
Why Choose Buttermilk for Waffles?
Buttermilk brings a subtle tang that enhances flavor while tenderizing the batter through its acidity, which reacts with baking soda to produce carbon dioxide bubbles for fluffiness. Unlike regular milk, it creates steam during cooking, contributing to a light crumb. Warm buttermilk further improves texture by hydrating flour evenly, preventing dense spots. If fresh buttermilk is unavailable, substitute by mixing milk with lemon juice or vinegar—allow it to sit for 10 minutes to curdle.
Essential Ingredients Breakdown
The beauty of this recipe lies in its straightforward components, each playing a crucial role in texture and taste. Here’s a detailed look:
- All-purpose flour (2 cups): Provides structure without heaviness; avoids cake flour’s fragility or bread flour’s chewiness.
- Sugar (2 tablespoons): Adds subtle sweetness and aids in browning via caramelization for crisp edges.
- Baking powder (2 teaspoons) and baking soda (1 teaspoon): Combo ensures maximum rise—baking powder for steady lift, soda for buttermilk reaction.
- Salt (½ teaspoon): Enhances flavors and balances tang.
- Warm buttermilk (2 cups): Key to tenderness and fluff; warmth activates leaveners quickly.
- Melted butter (⅓ cup): Imparts richness and crispness; brown it for nutty depth.
- Eggs (2): Bind ingredients and add lightness without separating whites.
- Vanilla extract (1 teaspoon): Rounds out flavors with warm aroma.
Optional add-ins like cornstarch (¼ cup replacing some flour) boost crispiness by inhibiting gluten development.
Step-by-Step Waffle Preparation
Success hinges on technique. Follow these steps for flawless results:
- Prepare dry mix: In a bowl, whisk flour, sugar, baking powder, baking soda, and salt until uniform. This prevents leavener pockets.
- Mix wet ingredients: Combine warm buttermilk and melted butter, then add eggs and vanilla. Stir gently.
- Combine gently: Fold dry into wet until just mixed—lumps are good to avoid tough gluten.
- Rest batter: Let sit 10-30 minutes. This hydrates flour, thickens batter, and improves browning.
- Preheat iron: Heat fully and grease lightly with oil or butter for non-stick release and crunch.
- Cook precisely: Pour ⅓-½ cup batter per waffle, spreading to edges. Cook until steam subsides and edges are golden, about 4-6 minutes.
| Waffle Iron Type | Batter Amount | Cook Time |
|---|---|---|
| Standard | ⅓ cup | 4-5 min |
| Belgian | ½-¾ cup | 5-6 min |
| Mini | 2-3 tbsp | 3-4 min |
Pro Tips for Waffle Perfection
- Don’t overmix: Small lumps preserve tenderness.
- Brown the butter: Swirl in pan post-melt for toasty notes.
- Resting matters: Enhances flavor and texture.
- Warm storage: Use 225°F oven on a wire rack to maintain crispness.
- Grease smartly: Cooking spray or melted butter prevents sticking.
Creative Flavor Variations
Customize beyond basics:
- Chocolate chip: Fold in ½ cup chips post-mixing.
- Herbed savory: Add 1 tsp dried herbs and omit sugar; top with fried eggs.
- Whole grain: Swap half flour for whole wheat.
- Gluten-free: Use 1:1 GF flour blend.
- Pumpkin spice: Mix in ½ cup puree, 1 tsp cinnamon, ¼ tsp nutmeg.
Topping Ideas to Elevate Your Waffles
Pair with classics or innovate:
- Maple syrup or cinnamon syrup for sweetness.
- Fresh berries, whipped cream, or powdered sugar.
- Savory: Fried chicken, gravy, or avocado.
- Nutty: Peanut butter, Nutella, chopped nuts.
- Fruit preserves, honey, or strawberry sauce.
Storage and Freezing Guide
Make ahead for convenience:
- Room temp: Up to 2 hours on rack.
- Fridge: 2-3 days in airtight container; reheat in toaster.
- Freezer: Cool fully, wrap individually, freeze up to 3 months. Reheat from frozen at 350°F for 5 minutes or toaster.
Batch cooking saves time—waffles freeze better than pancakes due to structure.
Nutrition Snapshot
Per waffle (1/5 batch, plain): ~250 calories, 10g fat, 30g carbs, 8g protein. Varies with toppings. Buttermilk adds calcium; whole grains boost fiber.
Frequently Asked Questions
Can I use regular milk?
Yes, but make DIY buttermilk with 2 tbsp lemon juice per cup milk. Tang and tenderness reduce slightly.
Why are my waffles soggy?
Overmixing, insufficient preheat, or overcrowding batter. Rest and grease well.
Belgian vs. standard iron?
Belgian yields thicker waffles; adjust batter slightly thicker. Both work.
How to make vegan?
Use plant milk + acid, flax eggs, vegan butter.
Can I make batter ahead?
Yes, refrigerate overnight; leaveners weaken after 24 hours.
Troubleshooting Common Issues
| Problem | Cause | Solution |
|---|---|---|
| Dense texture | Overmixing | Mix minimally |
| No crisp | Cold iron | Preheat fully |
| Sticking | No grease | Spray generously |
| Flat | Old leaveners | Test freshness |
Experiment to perfect your setup.
References
- Best Buttermilk Waffle Recipe — Lil’ Luna. 2023-05-15. https://lilluna.com/buttermilk-waffles/
- Grandma’s Buttermilk Waffles — Ambitious Kitchen. 2022-08-10. https://www.ambitiouskitchen.com/grandmas-buttermilk-waffles/
- Crispy Homemade Buttermilk Waffles — Coley Cooks. 2024-01-20. https://coleycooks.com/waffles/
- The BEST Buttermilk Waffles — The Speckled Palate. 2023-11-05. https://www.thespeckledpalate.com/buttermilk-waffles/
- The Best Buttermilk Waffles — Completely Delicious. 2023-03-12. https://www.completelydelicious.com/best-buttermilk-waffles/