Creating breaded pork chops with an impeccably crispy exterior is a culinary skill that combines proper ingredient selection with precise cooking techniques. Whether you’re preparing a weeknight dinner or hosting guests, mastering this classic preparation method elevates your cooking repertoire and delivers consistently excellent results. The transformation of simple pork chops into a restaurant-quality dish hinges on understanding how different elements work together—from the cut of meat you select to the oil temperature during cooking.
Understanding Your Protein: Selecting Quality Pork Chops
The foundation of any successful breaded pork chop dish begins with choosing the right cut and quality of meat. The thickness of your pork chops significantly impacts cooking time and the final texture. Ideally, select chops that measure between three-quarters of an inch and one inch thick. This dimension provides enough substance to remain juicy internally while allowing adequate time for the breading to achieve optimal crispness without the interior overcooking.
Center-cut pork chops typically offer the best balance of tenderness and flavor. These chops come from the loin area and contain moderate marbling that prevents the meat from becoming dry during cooking. When shopping, examine the meat’s color and look for chops with a natural pink hue and minimal surface liquid. Room-temperature meat cooks more evenly than cold meat directly from the refrigerator, so consider removing your pork chops from cold storage approximately thirty minutes before preparation.
Preparing the Protein Surface
Before applying any breading, proper preparation of the pork chop surface ensures better adhesion of the coating and more even browning. Pat the chops thoroughly with paper towels to remove excess moisture. Any residual moisture inhibits crust formation and can cause oil splattering during frying. For thicker chops or those with irregular shapes, consider gentle pounding with a meat mallet to create uniform thickness. This technique promotes even cooking throughout the meat and prevents the breading from cooking at different rates across the surface.
The Three-Layer Breading System: Building Texture and Flavor
Professional kitchens employ a systematic breading approach called the “standard breading procedure,” which creates multiple layers of coating that yield superior crispness. Understanding and implementing this method transforms your results significantly.
First Layer: The Flour Base
The initial flour coating serves as the foundation for your breading system. All-purpose flour works reliably for this purpose, though some practitioners combine all-purpose flour with cornstarch in a ratio of three parts flour to one part cornstarch. This combination creates an especially crispy texture. Season your flour mixture generously with salt and pepper, adding other dry seasonings according to your preference—garlic powder, paprika, dried thyme, or cayenne pepper each impart distinct flavor profiles.
Distribute the seasoned flour mixture evenly across a shallow dish or plate. Working with one pork chop at a time, coat both sides thoroughly, shaking off excess flour. This first layer adheres directly to the meat and provides the binding surface for subsequent layers.
Second Layer: The Binding Egg Wash
The egg wash acts as the adhesive that bonds your flour base to the final breadcrumb layer. Create your egg wash by whisking together whole eggs with approximately one tablespoon of water or milk per two eggs. This liquid consistency ensures even coverage without excessive pooling. Some cooks add a pinch of salt and a few grinds of black pepper to their egg wash for subtle flavor enhancement.
Dip each flour-coated pork chop into the egg wash, ensuring complete coverage on both sides. Allow excess egg wash to drip away before proceeding to the final coating layer. This step is crucial—insufficient egg wash results in weak adhesion, while excessive quantities create unnecessarily thick layers that may not cook through properly.
Third Layer: The Breadcrumb Crust
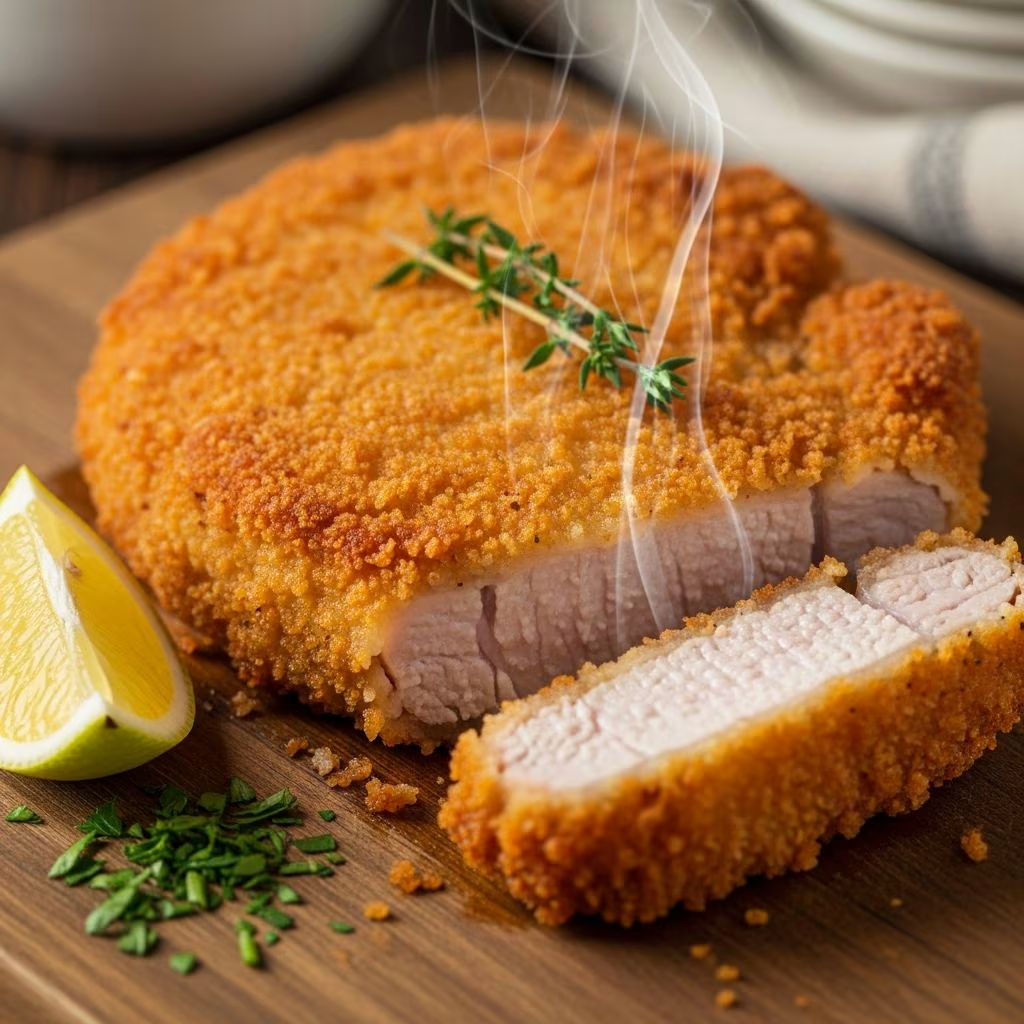
Breadcrumbs form the ultimate protective barrier that creates the signature crispy texture. Panko-style breadcrumbs have become the standard choice for achieving exceptional crispness because of their larger particle size and irregular structure, which creates more surface area for browning. Regular fine breadcrumbs produce adequate results but tend toward a softer crust. Japanese panko breadcrumbs maintain their structural integrity during cooking better than conventional options.
Spread your chosen breadcrumbs in a shallow dish or plate. You may season them identically to your flour mixture or introduce complementary flavors. Some preparations incorporate finely grated Parmesan cheese into the breadcrumb mixture, contributing both flavor and additional browning potential. Press the egg-wash-coated pork chop firmly into the breadcrumb mixture, ensuring complete coverage and good adhesion on both sides.
Resting and Preparation Before Cooking
After completing the breading process, resist the temptation to immediately place the chops in hot oil. Instead, arrange the breaded pork chops on a clean plate and refrigerate them for a minimum of fifteen minutes, though thirty minutes is preferable. This resting period allows the coating to set and adhere more securely to the meat. When the cold breaded chops encounter hot oil, the sudden temperature change creates optimal conditions for crust formation while the coating remains intact.
This step distinguishes home cooks who achieve consistent results from those who experience occasional breading failures such as coating separation or insufficient browning.
Selecting and Heating Your Cooking Oil
The choice of cooking oil and its temperature represents one of the most critical factors in achieving crispness. Select oils with high smoke points—the temperature at which the oil begins to break down and smoke. Vegetable oil, canola oil, and peanut oil all maintain stable properties at the temperatures required for frying breaded items, typically between 325 and 375 degrees Fahrenheit.
Temperature Control and Monitoring
Investing in a reliable thermometer transforms your cooking consistency dramatically. Instant-read thermometers or dedicated fry thermometers provide accurate readings that guide your cooking decisions. Oil that is too cool produces soggy, grease-absorbing breading, while excessively hot oil burns the exterior before the interior cooks properly.
For pan-frying breaded pork chops, maintain oil at approximately 350 degrees Fahrenheit. This temperature allows the breading to develop a mahogany-brown crust while the meat reaches safe internal temperatures without drying out. To verify temperature without a thermometer, drop a small piece of bread into the oil—it should sizzle immediately and turn golden within approximately one minute if the temperature is correct.
Oil Quantity and Pan Selection
Use enough oil to reach halfway up the sides of your pork chops, creating conditions similar to shallow frying. A heavy-bottomed skillet or cast-iron pan distributes heat more evenly than lighter cookware, reducing hot spots that cause uneven browning. Avoid overcrowding the pan—each pork chop requires sufficient space to develop its crust without competing for heat or oil contact.
The Cooking Process: Timing and Technique
Carefully place your rested, breaded pork chops into the preheated oil. Depending on thickness, cook for approximately four to five minutes per side. The surface should transform from pale yellow to deep golden brown during this period. Resist the urge to move the chops constantly—allow each side sufficient time to develop proper color and crust before flipping.
Once both sides achieve the desired golden-brown color, transfer the cooked pork chops to a plate lined with paper towels to drain excess oil. At this point, verify that the internal temperature has reached a safe level—the USDA recommends 145 degrees Fahrenheit for pork, measured at the thickest portion of the meat using an instant-read thermometer.
Common Challenges and Solutions
| Challenge | Probable Cause | Solution |
|---|---|---|
| Breading separates from meat | Insufficient egg wash or inadequate resting time | Ensure thorough egg coating; refrigerate for minimum thirty minutes before cooking |
| Pale, soft crust | Oil temperature too low | Increase oil temperature to 350°F; use a thermometer for accuracy |
| Burnt exterior, undercooked interior | Oil temperature too high or insufficient thickness | Reduce temperature slightly; pound chops to uniform thickness |
| Greasy texture | Oil temperature too low or excessive oil absorption | Maintain proper temperature; drain on paper towels immediately after cooking |
| Uneven browning | Overcrowded pan or hot spots | Cook in batches; use heavy-bottomed cookware for even heat distribution |
Flavor Variations and Customization
Once you master the fundamental technique, countless flavor variations become possible. Italian-seasoned breadcrumb mixtures incorporate dried basil, oregano, and additional Parmesan for Mediterranean-inspired results. Asian-influenced versions might include sesame seeds mixed into panko breadcrumbs with a touch of ginger powder in the flour coating. Cajun variations introduce cayenne pepper, paprika, and garlic powder to each layer for bold, spicy heat.
Experiment with different flour components—some cooks substitute a portion of all-purpose flour with finely ground almond flour or matzo meal for different texture properties. However, maintain at least seventy percent all-purpose flour to ensure proper structure and adhesion throughout the breading system.
Serving Suggestions and Complementary Sides
Perfectly crispy breaded pork chops pair beautifully with numerous accompaniments. Fresh lemon wedges brighten the richness of the fried coating, while simple pan sauces made from broth, white wine, or cream complement the meat’s flavor. Roasted vegetables such as Brussels sprouts or asparagus provide textural contrast. Mashed potatoes or rice absorb the flavorful oil that remains on the plate, while a fresh green salad offers a lighter balance to the substantial main course.
Storing and Reheating Leftovers
Refrigerate leftover breaded pork chops in an airtight container for up to three days. To reheat while maintaining crispness, place chops on a wire rack over a baking sheet and warm in a 350-degree Fahrenheit oven for approximately ten minutes. This method revives the crust more successfully than microwave reheating, which tends to soften the breading. For maximum freshness, consume leftover pork chops within one to two days of cooking.
Frequently Asked Questions
Can I prepare breaded pork chops in advance?
Yes, the breading process is ideally completed several hours before cooking. Arrange breaded chops on a parchment-lined plate, cover loosely with plastic wrap, and refrigerate until ready to cook. This allows the coating to thoroughly set, improving adhesion and crust development.
What is the difference between panko and regular breadcrumbs?
Panko breadcrumbs feature larger, irregularly shaped particles that create more surface area for browning and maintain structural integrity better during cooking. Regular breadcrumbs are finer and more densely packed, resulting in a smoother but sometimes softer crust.
Can I bake breaded pork chops instead of frying?
Baking produces adequate results but rarely achieves the same level of crispness as frying. If baking, spray breaded chops with cooking oil spray, place on a wire rack over a baking sheet, and bake at 400 degrees Fahrenheit for approximately fifteen to eighteen minutes until the internal temperature reaches 145 degrees Fahrenheit.
How do I prevent the breading from burning?
Maintain consistent oil temperature at approximately 350 degrees Fahrenheit and avoid overcrowding the pan. If the oil temperature drops significantly when you add chops, wait for it to recover before cooking additional batches.
Should I use bone-in or boneless pork chops?
Both work well, though boneless chops provide more surface area for breading. Bone-in chops offer superior flavor and attractive presentation. Choose based on personal preference and available inventory.
References
- Safe Minimum Internal Temperature Chart — United States Department of Agriculture Food Safety and Inspection Service. 2024. https://www.fsis.usda.gov/food-safety/safe-food-handling-and-preparation/food-safety-basics/safe-minimum-internal-temperature-chart
- Smoke Point of Cooking Oils: Complete Guide — The Culinary Institute of America. 2023. https://www.cia.edu
- The Science of Breading: Adhesion and Texture Development — Food Network Kitchen. 2024. https://www.foodnetwork.com
- Meat Quality Standards and Selection Guidelines — National Pork Board. 2024. https://www.porkboard.org