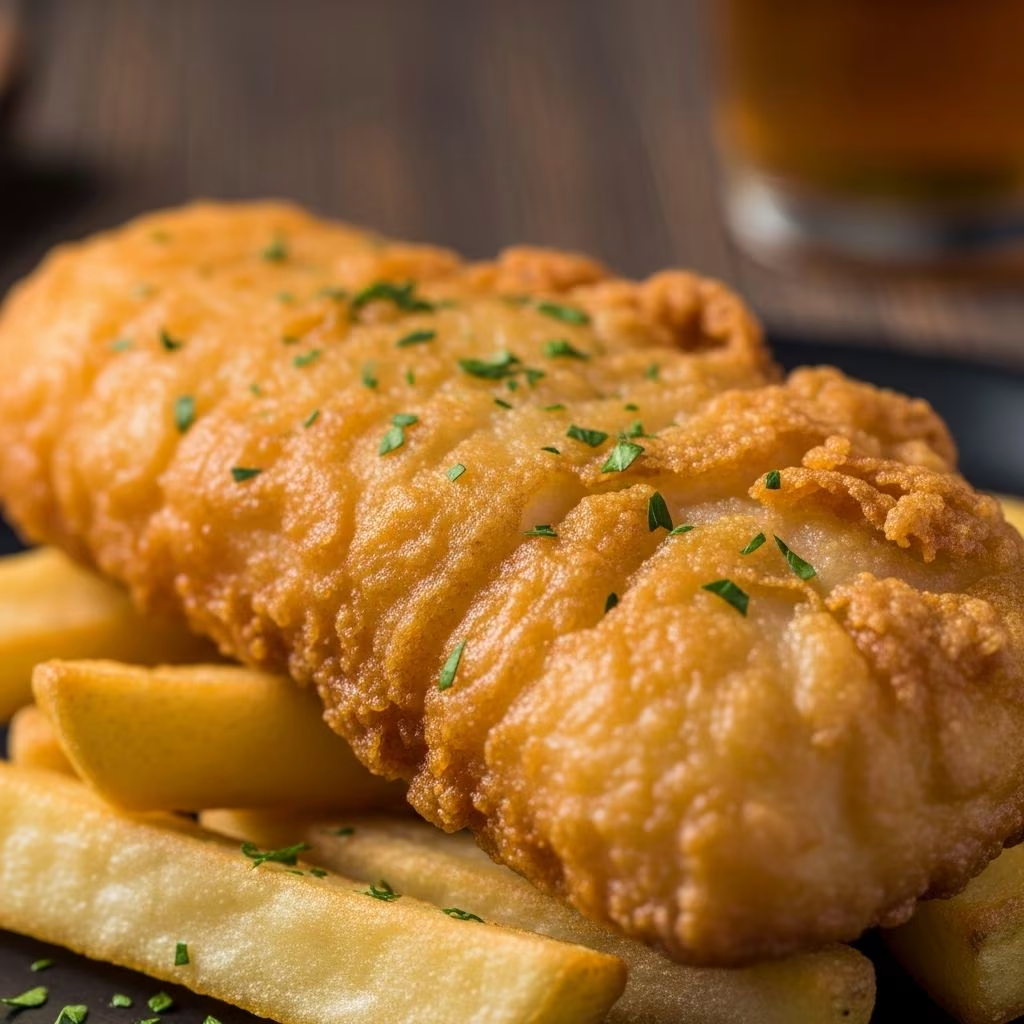
Creating a perfectly crispy, golden-brown beer batter at home requires understanding the balance between ingredients, temperature control, and technique. This comprehensive guide explores everything you need to know to achieve restaurant-quality results when frying foods with beer batter, whether you’re preparing fish fillets, vegetables, or other battered delicacies.
Understanding the Foundation of Beer Batter
Beer batter has become a staple in kitchens worldwide, prized for its ability to create a light, airy crust with exceptional crispiness. The fundamental principle behind beer batter lies in the interaction between carbonated liquid and dry ingredients. The carbonation creates tiny bubbles throughout the batter, which expand when exposed to hot oil, resulting in the desired crispy texture.
The basic structure of beer batter consists of flour as the primary binding agent, combined with specialized additives that enhance texture and promote browning. Unlike standard batters that rely solely on eggs and milk, beer-based batters leverage carbonation to achieve their signature lightness. This distinction makes beer batter particularly effective for achieving the crunchy exterior that many home cooks struggle to accomplish with conventional recipes.
Selecting the Right Ingredients
Flour and Starches
The flour component forms the backbone of your batter structure. Most successful beer batter recipes utilize a combination of all-purpose flour with cornstarch or cornflour. The addition of cornstarch serves a critical purpose—it reduces gluten development and creates a more delicate, crispy coating. A typical ratio involves using one cup of flour combined with two to four tablespoons of cornstarch, though some recipes incorporate self-raising flour for added leavening power.
Cornstarch’s effectiveness stems from its different protein structure compared to wheat flour. By interrupting the gluten network formation, cornstarch prevents the batter from becoming tough or rubbery during frying. This is why many professional kitchens prioritize including cornstarch in their batter formulations.
Leavening Agents
Baking powder plays an essential role in beer batter formulations, typically added at a rate of one to two teaspoons per cup of flour. This ingredient provides chemical leavening that complements the physical leavening action of carbonated beer. The combination of both types of leavening ensures maximum lift and crispiness throughout the coating.
The timing of baking powder addition matters significantly. Many experienced cooks recommend whisking baking powder into the dry ingredients before adding the beer, rather than incorporating it with the wet ingredients. This approach prevents premature activation and ensures the baking powder remains effective when the batter contacts hot oil.
Seasonings and Flavor Enhancement
While beer batter should allow the natural flavors of the main ingredient to shine through, strategic seasoning elevates the overall dish. Common additions include:
- Garlic powder for savory depth
- Onion powder for aromatic complexity
- Paprika for subtle warmth and color enhancement
- Kosher salt for seasoning and texture modification
- Black pepper for gentle spice
These seasonings should be measured carefully, as overpowering flavors can mask the delicate taste of fried fish or vegetables. Proportionally, one teaspoon of each powder per cup of flour provides balanced flavor without overwhelming the palate.
Choosing Your Beer
Beer selection significantly impacts both the flavor profile and texture of your finished batter. Light beers, including pale ales, lagers, and cream ales, represent the optimal choice for most applications. These beers possess sufficient carbonation to create the desired bubbling action without imparting strong malty or bitter flavors to the coating.
The carbonation level directly correlates with batter crispiness—the more pronounced the carbonation, the lighter and airier the final product becomes. When selecting beer, listen for a satisfying hiss upon opening as an indicator of good carbonation levels. Darker beers or heavily hopped styles may transfer noticeable flavors to the batter, which some cooks prefer but others find distracting.
For those avoiding alcohol, carbonated sodas or sparkling water serve as effective substitutes, maintaining the carbonation benefit while eliminating any alcohol content. The key remains preserving adequate carbonation for proper batter performance.
Temperature Control and Oil Preparation
Achieving the Ideal Oil Temperature
Oil temperature represents one of the most critical variables in successful beer batter frying. Most recipes call for heating oil to approximately 375 degrees Fahrenheit, a temperature that creates the ideal balance between cooking the interior and crisping the exterior. At this temperature, the exterior develops a golden-brown color within the appropriate timeframe, typically three to four minutes per side for fish fillets.
Maintaining consistent temperature proves essential. If oil falls below the target range, the batter absorbs excess oil and becomes greasy rather than crispy. Conversely, excessively hot oil can burn the exterior before the interior reaches proper doneness. Using a reliable deep-fry thermometer removes guesswork from this crucial step.
Oil Volume and Saucepan Selection
Adequate oil depth allows for proper cooking and prevents crowding in the cooking vessel. Most home cooks maintain two to three inches of oil in a heavy-bottomed saucepan or dedicated deep fryer. Heavy construction prevents temperature fluctuations caused by rapid oil movement, ensuring consistent results batch after batch.
The choice between stovetop frying and deep fryers depends on personal preference and kitchen equipment. Deep fryers offer superior temperature consistency and larger capacity, while stovetop cooking provides flexibility and requires minimal dedicated equipment. Whichever method you choose, prioritize even heat distribution for reliable results.
Pre-Frying Preparation Techniques
The Dredging Process
Proper dredging establishes the foundation for successful beer batter application. Begin by preparing a flouring mixture—typically comprised of one-half cup flour combined with two tablespoons of cornstarch—in a shallow bowl or dish. This mixture serves as the first stage coating that helps the beer batter adhere to your main ingredient.
Coat each piece of fish or vegetables thoroughly in the flour mixture, then gently tap to remove excess. This step prevents thick flour accumulation that would create uneven batter adherence and potentially separate during frying. The light flour dusting acts as an anchor point for the subsequent beer batter layer.
Beer Batter Application
Once your ingredient is dredged, dip it into the prepared beer batter, ensuring complete coverage with a generous, thick coat. The batter should cling to the floured surface, creating a substantial protective layer. When transferring your item to hot oil, support it gently to prevent batter from sliding off.
Timing matters when applying batter. Work quickly once you’ve mixed the beer with dry ingredients, as carbonation gradually dissipates over time. Using the batter within five to ten minutes of preparation ensures maximum carbonation remains available for creating that desirable crispy texture.
Temperature Control of Ingredients
Keeping both the batter and main ingredients cold before frying promotes several beneficial outcomes. Cold batter experiences a more dramatic temperature shock when entering hot oil, encouraging faster exterior crisping. Additionally, cold fish fillets or vegetables cook more evenly, preventing exterior burning before interior cooking completes.
Refrigerate your prepared batter for up to thirty minutes before use. Some advanced cooks add ice cubes directly to the batter moments before frying, creating an ultra-cold mixture that performs exceptionally well. This approach requires working quickly, as melting ice dilutes the batter, but the results often justify the extra effort.
Mastering the Frying Process
Cooking Times and Indicators
Fish fillets typically require three to four minutes per side when frying in properly heated oil at 375 degrees Fahrenheit. The batter should develop a medium golden-brown color that indicates proper cooking without excessive browning. Visual cues matter, so observe how your first batch cooks to calibrate expectations for subsequent batches.
Avoid overcrowding your cooking vessel, as this drops oil temperature and compromises results. Fry items individually or in small batches, allowing adequate space for heat circulation and batter expansion. Patience during this stage pays dividends in final texture and appearance.
Draining and Finishing
Immediately after removing items from oil, place them on a paper towel-lined plate to drain excess oil. Alternately, wire racks positioned over baking sheets facilitate better air circulation and prevent the bottom from becoming soggy through contact with accumulating oil. Wire racks represent the superior option for maintaining crispiness during the cooling period.
Serve fried items while still hot to maximize the contrast between the crispy exterior and tender interior. Even brief delays allow steam to escape and crispiness to diminish, so coordinate frying with serving whenever possible.
Common Mistakes and Solutions
| Problem | Cause | Solution |
|---|---|---|
| Greasy, heavy batter | Oil temperature too low | Ensure oil reaches 375°F before frying; use thermometer |
| Burnt exterior, raw interior | Oil temperature too high | Reduce oil temperature to 375°F; increase cooking time slightly |
| Tough, rubbery coating | Excess gluten development | Increase cornstarch ratio; avoid overmixing batter |
| Batter separation | Inadequate flour dredging | Apply thicker flour coating before beer batter dipping |
| Dense, non-crispy batter | Low carbonation or flat beer | Use fresh beer with strong carbonation; work quickly |
Ingredient Flexibility and Variations
Beer batter’s versatility extends beyond traditional fish preparations. Vegetables including mushrooms, jalapeños, and onion rings benefit enormously from quality beer batter coating. The fundamental techniques remain consistent regardless of primary ingredient, though cooking times may adjust based on density and thickness.
For non-alcoholic preparations, replace beer with soda water or club soda, ensuring adequate carbonation remains the priority. The cooking process and ingredient combinations function identically to alcohol-containing versions. Some home cooks experiment with flavored sparkling beverages, though neutral options typically produce superior results.
Frequently Asked Questions
Can I prepare beer batter in advance?
Beer batter can be prepared up to thirty minutes ahead of frying, though carbonation gradually diminishes over time. For optimal crispiness, mix batter immediately before use. If preparing ahead, mix only the dry ingredients, then add cold beer just before frying.
What type of fish works best for beer batter?
White-fleshed fish with large flakes, such as cod, halibut, tilapia, and redfish, represent ideal choices. These varieties possess mild flavors that complement rather than compete with beer batter seasoning, and their firm texture maintains integrity during frying.
How do I achieve maximum crispiness?
Maximize crispiness by maintaining oil temperature at exactly 375 degrees Fahrenheit, using fresh carbonated beer, increasing cornstarch content, keeping all ingredients cold before frying, and draining on wire racks rather than paper towels immediately after cooking.
Can overmixing batter ruin the final product?
Yes, excessive mixing develops gluten and deflates carbonation, both of which reduce crispiness. Mix batter just until no flour streaks remain; a few small lumps actually indicate proper mixing technique and contribute to superior texture.
What oil works best for frying?
Neutral-flavored oils with high smoke points—including vegetable, canola, and peanut oil—perform optimally for beer batter frying. Avoid olive oil or butter, which burn at the required temperatures and impart strong flavors.
Professional Tips for Success
Experienced cooks recommend mixing dry ingredients thoroughly before adding beer, ensuring even distribution of leavening agents and seasonings. Take time to whisk together flour, cornstarch, baking powder, and seasonings until completely combined, as this step prevents inconsistent texture throughout batches.
Consider investing in a quality deep-fry thermometer, as this single tool elevates results more significantly than any other equipment. Maintaining precise oil temperature proves impossible through guesswork alone, making a thermometer essential for consistent success.
Prepare your workspace before beginning—line plates with paper towels or position wire racks, ensure all ingredients are ready, and confirm oil temperature before beginning the frying process. This preparation prevents rushing during the actual cooking phase and produces noticeably better results.
Storing and Reheating Fried Items
Freshly fried items represent the peak of quality, but leftovers can be reheated effectively. Store cooled fried foods in airtight containers within the refrigerator for up to three days. Reheat in a 375-degree Fahrenheit oven for approximately ten minutes, which revives crispiness better than microwave reheating.
For extended storage, freeze fried items for up to three months. Thaw in the refrigerator before reheating using the oven method described above. While reheated items never quite match fresh preparations, proper storage and reheating techniques minimize quality degradation.
References
- The Best Beer Batter Recipe — The Kitchen Magpie. Accessed April 2026. https://www.thekitchenmagpie.com/the-best-beer-batter-recipe/