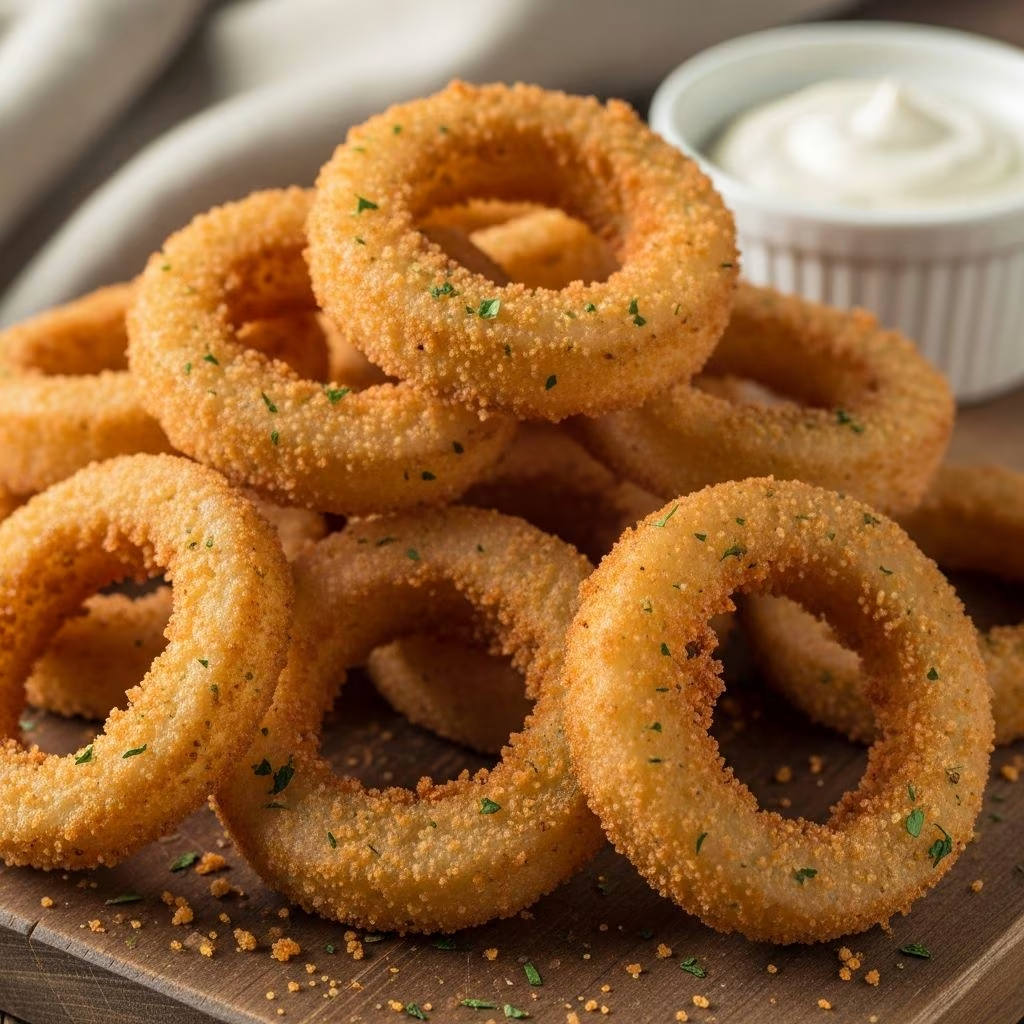
Onion rings have long been a beloved appetizer and side dish, but their traditional preparation through deep frying adds significant calories and fat to an otherwise simple vegetable. The good news is that achieving that coveted crispy exterior and tender interior is entirely possible using your oven. This method transforms onion rings into a lighter option without sacrificing the satisfying crunch that makes them so appealing. By understanding the right techniques and ingredient combinations, home cooks can create restaurant-quality baked onion rings that rival their deep-fried counterparts.
Understanding the Science Behind Crispy Baked Onion Rings
The key to achieving crispiness in baked onion rings lies in understanding how heat and moisture interact with breading. When you bake rather than fry, you’re working with dry heat instead of oil immersion. This requires a strategic approach to coating and preparation to ensure the exterior becomes golden and crunchy rather than soggy. The three-layer dredging process—flour, liquid batter, and breadcrumbs—creates an insulating shell that traps steam from the onion while allowing the exterior to dry and crisp up in the oven’s heat.
The type of breadcrumbs you select significantly impacts the final texture. Panko breadcrumbs, which are larger and airier than regular breadcrumbs, create more surface area for browning and contribute to a superior crunch. The oil content in your breading mixture is essential as well; incorporating fat directly into the coating mixture ensures even browning without relying on deep frying.
Selecting and Preparing Your Onions
The choice of onion variety affects both flavor and texture of your finished dish. Sweet onion varieties such as Vidalia onions are often preferred for this recipe because they provide a milder, sweeter flavor profile that appeals to a broader audience. Yellow onions can also be used, though they offer a more assertive onion flavor. Whatever variety you choose, proper slicing is crucial to the success of your recipe.
When slicing onions, aim for consistent thickness—typically around one-quarter inch for traditional onion rings or one-half inch for sturdier versions. Consistent thickness ensures that all rings cook uniformly without some becoming overcooked while others remain undercooked. After slicing, separate the rings carefully by hand, working gently to keep them intact for the breading process.
Some recipes recommend soaking sliced onions in water before coating. This step serves multiple purposes: it helps separate the rings, removes some of the pungent sulfur compounds that can make raw onions harsh, and provides initial hydration that helps the onion soften during baking. If you choose to soak, use cold water and limit the soaking time to prevent the onions from becoming waterlogged.
Essential Ingredients and Their Roles
| Ingredient | Purpose | Typical Amount |
|---|---|---|
| All-Purpose Flour | Base coating for texture and adhesion | ½ to 2 cups |
| Panko Breadcrumbs | Outer crust for crispness | 2 to 3 cups |
| Buttermilk or Egg Mixture | Binding agent and moisture | 1 to 2 cups |
| Seasonings (Salt, Paprika, Garlic Powder) | Flavor enhancement | Varies by preference |
| Olive Oil or Butter | Added to breadcrumb mixture for browning | 2 to 4 tablespoons |
The liquid component of your batter is particularly important. Buttermilk provides tanginess and helps tenderize the onion while creating a cohesive batter. If buttermilk is unavailable, combining regular milk with a small amount of lemon juice or vinegar creates a suitable substitute. Some recipes use mayonnaise mixed with egg whites as the binding agent, which adds richness and helps achieve browning.
Seasonings should be distributed throughout your flour mixture for even seasoning distribution. Common choices include paprika for color and mild flavor, garlic powder for depth, kosher salt for enhancement, and freshly ground pepper. Some cooks add curry powder, chili powder, or Italian seasoning to create variations in flavor.
The Three-Step Dredging Process
Achieving an even, well-adhered coating requires following a systematic dredging process. This method ensures that each layer adheres properly and contributes to the final texture.
- First step—flour coating: Combine all-purpose flour with your chosen seasonings in a shallow dish. Working with one onion ring at a time, coat it thoroughly in the seasoned flour mixture, shaking off any excess. This initial layer creates a foundation that helps the wet batter adhere to the onion surface.
- Second step—wet batter: Transfer each floured ring to your prepared buttermilk or egg mixture, ensuring complete coverage. Some cooks use a fork to handle the rings during this step to keep hands clean. Allow excess batter to drip back into the bowl before proceeding to the next step.
- Third step—breadcrumb coating: Place each battered ring into a shallow dish containing panko breadcrumbs mixed with a small amount of oil. Press gently to ensure the breadcrumbs adhere well, then transfer to your prepared baking sheet.
This three-layer approach creates distinct textures: the flour provides grip, the batter creates moisture and binding, and the breadcrumbs form the crispy exterior. The oil mixed into the breadcrumbs is essential for achieving golden browning in the oven without deep frying.
Preparing Your Baking Setup
Proper preparation of your baking sheets determines whether your onion rings stick or release easily. Line your baking sheets with parchment paper to prevent sticking and simplify cleanup. Some recipes suggest lightly coating the parchment with cooking spray or oil, though parchment paper alone is often sufficient due to the oil already incorporated into the breading mixture.
Arrange breaded onion rings in a single layer on the prepared sheets, ensuring they do not touch or overlap. This spacing allows hot air to circulate freely around each ring, promoting even cooking and browning. If you have limited oven space, smaller rings can be nested inside larger ones to save room without affecting cooking quality.
Before placing the rings in the oven, apply a light coating of cooking spray to the surface of each ring. This spray provides additional fat that helps the exterior brown and crisp, simulating the effect of oil immersion while using minimal fat.
Baking Temperature and Timing
Oven temperature varies slightly among recipes but generally ranges from 400°F to 450°F. Higher temperatures such as 450°F can produce crispier results more quickly, typically requiring 15 to 20 minutes of baking time. Lower temperatures around 400°F to 425°F may require 20 to 30 minutes for complete cooking.
Baking time depends on several factors including oven calibration, onion ring thickness, and desired crispness level. Most recipes recommend checking rings at the 10 to 15-minute mark and flipping them approximately halfway through cooking to ensure even browning on all sides. Flipping is particularly important for achieving consistent color and crispness on both the top and bottom surfaces.
Onion rings are finished when they achieve a golden-brown color and the onion inside has softened. You can test doneness by removing the largest ring and allowing it to cool slightly before tasting; the onion should be tender while the breading should remain crispy.
Flavor Variations and Creative Additions
While classic onion rings with basic seasonings are delicious, numerous variations can expand your repertoire. Consider these options for different flavor profiles:
- Add cornmeal to your breading mixture for increased crunchiness and subtle corn flavor
- Mix grated Parmesan cheese into the breadcrumb coating for savory depth
- Incorporate curry powder or turmeric for warm, complex spice notes
- Use a Cajun or creole seasoning blend for bold, spicy results
- Add dried Italian herbs for Mediterranean-inspired flavoring
Nutritional Considerations
Baking onion rings instead of deep frying significantly reduces the fat and calorie content while maintaining the appealing texture and flavor. A typical serving of baked onion rings contains a fraction of the fat found in fried versions, making them a more health-conscious choice for those monitoring their intake. The cooking method preserves more of the onion’s nutritional content, including beneficial compounds like quercetin, an antioxidant found in onions.
Storage and Reheating Guidance
Leftover baked onion rings can be stored in an airtight container in the refrigerator for up to three days. When ready to enjoy them again, reheating properly maintains their crispy texture. Place stored rings on a baking sheet and warm them in a 400°F oven for approximately 10 to 12 minutes, until they return to their desired crispness. Avoid using a microwave for reheating, as this method tends to soften the breading rather than restore crispness.
For longer-term storage, you can freeze uncooked breaded onion rings on a baking sheet for several hours, then transfer them to a freezer-safe container for up to three months. Bake frozen rings directly from the freezer, adding a few extra minutes to the cooking time to ensure the onion is fully softened and heated through.
Troubleshooting Common Issues
Even with careful technique, you may encounter occasional challenges. Soggy breading usually results from insufficient spacing on the baking sheet, inadequate cooking spray application, or oven temperature that is too low. Ensure proper air circulation and maintain adequate oven temperature to achieve crispness. If rings remain undercooked after the recommended time, lower your oven rack position to bring rings closer to the heating element and continue baking.
Breading that falls off indicates insufficient adhesion, typically caused by excess moisture on the onion before coating or inadequate pressing during the breadcrumb step. Ensure onions are patted dry after soaking, and press firmly when applying breadcrumbs to promote adhesion.
Serving Suggestions and Pairings
Baked onion rings pair beautifully with numerous dipping sauces. Traditional choices include ketchup, ranch dressing, and mayonnaise-based sauces. For more adventurous options, consider sriracha mayo, garlic aioli, or vinegar-based dipping sauces. Onion rings also complement main courses as a side dish, from burgers to grilled meats, or can serve as an appetizer for entertaining.
Frequently Asked Questions
Can I prepare onion rings ahead of time?
Yes, you can bread onion rings several hours in advance and refrigerate them on a baking sheet until ready to bake. This allows you to prepare components ahead for entertaining. Bake directly from the refrigerator, adding one to two minutes to the cooking time.
What is the best onion variety for this recipe?
Sweet onion varieties such as Vidalia, Walla Walla, or Texas Sweet are ideal because they provide mild, sweet flavor. Yellow or white onions work well if sweet varieties are unavailable, though they offer more assertive onion flavor.
How can I make this recipe gluten-free?
Substitute all-purpose flour with a gluten-free flour blend designed for baking, and use certified gluten-free panko breadcrumbs. The technique remains identical, though you may need to experiment slightly with liquid ratios as gluten-free flours absorb moisture differently.
Why are my onion rings not crisping?
Lack of crispness usually stems from insufficient cooking spray application, overcrowding on the baking sheet, or oven temperature that is too low. Ensure proper spacing, apply adequate cooking spray, and verify your oven temperature with an independent thermometer.
References
- Crispy Oven Baked Onion Rings — Life, Love, and Good Food. Retrieved from https://lifeloveandgoodfood.com/crispy-oven-baked-onion-rings/
- Crispy Oven Baked Onion Rings with Panko Crust — Little Black Skillet. Retrieved from https://littleblackskillet.com/oven-baked-onion-rings/
- Baked Onion Rings Recipe — Forks Over Knives. Retrieved from https://www.forksoverknives.com/recipes/vegan-snacks-appetizers/onion-rings/
- Baked Onion Rings — Food Network. Retrieved from https://www.youtube.com/watch?v=RrN3WLJnabI
- Crispy Baked Onion Rings — Erren’s Kitchen. Retrieved from https://www.errenskitchen.com/skinny-seasoned-baked-onion-rings/
- Oven Baked Onion Rings — Instructables. Retrieved from https://www.instructables.com/oven-baked-onion-rings/
- Best Onion Rings Recipe in the Oven — YouTube. Retrieved from https://www.youtube.com/watch?v=gkA1B9zEE80
- Baked Onion Rings — Brooklyn Farm Girl. Retrieved from https://brooklynfarmgirl.com/baked-onion-rings/