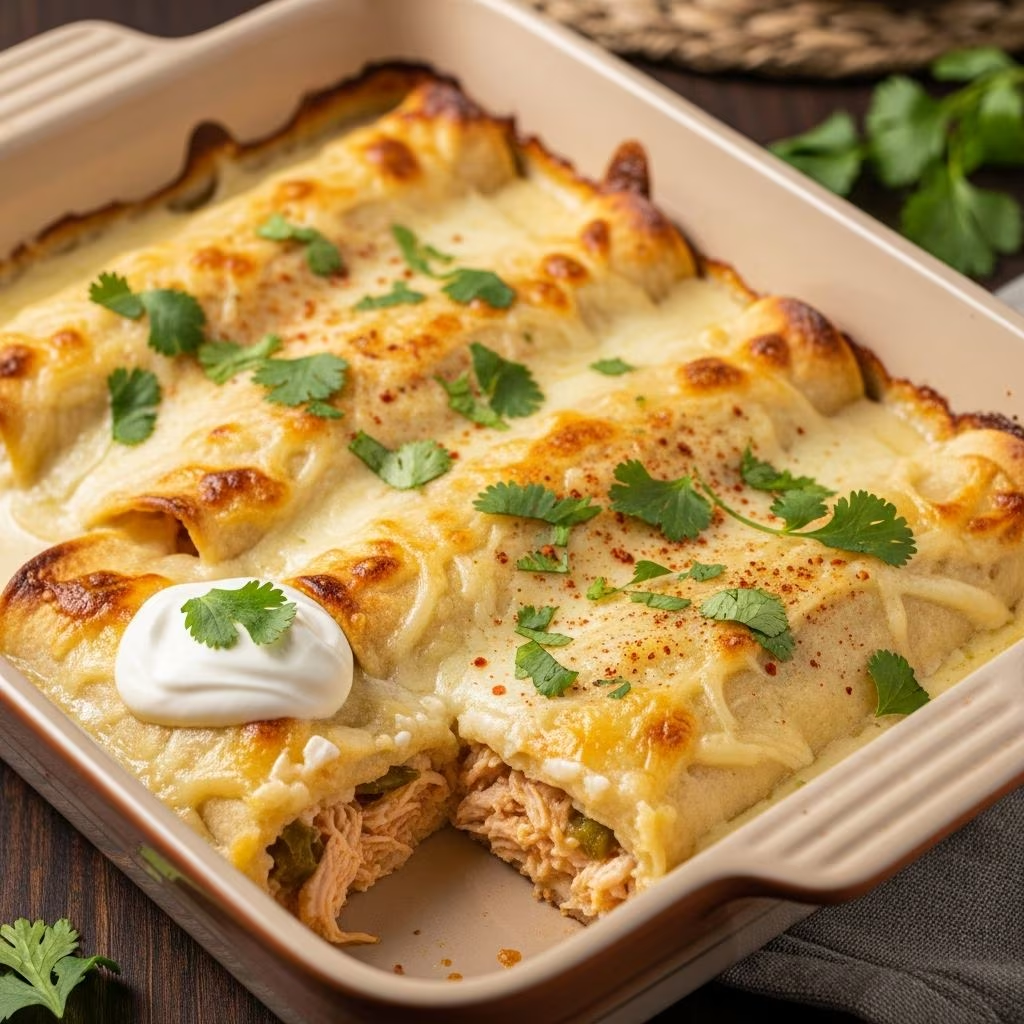
Creamy chicken enchiladas represent one of the most versatile and satisfying dinner options available to home cooks. This Mexican-inspired dish combines tender shredded chicken, melted cheese, and a luxurious creamy sauce, all wrapped in soft tortillas and baked to golden perfection. Whether you’re preparing dinner for your family or hosting guests, this dish consistently delivers restaurant-quality results without requiring advanced culinary skills.
Understanding the Core Components of This Dish
To master creamy chicken enchiladas, it helps to understand how each component contributes to the final result. The foundation consists of four essential elements: the protein base, the tortilla wrapper, the creamy sauce, and the cheese topping. Each element plays a crucial role in creating the layered flavors and textures that make this dish so appealing.
The protein component typically features shredded chicken, which can come from several sources. Rotisserie chicken offers convenience and saves preparation time, while freshly cooked and shredded chicken provides a fresher taste profile. Leftover chicken from previous meals works excellently, making this an ideal recipe for repurposing ingredients. The chicken should be tender and easily pulled apart into uniform pieces.
Tortillas serve as the edible vessel for your filling. Both flour and corn tortillas work effectively, though flour tortillas tend to be more pliable and forgiving for wrapping purposes. Corn tortillas offer a more authentic flavor and work particularly well when you plan to freeze leftovers, as they maintain better texture during the freezing process.
Constructing the Perfect Creamy Sauce
The sauce distinguishes creamy chicken enchiladas from their red sauce counterparts and deserves special attention. Several approaches exist for creating this crucial element.
Traditional Cream-Based Sauce Method
This method begins by melting butter in a skillet over medium heat. Once melted, flour is whisked in to create a roux, which acts as a thickening agent. The mixture should cook for approximately one minute, stirring constantly to prevent lumps from forming. After this brief cooking period, chicken broth is gradually added while whisking continuously to maintain a smooth consistency. The mixture will thicken slightly as it simmers for a few minutes. Finally, sour cream and diced green chiles are stirred in, and the sauce is removed from heat immediately to prevent curdling.
Cream Cheese Shortcut Method
For those seeking maximum simplicity, softened cream cheese combined with sour cream creates an equally delicious sauce. To execute this method effectively, cube the cream cheese and microwave it for 15-second intervals until it reaches a very soft consistency. Then mix the softened cream cheese with sour cream and salsa until the mixture becomes smooth and pourable. This approach eliminates the need for making a traditional roux and reduces preparation time significantly.
Soup-Based Convenience Method
Many variations incorporate canned cream of chicken soup as a base ingredient. This method involves combining the soup with sour cream and other seasonings to create a quick, foolproof sauce that requires no stovetop cooking techniques.
Essential Ingredients and Ingredient Variations
While numerous ingredient combinations work well, understanding the core ingredients allows for successful variations tailored to your preferences.
| Ingredient Category | Primary Options | Quantity Guide |
|---|---|---|
| Chicken | Rotisserie, cooked shredded, or canned | 2-3 cups shredded |
| Cheese | Monterey Jack, Cheddar, Mexican blend | 2-3 cups total |
| Tortillas | Flour or corn, 8-10 inch diameter | 8-10 tortillas |
| Creamy Base | Sour cream, cream cheese, soup | 1-2 cups combined |
| Sauce Component | Salsa, green chiles, enchilada sauce | 1-2 cups |
Step-by-Step Assembly and Preparation Process
Successful enchilada preparation follows a logical sequence that ensures even cooking and optimal flavor distribution.
Preparation Phase
Begin by preheating your oven to 350°F, as this temperature allows the enchiladas to heat through completely while preventing excessive browning of the cheese topping. While the oven preheats, prepare your filling by combining shredded chicken with approximately one cup of shredded cheese and seasonings in a medium bowl.
Prepare your sauce according to your chosen method. If using the cream-based method, this step takes approximately 10 minutes. If using a shortcut method, you can prepare the sauce while the oven preheats.
Assembly Phase
Lightly spray a 9×13-inch baking dish with cooking spray to prevent sticking. Spread a thin layer of your prepared sauce on the bottom of the dish—approximately one-quarter cup. This foundation layer prevents the enchiladas from sticking and creates a moisture-rich environment for even cooking.
Working with one tortilla at a time, place it on a flat surface and spoon approximately one-quarter to one-half cup of the chicken mixture down the center of the tortilla. The exact amount depends on your tortilla size and filling consistency. Roll the tortilla tightly, being careful not to tear it, and place it seam-side down in the prepared baking dish. This orientation prevents the filling from escaping during baking.
Repeat this process with remaining tortillas, arranging them snugly in the baking dish in a single layer. It’s acceptable if the enchiladas touch slightly, as they’ll cook more evenly when nestled together.
Finishing Phase
Pour the remaining sauce over the enchiladas, ensuring that all exposed portions receive coverage. Some recipes recommend leaving the edges slightly uncovered to allow them to crisp during baking. Sprinkle the remaining shredded cheese evenly over the top, distributing it to ensure every enchilada receives adequate coverage.
Baking and Timing Considerations
Bake the assembled enchiladas for 20-30 minutes, depending on your oven and the filling temperature. You’re looking for signs that the filling has heated through completely and the cheese has melted and begun to brown slightly. If the cheese isn’t browning sufficiently after 25 minutes, briefly switch your oven to broil setting and broil for one to two minutes until the cheese achieves the desired appearance.
Allow the baked enchiladas to rest for 5-10 minutes after removing from the oven. This resting period allows the sauce to set slightly, making the enchiladas easier to serve and preventing the sauce from running across the plate.
Flavor Enhancement and Seasoning Strategies
Beyond the basic recipe, several techniques elevate the flavor profile of your enchiladas. Chili powder adds authentic depth and warmth. Cumin contributes earthiness that complements the other ingredients. Fresh cilantro stirred into the sauce at the end of cooking provides brightness and freshness. Jalapeño slices added during assembly create layers of heat for those who enjoy spice.
Green chiles are a traditional ingredient that adds authentic flavor and mild spiciness. Diced tomatoes mixed into the sauce increase the vegetable content while adding slight acidity that balances richness. Onions sautéed until golden before being incorporated into the filling add subtle sweetness and complexity.
Topping Options and Serving Suggestions
While the enchiladas finish baking, prepare complementary toppings that add freshness and texture. Sour cream dolloped on top of each serving provides cooling contrast to any spice. Sliced avocado adds creamy richness and nutritional value. Fresh cilantro leaves scattered over the top contribute aromatic brightness. Diced tomatoes add visual appeal and acidic contrast. Sliced radishes provide crisp texture and peppery flavor. A lime wedge served alongside encourages diners to add citrus brightness to each bite.
Storage and Make-Ahead Instructions
Creamy chicken enchiladas adapt well to advance preparation and storage. Assemble the enchiladas completely in the baking dish without baking, cover with plastic wrap or aluminum foil, and refrigerate for up to 24 hours. When ready to serve, add five to ten minutes to the baking time since the dish begins from a cold state. For longer storage, freeze unbaked enchiladas for up to three months. Thaw overnight in the refrigerator before baking.
Leftover baked enchiladas store well in an airtight container in the refrigerator for three to four days. Reheat in a 350°F oven for 15-20 minutes until warmed through. Alternatively, individual portions can be reheated in a microwave, though this method may result in slightly less even heating.
Troubleshooting Common Issues
Dry enchiladas: This issue typically results from insufficient sauce. Ensure you’re using adequate sauce and that it thoroughly coats the filled tortillas. Consider increasing the sauce component in future preparations.
Tough or rubbery tortillas: This occurs when tortillas dry out during baking. Ensure tortillas are completely covered by sauce, or cover the baking dish loosely with foil for the first 15 minutes of baking.
Runny filling: Excessively wet filling makes rolling difficult. If your shredded chicken is very wet, drain it before combining with other filling ingredients. Some recipes reserve a portion of sauce specifically for topping to prevent oversaturating the filling.
Sauce separation: If using sour cream in your sauce, avoid boiling the mixture, as this causes separation. Add sour cream at the end of sauce preparation and keep temperatures below boiling point.
Frequently Asked Questions
Can I use rotisserie chicken from the grocery store?
Absolutely. Rotisserie chicken saves significant preparation time and produces excellent results. Simply shred the meat using two forks or your hands after it has cooled slightly.
What type of cheese works best?
Monterey Jack and Cheddar are traditional choices that melt smoothly. Mexican cheese blends specifically formulated for enchiladas are also widely available. Avoid using mozzarella exclusively, as it doesn’t provide the same flavor depth.
How can I make this dish vegetarian?
Substitute shredded chicken with sautéed vegetables like zucchini, bell peppers, mushrooms, and spinach. Maintain the same sauce components and assembly process.
Is it possible to prepare these in advance?
Yes. Assemble the enchiladas, cover, and refrigerate up to 24 hours before baking. You can also freeze unbaked enchiladas for up to three months.
What sides pair well with enchiladas?
Spanish rice, refried beans, black beans, a fresh green salad, or cilantro-lime rice all complement enchiladas well.
Variations and Creative Adaptations
While the classic preparation is excellent, several variations offer fresh takes on the traditional recipe. Substitute green salsa with red salsa for a different flavor profile. Add diced jalapeños to the filling for increased heat. Incorporate sautéed onions into the sauce for added depth. Layer black beans with the chicken filling for increased nutritional content and heartiness. Create a white sauce variation by using chicken broth and cream without any salsa component.
References
- Creamy Chicken Enchiladas Recipe — Like Mother, Like Daughter. 2024. https://lmld.org/creamy-chicken-enchiladas/
- Creamy White Chicken Enchiladas — The Country Cook. 2024. https://www.thecountrycook.net/creamy-chicken-enchiladas/
- Sour Cream Chicken Enchiladas Recipe — Homesick Texan. 2024. https://www.homesicktexan.com/sour-cream-chicken-enchiladas-recipe/
- Creamy Chicken Enchiladas — Salt & Lavender. 2024. https://www.saltandlavender.com/creamy-chicken-enchiladas/
- Creamy Chicken Enchiladas — Lemon Tree Dwelling. 2024. https://www.lemontreedwelling.com/creamy-chicken-enchiladas/