Decorating cookies transforms simple baked goods into works of art, perfect for holidays, parties, or everyday enjoyment. Whether you’re a novice or looking to refine your skills, understanding the fundamentals of icing application and embellishments opens up endless creative possibilities. This guide explores essential methods, tools, and pro tips drawn from reliable baking practices to help you achieve polished, eye-catching designs.
Essential Tools for Cookie Decorating
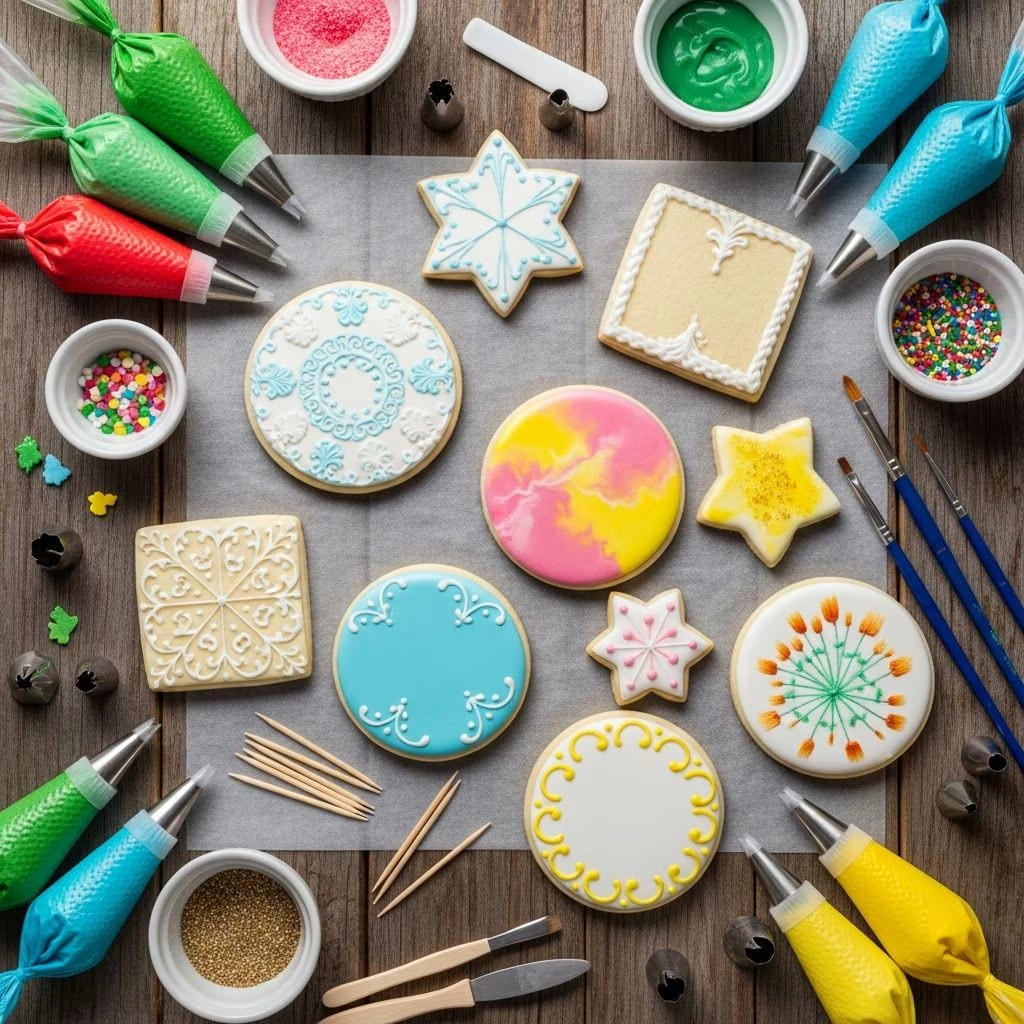
Starting with the right equipment makes the process smoother and more enjoyable. Basic supplies include piping bags, tips, couplers, and gel food coloring for vibrant hues that don’t alter icing consistency.
- Piping bags and tips: Use disposable or reusable bags fitted with couplers for easy tip swaps. Round tips like #2 for details and #4 for outlines and flooding are staples.
- Toothpicks and offset spatulas: Ideal for spreading icing evenly or correcting mistakes without disrupting the surface.
- Sprinkles and edible accents: Add texture with sugars, pearls, or glitter while icing is wet for secure adhesion.
- Clips and stands: Secure bag ends to prevent leaks and prop cookies upright during drying.
Invest in quality gel colors to maintain icing flow; liquid colors can thin mixtures undesirably. For beginners, sandwich bags serve as affordable piping alternatives.
Preparing the Perfect Royal Icing Base
Royal icing, made from confectioners’ sugar, aquafaba or meringue powder, and water, dries hard for stackable cookies. Consistency is key: thicker for outlines, thinner for flooding.
Basic Recipe (Yields enough for 2 dozen cookies):
| Ingredient | Amount |
|---|---|
| Confectioners’ sugar | 4 cups |
| Aquafaba or meringue powder mixture | 4-6 tbsp |
| Extract (vanilla, almond) | 1 tsp (optional) |
| Gel food coloring | As needed |
- Mix sugar and aquafaba until smooth, adjusting liquid for desired thickness.
- Divide into bowls, tint with gel colors, and transfer to piping bags.
- Test consistency: Outline icing should hold peaks; flood icing should settle flat in 10-15 seconds.
Store in airtight containers; remix periodically to prevent crusting. Vegan options using aquafaba mimic traditional egg-white versions effectively.
Core Technique: Outlining and Flooding
The foundation of most designs is outlining a border with stiff icing, followed by flooding the interior with thinner icing. This prevents drips and creates clean edges.
Steps for single-color flooding:
- Pipe a continuous outline around the cookie edge using tip #4.
- Immediately flood the center, using a toothpick to guide icing into corners.
- Add wet sprinkles for embedded sparkle; shake gently to even.
Drying time: 1-2 hours for stacking. This method suits simple shapes like hearts or stars, yielding professional results with minimal effort.
Building Dimension with Layered Icing
Elevate basic floods by adding a second layer after the first sets. This creates raised details like polka dots, stripes, or messages.
- Flood base layer and dry 1-2 hours.
- Switch to finer tip #2 for precise piping on top.
- Allow full set (4-6 hours) before packaging.
Layering adds depth without complexity; experiment with color contrasts for stripes on rectangular cookies or swirls on rounds.
Sectioned Designs for Multi-Color Effects
For vibrant, non-bleeding patterns, pipe sections alternately, allowing partial drying between applications.
On pumpkin or tree shapes:
- Outline and flood center section.
- Pipe adjacent areas, leaving gaps; dry 30 minutes.
- Fill gaps once set, preventing bleed.
This technique shines on complex outlines, maintaining sharp divisions even with bold colors.
Sprinkle-Enhanced Sectioning
Combine sections with sprinkles for speedy, textured looks—no long waits required.
- Pipe and flood sprinkle-designated areas first.
- Dip immediately into sugars or nonpareils.
- Proceed with remaining icing sections.
Ideal for flowers: Center dip in sprinkles, then alternate petals. Sprinkles act as barriers, keeping colors distinct.
Advanced Embellishments and Finishes
Beyond icing, incorporate elements for wow-factor designs.
| Method | Description | Best For |
|---|---|---|
| Stenciling | Dust powders over stencils for patterns. | Geometric motifs |
| Royal Icing Transfers | Pipe designs on parchment, attach when dry. | Custom shapes |
| Modeling Chocolate | Mold accents like flowers or figures. | 3D details |
| Edible Lace/Wafer Paper | Add delicate filigree or petals. | Wedding cookies |
Frosting sheets allow stamping or cutting for printable designs. Airbrushing offers ombre effects for pros.
Troubleshooting Common Issues
Even experts face hiccups; quick fixes keep projects on track.
- Bleeding colors: Ensure sections set 30+ minutes; use barriers.
- Lumpy icing: Sift sugar; remix gently.
- Cracking: Avoid over-thinning; dry in low humidity.
- Soft set: Increase drying time or add stabilizer.
Practice on parchment first to perfect pressure control.
Storage and Presentation Tips
Proper handling preserves designs. Store in single layers at room temp; freeze airtight for longer. Package in cellophane bags with ribbons for gifts.
Display on tiers or platters; humidity-proof with fans during events.
Seasonal and Themed Ideas
Adapt techniques year-round:
- Holidays: Red/green floods with white details for trees; orange sections for pumpkins.
- Weddings: Lace overlays and pearl accents.
- Birthdays: Bold stenciled numbers and sprinkles.
Scale complexity to skill: Beginners start flooded; advance to transfers.
FAQ
What is the best icing for cookie decorating?
Royal icing dries firm, ideal for stacking. Use buttercream for softer eats.
How long does royal icing take to dry?
Floods set in 1-2 hours; full cure 4-24 hours depending on thickness.
Can I make royal icing vegan?
Yes, aquafaba replaces egg whites seamlessly.
What if my icing is too thick/thin?
Add water drop-by-drop for thinning; more sugar for thickening. Test ribboning.
Are piping tips necessary?
Not for starters—ziplocks work; tips enhance precision.
References
- How to Decorate Sugar Cookies (4 Ways + Video) — Sally’s Baking Addiction. 2023-12-01. https://sallysbakingaddiction.com/decorated-sugar-cookies/
- How to Decorate Cookies Like a Professional — Collin Street Bakery. 2024-05-15. https://collinstreet.com/blogs/recipes/how-to-decorate-cookies-like-a-professional
- Beginner Guide to Cookie Decorating — Haniela’s. 2023-11-10. https://www.hanielas.com/cookie-decorating/
- How to Decorate Sugar Cookies | Sally’s Baking — YouTube (Sally’s Baking Recipes). 2023-01-20. https://www.youtube.com/watch?v=a7-F5KcmPK4
- How To Start Decorating Cookies – A Beginners Guide — SweetAmbs. 2024-02-28. https://www.sweetambs.com/tutorial/how-to-start-decorating-cookies-a-beginners-guide/