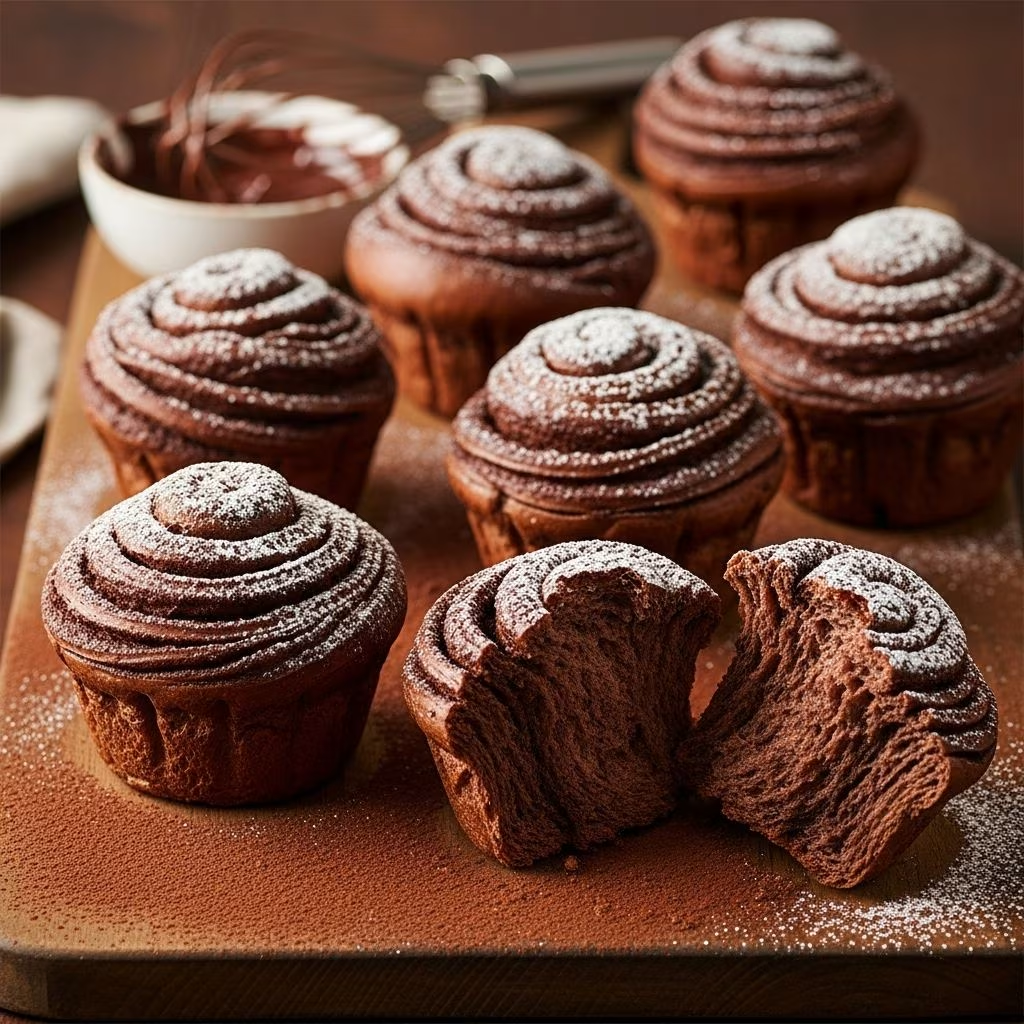
Indulge in the luxurious texture of **cocoa brioche morning buns**, where buttery, enriched dough meets intense chocolate swirls for a pastry that rivals professional bakeries. These buns combine the lightness of brioche with the flakiness of laminated dough, creating layers that melt in your mouth.
Why Cocoa Brioche Buns Captivate Bakers
Brioche dough stands out due to its high butter and egg content, resulting in a soft, golden crumb that’s ideal for sweet pastries. Infusing cocoa into the mix or filling adds depth, transforming simple buns into gourmet delights perfect for brunches or afternoon snacks.
The lamination process—folding butter into the dough—creates airy layers that puff dramatically in the oven. This technique, borrowed from croissant-making, elevates basic buns to something extraordinary, offering crisp exteriors and tender interiors.
Essential Ingredients for Success
Gathering high-quality components is crucial for authentic flavor and structure. Focus on European-style butters with higher fat content for superior rise and taste.
- Flour: Bread or all-purpose flour provides gluten strength; aim for 500-700g per batch.
- Yeast: Instant or fresh yeast ensures reliable fermentation; 2-7g activates the dough.
- Fats: 200-300g softened butter, cubed for easy incorporation.
- Sweeteners: Granulated sugar (100-200g) feeds yeast and tenderizes.
- Eggs: Whole eggs plus yolks boost richness and color.
- Cocoa & Chocolate: Unsweetened powder and bittersweet chunks for filling intensity.
- Liquids: Room-temperature water or milk (200-250ml) hydrates without shocking yeast.
Optional add-ins like vanilla extract, orange zest, or sea salt enhance complexity.
Mastering the Brioche Dough Base
Start with a stand mixer fitted with a dough hook for efficiency. The dough’s high hydration and fat make it sticky—patience is key.
- Combine dry ingredients: flour, yeast, salt, and sugar in the mixer bowl.
- Mix wet ingredients separately: water, eggs, and yolk until uniform.
- Gradually add liquids to dry on low speed until a shaggy dough forms (2 minutes).
- Incorporate butter piece by piece on medium-low, kneading 10-15 minutes until smooth and elastic. It should pull away from the bowl sides.
Divide into plain and cocoa portions if desired: knead cocoa powder into half for contrast. Proof in greased bowls until doubled, about 1 hour at room temp.
Pro Tip: Temperature Control
Keep dough and butter at 68-72°F (20-22°C). Too warm, and butter leaks; too cold, and it cracks during rolling.
Crafting the Irresistible Chocolate Filling
A glossy, fudgy filling binds the layers. Melt chocolate, butter, and cocoa gently, then cool and whisk in sugar and egg white for shine.
- 2oz bittersweet chocolate, chopped
- 4 tbsp butter
- 3 tbsp cocoa powder
- ¼ cup confectioners’ sugar
- 1 egg white
Microwave in bursts at 50% power, stirring until smooth. Cool 30 minutes before spreading thinly over dough, avoiding edges.
Laminating for Flaky Perfection
Lamination traps steam for lift. Chill dough squares, layer with filling, stack, and refrigerate 30 minutes.
| Step | Action | Time/Chill |
|---|---|---|
| 1. Shape | Press plain dough into 6×6-inch square | – |
| 2. Fill | Spread cooled filling evenly | – |
| 3. Top | Add cocoa dough square, press | 30 min fridge |
| 4. Roll | Extend to 12×16-inch rectangle | – |
| 5. Cut | Slice into 1-inch strips | – |
| 6. Coil | Twist into S-shapes | 2+ hours fridge |
Coil strips tightly into spirals or S-forms for visual appeal. Space on parchment-lined sheets.
Proofing and Baking Techniques
Overnight refrigeration develops flavor and relaxes gluten. Proof at room temp 1 hour pre-bake.
- Preheat to 350°F (175°C), dual racks.
- Brush with egg wash (yolk + milk) for gloss.
- Bake 18-22 minutes, rotating midway until deep golden.
Cool on racks to prevent sogginess. Yield: 12 large buns.
Variations to Suit Every Craving
Customize for diversity:
- Classic Chocolate Chip: Fold chips into dough post-chill.
- Orange Infusion: Add zest and flower water to dough.
- Nutty Twist: Mix hazelnuts or pecans into filling.
- Savory Spin: Omit sugar, add cheese and herbs.
- Cruffin Style: Bake in muffin tins for density.
Troubleshooting Common Pitfalls
| Issue | Cause | Solution |
|---|---|---|
| Dough too sticky | High hydration | Flour hands/counter lightly; knead longer |
| Flat buns | Underproofed | Extend rise time; check finger poke test |
| Butter leaks | Warm temps | Chill more; cooler room |
| Pale color | Weak egg wash | Use yolk-heavy mix; bake hotter initially |
| Dense texture | Overworked gluten | Gentle handling post-lamination |
Storage and Make-Ahead Strategies
Fresh is best, but freeze shaped buns pre-proof up to 1 month. Thaw overnight, proof, and bake. Store airtight 2 days; refresh in 300°F oven 5 minutes.
Pairing Ideas for Brunch Glory
Serve warm with coffee, fresh berries, or yogurt. For indulgence, dust with powdered sugar or drizzle ganache.
FAQ
Can I make these without a stand mixer?
Yes, knead by hand 25-30 minutes until satiny, but it’s labor-intensive.
How do I know dough is ready to rise?
It should windowpane—stretch thin without tearing.
Vegetarian version?
Replace egg white in filling with aquafaba; use plant milk.
Scaling for smaller batches?
Halve ingredients; yields 6 buns, adjust times slightly.
Gluten-free adaptation?
Use GF flour blend with xanthan gum, but layers may differ.
References
- Chocolate Brioche Buns Recipe — Plugrà. Accessed 2026. https://plugra.com/recipe/chocolate-brioche-buns/
- Easy Chocolate Brioche Buns — Del’s Cooking Twist. Accessed 2026. https://www.delscookingtwist.com/easy-chocolate-brioche-buns/
- Chocolate Morning Buns — Buttermilk by Sam. Accessed 2026. https://buttermilkbysam.com/chocolate-morning-buns/