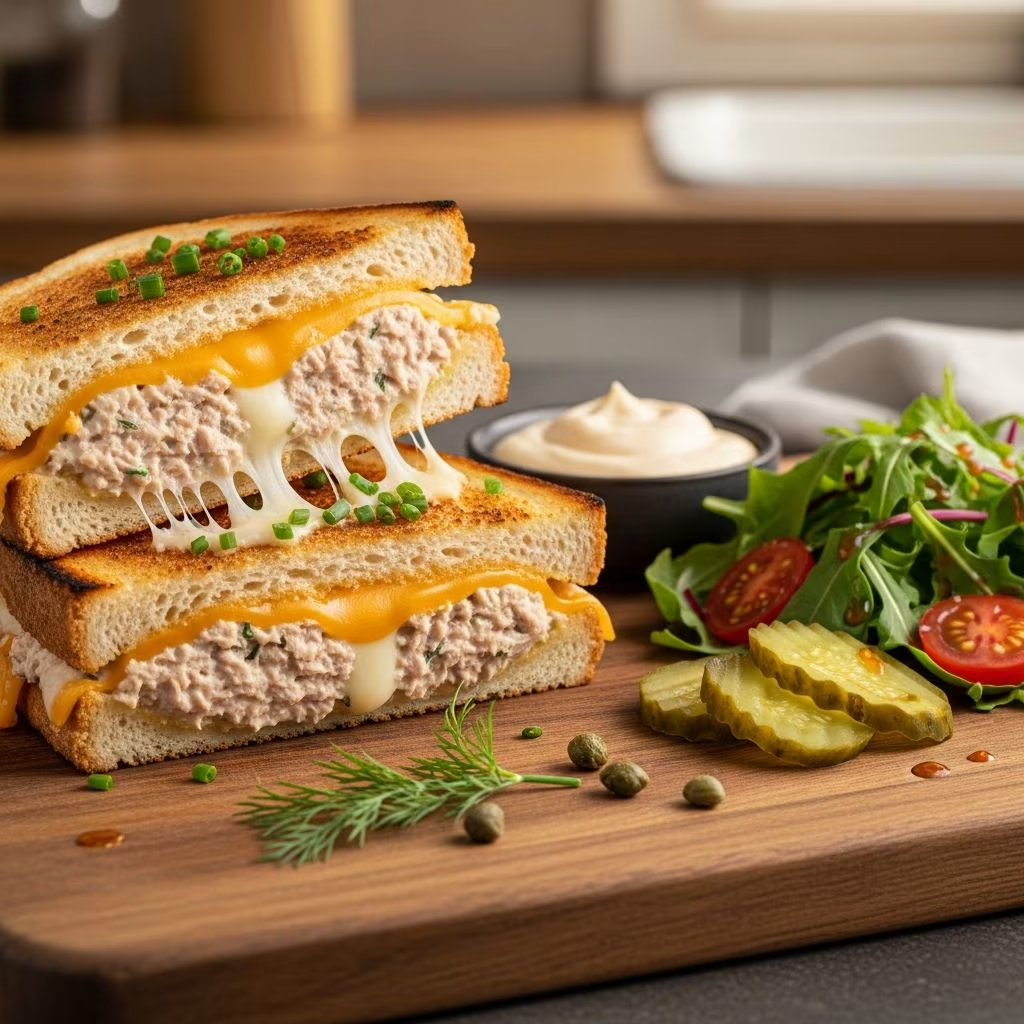
The tuna melt stands as a beloved classic in American diner culture, representing the perfect intersection of simplicity and satisfaction. This warm sandwich combines creamy tuna salad with melted cheese on toasted bread, creating a comforting meal that appeals to both casual lunch enthusiasts and culinary novices. Whether you’re preparing a quick weekday lunch or seeking to impress guests with an effortless yet delicious offering, mastering the tuna melt opens doors to countless flavor variations and personal customizations.
Understanding the Foundation: Essential Ingredients
Creating an outstanding tuna melt begins with understanding each ingredient’s role and selecting quality components. The foundation starts with canned tuna, which serves as the protein base. Most recipes call for two to four five-ounce cans, depending on how many servings you’re preparing. Water-packed tuna offers a lighter option compared to oil-packed varieties, though either works well when properly drained.
Mayonnaise acts as the binding agent and flavor enhancer, typically comprising one-third to two-thirds cup for standard recipes. This creamy component creates the rich texture that defines authentic tuna salad. Beyond mayo, celery contributes both crunch and subtle flavor, usually requiring one to two ribs that are finely diced. Fresh dill pickle provides tanginess and textural contrast, complementing the tuna’s mild profile with its distinctive acidity.
Red onion introduces sharpness and pungency, balancing the richness of mayonnaise. Most recipes incorporate one-half to one full small onion, finely minced to distribute flavor evenly throughout the mixture. Additional aromatics such as garlic cloves, fresh dill herbs, and capers create depth and sophistication, elevating a basic tuna salad into something worthy of a restaurant menu.
For the sandwich structure itself, bread selection significantly impacts the final result. Sourdough, white bread, whole wheat, or rye each imparts distinct characteristics. Cheese should be of superior quality—American, cheddar, and Swiss varieties melt predictably and complement tuna’s subtle flavor. Finally, unsalted butter facilitates proper toasting and melting, requiring approximately one to two tablespoons depending on cooking method and sandwich quantity.
Preparing Your Tuna Salad Mixture
The preparation phase establishes the sandwich’s flavor foundation and requires careful attention to technique. Begin by draining your canned tuna thoroughly, pressing it gently against the can’s side with a fork to remove excess liquid. This step prevents a watery, unappetizing filling.
In a medium-sized bowl, combine your drained tuna with mayonnaise, stirring until the mixture reaches a uniform consistency. Next, incorporate your diced celery, finely minced red onion, chopped dill pickle, and any optional ingredients such as capers, fresh dill, garlic, or lemon juice. The order of addition doesn’t significantly affect the outcome, but adding mayonnaise first ensures even distribution of other ingredients throughout the binding base.
Season generously with kosher salt and freshly cracked black pepper, tasting as you adjust to personal preference. Remember that seasoning intensity increases when ingredients meld after sitting briefly. For enhanced flavor complexity, incorporate fresh lemon juice, providing brightness that cuts through the richness. Some variations include Dijon mustard, adding subtle tanginess and depth, or a splash of pickle brine for additional acidity and unique character.
Once combined, transfer your prepared tuna mixture to a storage container if not using immediately. This mixture keeps refrigerated for up to three days, making it convenient for meal preparation or quick lunch assembly throughout the week.
Mastering the Cooking Technique
The cooking method transforms your ingredients into a melted, toasted masterpiece requiring proper temperature control and timing. Begin by preheating your griddle or cast-iron skillet over low to medium heat. Medium-high temperatures risk burning the bread exterior before cheese melts adequately, resulting in an unsatisfactory texture contrast.
Add approximately one tablespoon of unsalted butter to your cooking surface, allowing it to melt completely until it bubbles gently. This indicates optimal temperature for toasting bread. Place four bread slices directly onto the buttered surface, toasting for approximately two to three minutes until the undersides achieve a light golden brown color.
Using a spatula, carefully flip each slice, then add another tablespoon of butter to the empty griddle space. Immediately place one slice of cheese on each toasted bread piece. Distribute your prepared tuna salad generously onto two of the cheese-topped slices, leaving the other two slices as plain cheese bases. Cook for approximately two minutes, allowing the cheese to melt completely while the bread develops further browning.
Once cheese melts into a cohesive layer, carefully place the plain cheese-covered bread slices directly atop the tuna-laden slices, cheese-side down, creating a complete sandwich. This positioning ensures maximum cheese integration throughout the sandwich structure. Cook for an additional minute on the griddle to seal the sandwich and develop slight browning on the exterior.
Remove carefully from the griddle using your spatula, allowing excess butter to drain away. Slice diagonally to create two triangular portions, which facilitates easier eating and provides an aesthetically pleasing presentation. Serve immediately while cheese remains warm and melted.
Advanced Cooking Variations and Alternatives
Beyond the traditional skillet method, several cooking approaches yield excellent results suited to different circumstances. For smaller portions or open-faced presentations, construct sandwiches by placing tuna salad and cheese atop a single slice of toasted bread. Transfer to a baking sheet and broil for two to three minutes at 425°F until cheese bubbles and browns slightly. This method creates an elegant presentation suitable for entertaining.
Panini presses offer another convenient option, requiring minimal butter and producing uniform pressing and toasting. Simply assemble your sandwich traditionally, then press according to manufacturer instructions until bread achieves desired crispness and cheese fully melts. This method works exceptionally well with heartier bread varieties.
For those without griddles or cast-iron skillets, standard skillet cooking works perfectly well. Use medium heat to prevent burning, cooking approximately three to four minutes per side. The slightly higher sides of standard skillets can make flipping more challenging but don’t significantly affect the final product’s quality.
Flavor Enhancement Strategies
While the basic tuna melt serves as a satisfying standalone sandwich, numerous additions and modifications create personalized variations. Consider incorporating hard-boiled eggs, finely chopped and folded into the tuna mixture for added richness and protein. Bell peppers provide fresh crunch and color, while jalapeños contribute subtle heat and complexity suited to adventurous palates.
Herb variations expand possibilities considerably. Fresh dill complements tuna’s delicate flavor, while tarragon offers slightly more sophisticated herbal notes. Chopped parsley adds brightness without overwhelming other flavors. For those seeking umami depth, anchovies or Worcestershire sauce provide concentrated salty-savory characteristics.
Cheese selection dramatically influences the final flavor profile. Swiss cheese creates mild, slightly sweet undertones, while cheddar delivers sharper, more pronounced tastes. Pepper jack introduces gentle heat, and fresh mozzarella offers creamy mildness. Combining two cheese varieties creates complex melted layers that enhance the overall eating experience.
Bread selection similarly impacts flavor development. Rye bread introduces distinctive earthiness, sourdough contributes tangy notes that brighten the creamy filling, and whole wheat offers nutty characteristics. Experiment with different breads to discover personal preferences and unexpected flavor combinations.
Essential Cooking Tips and Troubleshooting
Successful tuna melt preparation depends on understanding common challenges and preventative measures. Temperature control remains paramount—excessive heat burns bread surfaces while leaving cheese insufficiently melted. If your bread browns too quickly, reduce heat and cover the skillet with a lid to distribute warmth more evenly.
Butter management affects both flavor and texture. Insufficient butter results in dry, unappetizing bread, while excessive amounts create greasy sandwiches. Typically, one-half to one tablespoon per pair of bread slices achieves optimal balance. Ensure butter fully melts and bubbles slightly before adding bread, preventing absorption of unmelted fat.
Cheese melting requires patience. Never attempt to rush this process by increasing heat dramatically. Instead, allow adequate time at moderate temperatures, using a lid if necessary to trap steam and accelerate melting. Thinly sliced cheese melts more evenly than thick chunks, which tend toward uneven distribution.
Sandwich assembly technique prevents filling leakage and structural collapse. Ensure cheese partially melts before adding the top bread slice, creating an adhesive layer that binds components. Spread tuna salad evenly rather than heaping it in one location, distributing weight uniformly across the sandwich base.
Storage and Make-Ahead Strategies
The tuna salad mixture maintains excellent refrigerated storage for three days, enabling convenient meal preparation. Keep prepared tuna in an airtight container away from strong-smelling foods that can transfer flavors. Assemble sandwiches immediately before cooking rather than preparing them in advance, as bread absorbs moisture and loses desirable texture when exposed to wet filling for extended periods.
If you must prepare sandwiches ahead, assemble them immediately before cooking time, keeping the completed sandwich wrapped until ready to heat. Alternatively, keep components separate and combine just before cooking. The prepared tuna maintains quality best when stored in a sealed container positioned away from the refrigerator’s coldest section.
Nutritional Considerations
Understanding the nutritional profile helps inform ingredient choices and portion sizes. Canned tuna in water provides significant protein—approximately 20 grams per five-ounce can—while remaining relatively low in calories. Mayonnaise contributes fat and calories substantially, so controlling the quantity creates lighter versions without sacrificing flavor.
Vegetable additions like celery, onion, and pickles contribute minimal calories while increasing nutrient density and fiber content. Cheese contributes calcium and protein alongside saturated fat, so balance remains important for health-conscious preparations. Whole grain or sourdough bread options provide additional fiber and micronutrients compared to white bread varieties.
Frequently Asked Questions
Can I prepare the tuna salad the night before?
Yes, the tuna mixture keeps refrigerated for up to three days. Store in an airtight container, and stir briefly before using. Avoid combining with bread until immediately before cooking.
What type of bread works best?
Sourdough, white, rye, and whole wheat all work excellently. Choose based on personal preference—sourdough adds tang, rye offers earthiness, and whole wheat provides nutrition.
Can I use fresh tuna instead of canned?
Yes, cooked fresh tuna flaked into similar-sized pieces works wonderfully. Use approximately the same weight as canned tuna, and prepare following identical mixing instructions.
How do I prevent burning the bread?
Use low to medium heat exclusively. If browning occurs too quickly, reduce temperature and cover the skillet with a lid to distribute heat more evenly.
Can I make this recipe without mayonnaise?
While traditional recipes rely on mayo for creaminess and binding, Greek yogurt, sour cream, or avocado offer reduced-fat alternatives with slightly different flavor profiles.
References
- Classic Tuna Melt Recipe — StarKist. Accessed April 2026. https://starkist.com/recipe/classic-tuna-melt/
- Tuna Melt Recipe (Classic Diner Specialty) — Chef Billy Parisi. Accessed April 2026. https://www.billyparisi.com/tuna-melt/
- Best 10-Minute Tuna Melt Recipe — Diethood. Accessed April 2026. https://diethood.com/tuna-melt-recipe/
- Classic Tuna Melt — Budget Bytes. Accessed April 2026. https://www.budgetbytes.com/tuna-melt/
- How To Make The Best Tuna Melts — The Pioneer Woman. Accessed April 2026. https://www.thepioneerwoman.com/food-cooking/recipes/a69938942/tuna-melts-recipe/