Peanut butter pie represents a timeless American dessert with deep historical roots. This beloved confection combines the richness of peanut butter with complementary ingredients to create an elegant yet accessible treat. The dessert gained particular prominence through its association with the Carter family, whose connection to peanut farming made this pie a signature dish at their table. Whether you’re preparing for a special occasion or seeking a crowd-pleasing dessert, mastering this recipe offers both satisfaction and impressive results.
Understanding the Components of This Classic Dessert
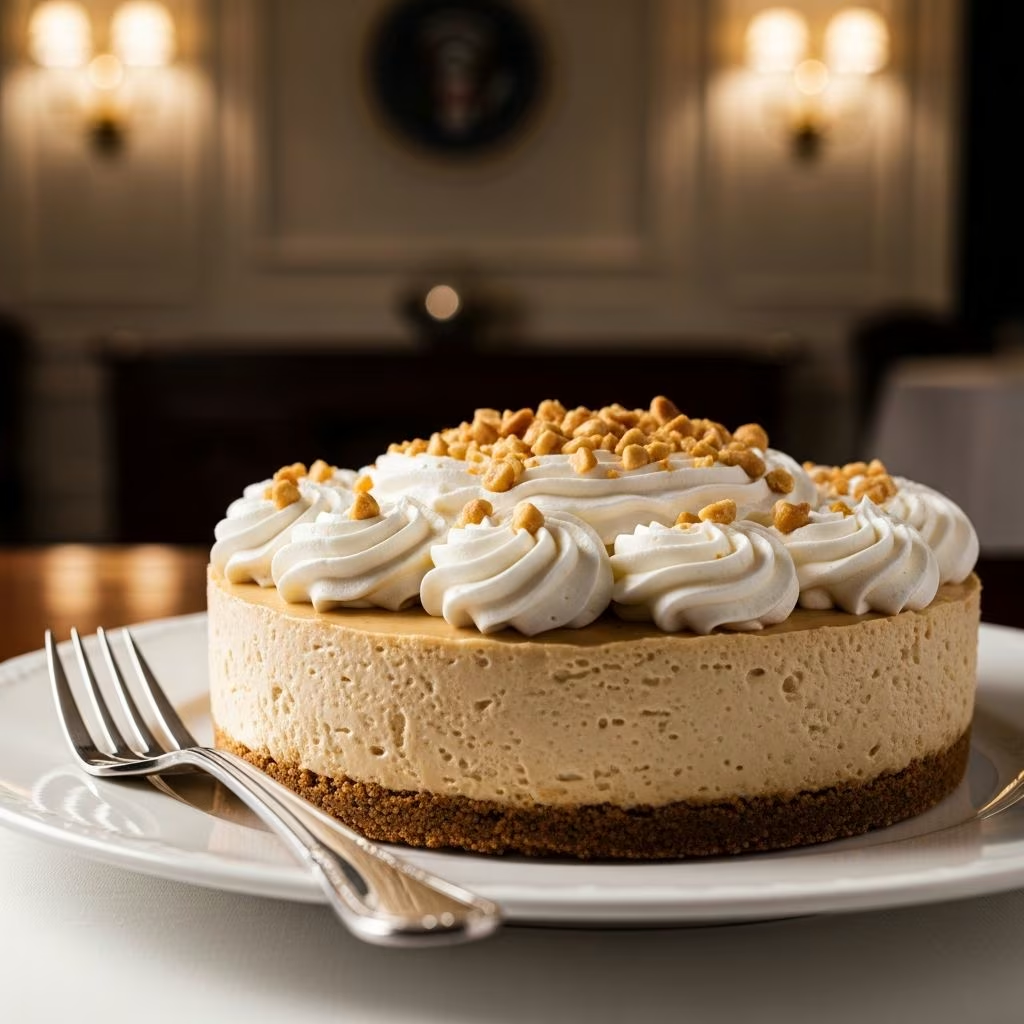
A well-constructed peanut butter pie consists of distinct layers that work together harmoniously. The foundation begins with a reliable graham cracker crust, which provides structural support and a subtle sweetness that complements the robust peanut butter flavors. Above this sits the filling—a creamy mixture combining cream cheese, peanut butter, and sweetened whipped elements. The crowning achievement involves either a simple whipped cream topping or a traditional meringue that adds visual appeal and textural contrast.
Each component serves a specific purpose in the overall composition. The crust offers a slight crunch that prevents the pie from becoming monotonously soft. The filling delivers the intended peanut butter experience with a luxurious, smooth consistency. Additional toppings provide both aesthetic enhancement and opportunities for customization based on personal preferences or dietary considerations.
Essential Ingredients and Their Roles
Success with this dessert begins with understanding what each ingredient contributes:
- Cream cheese: Provides richness and structural integrity to the filling, preventing it from becoming overly light or unstable
- Peanut butter: Delivers the signature flavor profile and creates the characteristic smooth, dense texture
- Powdered sugar: Sweetens the filling while maintaining the smooth consistency better than granulated alternatives
- Milk: Adjusts the consistency of the filling to achieve optimal spreadability and texture
- Whipped cream or whipped topping: Lightens the filling and creates an airy, cloud-like consistency
- Graham cracker crust: Forms the base and contributes subtle sweetness and structural support
- Optional meringue components: Egg whites, sugar, cream of tartar, and vanilla create an impressive topping with textural interest
The quality of your peanut butter selection significantly impacts the final result. Creamy varieties work best, as chunky styles can create an inconsistent texture. Similarly, using full-fat cream cheese rather than reduced-fat alternatives ensures optimal richness and mouthfeel.
The Foundation: Creating the Perfect Crust
While many recipes utilize store-bought graham cracker crusts for convenience, understanding the foundation matters for quality-conscious bakers. A standard crust requires approximately two cups of graham cracker crumbs combined with melted butter and a small amount of sugar, pressed firmly into a nine-inch pie pan.
If using a pre-made crust, ensure it has been properly prepared according to package directions before adding the filling. Some recipes recommend lightly baking the crust beforehand to create additional stability, while others proceed directly to filling assembly. This choice depends on personal preference and the specific recipe variation being followed.
Mastering the Filling Preparation
The filling represents the heart of this dessert, and proper technique ensures exceptional results:
- Begin by allowing cream cheese to reach room temperature, which facilitates easier blending and creates a smoother final texture
- Combine the softened cream cheese with powdered sugar in a mixing bowl
- Beat the mixture on medium speed for approximately five minutes until the combination becomes light, fluffy, and noticeably pale
- Add the peanut butter and milk, continuing to mix for an additional two minutes until uniform color and consistency appear throughout
- Gently fold in pre-whipped cream using a spatula, employing careful motions to maintain the incorporated air that creates lightness
- Pour the completed filling into the prepared crust, smoothing the top gently to create an even surface
Temperature management throughout this process proves crucial. Ingredients that are too cold resist proper blending and may create lumps. Conversely, overly warm ingredients can become too soft and lose their structure. The goal is a filling that spreads easily yet maintains its shape in the final pie.
Chilling and Storage Considerations
After filling assembly, refrigeration represents a non-negotiable step. Most variations require a minimum of four to six hours of chilling to allow the filling to set properly and flavors to meld. Some bakers prefer overnight refrigeration for maximum firmness, which also facilitates cleaner slicing.
Store your completed pie in the refrigerator, covered loosely to prevent odor absorption from other foods. Properly stored pies maintain quality for three to four days. For extended storage, freezing is an option—simply wrap the pie securely and freeze for up to one month. Thaw in the refrigerator before serving.
The Traditional Meringue Topping Alternative
While modern variations often feature simple whipped cream, the traditional approach incorporates a properly executed meringue. This component transforms the dessert into an elegant showstopper:
- Separate eggs carefully, ensuring no yolk enters the whites
- Begin beating egg whites on medium speed until soft foam develops
- Add cream of tartar and a pinch of salt to stabilize the mixture
- Increase speed to high, gradually incorporating sugar (approximately one tablespoon at a time)
- Continue beating until stiff, glossy peaks form
- Spread meringue over the filled pie, creating peaks and ensuring edges seal completely to the crust
- Bake at 325°F for approximately ten minutes until the meringue achieves light golden-brown coloring
Meringue requires careful attention to prevent weeping or browning excessively. The key involves achieving stiff peaks without overbeating, which can cause separation and a grainy texture.
Professional Techniques for Enhanced Results
Several strategies elevate this dessert beyond the basic preparation:
- Taste before pouring: Sample the filling mixture to adjust sweetness or peanut flavor intensity according to preference
- Knife preparation: Use a sharp knife dipped in warm water and wiped clean between cuts to achieve neat, attractive slices
- Decorative garnishes: Consider topping slices with chopped peanuts, cocoa powder, or chocolate shavings
- Texture variation: Mix chopped peanuts into the filling for added crunch and visual interest
- Temperature management: Serve slightly chilled rather than ice-cold for optimal flavor perception
Troubleshooting Common Issues
Understanding potential problems and their solutions ensures consistency:
| Issue | Likely Cause | Solution |
|---|---|---|
| Filling too soft or runny | Insufficient chilling time or warm environment | Return to freezer for additional hours; ensure consistent cool storage |
| Lumpy texture in filling | Inadequate mixing or overly cold cream cheese | Allow ingredients to reach room temperature before combining |
| Meringue separates or weeps | Over or under-beating; sugar not fully dissolved | Practice proper beating technique; ensure sugar is gradually incorporated |
| Crust becomes soggy | Excess moisture from filling | Use less milk in filling; consider pre-baking the crust lightly |
Equipment Requirements
Successful execution requires basic kitchen equipment:
- Large mixing bowl for combining filling ingredients
- Electric mixer (hand or stand variety) for achieving proper consistency
- Measuring cups and spoons for accurate ingredient quantities
- Rubber spatula for folding whipped cream gently
- Nine-inch pie pan or pre-formed crust container
- Sharp knife for clean slicing
- Refrigerator with adequate space for proper chilling
Serving Suggestions and Presentation
This dessert accommodates various presentation styles. Individual slices gain elegance with a dollop of fresh whipped cream and a sprinkle of crushed peanuts. For more casual presentations, serve directly from the pie tin with simple garnishes. Consider pairing with coffee, milk, or complementary beverages. The richness of peanut butter pie pairs particularly well with chocolate-based drinks or lighter options like herbal tea.
Frequently Asked Questions
Can this pie be made without eggs?
Yes, the standard no-bake variation requires no eggs in the filling itself. Only traditional meringue-topped versions use eggs. For completely egg-free options, substitute the meringue with additional whipped cream or purchase egg-free whipped topping alternatives.
What if I’m allergic to peanuts?
Consider substituting with alternative nut butters like almond butter or sunflower seed butter. These options provide similar richness and texture while accommodating dietary restrictions. Adjust quantities slightly based on the specific substitute’s consistency.
How far in advance can this be prepared?
The pie can be prepared up to three days ahead and stored covered in the refrigerator. For longer storage, freeze for up to one month. Thaw in the refrigerator before serving for best results.
Is a no-bake version preferable to versions with meringue?
Both approaches offer advantages. No-bake versions provide simplicity and reliability, while meringue-topped pies offer traditional appeal and elegant presentation. Choose based on time availability and desired final appearance.
Can heavy cream be whipped fresh instead of using pre-made topping?
Absolutely. Whip heavy cream with a small amount of powdered sugar until stiff peaks form, then fold gently into the peanut butter mixture. This fresh option provides superior texture and flavor compared to commercial alternatives.
Conclusion: Mastering a Timeless Classic
This peanut butter pie transcends its role as a simple dessert, representing a connection to culinary tradition and comfort food enjoyment. Whether prepared in the modern no-bake style or following traditional meringue methods, the fundamental appeal remains consistent—combining accessible ingredients into an impressive, delicious result. With attention to proper technique, ingredient quality, and chilling time, anyone can master this classic preparation and create memorable dessert experiences for family and guests.
References
- Jimmy Carter’s Peanut Butter Pie Recipe — CDKitchen. https://www.cdkitchen.com/recipes/recs/197/Jimmy_Carters_Peanut_Butter_Pie15200.shtml
- A Sweet Tribute: Jimmy Carter’s Beloved Peanut Butter Pie — Butterie Dish. https://www.butteriedish.com/blogs/butterie-blog/a-sweet-tribute-jimmy-carter-s-beloved-peanut-butter-pie
- Old Fashioned Peanut Butter Pie — Gift of Hospitality. https://www.giftofhospitality.com/peanut-butter-pie/
- Rosalynn Carter’s Peanut Butter Pie — The Historical Homemaker. 2023-03-07. https://thehistoricalhomemaker.com/2023/03/07/rosalynn-carters-peanut-butter-pie/
- I Tried Jimmy Carter’s Peanut Butter Pie Recipe — Parade Magazine. https://parade.com/food/jimmy-carter-peanut-butter-pie-recipe-review