Cherry pie stands as a timeless dessert that captures the essence of summer’s bounty in every slice. With its buttery, flaky crust encasing a vibrant, juicy filling, this classic treat balances sweet and tart flavors perfectly. Whether you’re using fresh-picked cherries or quality canned ones, achieving a pie that’s not runny but holds its shape requires attention to detail in preparation and baking. This guide draws from proven recipes to walk you through everything from selecting cherries to serving suggestions, ensuring your pie impresses at any gathering.
Why Cherry Pie Captivates Bakers and Eaters Alike
Cherry pie’s appeal lies in its simplicity paired with bold flavors. Fresh cherries release natural juices that, when thickened properly, create a glossy filling that contrasts beautifully with a golden crust. Recipes often incorporate citrus for brightness and thickeners like cornstarch to prevent sogginess. Home bakers love it because variations allow for creativity—add almond extract for nuttiness or mix cherry types for complexity—while the result feels indulgent yet straightforward.
Historically, cherry pie evokes American traditions, but its roots trace to European fruit tarts. Today, it’s a staple for picnics, holidays, and everyday indulgences. Success hinges on fresh ingredients and technique: pitting cherries efficiently, chilling dough to avoid toughness, and cooling the baked pie fully to set the filling.
Selecting the Best Cherries for Your Pie
The heart of any great cherry pie is the fruit itself. Opt for **Bing cherries** when in season for their deep sweetness and firm texture, ideal for a non-watery filling. **Rainier cherries** offer a milder flavor, while **tart varieties** like Montmorency provide zing that pairs well with added sugar.
- Fresh cherries: Choose plump, glossy ones with stems attached. Pit about 4-5 cups (roughly 2 pounds whole) to yield enough for a standard 9-inch pie.
- Canned cherries: Drain well and use the syrup to make a slurry for thickening, ensuring balanced sweetness.
- Frozen cherries: Thaw and drain excess liquid to mimic fresh results.
Avoid overripe or bruised fruit, as it leads to excess juice. For peak flavor, harvest in June or July from local farms if possible.
Mastering the Perfect Pie Crust
A flaky crust is non-negotiable for cherry pie excellence. Homemade dough outperforms store-bought in tenderness and taste, but both work with proper handling.
| Crust Type | Pros | Cons | Best For |
|---|---|---|---|
| All-Butter | Rich flavor, flakes easily | Shrinks if not chilled | Flavor-focused bakers |
| Shortening Blend | Tender, easy to roll | Less flavor | Beginners |
| Store-Bought | Quick prep | Can be tough | Time-crunched cooks |
Key tips: Keep ingredients cold, handle minimally, and chill dough for at least 2 hours. Roll to 12 inches for a 9-inch pan, fitting with overhang for crimping.
Quick All-Butter Crust Recipe
Makes two 9-inch crusts.
- 2 ½ cups all-purpose flour
- 1 tsp salt
- 1 tbsp sugar
- 1 cup cold unsalted butter, cubed
- ½ cup ice water
Pulse dry ingredients with butter in a food processor until pea-sized. Add water gradually until dough forms. Divide, wrap, and chill.
Crafting a Thick, Flavorful Cherry Filling
The filling’s success depends on balancing sweetness, acidity, and thickness. Cornstarch or tapioca starch absorbs juices without muting flavor.
Ingredients for Classic Filling (Serves 8)
- 4 ½ cups pitted cherries (halved or quartered)
- ⅔ cup granulated sugar (adjust for tart cherries)
- 3-4 tbsp cornstarch
- 1 tbsp lemon juice
- 1 tsp lemon zest or vanilla/almond extract
- 2 tbsp cherry juice (optional)
- 1 tbsp cold butter, cubed
Step-by-Step Filling Preparation
- Prep cherries: Pit, halve or quarter to release juices evenly. Quartering prevents a chunky texture.
- Season: Toss with sugar, lemon juice, zest/extracts, and cornstarch. Let sit 15-30 minutes to macerate.
- Cook if needed: For extra insurance against runniness, simmer briefly on stovetop: Cook cherries with sugar/lemon until juicy, remove fruit, thicken juices with cornstarch slurry, then recombine.
- Assemble: Fill bottom crust, dot with butter.
Flavor boosters: Almond extract mimics maraschino notes; vanilla bean infuses depth. For tart cherries, increase sugar by ¼ cup.
Assembling and Baking Your Cherry Pie
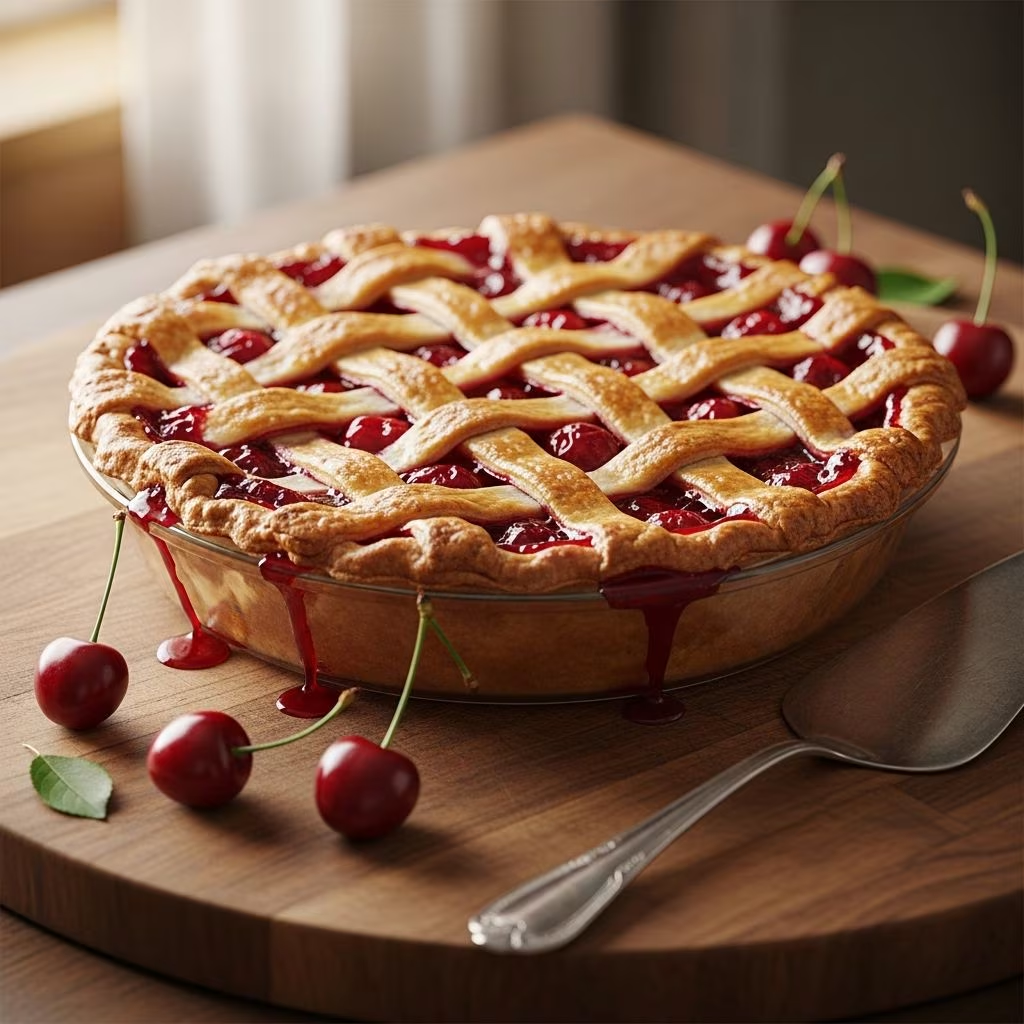
Assembly is where technique shines. Line a 9-inch glass or metal pie plate with bottom crust. Add filling, top with second crust (solid, lattice, or cutouts). Crimp edges, vent top, brush with egg wash, and sprinkle sugar.
- Baking temp: 400°F for 20 minutes, then 375°F for 40-50 minutes until bubbly and golden.
- Shield edges: Use foil to prevent burning.
- Cool completely: 4+ hours on a wire rack—essential for sliceable texture.
Lattice tops allow steam escape and showcase filling. For deep-dish pies, use canned cherries for volume.
Troubleshooting Common Cherry Pie Pitfalls
Runny filling? Use more thickener or cook juices separately. Soggy bottom? Bake on a preheated stone or skip glass pans. Tough crust? Overworked dough or warm butter.
| Problem | Cause | Solution |
|---|---|---|
| Runny pie | Too much juice | Quarter cherries, add cornstarch, cool fully |
| Shrunk crust | Insufficient chill | Chill dough 2+ hours |
| Burnt edges | High heat | Foil shield after 20 min | Dull flavor | Flat cherries | Fresh fruit + citrus/extracts |
Creative Twists on Classic Cherry Pie
Elevate your pie with these ideas:
- Mixed berries: Add blueberries or raspberries for tartness.
- Spiced: Cinnamon or cardamom in filling.
- Streusel top: Crumble instead of crust for crunch.
- Vegan version: Plant butter, aquafaba wash.
- Mini pies: In muffin tins for portions.
Pair with vanilla ice cream or whipped cream. For holidays, tint lattice red with food coloring.
Storage and Make-Ahead Strategies
Baked pie stores at room temp for 2 days, fridge for 5. Freeze unbaked (up to 3 months) or baked (reheat at 350°F). Filling can be prepped 24 hours ahead, chilled. Dough freezes well for 3 months.
Frequently Asked Questions
Can I use canned cherries for cherry pie?
Yes, drain syrup, thicken it into a slurry, and mix back for perfect results.
Fresh vs. frozen cherries—which is better?
Fresh for peak flavor, but frozen (thawed/drained) works anytime.
How do I pit cherries without a tool?
Use a straw or chopstick through the stem end; wear gloves to avoid stains.
Why is my pie filling not thickening?
Ensure cornstarch fully dissolves and bake until bubbling vigorously.
Gluten-free cherry pie possible?
Swap 1:1 gluten-free flour blend in crust; xanthan gum helps binding.
Nutritional Snapshot and Serving Ideas
A slice (1/8 pie) offers about 400 calories, rich in antioxidants from cherries. Serve warm with custard or cheese for contrast.
References
- 5-Star Cherry Pie – Life, Love, and Good Food — Life Love and Good Food. 2023-06-15. https://lifeloveandgoodfood.com/cherry-pie-recipe/
- Easy Homemade Cherry Pie – Tastes Better From Scratch — Tastes Better From Scratch. 2024-02-10. https://tastesbetterfromscratch.com/cherry-pie/
- Homemade Cherry Pie (With Thick Filling) – Sally’s Baking Addiction — Sally’s Baking Addiction. 2023-11-20. https://sallysbakingaddiction.com/cherry-pie/
- Classic Cherry Pie With Pie Crust From Scratch – A Cozy Kitchen — A Cozy Kitchen. 2022-07-05. https://www.acozykitchen.com/classic-cherry-pie
- My Favorite Cherry Pie in the History of Ever – Mel’s Kitchen Cafe — Mel’s Kitchen Cafe. 2023-05-12. https://www.melskitchencafe.com/my-favorite-cherry-pie-in-the-history-of-ever/