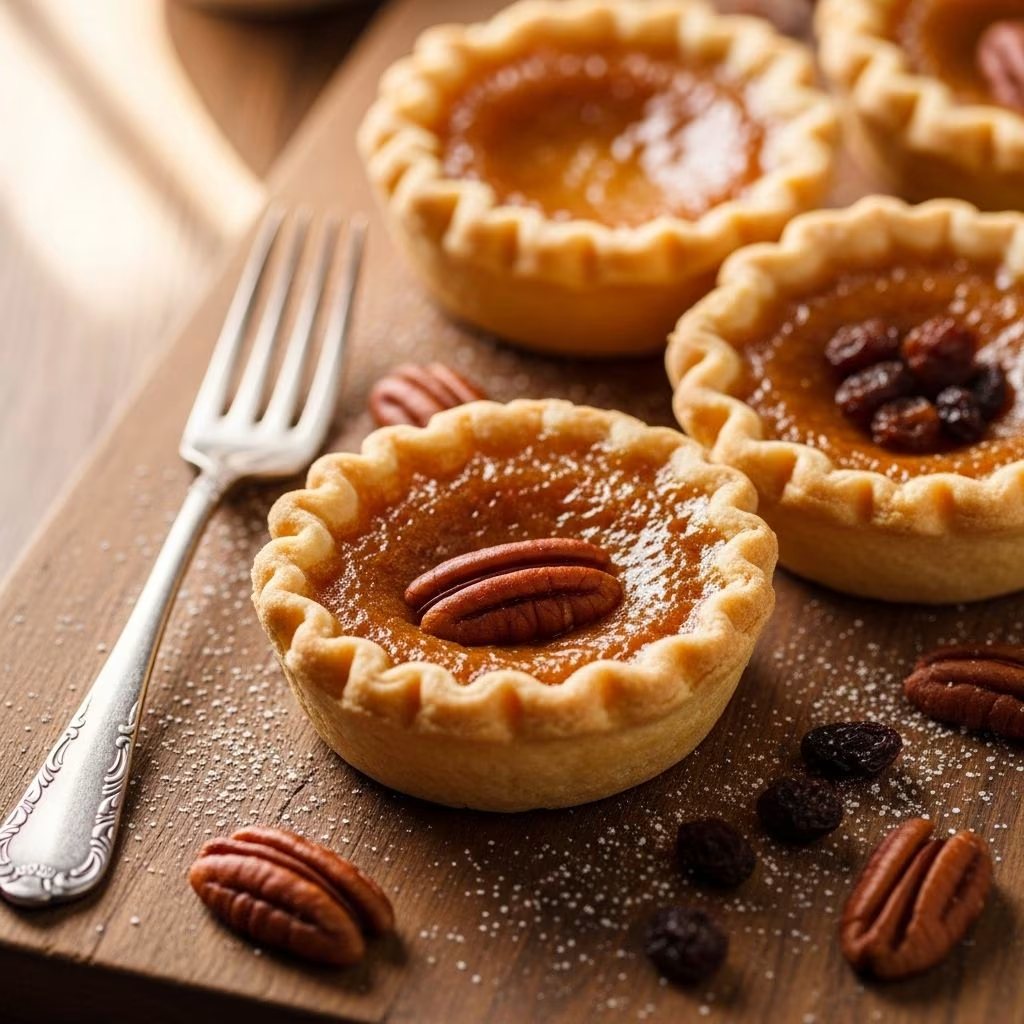
Canadian cuisine has gifted the world many delightful treats, and among its most treasured contributions stands the butter tart. This iconic dessert represents the perfect marriage of delicate pastry craftsmanship and sumptuous filling that melts on the palate. The appeal of butter tarts extends far beyond Canada’s borders, as bakers and food enthusiasts worldwide have embraced this classic confection. What makes these tarts so special is their ability to deliver both textural contrast and rich flavor in a single, elegant bite.
The journey to creating perfect butter tarts begins with understanding the fundamental components that make this dessert work. Each element—from the pastry shell to the filling— plays a crucial role in achieving that coveted balance between crispy exterior and gooey interior. Whether you are a seasoned baker looking to refine your technique or a novice entering the world of pastry-making, this comprehensive guide will walk you through every step of the process.
Understanding the Essential Ingredients
The beauty of butter tarts lies in their simplicity. The ingredient list is refreshingly short, which means that quality matters immensely. Each component must earn its place in the recipe, and choosing premium versions of these staples will directly impact your final results.
Components for the Pastry Foundation
The pastry shell serves as the structural foundation of your tarts and deserves careful attention. All-purpose flour provides the base structure, typically requiring around 1¾ cups for a batch of twelve tarts. This flour type strikes an ideal balance between gluten development and tenderness.
Salt is added in modest quantities—approximately ½ teaspoon—but its role is vital. Beyond seasoning, salt strengthens the gluten network and enhances the overall flavor profile by amplifying the butter’s richness without making the pastry taste salty.
Cold unsalted butter serves a dual purpose in the pastry. Approximately ½ cup of butter, cut into small cubes, creates the tender crumb structure so desirable in well-made tarts. As the butter melts during baking, it creates tiny air pockets that result in a light, flaky texture. The temperature of the butter cannot be overstated—cold butter remains distinct from the flour mixture rather than blending into it smoothly, which is precisely what creates those coveted layers.
A modest amount of sugar, around 1 teaspoon, adds subtle sweetness and can enhance browning through the Maillard reaction during baking. Cold water, typically ⅓ cup, brings the dough together. The water temperature is equally important as the butter temperature; cold water helps prevent the butter from warming and breaking down prematurely.
Elements of the Filling
The filling showcases a blend of complementary flavors and textures. Brown sugar, packed firmly to measure around 1 cup, provides the foundational sweetness and develops a caramel-like quality when combined with heat and butter. The molasses content in brown sugar contributes depth that white sugar cannot achieve.
Golden corn syrup adds viscosity and helps create that signature gooey consistency. A half-cup of this ingredient works in tandem with the brown sugar. More importantly, corn syrup and a small amount of white vinegar—approximately 1 teaspoon—work together to inhibit sugar crystallization, ensuring the filling maintains its smooth, glossy texture rather than becoming grainy.
Melted butter in the filling, about ¼ cup with salt added, enriches the mixture and contributes to its luxurious mouthfeel. Two beaten eggs bind the ingredients and add moisture while providing structural support as the filling sets during baking. Pure vanilla extract, around 1 teaspoon, rounds out the flavor profile with warmth and complexity. Optional additions like raisins or chopped nuts can introduce textural variety and additional flavor dimensions to your tarts.
The Pastry-Making Process Explained
Creating the perfect pastry requires attention to detail and understanding the science behind each step. The goal is to develop just enough gluten for structure while maintaining enough fat and air to create a tender, flaky texture.
Mixing and Developing the Dough
Begin by combining your dry ingredients in a large mixing bowl: flour, sugar, and salt. Whisk these together thoroughly to distribute the salt evenly and aerate the flour slightly. This whisking step is often overlooked but contributes to a more tender final product.
Next, add your cold butter cubes to the flour mixture. Using a pastry cutter, two knives, or simply your fingertips, work the butter into the flour. The goal is to break the butter into pea-sized pieces distributed throughout the mixture. This process should be done quickly to keep the butter cold. As you work, the mixture will become crumbly and resemble coarse breadcrumbs—this is exactly the texture you want.
Sprinkle your cold water over the flour mixture, starting with 2 tablespoons and adding more gradually as needed. Mix gently with a fork or your hands, incorporating just enough water so the dough comes together in a cohesive ball. Avoid overworking the dough, as this develops excessive gluten and results in toughness rather than tenderness.
Resting and Preparation
Once your dough comes together, shape it into a flat disc, wrap it in plastic wrap, and refrigerate for at least one hour. This resting period is crucial; it allows the gluten to relax, making the dough easier to roll, and permits the fat to firm up again after the handling involved in mixing. The dough can even be refrigerated for up to one week, making this an excellent make-ahead option.
When ready to proceed, remove your dough disc from the refrigerator and let it sit at room temperature for about 10 minutes to become slightly more pliable. Roll it out on parchment or wax paper to approximately ¼-inch thickness. Using a round cutter approximately 3 to 3.5 inches in diameter, cut rounds from the dough. A large cup or small bowl works perfectly if you lack a proper cutter.
Forming the Tart Shells
Gently press each pastry round into the cups of a 12-cup muffin tin, ensuring the dough covers the bottom and comes up the sides without gaps. The pastry should not extend significantly above the rim of the cups. Once all shells are formed, place the entire muffin tin in the freezer for 10 to 15 minutes. This brief freezing step firms the pastry and helps prevent it from shrinking excessively during baking.
Crafting the Perfect Filling
While the pastry chills, prepare your filling. In a large mixing bowl, combine the melted butter and brown sugar, stirring them together gently over medium heat until the sugar has fully dissolved and the mixture takes on a glossy appearance. The sugar should melt into the butter completely, creating a smooth base for the rest of the filling.
Remove this mixture from heat and allow it to cool slightly. In a separate bowl, beat the eggs together until they achieve a uniform light color and slightly increased volume. Once the butter-sugar mixture has cooled enough that it won’t scramble the eggs, add it to the beaten eggs while stirring constantly. This gradual incorporation prevents the eggs from cooking prematurely.
To this combined mixture, add the corn syrup, vanilla extract, white vinegar, and salt. Stir until all ingredients are evenly distributed and the filling achieves a smooth, consistent appearance. If desired, fold in raisins or chopped nuts at this stage. The filling should have a pourable consistency, similar to a thick sauce.
Assembly and Baking Procedures
Remove your chilled pastry shells from the freezer and carefully ladle the filling into each shell, dividing it as evenly as possible among the twelve tarts. The filling should come to approximately two-thirds full in each shell. Overfilling causes the mixture to bubble over during baking and creates a messier final product, so restraint here pays dividends.
Place the filled muffin tin into a preheated 350°F oven and bake for 20 to 25 minutes. During this time, the pastry will gradually transform to a golden brown color, and the filling will puff slightly as it sets. The filling should appear set when gently jiggled but might retain a very slight jiggle at the center—this is perfect, as residual carryover cooking will complete the setting process.
Remove the tarts from the oven when the pastry has achieved a beautiful golden hue. Allow the tarts to cool in the muffin tin for approximately 10 minutes. This brief cooling period helps them set and become sturdy enough to handle. Transfer them to a wire cooling rack to finish cooling completely. As they cool, the filling will continue to firm up, eventually achieving that characteristic gooey-but-not-runny consistency.
Advanced Pastry Techniques and Considerations
Several factors distinguish good butter tarts from exceptional ones. The type of butter used in the pastry makes a significant difference; European-style cultured butter with higher butterfat content (typically 82% or more) produces noticeably superior results compared to standard American butter. This higher fat content creates richer flavor and more tender pastry.
The handling of ingredients throughout the process impacts texture and structure. Keeping everything cold slows the incorporation of butter into flour and results in distinct layers rather than a uniform paste. Some bakers freeze their flour and mixing bowl beforehand to extend this benefit.
The role of the vinegar in the filling deserves special attention. Beyond preventing crystallization, the slight acidity cuts through the richness of the filling, preventing it from becoming cloying. Some bakers add slightly more vinegar than traditional recipes call for, appreciating how it balances the sweetness.
Customization Options and Variations
While the classic recipe stands on its own merits, several enjoyable variations exist. The addition of raisins provides pockets of sweetness and chewiness throughout the filling. Currants offer a more delicate fruit presence and are traditional in certain regional variations. Chopped walnuts or pecans contribute nutty depth and textural interest.
Some contemporary bakers experiment with different extracts—almond extract pairs interestingly with the filling, and maple extract nods to North American flavor traditions. A small amount of cinnamon or nutmeg added to the filling creates warming spice notes that complement the brown sugar perfectly.
Storage and Make-Ahead Strategies
Butter tarts keep remarkably well when stored properly. Once completely cooled, they can be refrigerated in an airtight container for up to five days. They also freeze beautifully for up to three months, either baked or unbaked. Unbaked tarts can go directly from freezer to oven with a slight extension to the baking time. Baked tarts thaw at room temperature and can be gently rewarmed in a 300°F oven for a few minutes to restore any softness lost to storage.
The dough itself freezes well for up to one month, and the filling can be prepared ahead and refrigerated until needed. This flexibility makes butter tarts an excellent choice for advance party planning or batch baking sessions.
Troubleshooting Common Issues
Shrinking pastry shells often result from overworking the dough or inadequate chilling time before baking. Ensuring proper rest periods and gentle handling throughout prevents this problem. If shells crack during baking, the issue usually stems from using pastry that was too warm when placed in the oven.
Crystallized filling indicates insufficient vinegar or corn syrup to prevent sugar crystallization. Ensuring these ingredients are present and well-distributed addresses this issue. Overflow during baking suggests the tarts were overfilled; future batches will improve with more conservative filling amounts.
A tough, dense pastry suggests the dough was overworked during mixing or that warm water was used instead of cold water. Conversely, a pastry that falls apart indicates too much water was added. Each attempt teaches valuable lessons about dough hydration and handling.
References
- Butter Tarts – Classic Canadian Dessert — The Recipe Rebel. 2024. https://www.thereciperebel.com/butter-tarts/
- Butter Tarts Recipe — Blue Jean Chef – Meredith Laurence. 2024. https://bluejeanchef.com/recipes/butter-tarts/
- Mrs Welch’s Butter Tarts — Freshy Recipes. 2024. https://cooking.freshy.com/recipe/909a79ae-a991-94e0-2891-14d6c78878a9
- Butter Tarts: The Quintessential Canadian Dessert — Mrs Butter Fingers. 2024. http://mrsbutterfingers.com/?p=816