Roasting chicken at home transforms into an exciting culinary experience when you embrace bold flavor combinations inspired by traditional Latin cuisine. The marriage of bright citrus elements with the complex heat from dried chiles creates a dish that captures attention with its aromatic profile and satisfying depth. This approach to preparing chicken elevates the everyday protein into something memorable, whether you’re cooking for family gatherings or casual weeknight meals.
Understanding the Flavor Foundation
The foundation of this dish rests on two primary flavor pillars: the refreshing acidity and brightness of citrus juices and zests, combined with the smoky, layered heat provided by dried chile peppers. Fresh orange juice provides natural sweetness and moisture that keeps the chicken juicy during roasting, while the zest adds an intense aromatic quality without the liquid component. This creates a balanced marinade that penetrates the meat gradually, developing complex flavors throughout the cooking process.
Dried chiles, particularly varieties like chile de árbol, contribute far more than simple heat. These peppers bring subtle fruity notes, earthiness, and a smoky character that develops when they’re properly prepared and incorporated into a marinade. Unlike fresh chiles that provide immediate pungency, dried varieties build their flavor profile through the cooking process, allowing the chicken to absorb their essence gradually.
Ingredient Selection and Preparation
The Essential Components
Creating an effective marinade begins with selecting quality ingredients. Fresh oranges should be chosen for their juiciness and aromatic potential—Valencia or blood oranges work particularly well. Extract juice directly from fresh fruit rather than relying on bottled versions, as the flavor complexity and natural brightness cannot be replicated synthetically.
Dried chiles require careful handling to unlock their full potential. Before incorporating them into the marinade mixture, toast them lightly in a dry skillet over medium heat for 30 to 45 seconds per side. This gentle warming activates their essential oils and intensifies their flavor profile without burning them. Once toasted, allow them to cool slightly before chopping finely or crushing them. This preparation step distinguishes a well-executed marinade from one that tastes flat or one-dimensional.
Garlic serves as the aromatic backbone, functioning similarly in many traditional preparations. Mincing or chopping garlic finely allows it to distribute evenly throughout the marinade while its pungent compounds gradually mellow and integrate with other flavors. Fresh garlic proves superior to powdered versions for maintaining vibrant flavor integrity throughout the cooking process.
Supporting Flavor Elements
- Fresh herbs: Rosemary, thyme, and oregano contribute earthy undertones that complement both citrus and chile notes
- Olive oil: High-quality extra virgin oil carries fat-soluble flavors and helps distribute spice throughout the marinade
- Acidic components: Beyond orange juice, lime juice or vinegar can enhance brightness and aid in tenderizing the meat
- Salt and pepper: These basics amplify other flavors while creating a seasoning foundation
- Additional spices: Cumin, paprika, or achiote provide layered complexity that enriches the overall flavor profile
Mastering the Marinade Process
Creating the Marinade Base
The marinade preparation follows a logical sequence designed to maximize flavor extraction and distribution. Begin by toasting your dried chiles and allowing them to cool to room temperature. While they cool, combine minced garlic, finely chopped fresh herbs, and your preferred spices in a bowl. These dry and semi-dry ingredients form the aromatic foundation upon which other flavors will build.
Next, add the fresh orange juice along with the zest (ensure you’ve removed only the colored outer layer, avoiding the bitter white pith). The acidity in the juice begins breaking down proteins in the chicken while the zest adds aromatic intensity. Incorporate your cooled, chopped dried chiles into this mixture, stirring thoroughly to ensure even distribution.
Finish by drizzling in high-quality olive oil while whisking to create an emulsion-like consistency. This helps bind the ingredients together and allows them to coat the chicken more effectively during marinating.
The Marinating Period
Time proves critical when marinating chicken. A minimum of 6 hours allows the flavors to begin penetrating the meat’s surface and exterior layers. Overnight marinating (8 to 12 hours) creates noticeably deeper flavor development, with the citrus acid gradually tenderizing the protein while the chile and spice compounds integrate more completely.
Place your whole chicken in a large bowl or container with a lid, ensuring the marinade completely covers the bird. This full submersion promotes even flavor distribution. If needed, arrange the chicken so that both cavity and exterior surfaces contact the marinade. Cover and refrigerate throughout the marinating period, occasionally turning the chicken if portions rise above the liquid level.
Preparation Steps Before Roasting
Readying the Bird
When you’re ready to roast, remove the chicken from the refrigerator approximately 30 minutes before cooking. This allows the bird to approach room temperature, promoting more even heat distribution during roasting. Pat the chicken thoroughly dry using paper towels—this crucial step ensures the skin develops a beautiful golden-brown exterior with desirable crispness rather than remaining pale and steamed.
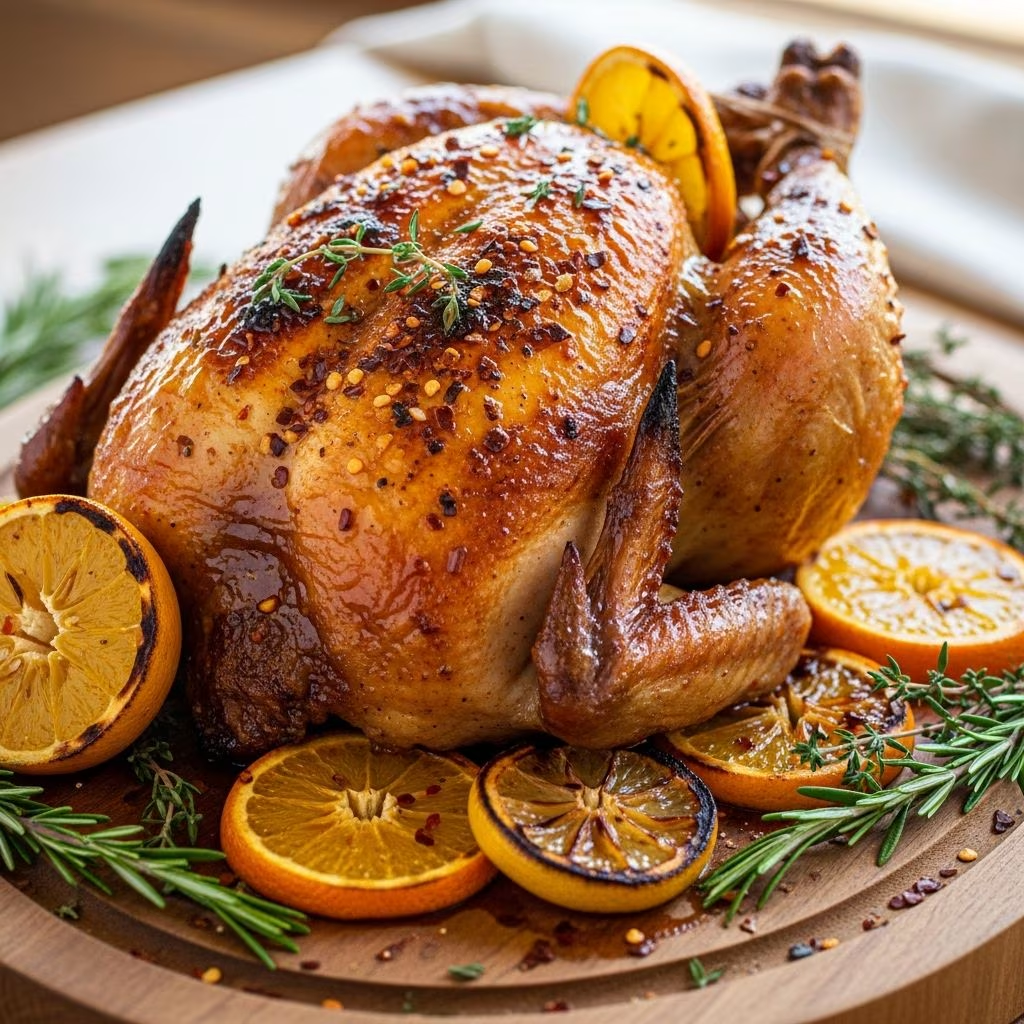
Prepare the cavity by stuffing it with orange slices, which release their juice during cooking and perfume the interior flesh. Fresh herbs like rosemary sprigs or thyme bundled together can be added alongside the citrus. Truss the chicken by tying the legs together with kitchen twine and tucking the wing tips beneath the body, creating a compact shape that roasts more evenly.
Setting Up Your Roasting Environment
Preheat your oven to 400°F (200°C), allowing it to reach full temperature before the chicken enters. Position a rack in the lower-middle portion of the oven to prevent the top from browning too quickly. Place the chicken in a large cast-iron skillet or roasting pan with sides high enough to capture cooking juices.
Before placing the chicken in the oven, brush it lightly with additional olive oil and sprinkle with salt and pepper. This final seasoning layer helps develop the skin’s exterior color and flavor while the interior remains protected by the marinade components that have already penetrated the meat.
The Roasting Process and Temperature Monitoring
Temperature Guidelines and Timing
A whole chicken weighing 4 to 5 pounds typically requires 50 minutes to 1 hour for complete roasting at 400°F. However, relying solely on time proves unreliable due to variations in oven performance, chicken size, and starting temperature. Instead, use an instant-read meat thermometer as your primary guide, inserting it into the thickest part of the thigh without touching bone. The chicken reaches safe internal temperature when this reading reaches 165°F (74°C).
During the roasting period, avoid opening the oven door frequently, as this disrupts temperature consistency and extends cooking time. If you notice the skin browning too quickly while the interior remains undercooked, tent the chicken loosely with aluminum foil to slow the browning process while heat continues penetrating the meat.
Observing Visual Cues
Beyond thermometer readings, visual indicators signal roasting progress. Initially, the skin appears pale as residual moisture evaporates. As roasting continues, the skin gradually shifts from pale to golden, eventually developing deeper brown tones across the entire surface. Crispy, deeply golden skin—often called “crackling” in traditional cooking terminology—indicates proper roasting completion. Any charred or blackened areas suggest excessive heat concentration in specific spots, which may indicate uneven oven performance or positioning adjustments needed for future attempts.
Creating Pan Sauce from Roasting Juices
Extracting Maximum Flavor
The flavorful liquid accumulated in your roasting pan represents liquid gold for sauce creation. Once the chicken reaches temperature and has been removed to a cutting board for resting, carefully pour or scrape the pan contents into a strainer, capturing all the flavorful drippings while filtering out any solids or impurities.
Return this strained liquid to the roasting pan over medium heat. Add a splash of white wine, which adds brightness and helps deglaze the pan—lifting flavorful browned bits (called fond) from the bottom surface. Scrape these accumulated flavors thoroughly into the liquid, as they contain concentrated umami elements that define great sauce character.
Sauce Finishing Techniques
Allow the mixture to simmer gently, reducing by approximately one-third. This concentration intensifies flavors while the liquid thickens slightly through evaporation. For additional body, create a slurry by mixing cornstarch or arrowroot powder with a small amount of orange juice, then whisk this into the simmering sauce. Continue whisking constantly until the sauce reaches desired thickness, typically requiring 2 to 3 minutes after addition. Fresh orange juice can be added to brighten the sauce, along with adjustments of salt and pepper to taste.
Complementary Side Dishes and Service
Vegetable Accompaniments
Roasted root vegetables provide excellent textural and flavor contrast to the citrus and chile-infused chicken. Carrots cut into batons or thick rounds, potatoes cut into wedges, and onion quarters can be tossed with olive oil, salt, and pepper, then added to the roasting pan during the final 25 to 30 minutes of cooking. The vegetables absorb the dripping pan juices, becoming caramelized and deeply flavorful while the chicken finishes cooking.
Additionally, quick-cooking green vegetables such as sautéed spinach, steamed broccoli, or roasted green beans add nutritional balance and visual appeal to the plate. These lighter preparations prevent the meal from becoming too heavy while the vibrant green colors create attractive plate presentation.
Resting and Carving
Allow the roasted chicken to rest for minimum 15 minutes after removal from the oven. This critical step permits the meat fibers to relax and reabsorb accumulated juices, resulting in significantly more moist and tender eating experience. Cover the resting chicken loosely with aluminum foil to retain warmth while preventing the skin from becoming soggy through direct steam condensation.
When carving, use a sharp knife to separate the legs by pulling them away from the body, then cutting through the joint connecting the thigh to the breast. Cut each leg into thigh and drumstick portions. Separate the wings by pulling them back and cutting through the joint connecting them to the breast. Finally, carve the breast meat by making diagonal cuts parallel to the breastbone, yielding attractive slices.
Flavor Variations and Customization
Adjusting Heat Levels
Home cooks can easily modify the chile intensity to match personal preferences. Those preferring milder results can reduce the quantity of dried chiles or substitute them with milder varieties such as guajillo or ancho chiles, which deliver flavor complexity without excessive heat. Conversely, those enjoying significant spice can increase the chile quantity or include hotter varieties such as chile de árbol’s cousins, cayenne, or Thai bird’s eye chiles.
Citrus Substitutions
While orange provides the primary citrus flavor in this preparation, experimentation proves rewarding. Lime juice creates a sharper, more herbaceous character, working particularly well when paired with cilantro and cumin additions. Grapefruit juice introduces slightly bitter undertones that complement the smoky chile qualities interestingly. A combination of multiple citrus fruits—perhaps two parts orange juice to one part lime juice—creates layered brightness that feels sophisticated and complex.
Troubleshooting Common Issues
Addressing Uneven Cooking
If you notice that parts of your chicken appear overcooked while others remain undercooked, this typically indicates uneven oven temperature or chicken positioning issues. In future attempts, rotate the pan halfway through cooking if your oven demonstrates hot spots. Additionally, ensuring the chicken reaches room temperature before roasting promotes more uniform heat penetration throughout the bird.
Managing Overly Crispy or Soggy Skin
Excessively crispy or burnt skin suggests excessive heat concentration on the exterior before the interior finishes cooking. Tent the chicken earlier in the cooking process to moderate browning rates. Conversely, pale or steamed-appearing skin results from insufficient initial drying or insufficient oven temperature. Ensure thorough patting dry before roasting and verify that your oven has fully preheated to the specified temperature using an oven thermometer.
Storage and Leftover Transformations
Refrigeration and Reheating
Leftover roasted chicken stores well in the refrigerator for up to 4 days when properly covered. Reheat gently in a 325°F oven, loosely covered with aluminum foil, until warmed through—approximately 15 to 20 minutes depending on portion size. Alternatively, shred the meat and use it in soups, salads, or grain bowls, where the citrus and chile flavors continue delighting in different formats.
Creative Uses for Leftovers
Shredded roasted chicken combined with the pan sauce creates excellent tacos when wrapped in warm tortillas with fresh cilantro, diced onions, and avocado. The meat works beautifully in grain bowls layered with rice, roasted vegetables, and a lime-cilantro crema. Additionally, bone broth can be created by simmering any remaining bones overnight with aromatics, creating a flavorful liquid for future soups or risottos.
Frequently Asked Questions
Can I prepare this dish in advance?
Yes, marinating the chicken overnight or for up to 24 hours intensifies flavor development. However, avoid marinating beyond 24 hours as excessive acid eventually breaks down the meat’s texture, creating mushiness rather than desirable tenderness.
What if I cannot find dried chiles de árbol?
Substitute with crushed red pepper flakes (using approximately 1 to 1.5 teaspoons to replace 5 dried whole chiles), ancho chiles for milder heat, or guajillo chiles for smoky complexity without excessive spice.
How do I know when the chicken is fully cooked?
Use an instant-read meat thermometer inserted into the thickest part of the thigh without touching bone. Target temperature is 165°F (74°C). Juices should run clear when the thigh is pierced, though thermometer readings prove more reliable than this visual test.
Can I use chicken breasts instead of a whole chicken?
Absolutely. Chicken breasts require significantly less cooking time, typically 20 to 25 minutes at 400°F. Watch carefully to prevent overcooking, which makes breasts dry and tough.
Is this recipe suitable for freezing?
Raw marinated chicken freezes well for up to 3 months, though thaw completely before roasting. Cooked chicken freezes for up to 3 months when properly wrapped, with best results achieved by shredding the meat and freezing it in its pan sauce.
References
- Pollo a la Naranja con Chile — Goya Foods. n.d. https://www.goya.com/es/recipes/citrus-and-chile-roasted-chicken/
- Pollo al horno con naranja — Cravings Journal. n.d. https://es.cravingsjournal.com/pollo-al-horno-con-naranja-8/
- USDA Food Safety and Inspection Service – Chicken Food Safety — U.S. Department of Agriculture. n.d. https://www.fsis.usda.gov/food-safety/safe-food-handling-and-preparation/poultry/chicken