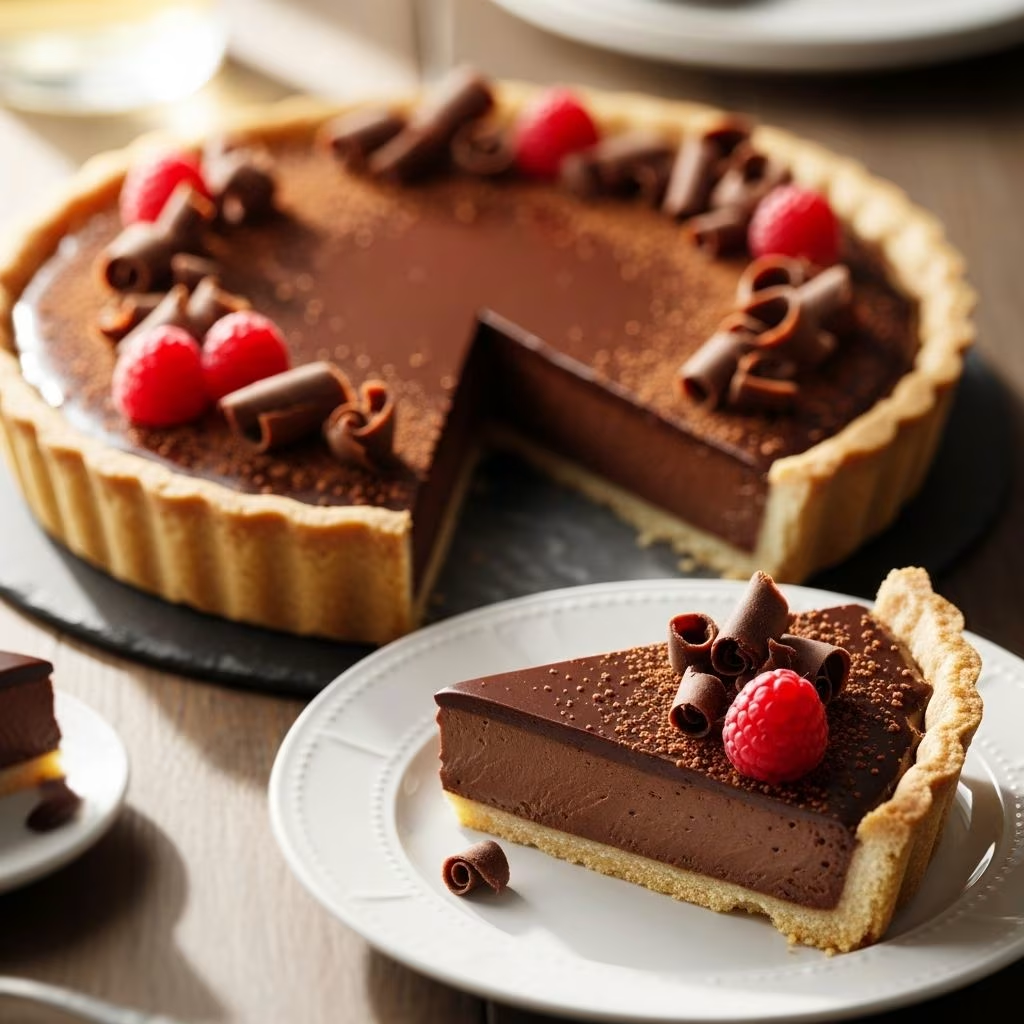
Chocolate truffle pie represents one of the most sophisticated yet surprisingly accessible desserts you can prepare in your own kitchen. Unlike traditional baked pies that require precise oven temperatures and careful timing, this delightful creation relies on the elegant simplicity of chocolate, cream, and proper technique. The beauty of this dessert lies in its multi-layered composition, where each component contributes distinct texture and flavor to create a harmonious whole. Whether you’re planning an intimate dinner party or seeking an impressive homemade treat, understanding the fundamentals of chocolate truffle pie construction will elevate your dessert-making abilities.
Understanding the Foundation: Selecting Your Crust
The crust serves as the structural foundation for your chocolate creation, and the choice you make significantly impacts the overall flavor profile. A graham cracker crust provides the ideal base for this rich chocolate dessert, offering a subtle sweetness and satisfying crunch that contrasts beautifully with the smooth, velvety layers above. The buttery, crispy texture of graham crackers creates a sturdy platform that won’t become soggy, thanks to the no-bake nature of the filling.
Creating a homemade crust requires minimal effort. Crush approximately twenty graham crackers into fine crumbs, then combine with two tablespoons of granulated sugar. Drizzle in six tablespoons of melted unsalted butter and mix until the texture resembles damp sand. Press this mixture firmly into a nine-inch pie pan, ensuring even coverage across the bottom and sides. For optimal results, allow the crust to cool completely before adding any filling layers.
If time constraints present a challenge, purchasing a pre-made graham cracker crust is entirely acceptable. Store-bought options maintain consistent quality and reduce preparation time, allowing you to focus your attention on perfecting the chocolate layers that define this dessert.
Crafting the Foundation Layer: Building the Truffle Base
The initial chocolate layer establishes the character of your pie. This component combines heavy cream and high-quality chocolate to create what bakers call a ganache—a luxuriously smooth chocolate preparation that forms the structural base for subsequent layers.
To prepare this layer, pour two-thirds cup of heavy cream into a small saucepan and warm it over medium heat until small bubbles appear around the edges. This heating process—never allowing the cream to reach a rolling boil—prepares it to properly melt the chocolate. Place six ounces of semi-sweet or bittersweet chocolate chips in a heat-safe bowl. The choice between these two options depends on your preference: semi-sweet chocolate provides a balanced sweetness, while bittersweet offers deeper, more complex flavor.
Pour the hot cream directly over the chocolate and resist the urge to immediately stir. Allow the mixture to rest undisturbed for one full minute. This resting period permits the heat to gently melt the chocolate without creating a grainy texture. After this pause, whisk the mixture gently until completely smooth. For a more refined approach, use a silicone spatula to fold the mixture rather than whisking, which introduces less air and maintains the dense quality characteristic of professional-quality ganache.
Once the truffle filling achieves the desired smoothness, spread it evenly across the bottom of your prepared crust using an offset spatula or the back of a spoon. Freeze this layer for twenty minutes—long enough for it to set firm without becoming completely hard. This timing proves crucial for preventing the layers from blending together during assembly.
The Middle Layer: Creating Whipped Chocolate Excellence
This intermediate layer represents the signature component that distinguishes chocolate truffle pie from simpler chocolate desserts. The whipped chocolate filling combines the rich intensity of melted chocolate with the ethereal lightness of whipped cream, creating a texture that feels both decadent and surprisingly delicate.
Begin by preparing another portion of chocolate. Combine six ounces of semi-sweet or bittersweet chocolate chips with one-half cup of heavy cream in a microwave-safe bowl. Microwave this mixture in twenty-second intervals, stirring between each burst, until the chocolate completely melts and the mixture becomes smooth. Alternatively, place the bowl over a pot of gently simmering water (a water bath technique known as a double boiler) and stir occasionally until melted. The microwave method offers convenience, while the double boiler provides more control and prevents overheating.
After melting, add one-half teaspoon of vanilla extract to the chocolate mixture and stir thoroughly. Allow this preparation to cool to room temperature—a critical step that prevents the chocolate from cooking the cream when combined. Test the temperature by dipping a clean finger into the mixture; it should feel warm but not hot.
While the chocolate cools, place the bowl and beaters of an electric mixer in the freezer for ten minutes. Remove the remaining one cup of heavy cream from refrigeration just before use. Pour the cold cream into the chilled bowl and beat on medium speed until the mixture becomes thick and medium peaks form. Medium peaks represent a specific stage of whipping: the peaks should hold their shape fairly well, but the tips curl slightly when the beaters are lifted from the cream.
Once the cream reaches the medium peak stage, add the cooled chocolate mixture and continue beating on medium speed until soft peaks form. Soft peaks hold their shape less rigidly than medium peaks, creating a flowing, cloud-like texture. This combined mixture should appear smooth with some visible ripples, creating a soft, spreadable consistency.
Spread this whipped chocolate filling over the frozen truffle layer, covering it completely. Use a spatula or the back of a spoon to create gentle waves or swirls across the surface. Refrigerate the pie for at least six hours, though overnight refrigeration yields superior results by allowing the layers to fully set and the flavors to meld.
The Final Touch: Fresh Whipped Cream Topping
The finishing layer contributes essential balance to this decadent dessert. Fresh whipped cream provides textural contrast and helps moderate the richness of the chocolate layers beneath. Prepare this topping immediately before serving to ensure optimal freshness and volume.
Place one cup of heavy cream and one-quarter cup of powdered sugar in the bowl of an electric mixer. Beat on medium-high speed until stiff peaks form—the stage where the peaks stand straight upright when the beaters are lifted. This stage requires more beating than the previous whipped chocolate mixture, as this topping should be stable enough to hold its shape prominently atop the pie.
Spread or dollop the whipped cream generously over the chocolate layers. For an elegant presentation, create decorative peaks and swirls using the back of a spoon or an offset spatula.
Finishing Details: Garnishing and Presentation
Proper garnishing transforms your chocolate truffle pie from impressive to restaurant-worthy. Use a vegetable peeler to create thin chocolate shavings directly over the top of the pie. Drawing the peeler along the edge of a chocolate bar creates delicate, attractive curls that catch the light beautifully. Alternatively, use a fine grater to produce smaller chocolate flakes.
When you’re ready to slice and serve, have a sharp knife and a clean kitchen towel nearby. Dip the knife in hot water and wipe it clean with the towel before making each cut. This simple technique creates clean, elegant slices rather than ragged edges. Repeat this process between each cut for the most professional presentation.
Essential Ingredients and Their Roles
| Ingredient | Quantity | Purpose in Recipe |
|---|---|---|
| Heavy Cream (Truffle Layer) | 2/3 cup | Creates smooth ganache base with chocolate |
| Semi-sweet Chocolate Chips (Truffle) | 6 oz | Provides rich, balanced chocolate flavor |
| Graham Cracker Crust | 1 (9-inch) | Structural foundation with subtle sweetness |
| Heavy Cream (Whipped Chocolate) | 1.5 cups total | Adds lightness and volume to middle layer |
| Semi-sweet Chocolate Chips (Whipped) | 6 oz | Intensifies chocolate flavor in middle layer |
| Vanilla Extract | 1/2 tsp | Enhances chocolate complexity |
| Heavy Cream (Topping) | 1 cup | Balances richness with fresh cream layer |
| Powdered Sugar | 1/4 cup | Sweetens and stabilizes whipped cream |
Storage and Make-Ahead Strategies
This dessert accommodates advance preparation beautifully. You can construct the pie through the whipped chocolate layer up to two days before serving. Cover the pie loosely with plastic wrap and refrigerate until you’re ready to add the final whipped cream topping.
The completely finished pie, including the whipped cream garnish, maintains excellent quality for up to twenty-four hours when stored in the refrigerator. The components remain stable, and the flavors continue to develop. Remove the pie from refrigeration approximately fifteen minutes before serving to allow the chocolate to soften slightly, enhancing its mouthfeel and flavor release.
Leftover pie stores well for three to four days when covered and refrigerated. However, the whipped cream topping may begin to separate slightly over time. For the most appealing presentation, consider adding a fresh whipped cream topping if serving older portions.
Customization Options and Variations
While the classic formula produces exceptional results, several variations offer interesting explorations. Adding one-quarter teaspoon of espresso powder to the truffle filling layer deepens the chocolate flavor without introducing noticeable coffee taste. Alternatively, incorporate a pinch of sea salt into the ganache for sophisticated flavor complexity.
The whipped chocolate middle layer welcomes subtle additions such as almond extract, peppermint flavoring, or a tablespoon of liqueur like Grand Marnier or Kahlua. These enhancements should represent mere whispers of flavor rather than dominant notes, preserving the chocolate focus of the dessert.
Frequently Asked Questions
What chocolate works best for this pie?
Both semi-sweet and bittersweet chocolates produce excellent results. Semi-sweet provides a sweeter, more approachable flavor, while bittersweet offers deeper complexity. Choose based on your personal preference and that of your intended audience. High-quality chocolate chips or chopped chocolate bars yield superior results compared to lower-grade alternatives.
Can I make this pie completely dairy-free?
Yes, with appropriate substitutions. Replace dairy heavy cream with full-fat coconut cream, aquafaba whipped topping, or commercially available plant-based whipping cream. The texture may differ slightly, but the overall result remains delicious and impressive.
How far in advance can I prepare the components?
You can create the crust up to three days ahead and store it covered at room temperature. Prepare the truffle filling and whipped chocolate middle layer up to two days before serving. Add the whipped cream topping no more than four hours before serving for optimal texture.
What causes the layers to blur together?
Insufficient freezing time between the truffle layer and the whipped chocolate filling causes blending. Ensure the initial truffle layer freezes solid for the full twenty minutes before spreading the next layer on top.
Can I use store-bought components?
Absolutely. Pre-made graham cracker crusts, store-bought ganache, and high-quality chocolate chips all work well. Using commercial components allows you to focus on the technical execution of whipping and assembling the layers.
Conclusion: Bringing Elegance to Your Table
Chocolate truffle pie exemplifies how fundamental culinary techniques combine to create something remarkable. By understanding each layer’s purpose and mastering the individual processes, you develop the foundation for consistently excellent results. This no-bake dessert proves that impressive homemade confections need not require complicated equipment or obscure ingredients. Armed with quality chocolate, fresh cream, and the techniques outlined throughout this guide, you can confidently create a dessert worthy of the finest occasions or simple weeknight indulgences.
References
- Chocolate Truffle Pie — Dessert Now Dinner Later. https://www.dessertnowdinnerlater.com/chocolate-truffle-pie/
- Chocolate Truffle Pie – Handle the Heat — Handle the Heat. https://handletheheat.com/chocolate-truffle-pie/
- Double Chocolate Truffle Pie — Avi Pie. https://avipie.com/double-chocolate-truffle-pie/
- The Ultimate Chocolate Truffle Pie – NO Baking Required! — Chocolate Covered Katie. https://chocolatecoveredkatie.com/chocolate-truffle-pie/