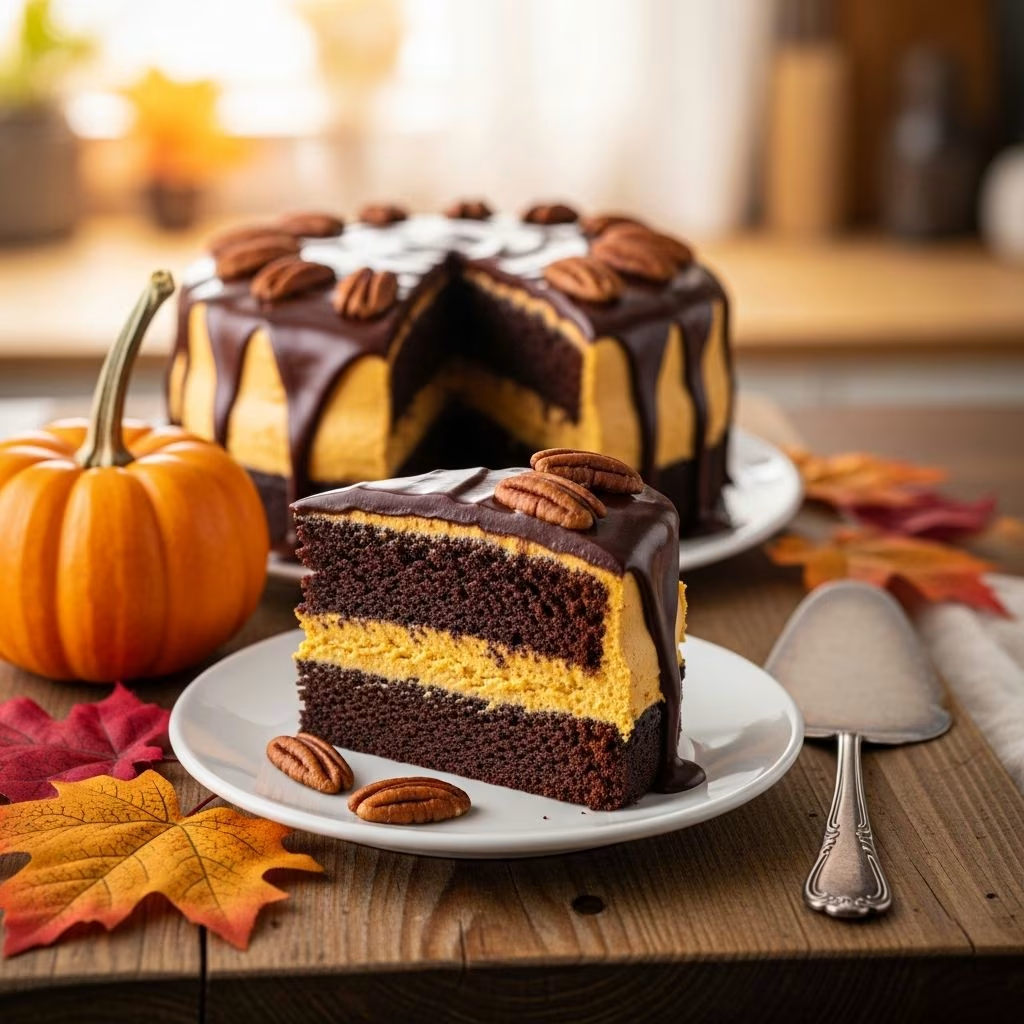
When autumn arrives, many home bakers seek desserts that capture the essence of the season while offering something unexpected. Chocolate pumpkin cake represents an elegant fusion of warm spices, rich cocoa, and the natural sweetness of pumpkin puree, creating a treat that appeals to those who appreciate both classic fall flavors and indulgent chocolate undertones. This combination has gained popularity in recent years as bakers discover how well these seemingly contrasting ingredients complement one another.
The appeal of chocolate pumpkin cake extends beyond its flavor profile. The presence of pumpkin puree in the batter creates exceptional moisture, resulting in a tender crumb that remains soft for days after baking. This natural moisture-retaining quality reduces the need for excessive oil or butter, making the cake both satisfying and balanced in its richness.
Understanding Your Ingredients
Creating a successful chocolate pumpkin cake begins with understanding the role each ingredient plays in the final product. The foundation typically includes fundamental baking staples combined with seasonal additions that define the cake’s character.
The Role of Pumpkin Puree
Pumpkin puree serves multiple functions beyond flavor contribution. This ingredient adds substantial moisture to the batter, which prevents the cake from becoming dry despite the cocoa powder’s naturally absorptive properties. When selecting pumpkin puree, opt for 100% pure pumpkin rather than sweetened pie filling, as this gives you complete control over sugar levels and prevents unwanted additives from affecting the final taste.
The typical amount ranges from one-half to one full cup of pumpkin puree per cake, depending on your desired intensity and moistness level. Room temperature pumpkin incorporates more smoothly into the wet ingredient mixture, creating a more uniform batter without lumps.
Cocoa Powder Selection
The chocolate character comes primarily from unsweetened cocoa powder, which typically comprises one-quarter to two-thirds cup in standard recipes. Natural cocoa powder, rather than Dutch-processed, provides a more distinct chocolate flavor that works harmoniously with pumpkin’s subtle sweetness. The cocoa powder also contributes beneficial compounds and deepens the cake’s color to a rich mahogany brown.
Spice Layering
Beyond the cocoa powder, complementary spices create complexity and warmth. Cinnamon appears as the primary spice, typically between one-quarter and one full teaspoon. Additional warming spices may include ground ginger, nutmeg, and allspice, each contributing distinct aromatic notes that enhance rather than overpower the chocolate element.
Essential Equipment and Pan Selection
The pan you choose influences both baking time and the cake’s final texture. Most chocolate pumpkin cake recipes accommodate various pan configurations, allowing flexibility based on your kitchen setup:
- Two 8-inch round pans produce a classic two-layer cake suitable for frosting and special presentations
- Three 6-inch round pans create a taller layer cake for those seeking dramatic presentation
- 9×13-inch rectangular pans yield sheet cakes ideal for casual gatherings and easier serving
- Bundt pans create visually striking single-piece cakes with minimal frosting requirements
- 9×5-inch loaf pans produce elegant loaf cakes perfect for gift-giving
Regardless of pan type, proper preparation proves essential. Grease pans thoroughly with butter, oil, or nonstick spray, and consider lining the bottom with parchment paper for foolproof release. This simple step prevents sticking and ensures your cake emerges intact and ready for finishing.
Crafting the Perfect Batter
Dry Ingredient Foundation
Begin by combining all dry ingredients in a large mixing bowl. Whisk together flour (typically 1.5 to 2.5 cups), cocoa powder, baking powder, baking soda, salt, and your chosen spices. Whisking rather than merely stirring ensures even distribution of leavening agents and spices throughout the flour base, preventing pockets of concentrated flavor or dense areas in the baked cake.
The leavening combination typically includes both baking powder and baking soda, which work together to create lift. Baking soda reacts with acidic components like pumpkin and buttermilk, while baking powder provides additional rise throughout the baking process. This dual-action approach creates a light, tender crumb.
Wet Ingredient Preparation
In a separate bowl, combine your wet ingredients. This mixture usually includes pumpkin puree, eggs, oil or melted butter, milk or buttermilk, sugar (both white and brown work well), and vanilla extract. Some recipes employ vigorous whisking at this stage to create emulsification, which helps distribute the oil evenly and creates a more uniform batter.
Temperature matters when combining wet ingredients. Room temperature eggs and pumpkin puree incorporate more thoroughly than cold ingredients, resulting in smoother batter with fewer lumps. If you’ve forgotten to bring ingredients to room temperature, warm them by setting them in a bowl of warm water for five to ten minutes before use.
Combining Wet and Dry Elements
The technique for combining these two components significantly impacts the final texture. Pour the wet ingredients into the dry mixture and fold or gently stir just until combined. Overmixing develops gluten networks that produce tough, dense cakes rather than tender, crumbly ones. Stop mixing as soon as no dry flour streaks remain visible—small lumps will dissolve during baking.
Many recipes include chocolate chips or mini chips folded in at the final moment, which adds bursts of chocolate throughout the cake without distributing cocoa powder unevenly.
Baking Temperature and Timing
Most chocolate pumpkin cakes bake at 350°F (175°C), though some recipes utilizing Bundt pans recommend 325°F for gentler, more even baking. Baking time varies considerably based on pan size and shape:
| Pan Type | Size | Baking Time |
|---|---|---|
| Round Cake Pans | 8-inch, 2 pans | 20-26 minutes |
| Round Cake Pans | 6-inch, 3 pans | 20-25 minutes |
| Rectangular Sheet Pan | 9×13 inch | 28-30 minutes |
| Square Pans | 8×8 inch or 9×9 inch | 45-60 minutes |
| Bundt Pan | Standard | 50-60 minutes |
| Loaf Pan | 9×5 inch | 55-65 minutes |
Check doneness using the toothpick test: insert a wooden toothpick into the cake’s center and remove it. The cake achieves proper doneness when the toothpick emerges completely clean or with just one or two moist crumbs clinging to it. If batter adheres to the toothpick, continue baking at five-minute intervals until the desired result appears.
Cooling Procedures
Proper cooling prevents structural collapse and ensures optimal texture development. Allow cakes to cool in their pans for 10 to 15 minutes before attempting removal. This waiting period allows the cake to firm up sufficiently for safe handling while remaining warm enough to release easily from the pan.
After initial cooling, run a thin knife around the pan’s edges and invert the cake onto a wire cooling rack. For Bundt cakes or delicate preparations, take extra care during this step or use a cooling rack placed over the pan before inverting.
Let cakes cool completely on the rack before frosting or storing. This typically requires one to two hours, though patience at this stage prevents frosting from melting and sliding off warm cake surfaces.
Frosting and Finishing Options
While chocolate pumpkin cake stands alone as a satisfying dessert, complementary frostings elevate the presentation and flavor profile. Several options work particularly well:
Pumpkin Cream Cheese Frosting
This frosting combines beaten cream cheese and softened butter, then incorporates pumpkin puree, confectioners’ sugar, and pumpkin pie spices. The result offers tangy contrast to the cake’s richness while reinforcing its seasonal character. This frosting pipes beautifully for decorative effects.
Chocolate Ganache
For those preferring intensified chocolate flavor, ganache made from melted butter and dark or milk chocolate provides elegance and sophistication. Simply melt the chocolate with butter on low heat, then drizzle or spread over the cooled cake. Ganache sets to a glossy finish that looks professionally executed.
Simple Dust Finish
Some bakers prefer minimal frosting, instead dusting the finished cake with cocoa powder, confectioners’ sugar, or a combination of cinnamon and coconut sugar. This approach highlights the cake’s natural color and texture while adding subtle visual interest.
Storage and Make-Ahead Strategies
Chocolate pumpkin cake actually improves over time as flavors meld and develop. Store unfrosted cake layers wrapped tightly in plastic wrap at room temperature for up to two days, or refrigerate for up to one week. Frozen, well-wrapped cake layers keep for up to three months, thawing at room temperature before frosting.
Frosted cakes remain fresh when covered and refrigerated for three to five days. Many bakers assemble and frost their cakes the day before serving, allowing flavors to meld overnight and simplifying day-of preparation.
Ingredient Variations and Substitutions
Baking offers flexibility for accommodating dietary preferences or ingredient availability. Those seeking lighter cakes might replace oil with applesauce in equal measure. Buttermilk can substitute for milk when available, adding slight tang and improved tenderness. Some recipes employ sour cream or Greek yogurt for additional moisture and richness.
For dietary considerations, many chocolate pumpkin cake recipes adapt well to gluten-free flour blends, dairy-free milk alternatives, and refined sugar substitutes, though minor adjustments may prove necessary due to these ingredients’ different absorption rates and behaviors.
Troubleshooting Common Issues
Dense or Heavy Cake: Overmixing develops gluten, creating tough texture. Mix only until ingredients combine. Additionally, ensure leavening agents haven’t expired, as expired baking soda and powder lose effectiveness.
Dry Cake: Pumpkin puree provides substantial moisture; insufficient quantities produce dryness. Additionally, overbaking causes moisture loss. Use the toothpick test rather than relying solely on timing, as ovens vary considerably.
Cake Sticking to Pan: Inadequate pan preparation causes this issue. Thoroughly grease pans with butter or oil, paying special attention to corners. Parchment paper provides insurance against stubborn adherence.
Uneven Baking: Position pans in the center of the oven on the middle rack when possible. If using multiple pans, rotate them halfway through baking for more uniform results. Allow sufficient space for heat circulation around each pan.
Serving Suggestions and Occasions
Chocolate pumpkin cake suits numerous gatherings and occasions. Serve slices at autumn brunches, Thanksgiving celebrations, Halloween parties, or casual weeknight desserts. The cake pairs beautifully with hot cider, coffee, or tea during cooler months.
For entertaining, consider plating individual slices with whipped cream and a sprinkle of additional cocoa powder or cinnamon for restaurant-style presentation. Individual loaf cakes make thoughtful homemade gifts for neighbors and friends during the fall season.
Frequently Asked Questions
Can I make this cake year-round? Absolutely. While the autumn season provides natural association with pumpkin, this cake works equally well any time of year. The combination of chocolate and pumpkin doesn’t require seasonal justification.
What if I don’t have buttermilk? Create a substitute by mixing regular milk with lemon juice or vinegar at a one-to-one ratio. Let it sit for five minutes before using, allowing it to curdle slightly and develop the acidic properties buttermilk provides.
Can I reduce the sugar content? Yes, though reducing sugar by more than 25 percent may affect moisture and texture. If reducing sugar, consider adding an extra tablespoon of pumpkin puree to maintain moisture balance.
How do I prevent my cake from sinking in the middle? This typically indicates underbaking or oven temperature discrepancies. Verify your oven temperature with a separate thermometer, as many home ovens run hot or cold. Additionally, ensure the cake bakes until the toothpick test confirms doneness throughout.
Is there a dairy-free version? Yes. Replace buttermilk with non-dairy milk mixed with lemon juice or vinegar. Use coconut oil instead of vegetable oil, and select dairy-free chocolate for any chips or ganache components.
References
- Food Safety Basics: Proper Storage and Handling of Pumpkin Products — U.S. Department of Agriculture. 2024. https://www.usda.gov/
- Understanding Baking Chemistry: Leavening Agents and Their Functions — King Arthur Baking Company. 2024. https://www.kingarthurbaking.com
- The Science of Cake Baking: Achieving Proper Texture and Moisture — Cornell University Food Science Department. 2023. https://www.cals.cornell.edu
- Cocoa Powder Varieties and Their Culinary Applications — American Society of Chocolate Technologists. 2023. https://www.asct.org
- Seasonal Produce Guide: Pumpkin Nutrition and Quality Selection — Academy of Nutrition and Dietetics. 2024. https://www.eatright.org