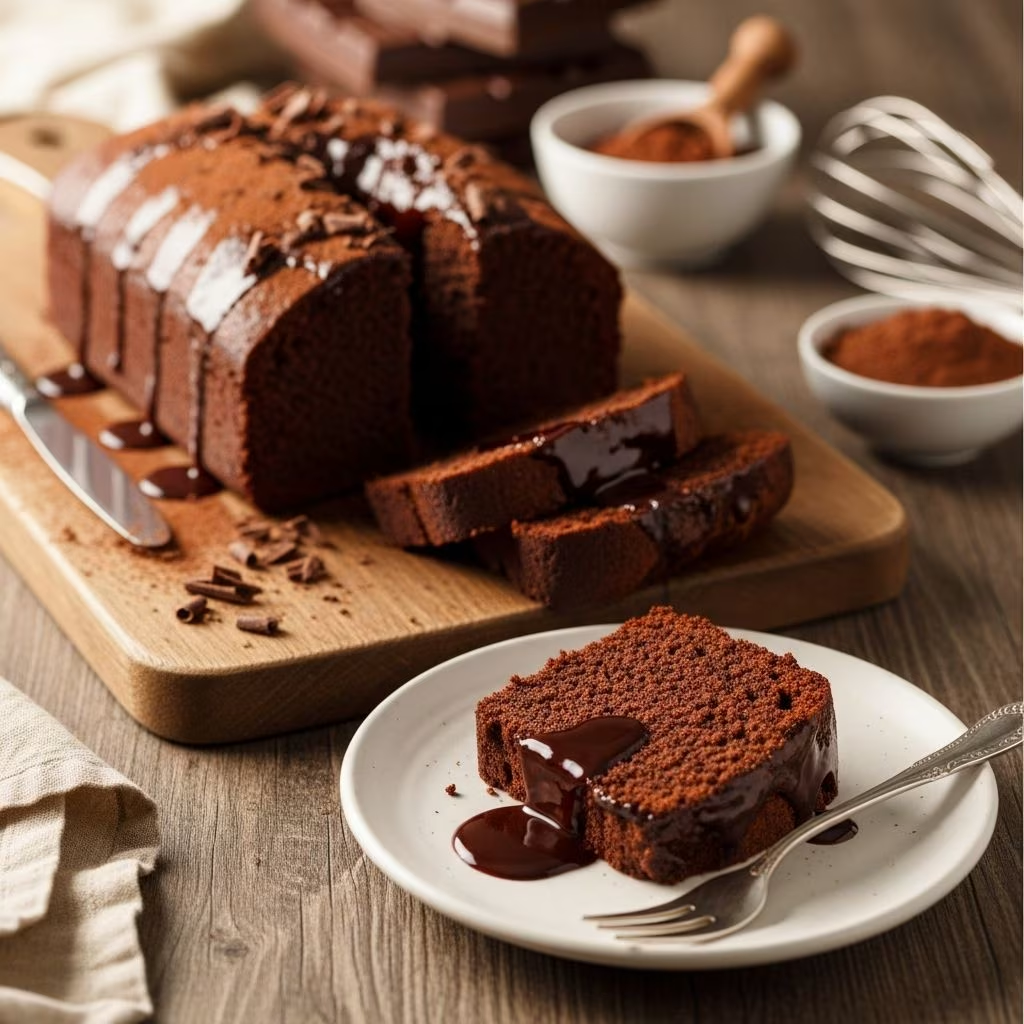
Pound cake has earned its place as a beloved classic in American baking traditions, and when infused with chocolate, it becomes an indulgent treat that appeals to home bakers and dessert enthusiasts alike. The beauty of chocolate pound cake lies in its simplicity—a straightforward combination of butter, sugar, eggs, flour, and chocolate that transforms into something far greater than the sum of its parts. This guide explores everything you need to know about creating a chocolate pound cake that features a tender crumb, rich flavor, and elegant presentation.
Understanding the Foundation of Pound Cake
Pound cake derives its name from its traditional ingredient ratio: one pound each of butter, sugar, eggs, and flour. This time-tested formula creates a dense yet moist cake with a distinctive fine texture. The chocolate variant follows similar principles while incorporating cocoa powder to develop deep, complex chocolate flavors. The structure of pound cake relies on the creaming method, where butter and sugar are beaten together to incorporate air, which then gets distributed throughout the batter via the eggs and dry ingredients.
The key to success with chocolate pound cake involves understanding how each ingredient contributes to the final product. Butter provides richness and flavor, while sugar not only sweetens but also helps create the tender crumb structure. Eggs act as both a binder and a leavening agent, contributing moisture and structure. The flour and cocoa powder form the dry matrix that gives the cake its body, while leavening agents like baking powder ensure proper rise without creating a crumbly texture.
Essential Ingredients and Their Roles
Butter: The Foundation of Richness
Unsalted butter serves as the primary fat in chocolate pound cake, typically comprising between one-third to one-half of the total weight of the cake. Using room-temperature butter is crucial because it creams more effectively with sugar, incorporating more air and creating a lighter, more tender crumb. Cold butter cannot be beaten properly and will result in a dense, heavy cake. Allow butter to sit at room temperature for at least 30 minutes before beginning your batter, ensuring it reaches approximately 68-70 degrees Fahrenheit.
Sugars: Sweetness and Structure
Most chocolate pound cake recipes combine granulated sugar with light brown sugar. Granulated sugar provides sweetness and helps create a fine crumb through proper crystallization, while light brown sugar adds moisture and a subtle molasses flavor that enhances the chocolate notes. The ratio typically favors granulated sugar, with brown sugar serving as a complementary ingredient rather than the dominant sweetener. Together, these sugars create the proper structure and moisture balance necessary for a tender, moist cake.
Eggs: The Binding Agent
Eggs play multiple roles in chocolate pound cake, serving as a binder, leavening agent, and moisture provider. Room-temperature eggs incorporate more smoothly into the batter and create better emulsification with the butter and sugar mixture. Most recipes call for five to six large eggs, added individually to ensure proper incorporation. This gradual addition allows each egg to fully integrate before the next one is introduced, preventing the batter from appearing curdled or breaking.
Cocoa Powder: The Chocolate Element
Dutch-processed or unsweetened cocoa powder forms the chocolate foundation of this dessert. Dutch-processed cocoa has been treated with an alkaline solution, creating a darker color and more mellow chocolate flavor, while unsweetened cocoa offers a more intense, acidic chocolate note. The choice between them depends on personal preference and the desired depth of chocolate flavor. Typically, pound cake recipes incorporate between one-half to three-quarters cup of cocoa powder, balanced against the flour quantity to maintain proper cake structure.
Additional Ingredients: Flavor and Texture Enhancers
Vanilla extract brightens the chocolate flavor and adds dimensional complexity. Baking powder provides gentle leavening without making the cake too airy, while salt enhances the chocolate notes and balances sweetness. Some recipes include buttermilk, sour cream, or brewed coffee as moisture-adding ingredients that also contribute subtle flavor dimensions. The choice between these wet ingredients affects both the crumb texture and the intensity of the chocolate flavor.
Preparation Techniques for Success
Pan Preparation
A properly prepared pan prevents sticking and ensures even baking. Tube pans or bundt pans work best for pound cake, as their center tube promotes even heat distribution and prevents dense centers. Grease the pan thoroughly with butter or non-stick spray, ensuring every crevice receives coverage. After greasing, dust with cocoa powder instead of flour—this adds a subtle chocolate flavor to the cake’s exterior and prevents white flour residue from appearing on the finished cake.
Dry Ingredient Integration
Sift flour, cocoa powder, baking powder, and salt together before adding to the batter. Sifting accomplishes multiple objectives: it aerates the dry ingredients, distributes leavening agents evenly, and removes any lumps from the cocoa powder. These benefits directly translate to a more tender, evenly textured cake with consistent chocolate flavor distribution throughout.
The Creaming Method
Beat softened butter with both sugars on low-to-medium speed for approximately three to four minutes until the mixture becomes light, fluffy, and pale in color. This extended beating incorporates air into the fat, which creates the foundation for a tender crumb. Scrape down the bowl frequently to ensure even mixing. Once properly creamed, the mixture should be noticeably lighter in texture and volume.
Egg Integration
Add eggs individually to the creamed mixture, beating well after each addition and scraping down the bowl to ensure complete incorporation. This gradual process prevents the batter from appearing broken or curdled. Each egg should be fully combined before the next one is introduced, requiring approximately 20-30 seconds of beating per egg.
Wet and Dry Alternation
When combining dry and wet ingredients, always begin and end with dry ingredients. Alternate additions in thirds: one-third dry, one-third wet, then one-third dry. This method maintains batter consistency and prevents overmixing. Overmixing at this stage develops gluten unnecessarily, resulting in a tougher crumb. Mix until ingredients just combine after each addition—visible streaks of unmixed ingredients are preferable to overmixing.
Baking Parameters and Temperature Control
Preheat your oven to 325 degrees Fahrenheit, a temperature lower than typical cake baking. This moderate temperature allows the cake’s exterior to bake through before the interior becomes overdone, ensuring even cooking from edge to center. Pour the batter into the prepared pan and smooth the top gently to promote level rising.
Baking time typically ranges from 60 to 90 minutes, depending on your specific oven and pan size. Begin checking for doneness around the 60-minute mark by inserting a toothpick into the cake’s center—it should emerge with a few moist crumbs but no wet batter. The top of the cake should appear set and spring back slightly when lightly touched.
Some ovens have hot spots or uneven heat distribution. If you notice one edge browning faster than others, rotate the pan halfway through baking to promote even cooking. Use an oven thermometer to verify your oven’s actual temperature, as many home ovens run hot or cold.
Cooling and Storage Considerations
Allow the baked cake to cool in the pan for approximately 10-15 minutes before attempting removal. This brief cooling period allows the cake to firm up slightly while still being warm enough to release easily from the pan. Run a thin knife around the edges and the center tube to loosen the cake, then invert onto a wire cooling rack. Complete cooling should occur on the rack over several hours before glazing or slicing.
Chocolate pound cake actually improves over 24 hours as flavors meld and the crumb sets to its optimal texture. Store leftover cake in an airtight container at room temperature for up to four days. The cake can also be wrapped tightly in plastic wrap and frozen for up to three months, then thawed at room temperature when desired.
Flavor Enhancement Options
While chocolate pound cake stands beautifully on its own, several enhancements can elevate the experience. A simple chocolate glaze—made from melted chocolate, butter, and cream—adds an elegant finishing touch. Powdered sugar dusting offers a classic presentation. Some bakers add a tablespoon of brewed coffee or espresso powder to the batter, which deepens the chocolate flavor without adding obvious coffee taste. Mini chocolate chips folded into the batter just before pouring add extra chocolate bursts throughout.
Troubleshooting Common Issues
| Problem | Likely Cause | Solution |
|---|---|---|
| Dense, heavy crumb | Insufficient creaming or overmixing batter | Ensure 3-4 minutes of creaming time; mix gently when combining wet and dry ingredients |
| Sunken center | Oven temperature too high or underbaking | Verify oven temperature with thermometer; bake until toothpick test passes |
| Dry cake | Overbaking or excessive cocoa powder | Check doneness earlier; reduce cocoa powder if using more than recommended |
| Uneven browning | Oven hot spots; pan rotation neglected | Rotate pan halfway through baking; use oven thermometer |
| Cracked top | Oven too hot; batter too thick | Lower oven temperature; ensure batter reaches proper consistency |
Frequently Asked Questions
Can I substitute all-purpose flour with cake flour?
Yes, cake flour can replace all-purpose flour at a slight adjustment. Cake flour has less protein, creating a more tender crumb. Use approximately 1.25 cups cake flour for every 1 cup of all-purpose flour called for in the recipe. This substitution works particularly well for chocolate pound cake, where tender texture is desired.
What’s the difference between Dutch-processed and natural cocoa powder?
Dutch-processed cocoa has been treated with an alkaline solution, resulting in darker color and more mellow flavor. Natural cocoa is acidic and offers a more intense chocolate taste. Either works in pound cake; choose based on the chocolate intensity you prefer. If using natural cocoa in a recipe calling for Dutch-processed, you may want to add a pinch of baking soda to neutralize some acidity.
Why is room temperature so important for ingredients?
Room temperature ingredients combine more smoothly and evenly, creating better emulsification and incorporating more air. Cold ingredients don’t mix thoroughly, resulting in dense texture and uneven flavor distribution. Always allow butter, eggs, and any dairy ingredients to reach room temperature before beginning.
Can I reduce the sugar in this recipe?
Reducing sugar affects more than just sweetness—it impacts texture, browning, and moisture. Reducing sugar by more than 10-15 percent may result in a less tender crumb and reduced browning. If you must reduce sugar, do so gradually and expect some texture changes.
How can I make this recipe gluten-free?
Replace all-purpose flour with a quality gluten-free flour blend designed for baking. Ensure the blend contains xanthan gum for proper binding. You may need to add slightly more liquid to compensate for gluten-free flour’s different absorption rate. Some bakers find that adding an extra egg helps create better texture.
Advanced Techniques for Perfection
Consider using a food scale for ingredient measurement. Weight-based measurements provide far greater accuracy than volume measurements, particularly crucial for flour and cocoa powder where packing affects density. This precision translates directly to more consistent, predictable results across multiple baking sessions.
Invest in an instant-read thermometer to verify when your cake reaches proper doneness. The internal temperature should read approximately 205-210 degrees Fahrenheit at the center. This objective measurement removes guesswork from the doneness determination.
Use parchment paper to line your pan in addition to greasing it. This double protection virtually guarantees easy cake removal and pristine sides. Some bakers consider this extra step essential for foolproof results.
Conclusion
Chocolate pound cake represents one of baking’s most rewarding projects—relatively straightforward in execution yet capable of producing restaurant-quality results through attention to technique and ingredient quality. By understanding the purpose of each ingredient, mastering the creaming method, and respecting temperature parameters, you can consistently produce a magnificent chocolate pound cake that impresses family and friends. Whether enjoyed plain with coffee, glazed with chocolate sauce, or accompanied by fresh berries, a properly made chocolate pound cake delivers rich chocolate flavor and tender crumb that makes it worthy of its place among classic desserts.
References
- The Science of Baking: How Ingredients Work Together — King Arthur University. 2024. https://www.kingarthurba.com/learning
- Cocoa Powder Processing and Its Effect on Flavor Profile — International Cocoa Organization (ICCO). 2023. https://www.icco.org
- Precision in Baking: Understanding Temperature and Measurement Standards — American Bakers Association. 2024. https://www.americanbakers.org
- Emulsification and Creaming Methods in Cake Batter Chemistry — Journal of Food Science, American Chemical Society. 2023. https://pubs.acs.org
- Oven Temperature Accuracy and Impact on Baking Outcomes — Good Housekeeping Institute. 2025. https://www.goodhousekeeping.com/institute