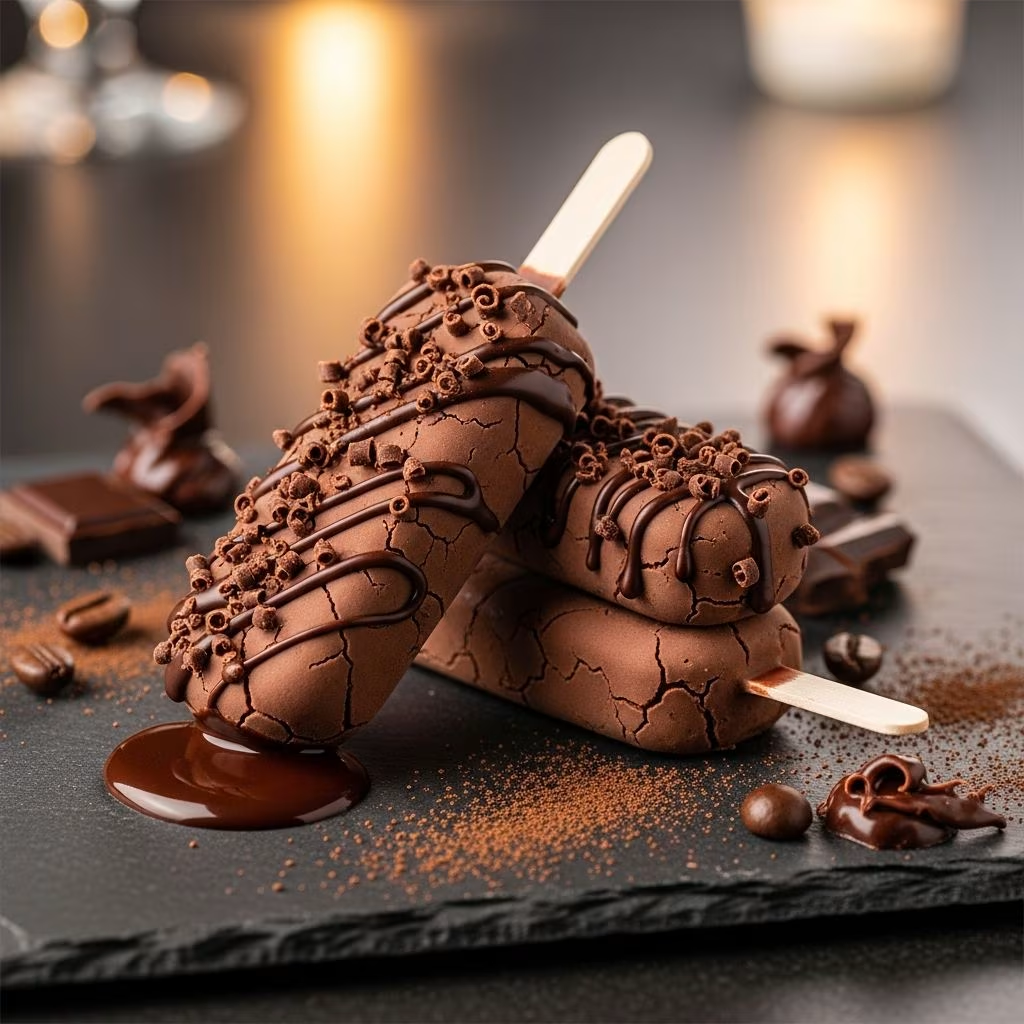
Experience the perfect harmony of deep chocolate richness and invigorating espresso in these homemade ice pops. These treats capture the essence of a fudgy brownie infused with coffee, delivering a creamy texture that’s both nostalgic and refined. Ideal for warm days or anytime cravings strike, they’re straightforward to make with pantry staples.
Why These Ice Pops Stand Out
Unlike store-bought versions loaded with artificial additives, these ice pops rely on high-quality cocoa and instant espresso for authentic flavor. The combination creates a balanced profile: bittersweet chocolate mellowed by milk’s creaminess and sharpened by espresso’s bold edge. They’re versatile too—enjoy as is or dress them up with toppings for extra flair.
- Rich and Creamy: Whole milk and cornstarch ensure a pudding-like consistency without iciness.
- Customizable Intensity: Adjust espresso for milder or stronger coffee notes.
- Make-Ahead Friendly: Store in the freezer for up to three months.
Essential Ingredients Breakdown
Gathering the right components is key to success. Focus on unsweetened cocoa for depth and instant espresso powder for seamless integration—no brewing required.
| Ingredient | Quantity | Purpose |
|---|---|---|
| Granulated Sugar | 1 cup | Sweetens without overpowering chocolate bitterness |
| Unsweetened Cocoa Powder | ¾ cup | Provides intense dark chocolate base |
| Instant Espresso Powder | 2 tbsp | Infuses robust coffee flavor |
| Cornstarch | 2 tbsp | Thickens for smooth, non-icy texture |
| Kosher Salt | ¼ tsp | Enhances overall flavor balance |
| Whole Milk | 3½ cups | Creates creamy body |
| Vanilla Extract | 1 tsp | Adds aromatic warmth |
Pro tip: Opt for Dutch-processed cocoa for smoother results, though natural works well too. For dairy-free adaptations, swap milk with coconut or almond varieties, adjusting thickeners as needed.
Step-by-Step Preparation Guide
Preparation takes about 20 minutes, plus freezing time. Patience during cooking prevents lumps and ensures even texture.
- Combine Dry Ingredients: In a medium saucepan, whisk sugar, cocoa, espresso powder, cornstarch, and salt until uniform. This prevents clumping.
- Incorporate Milk: Add 1 cup milk to form a paste, then stir in remaining milk for a smooth slurry.
- Cook the Base: Heat over medium, whisking frequently until simmering. Switch to a spatula and stir for 3 minutes until thickened like pudding.
- Add Vanilla: Remove from heat, stir in extract. Cool 10 minutes, whisking occasionally to avoid skin formation.
- Fill Molds: Pour into popsicle molds using a measuring cup for precision. Freeze 1 hour until semi-set.
- Insert Sticks: Add sticks and freeze 5+ hours until solid.
Yield: Approximately 10-16 pops, depending on mold size (2-3 oz per pop).
Mastering the Freezing Process
Freezing technique impacts texture. Partial freezing before sticks ensures straight alignment. For quick release, dip molds in hot water 5-10 seconds. If sticks loosen, refreeze briefly.
- Use silicone molds for easiest unmolding.
- Avoid overfilling to prevent spills.
- Layer flavors by pouring in stages if experimenting.
Flavor Variations to Elevate Your Pops
Start classic, then innovate. These tweaks keep things exciting.
| Variation | Add-Ins | Flavor Profile |
|---|---|---|
| Mint Chocolate | 1 tsp peppermint extract | Refreshing, after-dinner mint vibe |
| Spicy Mexican | ½ tsp cayenne, cinnamon | Warm heat balances cool freeze |
| Nutty Hazelnut | 2 tbsp hazelnut spread | Nutella-inspired indulgence |
| Boozy Adult | 2 tbsp coffee liqueur | Sophisticated, post-dinner treat |
| Vegan Delight | Coconut milk, agave | Tropical, refined sugar-free |
For chunkier pops, add chocolate chips or nuts after partial freeze, pushing into soft mixture.
Storage and Serving Suggestions
These pops maintain quality frozen for 3 months. Wrap individually in plastic for grab-and-go convenience. Serve straight from freezer or let soften 2 minutes for creamier bite.
- Topping Ideas: Drizzle chocolate sauce, sprinkle sea salt, or dip in melted dark chocolate.
- Pairings: Alongside fresh berries or as affogato-style with hot espresso pour-over.
- Batch Tips: Double recipe for parties; leftovers double as pudding.
Nutrition and Dietary Insights
Per pop (based on 12 servings): ~150 calories, 4g protein, 25g carbs, 5g fat. Primarily from milk and sugar, they’re a moderate treat. Customize with low-fat milk to reduce calories or use erythritol for keto-friendly version.
Common Mistakes and Fixes
Avoid pitfalls for pro results every time.
- Grainy Texture: Sift cocoa beforehand.
- Icy Pops: Ensure full thickening; add glycerin (1 tsp) for extra smoothness.
- Stuck Pops: Lukewarm—not scalding—water for release.
- Weak Flavor: Taste base before freezing; boost espresso if needed.
Health Benefits of Key Ingredients
Dark chocolate provides antioxidants like flavonoids, supporting heart health per USDA studies. Espresso offers a caffeine boost without crash, aiding alertness. Whole milk supplies calcium and vitamin D for bone strength.
Equipment Essentials
Invest in quality tools:
- 6-10 cavity popsicle molds (silicone preferred)
- Wooden sticks (natural, dye-free)
- Heatproof spatula and whisk
- Digital thermometer (optional, target 160°F/71°C)
Seasonal and Occasion Ideas
Perfect for summer barbecues, coffee shop brunches, or holiday gifts. Package in cellophane bags with ribbons for DIY presents. Scale up for events—crowds love interactive freezing stations.
Frequently Asked Questions
Can I use plant-based milk?
Yes, full-fat coconut or oat milk works best for creaminess. Increase cornstarch by ½ tbsp if needed.
How long do they last?
Up to 3 months wrapped tightly in freezer.
Substitute for espresso powder?
Brewed strong coffee (½ cup, reduced), but powder dissolves best.
Make without molds?
Use ice cube trays with toothpicks or paper cups with sticks.
Are they kid-friendly?
Reduce espresso to 1 tbsp for milder version.
Expert Tips from Home Cooks
Blend mixture post-cooking for ultra-smoothness. Experiment with single-origin cocoa for nuanced flavors. For layered pops, freeze juice base first, then chocolate topper.
References
- USDA FoodData Central: Cocoa Powder Nutrition — United States Department of Agriculture. 2023-05-15. https://fdc.nal.usda.gov/fdc-app.html#/food-details/169593/nutrients
- Caffeine Content in Espresso Powder — Mayo Clinic. 2024-02-10. https://www.mayoclinic.org/healthy-lifestyle/nutrition-and-healthy-eating/in-depth/caffeine/art-20045678
- Calcium in Dairy Milk — National Institutes of Health. 2023-11-20. https://ods.od.nih.gov/factsheets/Calcium-HealthProfessional/
- Flavonoids in Dark Chocolate — Harvard T.H. Chan School of Public Health. 2024-01-08. https://www.hsph.harvard.edu/nutritionsource/food-features/chocolate/