When entertaining guests or hosting a casual gathering, few appetizers deliver the combination of simplicity and satisfaction quite like a well-executed chili bean dip. This crowd-pleasing creation brings together humble pantry staples into a warm, creamy, and deeply flavorful dish that keeps people coming back for more. Whether you’re preparing for a tailgate party, family game night, or casual weekend entertaining, understanding how to layer flavors and achieve the right texture transforms basic ingredients into something truly memorable.
Understanding the Foundation: Core Ingredients Explained
The magic of chili bean dip begins with understanding what each component contributes to the final dish. The foundation typically rests on refried beans, which provide both substance and creaminess to the dip. These beans offer a neutral canvas that accepts and complements bolder flavors without overwhelming the palate. When selecting refried beans, quality matters—opt for varieties without excessive sodium and those with minimal additives for cleaner flavor profiles.
Cream cheese serves as the binding agent that creates the luxurious, spreadable texture people expect from quality dips. Room temperature cream cheese blends more smoothly with other ingredients, preventing lumps and ensuring an even consistency throughout the mixture. This ingredient transforms what could be a dense bean paste into something silky and inviting.
Chili itself—whether homemade or canned—provides the signature bold, spiced character that defines this appetizer. The choice between homemade and canned chili depends on your time availability and flavor preferences. Homemade versions allow complete control over spice levels and ingredient quality, while canned options deliver consistent results with minimal effort. Both approaches produce equally delicious results.
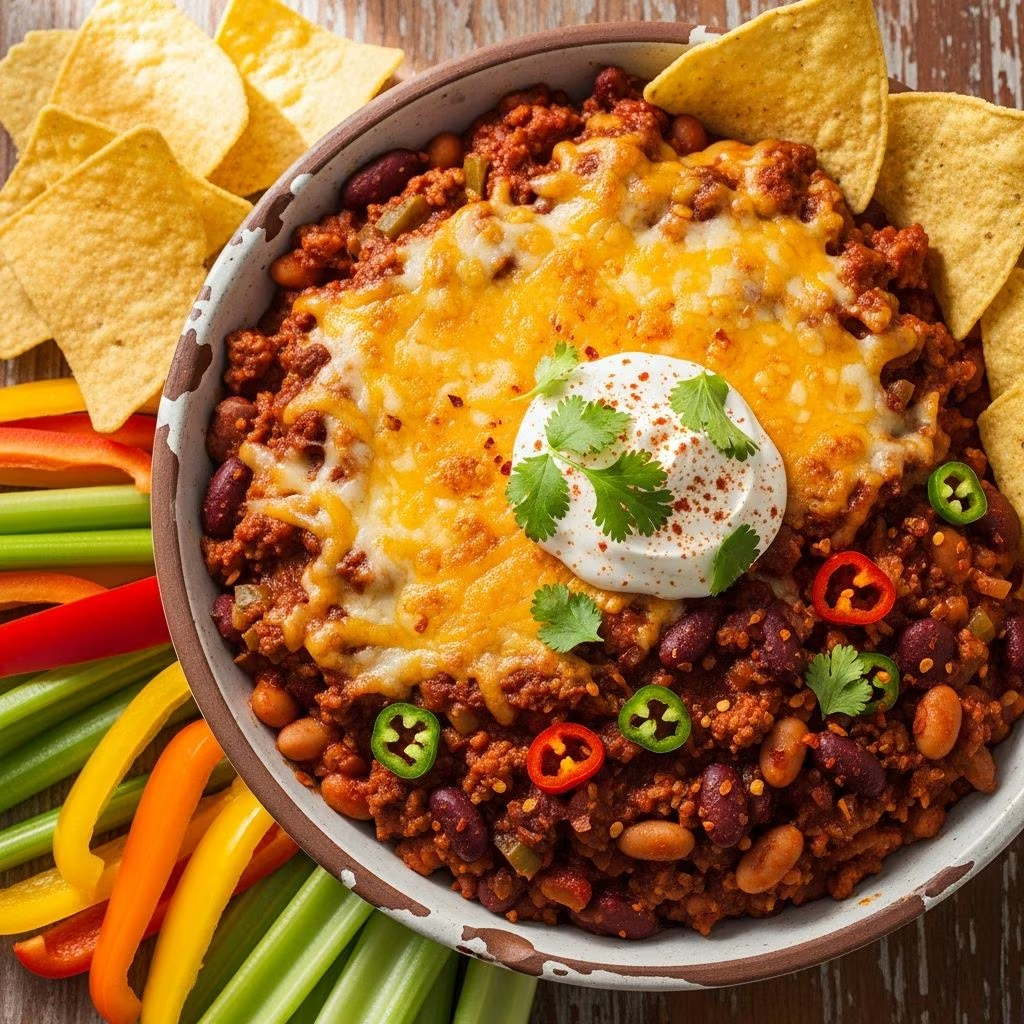
Cheese selection influences not just flavor but texture and appearance. Sharp cheddar delivers more pronounced taste than mild varieties, while hand-shredded cheese melts more uniformly than pre-shredded versions. The cheese creates that essential bubbly, golden topping that signals completion and adds visual appeal to your finished dip.
Building Layers: The Assembly Process
Creating an exceptional chili bean dip relies on understanding how to arrange components for maximum flavor distribution and appealing presentation. The assembly sequence matters significantly because it affects how flavors meld during baking and how textures develop.
Begin by creaming together your softened cream cheese and refried beans until you achieve a smooth, consistent mixture. This initial step creates an emulsified base that holds everything together. Mix thoroughly, scraping bowl sides to ensure no lumps remain. At this stage, incorporate your chosen seasonings—hot sauce, chili powder, cumin, or other flavor enhancers depending on your recipe variation.
Spread this prepared mixture into your baking vessel, creating an even base layer. A shallow baking dish allows more surface area for cheese melting and creates better texture distribution. Pat down gently to ensure contact with all dish surfaces, which helps with even heating.
Layer your cooked chili over the bean-cream cheese base. If your chili contains meat and beans, this adds both protein and substantial flavor that penetrates the softer layers beneath. Distribute it evenly to ensure every serving contains this flavorful middle layer.
Top with your shredded cheese, reserving a portion if your recipe calls for two-stage cheese application. This technique—adding cheese both before and after initial baking—creates appealing layered effects and ensures optimal melting throughout.
Temperature and Timing: Baking Fundamentals
Proper oven temperature and baking duration transform your assembled ingredients into a cohesive, delicious appetizer. Most chili bean dip recipes call for preheating your oven to 350-375°F. This temperature range provides gentle, even heating that melts cheese without browning it excessively or drying out the bean mixture underneath.
Initial baking typically requires 20-25 minutes for the ingredients to heat thoroughly and cheese to begin melting. Remove your dip at this point if your recipe incorporates a two-stage cheese approach. Add your reserved cheese and return to the oven for an additional 5-10 minutes until the top achieves that signature bubbly, slightly browned appearance.
Allowing your finished dip to rest for 5-10 minutes after removing from the oven permits the mixture to set slightly without cooling completely. This brief resting period also helps flavors settle and blend more completely. The dip will continue cooking slightly from residual heat, which can actually improve texture.
Flavor Enhancement Techniques
While the basic combination of beans, cream cheese, chili, and cheese creates a satisfying dip, thoughtful additions elevate your creation toward restaurant-quality status.
Spice and Seasoning: Hot sauce adds customizable heat levels tailored to your audience preferences. Begin conservatively—you can always add more, but you cannot remove excess heat. Chili powder, cumin, garlic powder, and oregano build complexity that makes people struggle to identify your secret ingredients.
Fresh Elements: Sliced green onions provide freshness and mild onion flavor that cuts through richness. Fresh jalapeño slices add both heat and visual interest. Cilantro introduces brightness that balances heavier components. These additions work best as final garnishes rather than mixing into the dip itself.
Textural Contrast: Pico de gallo—a combination of diced tomatoes, onions, cilantro, and lime juice—creates refreshing contrast against creamy elements. This addition transforms your dip from one-note to multi-dimensional.
Chili Options and Substitutions
Your chili selection dramatically impacts your dip’s final character. Understanding available options allows you to customize your creation:
- Homemade Quick Chili: Prepare in parallel with dip assembly using ground beef, onions, garlic, spices, beef broth, tomato sauce, and beans. This approach yields approximately 2.5 cups of chili—ideal dip proportions.
- Canned Chili: Offers convenience with consistent results and requires no advance preparation. Quality varies between brands; experiment to find your preference.
- Leftover Chili: Repurposing previously made chili provides economical convenience and makes this recipe perfect for post-dinner entertaining.
- Vegetarian Variations: Bean-based chili without meat creates satisfying vegetarian versions maintaining full flavor profiles.
Serving Strategies and Presentation
How you present and serve your chili bean dip influences both enjoyment and perceived quality. Serve your finished dip directly from its baking vessel to maintain temperature and create casual appeal. Surround with tortilla chips—crispy varieties that hold up well to repeated dipping perform better than softer options. Corn chips provide alternative starch that complements flavors differently than traditional tortillas.
For larger gatherings, transfer finished dips into slow cookers set to warm settings to maintain optimal temperature throughout your event. Replenish chips as they deplete. Garnish your dip surface periodically to maintain visual appeal.
Individual serving suggestions extend your dip’s utility beyond simple appetizer function. Use as a taco filling, quesadilla ingredient, or enchilada topping. These applications transform your dip into multi-purpose components of more substantial dishes.
Advance Preparation and Make-Ahead Options
Entertaining becomes significantly less stressful when you prepare components in advance. Assemble your dip completely through the cheese topping stage, cover tightly, and refrigerate up to 24 hours ahead. When ready to serve, simply add 5-10 minutes to total baking time to account for cold ingredients.
Alternatively, prepare your dip in grilling-safe cookware and transport directly to tailgate or outdoor gathering locations. Your dip bakes in the same vessel you’ll serve from, simplifying logistics and cleanup requirements.
Microwave versions accommodate situations where oven access isn’t available. Prepare your mixture without the cheese topping, cover, and microwave for approximately 2 minutes. Top with shredded cheese and microwave an additional 2-4 minutes until bubbly.
Customization Options and Variations
Transform basic chili bean dip into distinctive versions reflecting your preferences or dietary needs:
| Variation | Key Modifications | Best For |
|---|---|---|
| Spicy Version | Increase hot sauce, add cayenne pepper, include jalapeños | Heat-loving guests |
| Black Bean Style | Substitute black beans for refried beans, add cumin and lime | Southwestern flavor preferences |
| Cream-Forward | Increase cream cheese ratio, reduce chili quantity | Milder flavor preferences |
| Vegetarian | Use meatless chili or bean-based alternatives | Dietary restrictions |
| Loaded Version | Add corn, black olives, bell peppers, bacon bits | Substantial appetizer needs |
Frequently Asked Questions
Can I use any type of chili for this dip?
Yes, virtually any chili works effectively, whether homemade, canned, or previously frozen. Approximately 2.5 cups of chili suits standard dip proportions. Choose versions matching your spice preferences.
Should I soften cream cheese before using?
Room temperature cream cheese blends smoothly without lumps, creating superior texture. Allow 30-60 minutes for softening on your counter before preparation begins.
Why does my cheese not melt smoothly?
Hand-shredded cheese melts more evenly than pre-shredded varieties, which contain anti-caking agents preventing smooth melting. Invest the minimal extra time shredding your own cheese for noticeably better results.
How can I prevent my dip from becoming too thick?
Reduce baking time slightly or incorporate sour cream into your mixture to maintain creamier consistency. The ratio of liquids to solids significantly impacts final texture.
Can I make this dip lactose-free?
Substitute lactose-free cream cheese and cheddar for traditional versions while maintaining all other ingredients. The result proves equally delicious and accommodates dietary restrictions.
Pro Tips for Dip Success
Several insider techniques transform ordinary chili bean dips into exceptional ones. Position your baking dish on the oven’s center rack to ensure even air circulation and uniform cooking. Uncover your dip during final minutes to achieve the preferred cheese texture—covering maintains creaminess while uncovering produces crispier surfaces.
Taste your assembled mixture before baking and adjust seasonings accordingly. Salt levels, spice intensity, and flavor balance benefit from final adjustments before heat application. Trust your palate—you understand your audience’s preferences better than any recipe can anticipate.
Invest in quality ingredients despite modest cost differences. Superior cream cheese, real sharp cheddar, and flavorful chili create noticeably better results than budget alternatives. Your guests notice and appreciate the difference.
Conclusion: Creating Your Signature Dip
Chili bean dip represents the accessible appetizer—simple enough for weeknight entertaining yet impressive enough for formal gatherings. By understanding ingredient functions, mastering basic techniques, and customizing to suit your preferences, you create a signature version people request repeatedly. Whether you’re a seasoned entertainer or aspiring host, this straightforward recipe rewards experimentation and delivers consistent satisfaction. Your next gathering deserves the warm, inviting presence of homemade chili bean dip.
References
- Easy Black Bean and Corn Chili Dip Recipe — Cabot Creamery. https://cabotcreamery.com/blogs/recipes/black-bean-chili-dip
- Chili Cheese Bean Dip — An Affair from the Heart. https://anaffairfromtheheart.com/chili-cheese-bean-dip/
- Chili Cheese Dip Recipe — The Pioneer Woman. https://www.thepioneerwoman.com/food-cooking/recipes/a63573900/chili-cheese-dip-recipe/
- Chili Bean Dip Recipe — WILLIAMS Foods. https://williamsfoods.com/recipes/snacks-sides-appetizers/chili-bean-dip-recipe/
- 3 Ingredient Chili Dip — Al Dente Diva. https://aldentediva.com/3-ingredient-chili-dip/