Understanding Piccata: The Foundation of This Classic Dish
Piccata represents a traditional Italian cooking technique that transforms simple ingredients into something distinctly elegant and restaurant-worthy. At its core, the method involves preparing thin cutlets of meat—typically chicken or veal—coating them lightly with flour, and then sautéing them quickly over high heat until they develop a golden, crispy exterior while maintaining a tender interior. The name itself derives from the Italian word meaning “a blow” or “a hit,” referring to the pounding technique used to flatten the meat.
What distinguishes this cooking approach is its speed and simplicity combined with sophisticated flavor development. The high-heat searing creates what chefs call the Maillard reaction, a chemical process that generates complex, savory flavors through the browning of proteins and sugars. This technique, when applied to chicken piccata with artichoke hearts, creates a dish that feels restaurant-quality while remaining accessible for home cooks of all skill levels.
Selecting and Preparing Your Ingredients
The foundation of an exceptional piccata dish begins with ingredient selection. Boneless, skinless chicken breasts form the primary component, requiring approximately 1.5 to 2 pounds for a standard four to six-person serving. The key to success lies not in the ingredient itself but in how you prepare it for cooking.
The Art of Pounding Chicken
Before cooking, chicken breasts must be transformed from their natural thickness into thin, uniform cutlets. This step serves multiple purposes: it ensures even cooking throughout, reduces the overall cooking time, and creates a larger surface area for browning. Begin by placing each chicken breast on a cutting board between two sheets of plastic wrap or parchment paper. Using a meat mallet or the bottom of a heavy skillet, gently but firmly pound the chicken from the center outward, working toward the edges. The goal is achieving a consistent quarter-inch thickness throughout each piece.
Many home cooks make the mistake of pounding too aggressively, which can tear the meat fibers and create an undesirable texture. Instead, use steady, controlled pressure with the flat side of the mallet. Once properly pounded, some recipes call for cutting butterflied breasts in half, which further reduces thickness and cooking time.
Seasoning and Dredging
Prepare a shallow plate or dish with all-purpose flour mixed generously with kosher salt and freshly ground black pepper. Some variations incorporate dried herbs like oregano or even grated Parmesan cheese into this mixture for added flavor complexity. Dredge each chicken cutlet thoroughly in the seasoned flour mixture, ensuring complete coverage while shaking off excess flour. This coating serves two critical functions: it promotes browning through the Maillard reaction and helps thicken the sauce as the flour mingles with the pan drippings.
Building Flavor Through Strategic Cooking Techniques
Searing the Chicken to Perfection
Heat a large skillet over medium-high temperature until it becomes noticeably hot—you should see wisps of heat rising from the pan surface, though the oil should never smoke. Add a combination of olive oil and butter to the pan; the butter contributes rich flavor while the olive oil raises the smoke point, preventing burning at high temperatures.
Once the fat shimmers across the pan surface, carefully place the floured chicken cutlets into the hot oil, working in batches to avoid overcrowding. Overcrowding causes the temperature to drop dramatically, resulting in steaming rather than searing—a critical distinction. The chicken should sizzle immediately upon contact with the pan. Cook undisturbed for approximately four minutes on the first side until a deep golden crust forms, then flip and cook the second side for an additional four minutes. The internal temperature should reach 165 degrees Fahrenheit, though at this thickness, visual cues like opaque appearance throughout usually indicate doneness accurately.
Transfer the cooked chicken to a waiting plate and resist the urge to clean the pan. Those browned bits, called fond, contain concentrated flavor compounds essential to sauce development.
Creating the Aromatic Base
Return the unwashed pan to medium-high heat and add fresh butter along with remaining olive oil. The combination of fats ensures the garlic and artichokes cook evenly without burning. Add minced or chopped garlic and cook for approximately one minute until fragrant but not browned. Browning garlic creates bitterness, so timing here matters significantly.
Next, introduce the artichoke hearts—either fresh jarred artichokes rinsed and drained, or frozen artichokes that have been thawed and patted dry to remove excess moisture. Sauté these components together for another minute, allowing flavors to meld and the artichokes to warm through slightly.
Deglazing and Sauce Development
The Deglazing Process
Pour dry white wine into the pan with the aromatics and artichokes, immediately scraping the pan bottom vigorously with a wooden spoon to release all the fond. This process, called deglazing, transforms stuck-on browned bits into liquid flavor. Watch as the fond dissolves into the wine, creating a deeply flavorful liquid base. Allow this mixture to simmer over medium-high heat until the liquid volume reduces by approximately half—this concentration of flavors intensifies the overall taste profile.
Completing the Sauce
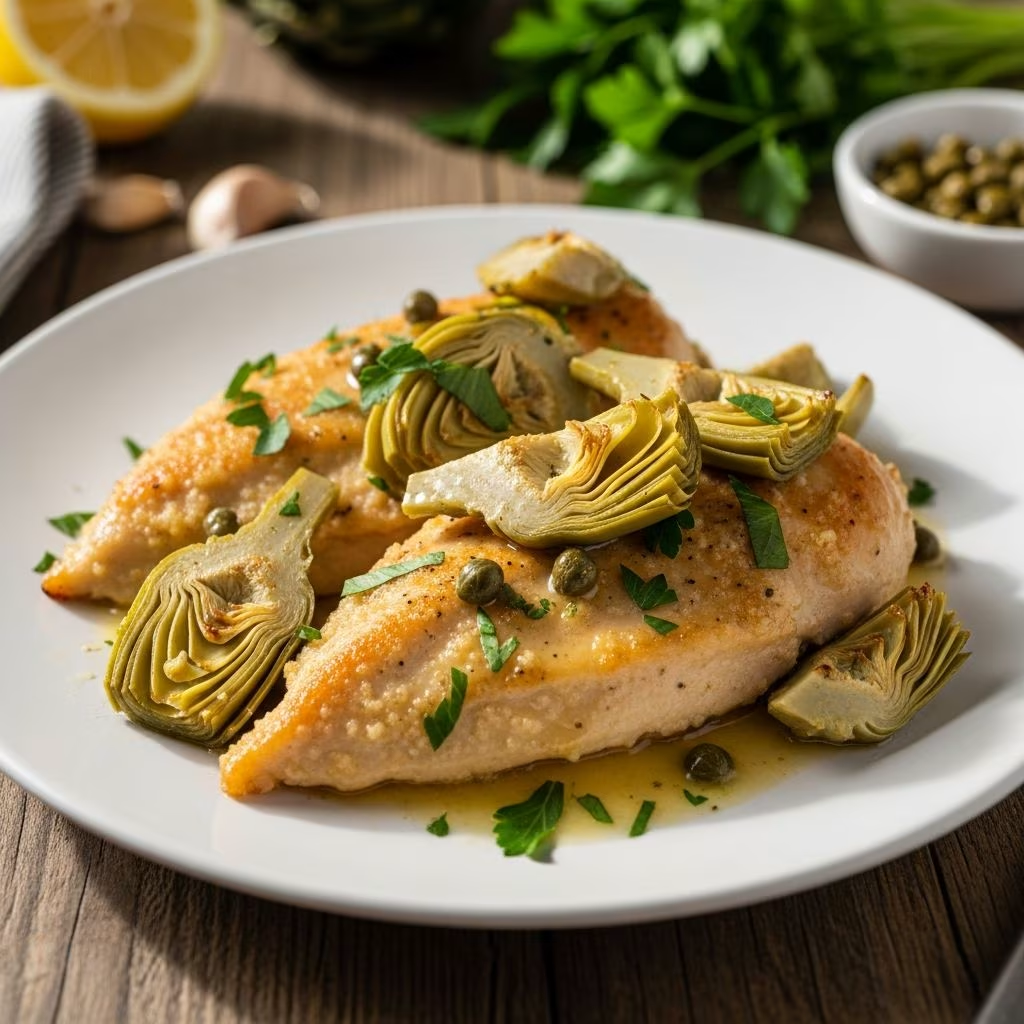
Once the wine has sufficiently reduced, add low-sodium chicken broth to the pan. The broth provides body and additional savory depth without overwhelming the delicate lemon notes that define piccata. Pour in fresh lemon juice—the juice of one large lemon typically provides the right balance of acidity—and add rinsed and drained capers, which contribute salty, briny punctuation to the sauce.
Reduce the heat to medium and return the pan contents to a gentle simmer. Here’s where technique again matters: instead of simply stirring the sauce, whisk in the remaining tablespoon of cold butter. This process, called “mounting” the sauce in culinary terminology, creates an emulsion that gives the sauce a silky, glossy finish rather than an oily appearance. Continue simmering and stirring occasionally for approximately five minutes until the sauce achieves a slightly thickened consistency that coats the back of a spoon.
Bringing Everything Together
Return the seared chicken pieces to the pan with the completed sauce, turning each piece to ensure complete coating. The residual heat will warm the chicken through—this step requires only about two minutes. Finish with a generous handful of fresh flat-leaf parsley, which adds color, texture, and a subtle herbaceous note that brightens the overall composition.
Taste the dish and adjust seasonings as needed. Some diners prefer additional lemon brightness, while others want more salt or capers. Because taste preferences vary significantly, this final tasting step ensures your version suits your palate perfectly.
Serving Suggestions and Complementary Sides
Grain-Based Accompaniments
The piccata sauce’s silky texture and bright flavors pair beautifully with various grain options. Consider serving over fluffy white rice, which provides a neutral canvas allowing the sauce to shine. Alternatively, quinoa offers a slightly nutty flavor and additional protein, making the meal more nutritionally complete. Pasta—particularly linguine or fettuccine—works exceptionally well, as the flat noodles capture and hold the sauce effectively.
Vegetable Pairings
Since artichokes already appear in the dish, consider supplementary vegetables that add color and nutritional variety. Sautéed fresh spinach, roasted asparagus, or steamed broccoli all complement the lemon and caper flavors without competing for attention. Some cooks incorporate spinach directly into the piccata during the final sauce stage, transforming it into a more substantial one-pan meal.
Wine Pairing Recommendations
The bright acidity and savory complexity of chicken piccata pairs naturally with crisp white wines. Pinot Grigio, Sauvignon Blanc, and Vermentino all feature the acidity necessary to match the lemon and capers while providing mineral notes that enhance the overall dining experience.
Recipe Variation Opportunities
Protein Substitutions
While chicken forms the traditional base, this cooking method adapts beautifully to other proteins. Thin veal cutlets—the original piccata preparation—offer a more delicate flavor profile. Pounded turkey cutlets provide a leaner alternative, while flattened pork medallions create a heartier version. Even thick white fish fillets, though not traditionally pounded, respond well to the piccata cooking technique and sauce preparation.
Flavor Modifications
The fundamental technique remains flexible regarding supporting flavors. Some variations incorporate fresh thyme or oregano into the sauce. Others add sun-dried tomatoes for complexity or substitute anchovy paste for some of the salt to deepen umami flavors. The addition of Dijon mustard contributes subtle tang and helps emulsify the sauce further.
Common Cooking Challenges and Solutions
| Challenge | Likely Cause | Solution |
|---|---|---|
| Chicken turns out tough or rubbery | Overcooking due to thick pieces or high temperature | Pound chicken thinner and use a meat thermometer to verify doneness at 165°F |
| Sauce appears greasy or separated | High heat or insufficient whisking of cold butter | Reduce to medium heat and whisk cold butter slowly into the warm sauce |
| Flour coating doesn’t adhere properly | Wet chicken surface or insufficient seasoning in flour | Pat chicken dry before dredging and season flour mixture generously |
| Sauce lacks depth of flavor | Insufficient deglazing or underdeveloped fond | Allow wine to reduce more completely and scrape pan thoroughly during deglazing |
Frequently Asked Questions
Can I prepare piccata ahead of time?
Piccata is best served immediately after preparation, as the sauce continues thickening as it cools and the chicken begins drying out. However, you can prepare individual components in advance: pound and season chicken up to two hours ahead, prepare the sauce base without the chicken, and have all ingredients measured and ready. Final assembly then takes only fifteen to twenty minutes.
What if I don’t have fresh artichokes?
Jarred artichokes work beautifully when rinsed and drained thoroughly to remove excess oil and salt. Frozen artichokes, when thawed and patted dry, offer comparable results. Fresh artichoke preparation is time-consuming and unnecessary for this recipe.
How do I prevent the chicken from becoming dry?
Thin pounding ensures rapid cooking that preserves moisture. Avoid cooking beyond 165 degrees internal temperature, and remember that carryover cooking continues raising temperature after removing from heat. Returning the chicken to the sauce at the very end—just for warming rather than cooking—further prevents drying.
Can I double this recipe?
Absolutely. Scale ingredients proportionally, but cook the chicken in multiple batches rather than overcrowding the pan, which prevents proper browning. The sauce can be prepared in a larger pan if you have one available.
What wine works best for deglazing?
Use dry white wine that you would enjoy drinking. Pinot Grigio, Sauvignon Blanc, or unoaked Chardonnay all work well. Avoid heavily oaked wines or sweet wines, which can imbalance the delicate lemon-caper profile.
Nutritional Considerations and Dietary Adaptations
A single serving of chicken piccata with artichoke hearts typically provides approximately 300-350 calories, with significant protein content from the chicken and minimal carbohydrates from the light flour coating. The dish naturally accommodates various dietary preferences: it’s gluten-free when using appropriate flour substitutes, dairy-free when substituting olive oil for butter, and keto-friendly when served without grains.
The artichoke hearts contribute fiber and various micronutrients including folate and vitamin K, while lemons provide vitamin C and antioxidants. Capers add probiotics if using traditionally fermented varieties. This combination creates a nutritionally well-rounded meal requiring minimal additional supplementation.
Final Thoughts on Mastering Piccata Preparation
Chicken piccata with artichoke hearts represents an accessible entry point into more sophisticated cooking techniques. The fundamental skills required—proper pounding, temperature management, and sauce emulsification—transfer to countless other dishes. What appears restaurant-quality on the plate requires only straightforward technique and quality ingredients rather than extensive culinary training. With practice, this dish becomes a reliable choice for both weeknight dinners and more formal entertaining occasions, delivering consistent excellence through understanding the underlying principles of why each step matters.
References
- Chicken Piccata with Artichokes — Williams Sonoma. https://www.williams-sonoma.com/recipe/chicken-piccata-with-artichokes.html
- Chicken Piccata With Artichokes — Italian Food Forever. 2020-04-10. https://italianfoodforever.com/2020/04/chicken-piccata-with-artichokes/
- Chicken Piccata with Artichokes and Spinach — Taste Cooking. https://tastecooking.com/recipes/chicken-piccata-with-artichokes-and-spinach/
- Chicken Piccata with Artichoke Hearts — Reese Specialty Foods. https://reesespecialtyfoods.com/recipe/chicken-piccata-artichoke-hearts/