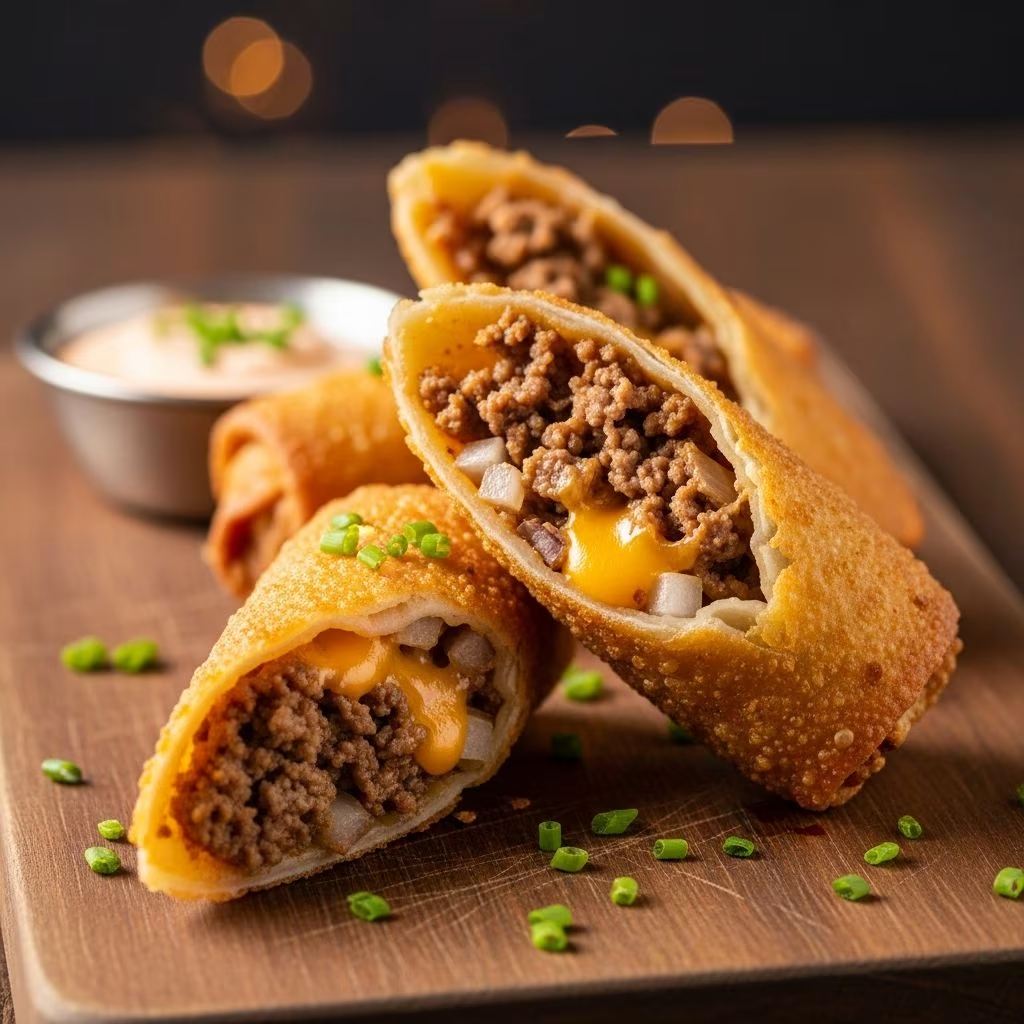
Imagine the savory essence of a classic cheeseburger—juicy ground beef, sharp cheddar, tangy pickles, and caramelized onions—transformed into bite-sized, crunchy delights. Cheeseburger egg rolls offer all these familiar flavors in a portable, crispy package that’s ideal for gatherings, family movie nights, or casual snacking. This fusion of American diner comfort and Asian-inspired wrappers creates an addictive appetizer that’s simple to prepare yet impressive to serve.
These rolls draw inspiration from popular versions found at theme parks and chain restaurants, but you can customize them at home with pantry staples. Whether deep-fried for maximum crunch, air-fried for a lighter touch, or baked for health-conscious eaters, they deliver bold taste without the mess of traditional burgers. Pair them with creamy dipping sauces mimicking special burger spreads, and you’ve got a crowd-pleasing hit.
Why Cheeseburger Egg Rolls Are a Game-Changer
Traditional burgers require buns, plates, and utensils, but egg rolls are handheld and mess-free. They’re versatile for any occasion: super bowl parties, potlucks, or weeknight appetizers. The thin egg roll wrappers crisp up beautifully, contrasting the gooey cheeseburger filling inside. Plus, they’re customizable—add bacon for smokiness, swap cheeses for variety, or tweak spices for heat.
Preparation is straightforward, taking about an hour total, with most time spent on cooking the filling and rolling. No advanced skills needed; even beginners can master the technique. Nutritionally, while fried versions are indulgent, air frying cuts oil significantly, making them a smarter indulgence.
Essential Ingredients for Perfect Rolls
Gathering the right components ensures flavorful, sturdy rolls that hold together during cooking. Focus on fresh ground beef (80/20 lean for juiciness), quality cheese that melts smoothly, and egg roll wrappers from the refrigerated section of your grocery store.
- Ground beef: 1-2 pounds, preferably 80/20 for fat that keeps the filling moist.
- Onions and garlic: Finely diced for even distribution; yellow or white onions add subtle sweetness.
- Cheese: Shredded cheddar or American slices (about 1-12 oz per pound of beef) for creamy melt.
- Pickles: Dill pickles, diced small (½ cup) for classic tang.
- Seasonings: Salt, pepper, garlic powder, Worcestershire sauce, soy sauce or coconut aminos for umami depth.
- Egg roll wrappers: 12-20 sheets, thawed if frozen.
- Oil: Vegetable or avocado for frying; cornstarch slurry for sealing.
For dipping sauces, mix mayo, ketchup, mustard, relish, and spices to evoke fast-food favorites.
Step-by-Step Guide to Making the Filling
The heart of these rolls is a well-seasoned, cohesive filling. Start by sautéing aromatics to build flavor layers.
- Heat 1-2 tablespoons oil in a skillet over medium heat. Add ½ diced onion and 2-5 minced garlic cloves; cook until softened and fragrant, about 3-5 minutes.
- Add 1-2 pounds ground beef, breaking it up with a spoon. Season with ½-1½ tsp salt, ½-1 tsp pepper, 1 tsp garlic powder, and 1-1½ tsp smoked paprika if desired.
- Cook until browned, draining excess fat. Stir in 1 tbsp Worcestershire, 1-2 tsp soy sauce, and 2 tbsp ketchup for moisture and tang. Simmer 2-3 minutes.
- Remove from heat. Mix in 6-12 oz shredded or chopped cheese until melted. Fold in ½ cup diced pickles. Let cool slightly to avoid sogginess.
This filling can be made ahead and refrigerated for up to 24 hours, streamlining assembly.
Mastering the Rolling Technique
Rolling ensures tight, leak-proof egg rolls. Work on a clean, dry surface.
| Step | Action | Tip |
|---|---|---|
| 1 | Place wrapper diamond-shaped. | Add 2-3 tbsp filling horizontally, 1 inch from bottom. |
| 2 | Fold bottom corner over filling. | Tuck tightly to enclose. |
| 3 | Moisten edges with egg white or cornstarch slurry (2 tsp cornstarch + ¼ cup water). | Prevents bursting during frying. |
| 4 | Fold in sides, then roll upward. | Press seam to seal; aim for 3-4 inch rolls. |
Practice with one or two to get the envelope shape. Keep unused wrappers covered with a damp towel.
Cooking Methods for Every Kitchen
Choose based on equipment and preference. All yield crispy results.
Deep Frying (Classic Crunch)
Heat 3-4 inches vegetable oil to 350-375°F in a deep pot. Fry 3-4 rolls at a time, 2-3 minutes per side until golden. Drain on paper towels.
Air Frying (Healthier Option)
Spray rolls with oil. Air fry at 375°F for 8-12 minutes, flipping halfway. No preheating needed for small batches.
Pan Frying or Baking
Shallow fry in ½ inch oil over medium-high, 2-3 minutes per side. Or bake at 400°F for 15-20 minutes, brushing with oil.
Monitor oil temperature to avoid greasy or burnt rolls.
Irresistible Dipping Sauces
Elevate with homemade dips. Whip up in minutes.
- Special Sauce: ½ cup mayo, ¼ cup ketchup, 3 tbsp mustard, ½ tsp garlic/onion powder, pinch cayenne, 1-2 tbsp relish. Whisk and chill.
- Ranch or Aioli: Mix sour cream, dill, garlic for herby contrast.
- Burger Relish Dip: Sweet relish, ketchup, vinegar for pickle-forward zing.
These sauces store refrigerated for a week, perfect for meal prep.
Customizations and Variations
Adapt to tastes or diets.
- Bacon Cheeseburger: Add 4 crumbled slices to filling.
- Spicy Kick: Cayenne, jalapeños, or pepper jack cheese.
- Veggie Boost: Finely chopped mushrooms, bell peppers.
- Cheese Swap: Monterey Jack, mozzarella for different melts.
- Low-Carb: Use lettuce wraps or low-carb wrappers.
For kids, skip spice; for adults, amp up umami with liquid smoke.
Storage, Freezing, and Reheating Tips
Make ahead for convenience.
- Fridge: Cooked rolls last 3-4 days in airtight container.
- Freezer: Assemble uncooked, freeze flat on tray, then bag for 2-3 months.
- Reheat: Air fry 400°F 5-7 minutes or oven 375°F until crisp. Avoid microwave sogginess.
Frozen rolls fry directly from freezer, adding 1-2 minutes cook time.
Nutrition and Serving Suggestions
Per roll (fried, approx.): 250-300 calories, 15g protein, 12g fat, 20g carbs. Balance with veggies.
Serve with fries, coleslaw, or salad. For mains, pair with rice or as taco filling.
Frequently Asked Questions
Can I bake instead of fry?
Yes, brush with oil and bake at 400°F for 18-22 minutes, flipping once.
Are spring roll wrappers the same?
Spring roll wrappers are thinner; egg roll are sturdier for frying. Both work.
How do I prevent leaks?
Cool filling fully, use slurry seal, don’t overfill.
Vegetarian version?
Swap beef for plant-based crumbles or lentils.
Make ahead for parties?
Fry day-of or freeze uncooked; reheat in batches.
Pro Tips for Restaurant-Quality Results
- Use a thermometer for oil temp.
- Double-fry for extra crunch: First 2 minutes low, rest high.
- Finely chop add-ins for even texture.
- Experiment with cheeses for melt tests.
References
- Cheeseburger Egg Rolls – The Country Cook — The Country Cook. 2023. https://www.thecountrycook.net/cheeseburger-egg-rolls-with-dipping-sauce/
- Cheeseburger Egg Rolls | Big Mac Sauce — Spinach and Bacon. 2023-05-16. https://spinachandbacon.com/2023/05/16/cheeseburger-egg-rolls/
- Cheeseburger Egg Rolls — Will Cook For Smiles. 2023. https://www.willcookforsmiles.com/cheeseburger-egg-rolls/
- Cheeseburger Egg Rolls — For the Love of Gourmet. 2023. https://fortheloveofgourmet.com/cheeseburger-egg-rolls/
- Cheeseburger Egg Rolls (Cheesecake Factory Copycat) — Plan to Eat. 2024-02. https://www.plantoeat.com/blog/2024/02/cheeseburger-egg-rolls-cheesecake-factory-copycat/