Cast iron baking has experienced a renaissance in modern kitchens, and for good reason. The even heat distribution and superior crust development that cast iron provides make it an exceptional choice for biscuit baking. Buttermilk biscuits, a staple of comfort food cuisine, reach their full potential when prepared in this versatile cookware. This comprehensive guide explores every aspect of creating bakery-quality buttermilk biscuits that boast a tender, flaky interior and a perfectly golden exterior.
Understanding the Science Behind Great Biscuits
The foundation of exceptional biscuits lies in understanding the interplay between ingredients and technique. Buttermilk serves as more than a flavor component; its acidic nature reacts with baking soda to create lift and tenderness. The fat content in butter creates steam pockets during baking, producing the characteristic flaky layers that distinguish quality biscuits from dense alternatives.
Temperature control proves critical throughout the biscuit-making process. Cold butter remains essential because it doesn’t immediately incorporate into the flour, instead creating small pockets that steam during baking. This contrast between temperature and technique explains why professional bakers emphasize keeping ingredients cold until the final moments before baking.
Essential Ingredients and Their Roles
Creating superior biscuits requires understanding how each ingredient contributes to the final product:
- All-Purpose Flour: The primary structure component, typically ranging from 2 to 4 cups depending on recipe yield. The protein content in all-purpose flour provides enough structure for rise without creating toughness.
- Cold Unsalted Butter: The critical fat component that creates flakiness. Recipes call for 4 to 12 tablespoons, kept cold and incorporated just before mixing.
- Buttermilk: The acidic liquid that tenderizes and contributes tangy flavor, typically between 1 and 2 cups.
- Leavening Agents: Baking powder and baking soda work together to create lift, with baking soda reacting with buttermilk’s acidity.
- Salt: Enhances flavor development, usually 1 to 1.25 teaspoons per batch.
Preparing Your Ingredients for Success
Preparation begins before you mix anything together. The quality of your final biscuits depends significantly on how thoroughly you prepare your workspace and ingredients.
Freezing the Butter: Professional bakers recommend freezing butter for at least 30 minutes before grating or cutting. This extended cold state ensures that butter remains in discrete particles rather than spreading into the flour. Some recipes suggest using a cheese grater to shred frozen butter directly into the flour mixture, a technique that distributes fat evenly while maintaining optimal temperature.
Chilling Your Buttermilk: While less critical than freezing butter, chilling buttermilk to approximately 40°F helps maintain dough temperature during mixing. This simple step prevents premature butter softening and supports better final texture.
Measuring Flour Accurately: The flour quantity significantly impacts biscuit texture. Spoon flour into measuring cups and level with a knife rather than scooping directly from the bag, which compacts flour and can add an extra 15-20% more than intended.
The Dry Ingredient Foundation
Combining dry ingredients seems straightforward but requires attention to detail. Whisk together flour, baking powder, baking soda, and salt thoroughly to distribute leavening agents evenly. This distribution ensures consistent rise throughout your biscuits rather than creating some with excessive rise and others with insufficient lift.
If using self-rising flour, which contains leavening agents and salt, adjust your recipe accordingly by eliminating separate baking powder and salt measurements.
Incorporating Fat for Maximum Flakiness
The technique for incorporating butter distinguishes exceptional biscuits from mediocre ones. Whether using a pastry cutter, two knives, or a cheese grater, the goal remains identical: distribute small butter pieces throughout the flour without fully blending them.
The Pastry Cutter Method: Cut cold butter into small cubes and work it into the flour mixture using a pastry cutter with a rocking motion, or use two knives in a scissor-like action. Continue until the mixture resembles coarse breadcrumbs with pea-sized butter pieces still visible.
The Grater Method: Using the large holes of a box grater on frozen butter provides superior results for many bakers. The grating process breaks butter into ideal-sized pieces while the cold temperature remains maintained. Flour the butter stick for better grip or use a paper towel to prevent slipping.
Bringing the Dough Together
Adding buttermilk requires a gentle touch. Pour it slowly while stirring with a silicone spatula or wooden spoon until the dough just combines. The dough will appear slightly shaggy and may retain some loose flour at this stage.
Overworking the dough at this point develops gluten, creating tough biscuits rather than tender ones. Stop stirring as soon as you achieve a unified mass, even if some flour particles remain slightly dry.
Kneading and Shaping Techniques
Turn the dough onto a lightly floured surface and knead gently just until loose flour disappears and the dough holds together. This minimal kneading—typically 2-4 turns—develops enough gluten for structure without creating density.
Rolling and cutting techniques vary among bakers. Some recipes advocate rolling the dough into a large square, cutting into quarters, stacking them, and repeating this process two additional times. This lamination technique, similar to puff pastry methods, creates exceptional flakiness by creating multiple butter layers.
Alternatively, roll the dough approximately 0.75 inches thick and cut using a 3-inch round cutter. Avoid twisting your cutter, as this seals the edges and prevents proper rise. Press straight down and lift straight up for optimal results.
Using Your Cast Iron Skillet Effectively
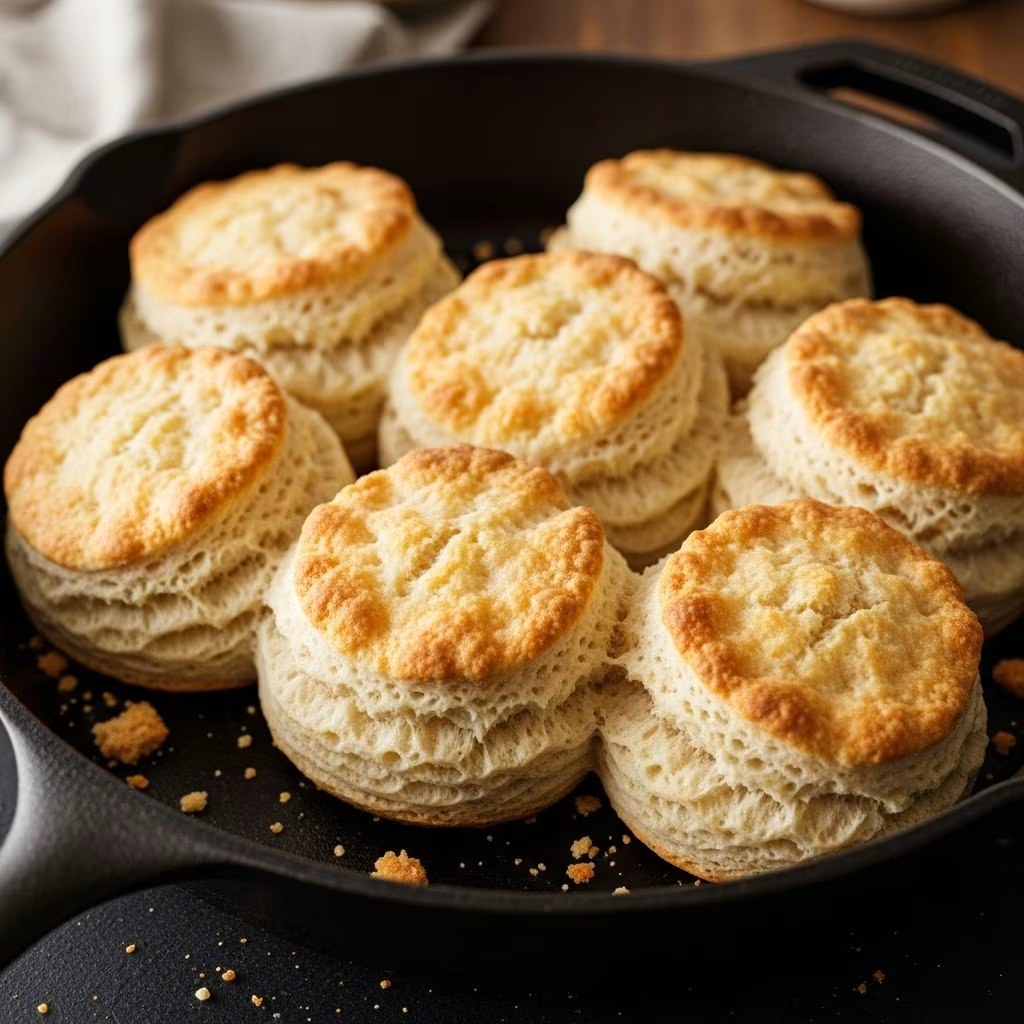
The cast iron skillet’s thermal properties prove invaluable for biscuit baking. Preheat your 9 to 10-inch cast iron skillet in the oven while bringing it to temperature, achieving a thoroughly heated baking surface. This hot pan promotes rapid bottom browning and ensures an even crust.
Arrange prepared biscuits in the heated skillet, spacing them closely together or allowing them to touch slightly. This proximity encourages upward rise rather than spreading outward, creating taller, more aesthetically pleasing biscuits. Brush the tops with melted butter before baking to promote golden browning and add richness.
Baking Parameters and Temperature Control
| Baking Temperature | Baking Time | Expected Yield |
|---|---|---|
| 425-450°F | 15-20 minutes | 7-12 biscuits |
| 350°F (alternative) | 20 minutes | Variable |
Most recipes call for baking at 425 to 450°F, achieving golden-brown tops within 15 to 20 minutes. Rotate your cast iron skillet halfway through baking to ensure even browning, as ovens often have hot spots that create uneven color.
Biscuits are finished when the tops display a light golden-brown color and the sides appear set. Overbaking creates hard, dry biscuits, so monitor closely during the final minutes.
Post-Baking Finishing Touches
Remove biscuits from the oven and allow them to cool for 5 minutes before serving. This brief resting period allows carryover cooking to complete while the structure sets slightly.
For enhanced flavor and appearance, brush hot biscuits with additional melted butter immediately upon removal from the oven. Some bakers prefer finishing with flake salt or honey butter for additional complexity.
Troubleshooting Common Biscuit Problems
Dense, Heavy Biscuits: Typically result from overworking dough or insufficient buttermilk. Ensure minimal mixing and kneading; let loose flour particles remain slightly dry in the initial stages.
Flat Biscuits with Minimal Rise: Indicates insufficient leavening or old baking powder/soda. Check expiration dates on your leavening agents and ensure proper measurement. Additionally, room-temperature dough produces less rise than properly chilled dough.
Uneven Browning: Caused by inconsistent oven temperature or insufficient skillet preheating. Always rotate your cast iron pan halfway through baking and verify your oven temperature with a separate thermometer.
Tough, Hard Biscuits: Usually indicates excessive kneading, overworking the dough, or using warm butter. Maintain cold ingredients throughout preparation.
Storage and Make-Ahead Options
Biscuits maintain optimal freshness for 24 hours when stored in an airtight container at room temperature. After this period, texture deteriorates as they begin drying out. Refresh day-old biscuits by wrapping in foil and warming in a 350°F oven for 10 minutes.
Prepare unbaked biscuits in advance by arranging them on a baking sheet, freezing until solid, then transferring to freezer bags for up to 3 months. Bake directly from frozen, adding 2-3 minutes to the standard baking time.
Serving Suggestions and Pairings
Cast iron buttermilk biscuits serve as versatile components in numerous dishes. Serve alongside breakfast with sausage gravy for a classic Southern preparation. Alternatively, split and fill with your preferred spreads—strawberry jam, honey butter, or whipped cream cheese provide excellent options.
For lunch and dinner applications, biscuits complement soups, stews, and chili beautifully. Their buttery, flaky nature makes them equally suitable for sweet applications with honey, preserves, or butter and cinnamon.
Frequently Asked Questions
Can I make biscuit dough ahead of time?
Yes, prepare dough through the shaping stage, wrap tightly, and refrigerate for up to 8 hours. The cold dough bakes into more flaky biscuits as butter remains properly dispersed and cold throughout the initial baking period.
What if I don’t have buttermilk?
Create a buttermilk substitute by combining 1 tablespoon of lemon juice or white vinegar with enough regular milk to equal 1 cup. Let stand for 5 minutes before using. This acidic mixture provides similar chemical reactions to true buttermilk.
Can I use butter from the freezer, or does it need thawing first?
Frozen butter works perfectly in biscuit recipes and offers advantages over refrigerated butter. Never thaw butter intended for biscuits; instead, grate it directly from the freezer into your dry ingredients.
Why are my biscuits spreading rather than rising?
Spreading typically results from warm dough or warm butter. Ensure all ingredients remain cold until combining. Additionally, avoid overworking the dough, which develops too much gluten and can create spreading rather than rising.
Can I use a different type of flour?
Cake flour creates even more tender biscuits but may reduce height slightly. Bread flour increases rise but creates a denser texture. All-purpose flour provides the ideal balance for most biscuit recipes.
What’s the advantage of using cast iron for biscuits?
Cast iron distributes heat evenly, preventing hot spots that create uneven browning. The retained heat promotes superior crust development and browning compared to standard baking sheets.
References
- Buttermilk Cast Iron Biscuits — Girl with the Iron Cast. Accessed April 2026. https://girlwiththeironcast.com/cast-iron-buttermilk-biscuits/
- Cast Iron Buttermilk Biscuits — Spiced Blog. Accessed April 2026. https://spicedblog.com/cast-iron-buttermilk-biscuits/
- Cast Iron Buttermilk Biscuits — The Toasty Kitchen. Accessed April 2026. https://thetoastykitchen.com/cast-iron-buttermilk-biscuits/
- Buttermilk Biscuits — Southern Cast Iron. Accessed April 2026. https://southerncastiron.com/buttermilk-biscuits/
- Briggs’ Buttermilk Biscuits Recipe — Lodge Cast Iron. Accessed April 2026. https://www.lodgecastiron.com/blogs/recipe/briggs-buttermilk-biscuits