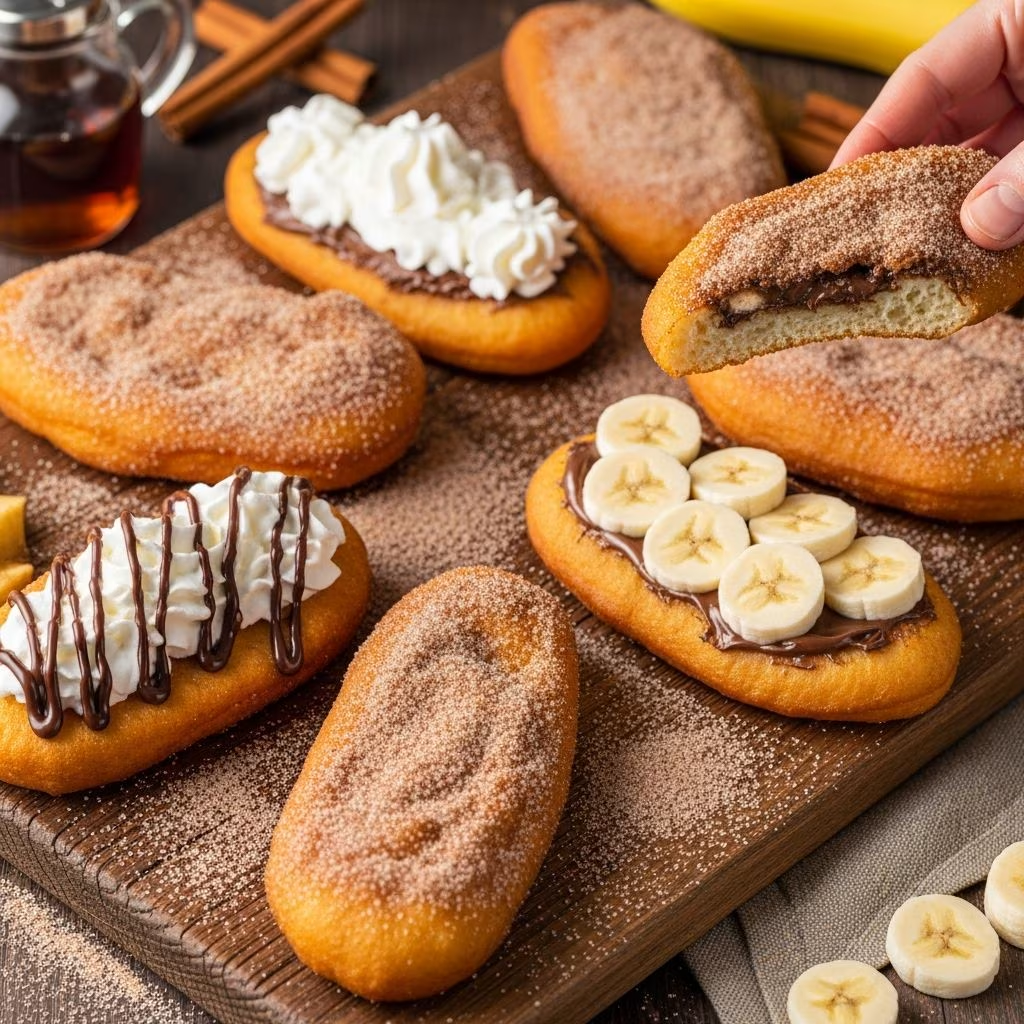
Canadian beaver tails, also known as fried dough or beaver tails pastry, represent a cherished part of Canada’s culinary heritage. These golden, crispy treats consist of yeast-leavened dough deep-fried to perfection and generously coated in cinnamon sugar. Originating from street festivals and fairgrounds, they evoke nostalgia for many, combining simple ingredients into a decadent snack that’s crunchy on the outside and soft within.
The Allure of Fried Dough in Canadian Culture
Fried dough pastries like beaver tails have deep roots in North American traditions, but their Canadian twist sets them apart. Shaped to mimic the flat tail of the beaver—Canada’s national animal—these pastries gained fame through BeaverTails Inc., a chain that popularized them at winter festivals and tourist spots. Beyond commercial versions, homemade recipes allow for personalization, making them ideal for family gatherings or casual indulgences.
Their appeal lies in the contrast of textures: a shatteringly crisp exterior from hot oil frying meets a pillowy interior thanks to proper yeast activation and rising. Topped simply with sugar and spice or elevated with maple syrup, they capture the essence of comfort food with a festive flair.
Essential Ingredients for Perfect Beaver Tails
Crafting authentic Canadian fried dough requires pantry staples balanced for flavor, texture, and rise. Here’s a breakdown of key components:
- Warm liquids: Water and milk at around 110°F (43-45°C) activate yeast without killing it.
- Yeast: Active dry yeast (about 5 teaspoons) provides the lift for airy dough.
- Sweeteners: A pinch for yeast proofing, plus 1/3 cup sugar in the dough for tenderness.
- Eggs and fat: 2-3 eggs and 1/3 cup vegetable oil enrich the dough, ensuring softness.
- Flour: 4-6 cups all-purpose or a mix with whole wheat for structure; unbleached preferred for better gluten development.
- Seasonings: Salt, vanilla extract for depth.
- Frying oil: Neutral vegetable oil (4+ cups) heated to 375°F (190°C).
- Coating: 2 cups granulated sugar mixed with 1/4 cup cinnamon.
Variations might include whole wheat flour for nuttiness or additions like lemon zest in the dough.
Step-by-Step Guide to Homemade Fried Dough
Follow these detailed instructions to achieve bakery-quality results at home. Patience with rising and precise oil temperature are key to success.
Proof the yeast: In a large bowl, combine 1/2 cup warm water (110°F), 5 tsp active dry yeast, and a pinch of sugar. Let sit 5-10 minutes until foamy, indicating active yeast.
Mix wet ingredients: Stir in 1 cup warm milk, 1/3 cup sugar, 1.5 tsp salt, 1 tsp vanilla, 2-3 beaten eggs, and 1/3 cup oil. Blend until smooth.
Incorporate flour: Add 2.5 cups flour initially, stirring to form a shaggy dough. Turn onto a floured surface and knead in remaining 2-3 cups flour gradually (up to 5-6 cups total) until smooth, elastic, and no longer sticky—about 8-10 minutes by hand or 5 minutes with a dough hook.
First rise: Form into a ball, place in a greased bowl, cover with a damp towel or plastic wrap. Let rise in a warm spot until doubled, 1 hour.
Shape the dough: Punch down, knead briefly. Pinch off golf ball-sized pieces (12-16 total). Roll each into 1/4-inch thick ovals or beaver tail shapes on a floured surface. Cover with a towel and rest 15-20 minutes.
Prepare for frying: Heat 4 inches of vegetable oil in a deep pot or fryer to 375°F (190°C). Test with a scrap of dough—it should sizzle immediately and brown in 60 seconds.
Fry in batches: Gently lower 1-2 pieces at a time. Fry 1-2 minutes per side until deep golden brown. Use tongs to flip and remove to paper towel-lined plates to drain.
Coat while warm: Mix 2 cups sugar with 1/4 cup cinnamon in a shallow dish. Press drained dough into mixture, coating both sides generously. Shake off excess.
Total time: 2-3 hours, including rising. Yields 12-16 servings.
Pro Tips for Crispy, Fluffy Results
Achieving restaurant-level beaver tails hinges on technique:
- Use a thermometer for oil—too low yields greasy dough; too high burns it.
- Don’t overcrowd the fryer; maintain temperature.
- Knead thoroughly for gluten development, preventing dense texture.
- Rest shaped dough to relax gluten, easing stretching into tails.
- Freshness matters: Enjoy same day for peak crispness.
| Common Issue | Solution |
|---|---|
| Dough too sticky | Add flour 1 tbsp at a time during kneading. |
| Oily pastries | Ensure oil is 375°F; drain well on towels. |
| Flat dough | Check yeast freshness; allow full rise time. |
| Not crispy | Fry longer per side to deep golden. |
Creative Topping and Serving Ideas
While cinnamon sugar is classic, experiment:
- Canadian classic: Drizzle with maple syrup.
- Chocolate lover: Spread Nutella or melted chocolate.
- Fruity twist: Lemon juice squeeze or berry jam.
- Decadent: Whipped cream, ice cream scoop for sundaes.
- Savory option: Garlic butter and cheese for non-dessert version.
Serve warm at parties, brunches, or winter skates. Pair with hot cocoa for ultimate comfort.
Nutrition and Storage Advice
One beaver tail (coated) offers about 300-400 calories, primarily from frying oil and sugar. Made with whole wheat, it adds fiber. Store leftovers airtight at room temp up to 1 day; reheat in 350°F oven 5 minutes to revive crispness. Freeze uncoated fried dough up to 1 month; thaw and reheat.
Frequently Asked Questions (FAQs)
Can I make beaver tails without yeast?
Yeast is essential for fluffiness; baking powder quick bread versions exist but lack authenticity.
Is whole wheat flour okay?
Yes, use half whole wheat for nutrition without heaviness.
How do I know oil is ready?
Dough scrap should float and brown in 60 seconds at 375°F.
Vegetarian/vegan friendly?
Replace eggs with flax eggs; use plant milk.
Can I bake instead of fry?
Baking at 400°F yields a chewier elephant ear; not traditional.
History and Regional Variations
Beaver tails trace to 1978 Ottawa invention by Grant and Pam Hooker at Rideau Canal festival, inspired by Quebec’s oreille de castor. Now nationwide, with U.S. cousins like elephant ears. Regional twists include poutine gravy savory versions or seasonal pumpkin spice.
This treat embodies Canadian pride—simple, hearty, celebratory. Whether at fairs or your kitchen, beaver tails deliver joy bite by bite.
References
- Canadian Fried Dough Pastry Recipe — Ottawa Mommy Club. 2023. https://ottawamommyclub.ca/canadian-fried-dough-pastry-recipe/
- Thera’s Canadian Fried Dough — PantryLink Recipes. 2023. https://pantrylink.app/recipes/theras-canadian-fried-dough
- Homemade Canadian Fried Dough – Beaver Tails Recipe — Life is a Party. 2023. https://www.lifeisaparty.ca/canadian-fried-dough/
- So Canadian…fried dough pastry — Craftberry Bush. 2014-06-01. https://www.craftberrybush.com/2014/06/so-canadian-fried-dough-pastry.html
- Homemade Canadian Beaver Tails — Michel Dumas. 2023. https://www.micheldumas.com/en/canadian-beaver-tails/