Butter cookies represent one of the most fundamental and beloved categories in the world of baking. Their simplicity belies their elegance—a perfect butter cookie requires nothing more than quality ingredients and proper technique. These delicate treats have graced tables at celebrations, afternoon teas, and family gatherings for generations, their universal appeal stemming from the perfect balance of buttery richness and tender crumb. Whether you’re a beginner baker seeking your first success or an experienced cook looking to refine your skills, understanding the nuances of butter cookie preparation will transform your baking results.
Understanding the Foundation: Core Ingredients and Their Roles
The magic of butter cookies lies in the quality and balance of just a few essential components. Unlike cookies that rely on leavening agents or spices for complexity, butter cookies depend on the inherent flavors of their base ingredients working in perfect harmony.
Butter serves as the primary flavor carrier and determines the cookie’s texture. Using softened butter rather than melted or cold butter ensures proper creaming, which incorporates air and creates a lighter crumb. Room-temperature butter should be soft enough to leave an impression when pressed but not greasy or melting. Unsalted butter provides better control over the final salt content, allowing bakers to adjust seasoning to preference. The butter fat content directly influences how tender and rich your cookies become.
Sugar provides sweetness while also affecting moisture and browning. Granulated white sugar creates crispy edges when cookies are slightly overbaked, while powdered sugar—used in some variations—produces softer, more delicate cookies. The ratio of sugar to butter affects whether cookies spread significantly during baking or maintain their shape.
Eggs or egg yolks act as a binder and add richness. Egg yolks contain emulsifiers that help create a smoother dough and contribute to the cookie’s luxurious mouthfeel. Some recipes use whole eggs for a slightly lighter texture, while others prefer yolks alone for maximum indulgence.
Flour provides structure and determines how tender the final cookie becomes. All-purpose flour works well for most butter cookies, containing enough protein to provide structure without making cookies tough. The amount of flour relative to fat is crucial—too much creates dense, hard cookies, while too little results in greasy, flat spreads.
Vanilla extract and salt enhance and balance the buttery flavor. Vanilla adds depth and complexity that makes butter shine, while salt amplifies all flavors and prevents cookies from tasting one-dimensional.
The Critical Role of Creaming in Cookie Success
The creaming process—beating butter and sugar together—represents the most crucial step in butter cookie preparation. This process accomplishes multiple important functions simultaneously. As the mixer beats butter and sugar, air becomes incorporated into the butter, creating tiny bubbles throughout. These bubbles expand during baking, contributing to a lighter, more tender texture. Additionally, creaming breaks down sugar crystals and disperses them evenly throughout the butter, creating a smooth, homogeneous mixture.
The ideal creaming time ranges from three to five minutes on medium-high speed. You’ll notice the mixture gradually transform from a dense, grainy paste into a lighter, fluffier mass that appears almost pale yellow. This visible change indicates proper incorporation of air. Under-creaming results in dense, heavy cookies that don’t spread properly, while over-creaming can cause excessive spreading and loss of structure during baking.
Temperature control matters significantly during this stage. If your kitchen is cold, butter may not cream properly, requiring you to work in longer bursts or warm the mixing bowl slightly. Conversely, if your kitchen is very warm, butter may become too soft to cream effectively.
Mixing Methods and Dough Development
After creaming, the next phase involves gradually incorporating remaining ingredients. Adding eggs and vanilla to the creamed mixture must be done carefully to maintain the air you’ve incorporated. Add these ingredients slowly, scraping down the bowl frequently to ensure even distribution. This step transforms your mixture into a smooth, fluffy base that will support the flour.
When adding flour, employ restraint and precision. Add flour in stages, mixing on low speed just until combined. Overmixing at this stage develops gluten, which leads to tough, chewy cookies rather than tender, delicate ones. Stop mixing as soon as you no longer see streaks of flour in the dough.
Many bakers find that finishing the dough by hand—using a wooden spoon or flexible spatula to fold in the final bits of flour—provides better control and prevents overmixing. This tactile approach allows you to feel the dough come together without the risk of overdevelopment.
Shaping and Presentation Options
Butter cookies offer remarkable versatility in shaping possibilities, each method producing slightly different textures and presentations:
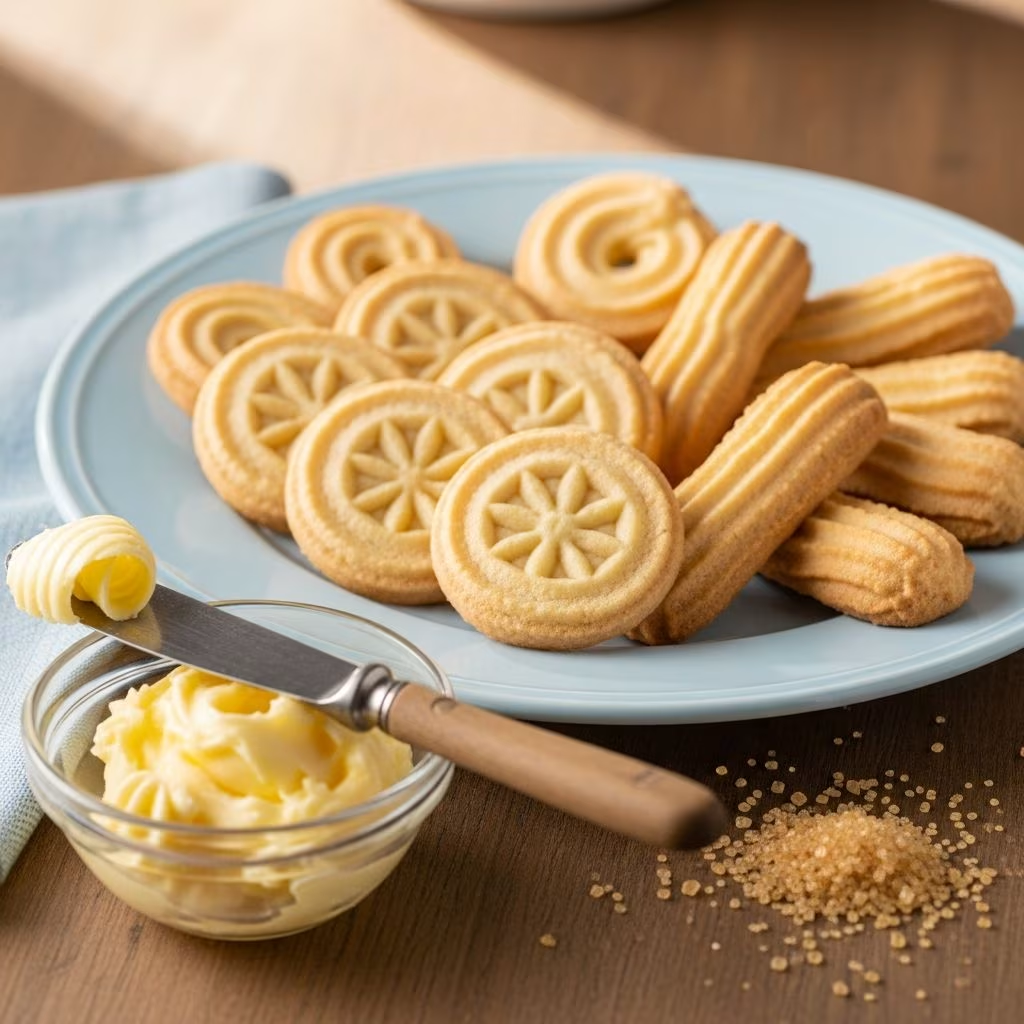
- Piping: Transfer dough to a piping bag fitted with a large decorative tip. This method creates uniform cookies with attractive patterns. Pipe cookies onto ungreased baking sheets, spacing them about two inches apart to allow for spreading.
- Scooping: Use a cookie scoop or tablespoon measure to portion dough directly onto baking sheets. This quick method produces rustic, uniform cookies without requiring special equipment or piping skills.
- Rolling and cutting: Chill dough for one to three hours until firm, then roll out to even thickness on a floured surface and cut with cookie cutters. This method works particularly well when decorating cookies with glazes or frostings.
- Slice-and-bake: Shape chilled dough into logs, wrap tightly, refrigerate or freeze, then slice and bake as desired. This makes fresh cookies available on demand.
Baking Temperature and Timing: Achieving the Perfect Finish
Oven temperature significantly affects butter cookie results. Most recipes call for baking at temperatures between 350°F and 400°F, with 375°F representing a common middle ground. Higher temperatures create darker, crispier cookies with more pronounced edges, while lower temperatures produce paler, more delicate cookies that spread less.
Baking time typically ranges from six to twelve minutes, depending on temperature, cookie size, and desired crispness. Cookies should appear set but not overly brown when removed from the oven. The edges should show slight browning while the centers remain pale and soft. Remember that cookies continue cooking slightly after removal from the oven, so slightly underbaked cookies will firm up as they cool.
Place oven racks in the middle position to ensure even heat circulation. If baking multiple sheets simultaneously, rotate them halfway through for uniform browning. Allow baked cookies to cool on the baking sheet for one minute before transferring to a cooling rack to prevent breakage.
Strategic Ingredient Variations for Distinctive Flavors
While classic butter cookies shine through their simplicity, thoughtful additions can create memorable variations without overwhelming the signature buttery taste:
| Variation | Ingredient Addition | Quantity | Effect |
|---|---|---|---|
| Almond Butter Cookies | Almond flour | ¼ to ⅓ of flour amount | Adds subtle nuttiness and tender crumb |
| Citrus-Infused | Orange or lemon juice and zest | 1-2 tablespoons juice, 1 teaspoon zest | Bright, fresh flavor complement |
| Rich Vanilla | Milk powder | 2-3 tablespoons | Increases depth and creaminess |
| Tender Texture | Cornstarch | 2-3 tablespoons | Creates melt-in-mouth quality |
Make-Ahead Strategies for Convenient Baking
Butter cookie dough stores remarkably well, making these treats ideal for advance preparation. Prepare dough up to two days ahead, storing it covered in the refrigerator. For longer storage, freeze dough in airtight containers for up to three months. When ready to bake, thaw overnight in the refrigerator, then bake as usual.
If using a slice-and-bake method, shape dough into logs, wrap individually in plastic wrap, and freeze. Bake directly from frozen, adding a minute or two to the baking time. This approach allows you to enjoy freshly baked cookies whenever desired without preparing the entire batch.
Baked cookies store well in airtight containers at room temperature for up to one week. Layer cookies between parchment paper to prevent breakage. For extended storage, freeze baked cookies for up to three months in freezer-safe containers.
Common Challenges and Practical Solutions
Cookies spread too much: This usually indicates over-softened butter or insufficient flour. Chill dough before baking, ensure butter is soft but not melting, and verify flour measurements using the spoon-and-level method rather than scooping directly from the bag.
Cookies turn out tough: Overmixing develops gluten, creating this problem. Mix on low speed and stop as soon as flour disappears. Additionally, too much flour relative to butter creates dense texture. Weigh ingredients for precision if possible.
Cookies don’t bake evenly: Hot spots in ovens cause uneven browning. Rotate baking sheets halfway through baking time. If bottom edges brown before tops, move the rack higher in the oven.
Cookies become hard after cooling: This occurs when baked too long or stored without an airtight container. Remove cookies from oven while slightly underbaked, and store immediately in sealed containers with parchment between layers.
Frosting and Finishing Techniques
While simple butter cookies need no embellishment, finishing options can elevate presentation for special occasions. A basic buttercream frosting combines softened butter, powdered sugar, and milk, beaten until fluffy and spreadable. Add vanilla extract or other flavorings to coordinate with your cookie base.
For a lighter finish, prepare a simple glaze by combining powdered sugar with water or milk and a small amount of butter. Brush or drizzle glaze over cooled cookies, allowing it to set before serving. Tinted glazes create beautiful visual effects, while piped royal icing allows for precise decorative details.
Consider simple embellishments like a light sprinkle of colored sugar, chopped nuts, or a dark chocolate dip. These additions should complement rather than overshadow the delicate butter flavor that defines classic cookies.
Equipment That Elevates Your Baking Results
While butter cookies can be made with basic tools, certain equipment significantly improves results. A stand mixer with paddle attachment ensures thorough creaming without hand fatigue. If using hand mixing, an electric hand mixer provides better control than manual beating.
A kitchen scale eliminates guesswork from ingredient measurement, improving consistency between batches. Piping bags with various tips allow creative presentation options. Cookie scoops portion dough consistently, ensuring uniform baking. An oven thermometer verifies true oven temperature, as many home ovens run hot or cold.
Frequently Asked Questions About Butter Cookie Baking
Can I substitute butter with oil or margarine?
Pure butter contributes unique flavor and texture that oils cannot replicate. Margarine often contains water that affects dough consistency and final texture. For best results, use real butter exclusively.
Why should dough be chilled before baking?
Chilling allows flour to fully hydrate and helps dough hold its shape during baking. This produces less-spread cookies with better definition. Chilling also reduces the risk of greasy-looking cookies from excessive spreading.
What causes cookies to brown on the bottom before the top bakes?
This indicates your oven rack sits too low or your oven runs hot on the bottom. Move racks higher and verify oven temperature with a thermometer. Use lighter-colored baking sheets rather than dark ones, which absorb more heat.
How do I know when cookies are perfectly baked?
Look for slight browning on edges while centers appear set but still slightly pale. The top should spring back when lightly touched. Remember that residual heat continues cooking after removal from the oven.
Can I use salted butter instead of unsalted?
Yes, but reduce or omit added salt to avoid oversalting. Butter salt content varies between brands, so this approach is less precise than using unsalted butter with controlled salt addition.
Conclusion: Mastering the Timeless Classic
Butter cookies represent baking fundamentals at their finest. Their success depends not on complex techniques or exotic ingredients but on understanding how basic components interact and respecting the importance of each step. By selecting quality butter, properly creaming your ingredients, mixing with restraint, and baking with attention to visual cues, you’ll produce cookies that rival any bakery offering. Whether you choose to keep them elegantly simple or add thoughtful variations, mastering butter cookies provides a foundation for countless baking successes. The techniques you develop baking these classics translate to improved results across your entire baking repertoire.
References
- King Arthur Baking Company: Butter Cookie Fundamentals — King Arthur Baking Company. https://www.kingarthurbaking.com/learn/article/butter-cookie-recipes
- USDA Composition of Foods Raw, Processed, Prepared — United States Department of Agriculture. 2019. https://fdc.nal.usda.gov
- Food Chemistry: Effects of Butter Composition on Cookie Quality — Journal of Food Chemistry, Elsevier. 2018. https://www.sciencedirect.com/journal/food-chemistry
- The Kitchn: Cookie Science Explained — The Kitchn Media Inc. https://www.thekitchn.com/why-cookies-spread-science-of-baking-201309