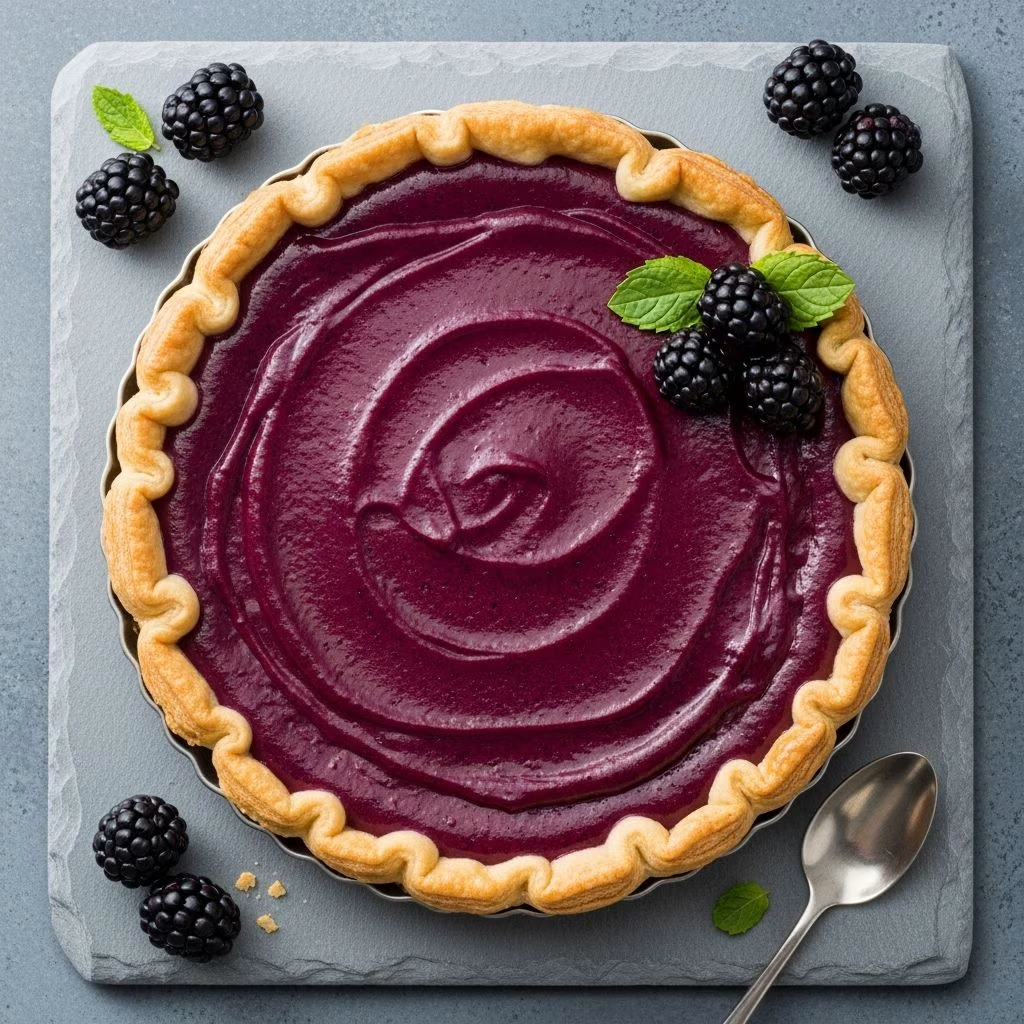
Creating an elegant blackberry curd tart combines several fundamental baking skills into one impressive final presentation. This dessert balances the tartness of fruit with the richness of a buttery filling, resulting in a sophisticated treat suitable for special occasions or elevated dinner parties. The interplay between a crisp, nutty crust and smooth fruit curd creates textural and flavor contrasts that elevate this dessert beyond typical berry preparations.
Understanding Curd as a Filling
Curd represents a distinctive category of dessert filling with a creamy, custard-like consistency achieved through gentle heat and egg emulsification. Unlike jam, which relies on pectin and prolonged cooking to achieve set consistency, curd maintains a silky texture through careful temperature control and the binding properties of eggs and butter working in combination.
The fundamental technique involves whisking eggs and egg yolks together, then gradually heating them with sugar and acidic juice while stirring continuously. This process denatures the egg proteins without allowing them to scramble, creating a smooth, pourable mixture. The addition of butter at the end contributes richness and helps stabilize the final texture, transforming the hot liquid into a spreadable paste as it cools.
Blackberry curd specifically offers a balance between sweet and tart characteristics. Fresh or frozen blackberries provide natural acidity that complements the sweetness of sugar and the richness of butter and eggs. The fruit’s deep color creates visual appeal, while its subtle flavor allows the technique itself to shine as the star of the filling.
Selecting and Preparing Your Foundation: The Crust
The crust serves as both structural support and complementary flavor component. A nut-based crust provides texture contrast and subtle flavor depth that pairs beautifully with fruit fillings. Common options include:
- Pecan crusts, offering warm, earthy undertones
- Hazelnut crusts, providing subtle nuttiness that doesn’t overpower the fruit
- Almond crusts, delivering delicate sweetness and fine texture
Constructing a nut crust begins with toasting whole nuts to develop their natural oils and intensify flavor. After cooling slightly, the nuts are ground into meal-sized pieces rather than fine flour, preserving texture and preventing the release of excess oil that can result in a greasy crust.
The dry ingredients—flour, powdered sugar, and salt—combine with the ground nuts to create the base. Cold butter, cut into small cubes, distributes throughout this mixture via pulsing in a food processor. The goal involves creating pea-sized pieces of butter throughout the dry ingredients, a step that ensures proper texture development during baking. The butter’s small size allows it to distribute evenly, creating pockets that produce a tender, slightly crumbly structure rather than a dense, heavy crust.
An egg yolk serves as the final binder, adding just enough moisture and richness to bring the mixture together without making it wet or sticky. The resulting dough requires minimal handling—working it briefly by hand just until it forms a cohesive ball preserves the pea-sized butter pieces and maintains the desired tender texture.
Chilling the dough thoroughly before rolling prevents excessive gluten development and allows the butter to remain cold, which contributes to proper flaking during baking. A 30-minute minimum chilling period is standard, though longer periods improve results without negative consequences.
The Blind Baking Process
Blind baking—partially baking an unfilled crust—prevents sogginess and ensures structural integrity when filled with moist substances like curd. This technique involves lining the rolled dough in a tart pan, chilling again to set the shape, then baking with pie weights or dried beans to prevent the bottom and sides from puffing up excessively.
Parchment paper creates a barrier between the crust and the pie weights, preventing direct contact that can cause sticking. Typically, the weighted crust bakes for 15-20 minutes until the edges show golden-brown color. Removing the weights and parchment, then continuing to bake for an additional 10-15 minutes, allows the bottom to dry completely and develop color.
Pricking the crust with a fork before the second baking phase prevents bubbling in areas where weights haven’t covered adequately. The finished pre-baked crust should appear completely set and lightly browned, cooled completely before receiving the curd filling.
Crafting Blackberry Curd from Scratch
The curd-making process requires attention to temperature and timing rather than complex techniques. Beginning with fresh or frozen blackberries, the fruit is processed into a thick puree in a food processor, then strained through a fine mesh sieve to remove seeds while capturing all flavor and juice.
Pressing the berry pulp against the sieve with the back of a spoon extracts maximum liquid without forcing seeds through. A properly strained mixture yields approximately 1¼ cups of blackberry liquid from roughly 3½ cups of whole berries, a significant reduction that concentrates flavor.
The strained blackberry puree combines with sugar, fresh lemon juice, and cold butter in a heavy-bottomed saucepan. This mixture heats gently over low heat—high heat risks scrambling the eggs that will be added—until the butter melts completely and the mixture reaches approximately 160°F. Some recipes specify bringing the mixture to a gentle simmer; proper heat control prevents overheating the fruit while allowing flavors to meld.
Meanwhile, whole eggs and additional egg yolks are whisked together in a separate bowl until just combined. Slowly tempering these eggs involves adding a small amount of the hot mixture while whisking constantly, gradually increasing the volume added until the egg mixture reaches a temperature approaching that of the pot. This gradual heating prevents the eggs from coagulating into scrambled pieces.
Once sufficiently tempered, the egg mixture returns to the pot with the remaining blackberry mixture, where continuous stirring over low heat allows the eggs to thicken the filling. This thickening process typically requires 10-15 minutes of constant attention. A sugar or candy thermometer inserted into the mixture should register 170-175°F when the curd has reached proper thickness and safety temperature.
Removing the curd from heat immediately upon reaching proper temperature prevents overcooking, which would result in graininess or separation. A pinch of salt balances the berry tartness and adds subtle depth to the flavor profile.
Achieving the Perfect Texture and Consistency
The consistency of finished curd should resemble a thick pudding or soft custard—thick enough to hold its shape on a spoon but spreadable when slightly warm. As the curd cools, it naturally thickens further due to the setting properties of the eggs and the solidification of butter as temperature drops.
Cooling the curd at room temperature while stirring occasionally prevents a thick skin from forming on the surface. Alternatively, placing plastic wrap directly against the surface of the curd as it cools prevents skin formation without requiring constant stirring. The completely cooled curd should be thick enough to stay in place when spooned into the pre-baked crust, yet smooth enough to spread into an even layer.
Assembling and Baking the Finished Tart
Assembly represents the most straightforward component of the overall process. Once both the pre-baked crust and cooled blackberry curd have reached room temperature, the curd is carefully spooned into the crust and spread into an even layer using an offset spatula or the back of a spoon.
The assembled tart then receives a brief baking at 350°F for approximately 10 minutes. This secondary baking step gently sets the curd and helps it adhere to the crust, though it doesn’t significantly increase the curd’s temperature. Some recipes omit this step entirely, allowing the curd to set through refrigeration alone.
After baking, the tart cools to room temperature before refrigeration. Chilling for at least 2-3 hours allows the curd to set completely, achieving a firm texture that slices cleanly. The tart should be brought to room temperature before serving to allow flavors to fully express themselves—cold temperatures temporarily mute flavor perception.
Storage and Make-Ahead Preparation
A significant advantage of blackberry curd tarts involves their make-ahead capability. The fully assembled and chilled tart stores well in the refrigerator for up to two days when covered with plastic wrap or stored in an airtight container. Preparation can be further distributed: the pre-baked crust and cooled curd can be prepared separately and stored for several days before assembly.
Individual components have different shelf lives. The pre-baked crust maintains quality for 2-3 days at room temperature in an airtight container. The blackberry curd, once cooled, stores refrigerated for 3-4 days. This component flexibility allows bakers to manage preparation across multiple days, making the final assembly a quick, simple task.
Flavor Variations and Customizations
The blackberry curd tart framework accommodates numerous modifications. Partially replacing the fresh lemon juice with lime juice creates a subtle flavor shift while maintaining the required acidity. Adding a small amount of balsamic vinegar—approximately 1 tablespoon—introduces unexpected depth and complexity without making the filling noticeably vinegary.
Crust variations include replacing pecans with hazelnuts, almonds, or even walnuts, each contributing distinct flavor characteristics. Some recipes incorporate a small amount of cinnamon or other warm spices into the crust to echo the fruit’s flavor profile.
Garnishing the finished tart with fresh blackberries or a light dusting of powdered sugar adds visual appeal and freshness. A thin layer of apricot glaze brushed over the top provides shine and subtle additional flavor without overwhelming the delicate fruit filling.
Troubleshooting Common Challenges
Curd that refuses to thicken despite reaching proper temperature may have insufficient eggs or require additional heat. Ensuring proper ratios—typically 2 whole eggs and 2 egg yolks to 1¼ cups of fruit puree—addresses this issue for future attempts.
Grainy or separated curd results from overheating, typically when the mixture exceeds 180°F or experiences rapid temperature increases. Maintaining low, steady heat and constant stirring prevents this outcome. If separation occurs, passing the warm curd through a fine sieve can restore smoothness for some recipes.
A crust that doesn’t crisp adequately may have received insufficient blind baking time or experienced heat that was too low. Ensuring the oven reaches the specified temperature and allowing adequate pre-baking time addresses this issue.
Serving Recommendations and Pairings
The blackberry curd tart complements various accompaniments. Lightly whipped cream or crème fraîche provides cooling contrast to the rich filling. Vanilla ice cream melting slightly into the warm tart creates luxurious texture combinations. A simple vanilla custard sauce creates an elegant presentation suitable for formal occasions.
The tart serves well as the focal point of a dessert course or as part of a dessert table alongside other offerings. Individual slices, cut with a hot, wet knife to ensure clean edges, present beautifully on dessert plates with minimal additional plating required.
References
- Blackberry Curd Tart Recipe — Ugly Duckling Bakery. Accessed 2026. https://uglyducklingbakery.com/blackberry-curd-tart-recipe/
- Blackberry Curd Tart with Hazelnut Crust — For Tart It’s Tart. YouTube. Accessed 2026. https://www.youtube.com/watch?v=eXextEs7hhM
- Lemon and Blackberry Tart — Lion’s Bread. Accessed 2026. https://www.lionsbread.com/lemon-and-blackberry-tart/
- Berry Curd Tart with a Deep Dish Almond Crust — Adventures in Cooking. Accessed 2026. https://adventuresincooking.com/berry-curd-tart/
- Peter’s Blackberry & Lemon Tart Recipe — The Great British Bake Off. Accessed 2026. https://thegreatbritishbakeoff.co.uk/recipes/all/peter-blackberry-lemon-tart/