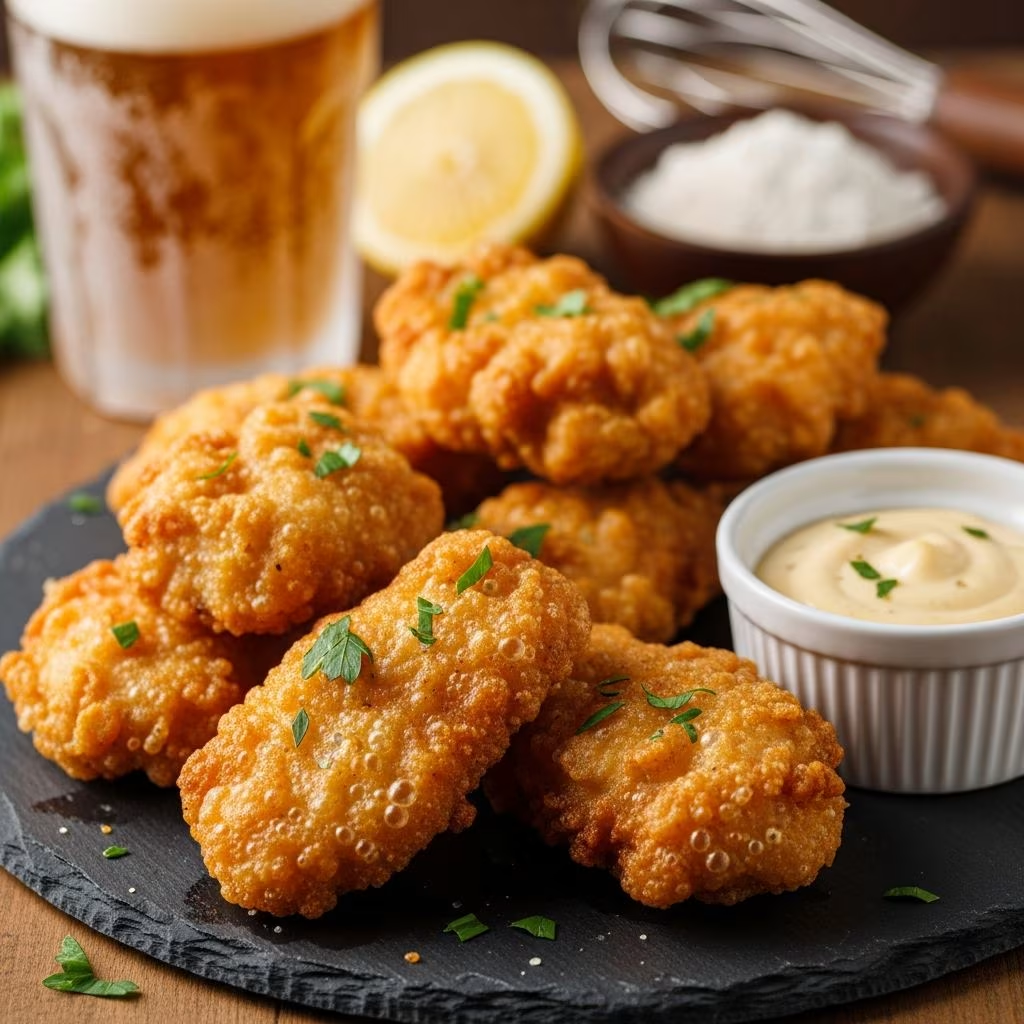
The combination of light beer and perfectly seasoned flour creates one of the most satisfying comfort foods available. Beer-battered chicken delivers a golden-brown exterior with a crispy texture while maintaining a tender, juicy interior. This technique has become a staple in both home kitchens and professional establishments because of its reliability and exceptional flavor profile. Understanding the fundamentals of beer battering allows anyone to recreate restaurant-quality results at home.
Understanding the Science Behind Beer Battering
The carbonation in beer serves a critical function in creating the ideal batter consistency. When beer is combined with flour and leavening agents, the carbon dioxide bubbles create pockets within the coating that fry up into a light and airy texture. This scientific principle explains why beer batters consistently outperform simple flour-and-water mixtures in producing crispy coatings. The alcohol content in beer also evaporates during frying, which contributes to the overall crispness of the final product.
The choice of beer variety significantly impacts the final flavor. Light beers work best because they provide carbonation and structure without overwhelming the delicate taste of chicken with strong, bitter notes. The batter achieves optimal texture when it maintains a consistency similar to pancake batter—thick enough to coat the chicken adequately but fluid enough to create an even layer.
Essential Ingredients and Their Functions
Each component of a beer batter serves a specific purpose in achieving the desired texture and flavor. Understanding these roles helps cooks make informed adjustments based on personal preferences or ingredient availability.
- All-Purpose Flour: Forms the foundation of the batter, providing structure and a base for the crispy coating. Most recipes use between one and one-and-a-half cups.
- Beer: Contributes carbonation, moisture, and subtle flavor. One cup of cold beer is typical, though ratios vary based on desired batter thickness.
- Baking Powder or Baking Soda: These leavening agents generate additional carbon dioxide, enhancing the light and crispy texture. Half a teaspoon is generally sufficient.
- Seasonings: Salt, garlic powder, onion powder, cayenne pepper, and smoked paprika build depth of flavor. These should be whisked thoroughly into the flour to distribute evenly.
- Cornstarch: Optional but effective, cornstarch can replace a portion of flour to create an even crispier exterior through a different frying mechanism.
Preparing Chicken for Maximum Results
The preparation phase determines whether your finished product will be uniformly cooked and properly textured. Proper sizing and seasoning at this stage make a substantial difference in the final outcome.
Begin by slicing chicken breasts into uniform pieces, approximately one inch thick. Consistency in sizing ensures that all pieces cook through at approximately the same rate, preventing some sections from being undercooked while others become overdone. Use a sharp knife and work on a clean cutting board, paying attention to creating pieces that are as similar in dimension as possible.
After slicing, pat the chicken pieces dry with paper towels. Any excess moisture on the surface interferes with batter adhesion and can cause oil splattering during frying. Once dried, season the chicken pieces generously with salt, pepper, and garlic powder. This base seasoning layer adds flavor directly to the meat rather than relying solely on the coating.
Constructing the Perfect Dredging Mixture
The dredging mixture serves as an intermediate layer between the wet beer batter and the chicken surface. This layer helps the batter adhere more effectively and adds textural complexity to the final product.
Combine all-purpose flour with salt, onion powder, and cayenne pepper in a shallow dish. Mix these dry ingredients thoroughly to ensure the spices distribute evenly throughout the flour. This uniformity is important because it prevents certain pieces from having concentrated pockets of seasoning while others lack flavor entirely. Some cooks add paprika or additional herbs to this mixture to customize the flavor profile according to personal taste.
Mixing the Beer Batter
Temperature and timing significantly affect batter quality. Begin by whisking together all dry ingredients in a large mixing bowl: flour, salt, baking powder, and smoked paprika. Whisk these ingredients for approximately 30 seconds to distribute the leavening agents evenly throughout.
Pour cold beer gradually into the dry mixture while whisking continuously. Adding beer slowly prevents lumps from forming, which would create an inconsistent coating. The goal is achieving a smooth, thick consistency—imagine the texture of pancake batter. If the mixture appears too thick, add additional beer one tablespoon at a time. Conversely, if it seems too thin, add a small amount of flour.
Keep the beer chilled until the moment you use it. Cold beer maintains its carbonation more effectively than room-temperature beer, which translates directly to a lighter, crispier final coating. Some experienced cooks keep both the beer and the batter in the refrigerator while preparing the remaining ingredients.
The Crucial Frying Process
Proper oil temperature determines whether chicken fries evenly with a crispy exterior and cooked interior. Most recipes recommend heating oil to between 350°F and 380°F. Test the oil temperature using a thermometer for accuracy, or use the traditional wooden spoon test: if bubbles form around the tip of a wooden spoon placed in the oil, the temperature is approximately correct.
Working in batches to avoid overcrowding, dip each flour-coated chicken piece into the beer batter, ensuring complete coverage. Let excess batter drip off for a moment before carefully lowering the chicken into the hot oil. Fry for approximately four to five minutes on each side, or until the coating turns golden brown and crispy.
Avoid moving pieces excessively while they fry, as this disrupts the crust formation. Use tongs or a slotted spoon to turn pieces only once, approximately halfway through the cooking time. Check for doneness by cutting into the thickest piece—the interior should be white with no pink remaining.
Cooling and Serving Recommendations
Remove fried chicken pieces with a slotted spoon and transfer them to a plate lined with paper towels. The paper towels absorb excess oil, improving both the texture and the health profile of the finished dish. Allow the chicken to drain for approximately one minute before serving.
Beer-battered chicken reaches its peak texture within minutes of finishing cooking. The coating remains crispest immediately after frying, so serve the dish as quickly as possible after it drains. Holding chicken in a warm oven causes the coating to soften and lose its signature crunch.
Alternative Cooking Methods
For cooks seeking reduced-fat options or those without access to large quantities of oil, air frying provides an effective alternative. Preheat an air fryer to 380°F and arrange battered chicken pieces in a single layer in the basket. Spray the coating lightly with nonstick cooking spray and cook for approximately 12 minutes until the exterior turns crispy and golden. While the texture differs slightly from traditional deep frying, air-fried versions provide significantly healthier results without sacrificing considerable flavor.
Flavor Variations and Customization
The basic beer batter formula accommodates numerous flavor adjustments. Cooks can substitute different beer styles, though lighter beers remain the preferred choice. For additional heat, increase cayenne pepper or add fresh ground black pepper. Include dried herbs such as thyme or oregano for Mediterranean-inspired variations.
Some recipes incorporate yogurt marinades before battering to add tenderness and subtle flavor. In this approach, chicken pieces soak in a mixture of yogurt, salt, pepper, and cayenne for one to four hours before battering and frying. This optional step results in exceptionally tender chicken with compound flavors.
Common Mistakes to Avoid
| Mistake | Impact | Solution |
|---|---|---|
| Warm beer | Reduced carbonation, softer coating | Keep beer refrigerated until use |
| Inconsistent chicken sizing | Uneven cooking, some pieces raw inside | Slice chicken into uniform one-inch pieces |
| Oil not hot enough | Greasy coating, undercooked interior | Use thermometer; maintain 350-380°F |
| Overcrowding the pan | Temperature drops, uneven cooking | Fry in batches; leave space between pieces |
| Lumpy batter | Thick patches, inconsistent coating | Whisk gradually while adding cold beer |
Equipment Essentials
- Instant-Read Thermometer: Ensures oil reaches and maintains optimal temperature
- Slotted Spoon or Tongs: Safely removes fried chicken without splashing hot oil
- Deep Skillet or Dutch Oven: Provides adequate oil depth and prevents splashing
- Paper Towels: Essential for draining excess oil
- Shallow Dishes: Ideal for holding dredging mixture and batter
- Cutting Board and Sharp Knife: Creates uniform chicken pieces
Frequently Asked Questions
Can I prepare the batter in advance?
Beer batter works best when used immediately after mixing. The carbonation diminishes over time, and the batter thickens as the flour absorbs liquid. If advance preparation is necessary, prepare all dry ingredients separately and mix with cold beer only when ready to cook.
What type of oil is best for frying?
Vegetable oil, canola oil, and peanut oil all work well because they have high smoke points and neutral flavors. Avoid olive oil, which has a lower smoke point and strong flavor that can overpower the chicken.
How can I tell when chicken is fully cooked?
Cut into the thickest piece at the end of cooking time. The meat should be completely white with no pink in the center. Internal temperature should reach 165°F when measured with a meat thermometer.
Is light beer necessary, or can I use other varieties?
Light beer is recommended because heavier beers with strong flavors can overpower the chicken. However, pale ales work acceptably. Avoid dark beers and stouts, which produce overly dominant flavors in the coating.
What’s the best way to reheat leftover beer-battered chicken?
Reheat in a 375°F oven for approximately 10 minutes to restore crispness. Microwaving softens the coating and is not recommended.
Serving Suggestions and Pairings
Beer-battered chicken pairs excellently with classic sides including coleslaw, french fries, and cornbread. For sauce accompaniments, consider sriracha mayo, ranch dressing, or spicy ketchup. The crispy coating provides excellent contrast to cool, creamy sauces or tangy vinegar-based dressings.
This versatile dish works equally well as a main course for family dinners or as a casual appetizer for gatherings. The appeal crosses age groups and dietary preference boundaries, making it a reliable choice for feeding diverse groups.
References
- Beer Battered Chicken — Easy Weeknight Recipes. Accessed April 2026. https://easyweeknightrecipes.com/beer-battered-chicken/
- Beer Battered Fried Chicken — Diethood. Accessed April 2026. https://diethood.com/beer-battered-fried-chicken/
- Culinary Chemistry: Beer Battered Fried Chicken — Sip Magazine. Accessed April 2026. https://sipmagazine.com/culinary-chemistry-beer-battered-fried-chicken/
- Beer-Battered Fried Chicken Fingers — Kosher.com. Accessed April 2026. https://www.kosher.com/recipe/beer-battered-fried-chicken-fingers-7725/