Baked mini doughnuts represent an ideal solution for anyone seeking a homemade treat that balances simplicity with indulgence. Unlike their fried counterparts, baked versions offer a lighter texture while maintaining the delightful flavor and visual appeal that make doughnuts so beloved. These diminutive pastries require minimal preparation time and basic pantry ingredients, making them accessible to bakers of all skill levels.
Why Choose Baked Over Fried?
The advantages of preparing baked mini doughnuts extend beyond health considerations. Baking eliminates the need for large quantities of oil and the associated mess of deep frying, making the process cleaner and more manageable in a home kitchen. The reduced fat content doesn’t compromise the tender crumb structure or satisfying taste; instead, it allows the natural flavors of flour, sugar, and vanilla to shine through more clearly.
Baked doughnuts also cool more quickly than fried varieties, allowing for faster frosting and decorating. For those preparing these treats for parties or gatherings, the streamlined preparation process means you can produce multiple batches without the time-intensive monitoring required by traditional frying methods.
Essential Equipment for Mini Doughnut Success
Creating baked mini doughnuts requires minimal specialized equipment. The foundation of your baking operation begins with a dedicated mini doughnut pan, which typically features six to twelve cavities per pan. These pans come in various materials, including aluminum and silicone, with aluminum pans generally providing more reliable, even browning.
Beyond the pan itself, you’ll benefit from:
- A piping bag or resealable plastic bag for batter distribution
- Measuring cups and spoons for ingredient accuracy
- Mixing bowls for combining wet and dry components
- A wire cooling rack to prevent moisture accumulation
- A stand mixer or hand mixer for combining ingredients smoothly
Foundational Ingredient Components
The basic formula for baked mini doughnuts remains consistent across most variations. Understanding each component’s role ensures better results regardless of which specific recipe you follow.
Dry Mixture Elements
All-purpose flour forms the structural foundation of your doughnuts, typically ranging from 1 to 1.75 cups per batch. The flour captures moisture from wet ingredients and, when combined with leavening agents, creates the characteristic light crumb that distinguishes quality doughnuts from dense failures.
Baking powder serves as the primary leavening agent in most recipes, creating the carbon dioxide bubbles that establish a tender texture. Most formulas incorporate between 1 and 1.5 teaspoons per batch. Salt enhances flavor perception and balances sweetness, though only a quarter teaspoon suffices for most recipes.
Wet Mixture Components
Butter contributes both flavor and fat content, creating moisture and richness in the finished product. Recipes typically call for melted butter ranging from 2 to 4 tablespoons, which distributes evenly throughout the batter when mixed with other wet ingredients.
Eggs bind ingredients together while providing structure and richness. Most recipes feature one large egg per batch, though some variations use additional eggs for extra richness and improved crumb structure.
Milk hydrates the dry ingredients and provides moisture throughout the baking process. Between half a cup and one full cup of milk appears across various formulas, with buttermilk sometimes substituted for tangier flavor profiles and slightly altered texture.
Vanilla extract provides aromatic depth, typically appearing in 0.5 to 1 teaspoon quantities per batch. Some bakers prefer almond extract for subtle flavor variation or incorporate both extracts simultaneously for greater complexity.
Comprehensive Baking Technique Guide
Preparation Stage
Begin by preheating your oven to between 325°F and 425°F, depending on your specific recipe and altitude considerations. Most standard formulas call for temperatures between 350°F and 400°F. Allow sufficient preheating time—typically 10 to 15 minutes—to ensure your oven reaches the target temperature before placing doughnuts inside.
Prepare your mini doughnut pans by lightly coating each cavity with non-stick cooking spray or oil. This crucial step prevents sticking and ensures easy removal once baking concludes. Some bakers prefer brushing oil directly onto pan surfaces rather than using spray, claiming this provides more even coverage.
Mixing Methodology
Combine all dry ingredients—flour, baking powder, salt, and any spices—in a mixing bowl before introducing wet components. This preliminary dry mixture ensures even distribution of leavening agents throughout the batter, preventing pockets of unmixed baking powder that could create unpleasant bitter flavors.
In a separate bowl, whisk together wet ingredients until just combined. If your recipe includes butter and sugar, cream these together first before adding eggs, milk, and vanilla. This creaming process incorporates air into the batter, promoting a lighter texture in the finished doughnuts.
Pour wet ingredients into the dry mixture, folding gently until just combined. Over-mixing develops gluten strands that result in tough, dense doughnuts rather than the light, tender texture desired. The batter should appear slightly lumpy rather than completely smooth.
Batter Distribution and Baking
Transfer batter to a piping bag fitted with a wide opening or use a resealable plastic bag with the corner cut off. Pipe batter into each doughnut cavity until approximately three-quarters full. This fill level allows room for doughnuts to rise without overflowing onto the pan’s sides.
If you lack a piping bag, a small spoon or squeeze bottle can distribute batter, though these methods may produce less uniform results.
Place filled pans into your preheated oven and bake for 7 to 12 minutes, depending on oven temperature and pan material. Doughnuts are finished when the edges turn light golden brown and the tops feel springy when touched. Avoid overbaking, which creates dry, crumbly results.
Cooling and Removal
Allow doughnuts to cool in the pan for 2 to 5 minutes after removal from the oven. This brief resting period allows the structure to set sufficiently for safe removal without breaking. After this initial cooling, gently slide a thin knife around each doughnut’s edges before carefully lifting them onto a wire cooling rack.
Complete cooling on the rack prevents moisture from accumulating on the bottom surfaces, which would create a soggy texture incompatible with most toppings.
Flavor Variation Possibilities
Spiced Autumn Varieties
Incorporating warm spices like cinnamon, nutmeg, and allspice creates autumn-inspired doughnuts that pair beautifully with morning coffee. Add these spices to your dry mixture at quantities between one-quarter and one-half teaspoon each, adjusting based on personal preference.
Pumpkin puree can replace a portion of the milk in your batter, creating seasonal doughnuts with natural moisture and subtle vegetable undertones that sophisticated palates appreciate.
Chocolate Integration Methods
Cocoa powder added to the dry mixture at 2 to 3 tablespoons per batch creates chocolate doughnuts without excessive richness. Alternatively, reserve a portion of batter and mix it with melted chocolate before piping into pans for marbled effects.
Extract Experimentation
Beyond vanilla and almond, consider experimenting with maple extract, lemon extract, or orange extract. These alternatives provide distinctive flavor profiles that elevate basic doughnut recipes into more sophisticated creations.
Topping and Glazing Options
Simple Sugar Coatings
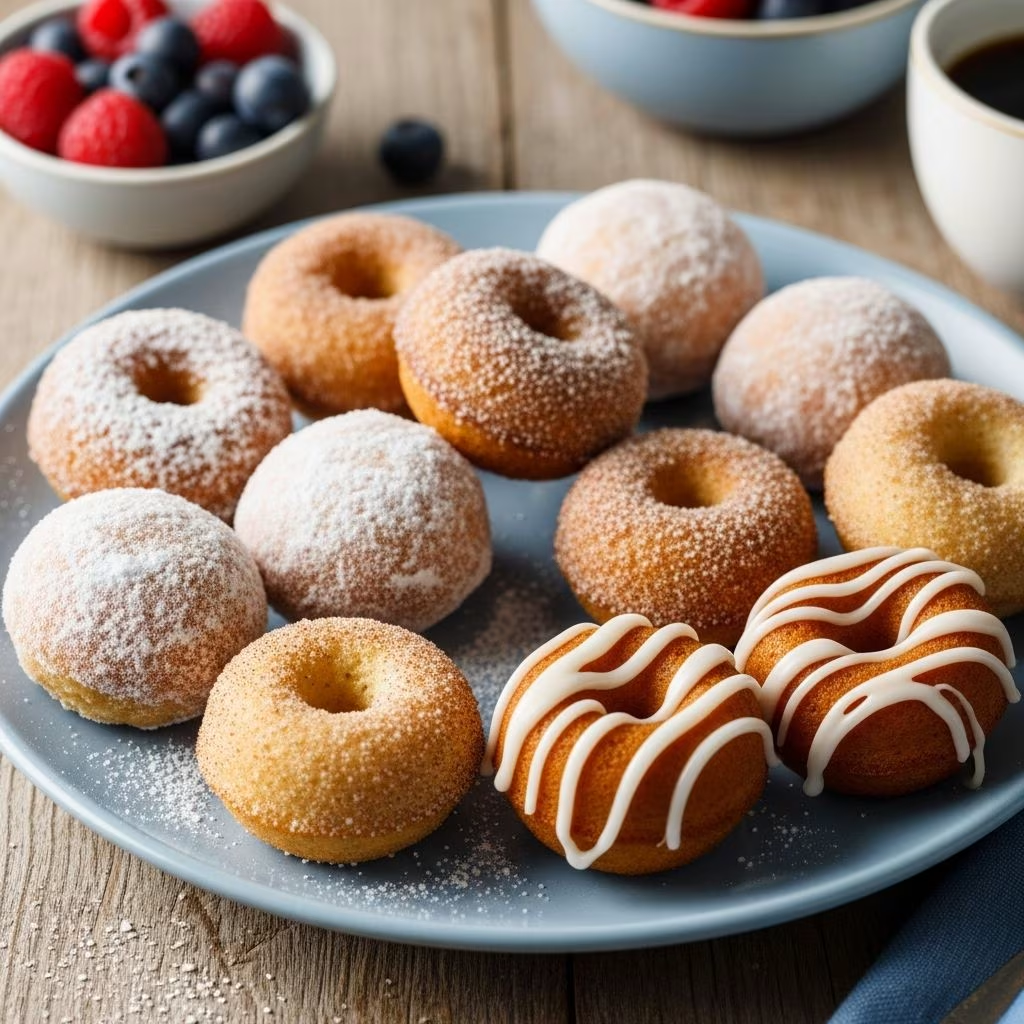
Combine melted butter with powdered sugar, cinnamon, and granulated sugar for classic topping options. While doughnuts remain slightly warm, brush them with melted butter and roll in the sugar mixture until fully coated. Excess sugar taps off easily, leaving an attractive, flavorful exterior.
Glazes and Frostings
Vanilla icing combines powdered sugar, butter, heavy cream, and vanilla extract into a spreadable consistency perfect for dipping warm doughnuts. Chocolate glaze substitutes cocoa powder for some powdered sugar, creating rich, decadent coatings.
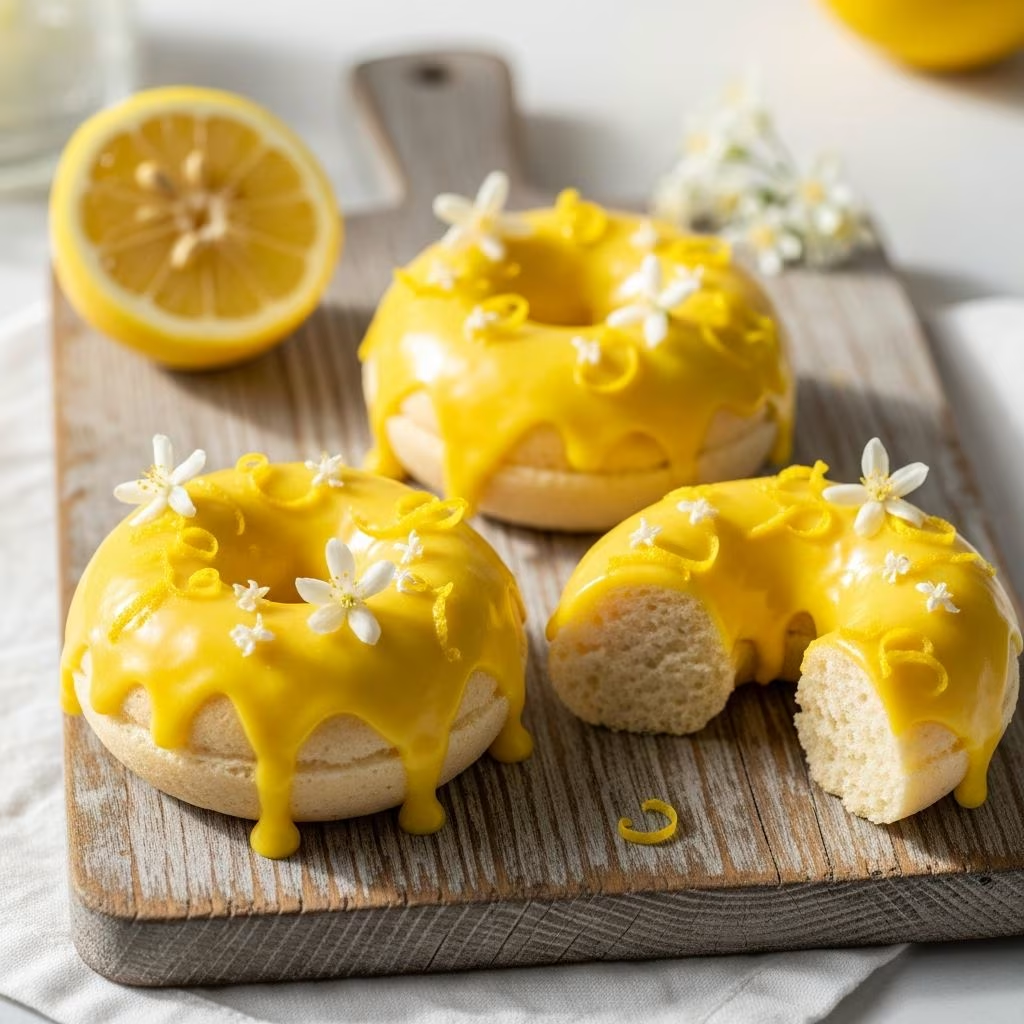
Fruit-based glazes incorporate fruit juices or purees, offering refreshing alternatives to traditional sweetened frostings. Raspberry, lemon, and orange glazes add visual interest while providing natural fruit flavors.
Decorative Elements
Sprinkles, chocolate chips, crushed cookies, and chopped nuts applied immediately after frosting create textural variety and visual appeal. These elements adhere best to wet glazes, so apply decorations before the frosting sets completely.
Storage and Shelf Life Considerations
Baked mini doughnuts maintain optimal freshness for two to three days when stored in an airtight container at room temperature. Glazed varieties may develop slight stickiness over time as the glaze continues to set and potentially absorbs ambient moisture.
Refrigeration extends shelf life to approximately one week, though cold temperatures can accelerate staling processes in some cases. Freezing undecorated doughnuts for up to three months preserves flavor and texture, allowing you to thaw and decorate them as needed for fresh-tasting treats throughout the season.
Frequently Asked Questions
What causes dense, heavy doughnuts?
Over-mixing the batter develops excessive gluten, resulting in tough textures. Additionally, insufficient leavening or expired baking powder can prevent proper rising. Ensure you measure baking powder accurately and verify its freshness before using.
Why do doughnuts stick to the pan?
Inadequate pan preparation represents the primary cause of sticking. Ensure thorough coating with cooking spray or oil, paying special attention to the inner cavity corners where sticking most commonly occurs.
Can I substitute milk alternatives?
Plant-based milks work adequately in most recipes, though buttermilk substitutes may affect final texture and flavor. Coconut milk creates richer results, while almond milk produces lighter crumbs.
How do I achieve uniform browning across multiple batches?
Allow your oven adequate preheat time and consider rotating pans halfway through baking if your oven exhibits hot spots. Aluminum pans typically produce more uniform browning than silicone alternatives.
What adjustments should I make for high-altitude baking?
Increase oven temperature by 25°F, slightly reduce baking powder by one-quarter teaspoon, and possibly reduce sugar by 1 to 2 tablespoons. These adjustments compensate for moisture evaporation and lower boiling points at higher elevations.
References
- All-Purpose Flour Composition and Function — King Arthur Baking Company. 2024. https://www.kingarthurbaking.com/learn/ingredient-spotlight/all-purpose-flour
- Baking Powder and Leavening Agents in Baked Goods — Food and Drug Administration (FDA). 2024. https://www.fda.gov/food/foodadditives-petitions/baking-soda-baking-powder
- High-Altitude Baking Guidelines — Colorado State University Extension. 2023. https://extension.colostate.edu/docs/pubs/foodnut/09379.pdf
- Gluten Development in Baking — American Association of Cereal Chemists. 2023. https://www.aaccnet.org/
- Food Storage and Shelf Life Recommendations — U.S. Department of Agriculture Food Safety and Inspection Service. 2024. https://www.fsis.usda.gov/food-safety/food-storage