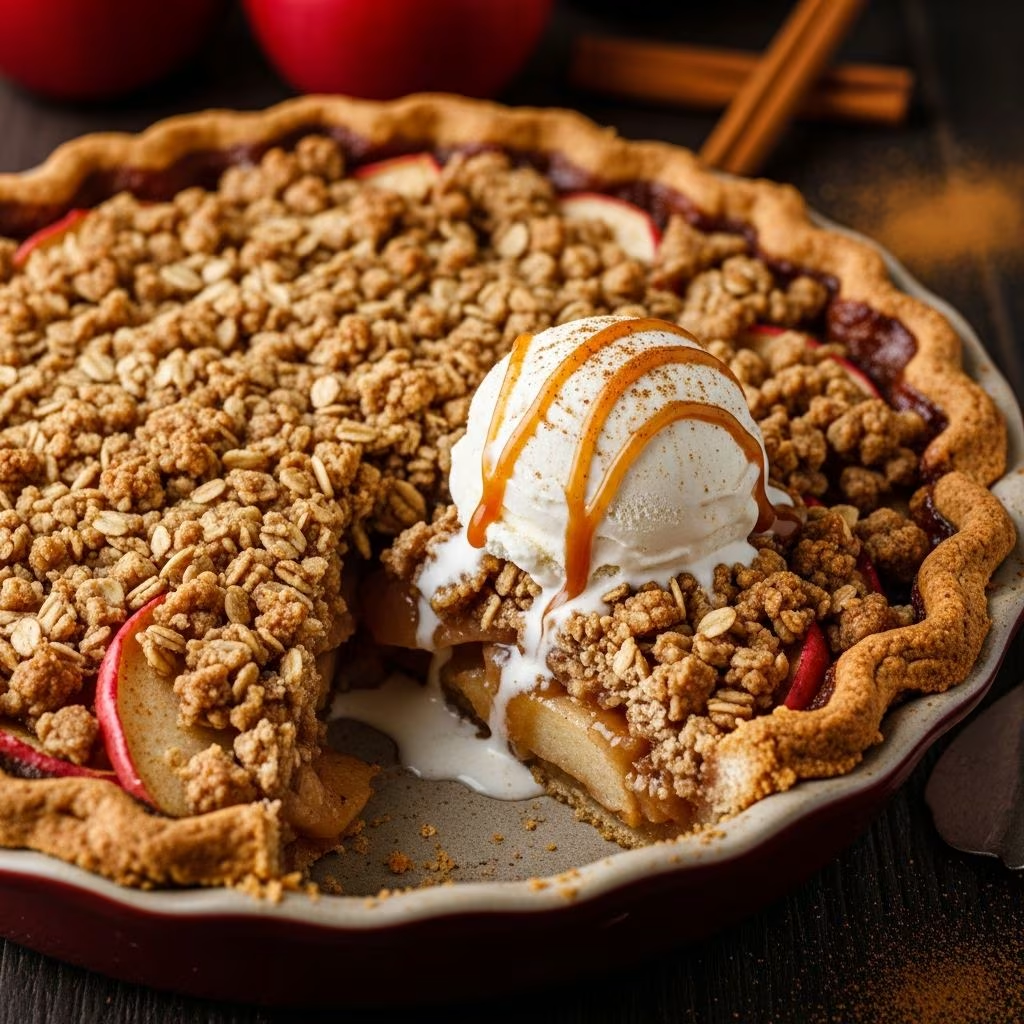
Indulge in the comforting embrace of **apple crisp pie**, where the tender sweetness of baked apples meets a flaky pie crust and a generous layer of buttery crumble. This dessert bridges the gap between traditional apple pie and classic apple crisp, offering the best of both worlds in every slice. Ideal for autumn gatherings, holiday feasts, or cozy weeknight treats, this recipe delivers restaurant-quality results with straightforward home kitchen techniques.
Why Apple Crisp Pie Stands Out
Unlike standard pies with double crusts that can feel heavy, apple crisp pie features a single bottom crust topped with a crumbly streusel. This allows the apples to shine while the topping adds irresistible texture. The combination prevents sogginess—a common pie pitfall—by elevating the fruit above the crust. Bakers love it for its forgiving nature: no intricate lattice or perfect crimping required. Fresh seasonal apples provide natural tartness balanced by sugars and spices, creating layers of flavor that deepen during baking.
Selecting the Best Apples for Your Pie
Choosing the right apples is crucial for texture and taste. Opt for a mix of varieties to achieve balance: tart **Granny Smith** holds shape and cuts sweetness, while sweet **Honeycrisp** or **Golden Delicious** adds juiciness. Aim for 4-6 cups of sliced apples (about 3-5 medium fruits) to fill a 9-inch pie crust generously. Peel, core, and slice into 1/4-inch pieces for even cooking. Firmer apples like Fuji work well too, resisting mushiness during the bake.
- Tart options: Granny Smith, Braeburn
- Sweet options: Honeycrisp, Fuji, Golden Delicious
- Pro tip: Slice uniformly to ensure consistent tenderness
Gathering Essential Ingredients
This recipe yields one 9-inch pie, serving 8. Prep time is 20 minutes, bake time 45-55 minutes.
Filling Components
| Ingredient | Quantity | Purpose |
|---|---|---|
| Apples (mixed varieties) | 5 cups, sliced | Main body, natural sweetness |
| Granulated sugar | 1/2 cup | Sweetens and tenderizes |
| Brown sugar | 1/4 cup | Depth and moisture |
| Lemon juice | 2 tbsp | Brightens flavors, prevents browning |
| Cinnamon | 1 tsp | Warm spice note |
| Nutmeg | 1/4 tsp | Subtle earthiness |
| Cornstarch or flour | 2 tbsp | Thickens juices |
Crumb Topping
| Ingredient | Quantity | Purpose |
|---|---|---|
| Flour | 1 cup | Structure for crumbs |
| Oats (rolled) | 1/2 cup | Chewy texture |
| Brown sugar | 1/2 cup | Caramelization |
| Cold butter, cubed | 1/2 cup (1 stick) | Richness and crunch |
| Cinnamon | 1/2 tsp | Flavor enhancement |
Crust
Use a store-bought 9-inch deep-dish frozen or thawed pie crust for simplicity, or homemade for extra flair.
Step-by-Step Baking Guide
Preheat and prep: Set oven to 375°F (190°C). Place a rimmed baking sheet on the lower rack to catch drips. Let frozen crust thaw slightly (10-15 minutes) on the sheet.
Prepare filling: In a large bowl, toss apple slices with sugars, lemon juice, spices, and thickener. Let sit 15-30 minutes to release juices, then drain excess liquid to avoid a watery pie.
Make crumble: In another bowl, combine flour, oats, brown sugar, cinnamon, and salt. Cut in cold butter using fingers, forks, or pastry blender until pea-sized clumps form. Chill if needed.
Assemble: Mound filling into crust—it will shrink during baking. Pile crumble evenly on top, pressing lightly.
Bake: Place on preheated sheet. Bake 45-55 minutes until topping is golden and apples bubble. If browning too fast, tent with foil after 30 minutes. Cool 2+ hours for clean slices.
Expert Techniques for Perfection
To elevate your pie, precook apples briefly in a skillet with butter, lemon, and spices. Simmer 5-7 minutes until slightly softened, then reduce juices to syrup for intense flavor. This method, drawn from seasoned bakers, ensures a thickened filling without raw fruit pockets. For crunchier topping, incorporate nuts like pecans or walnuts (1/2 cup chopped). Blind-bake the crust 10 minutes at 400°F with weights to prevent sogginess, though optional for this style.
Customizing Your Apple Crisp Pie
Adapt to preferences or pantry staples:
- Spice it up: Add allspice, cloves (1/4 tsp each), or cardamom for complexity.
- Gluten-free: Swap flour and oats for certified GF versions.
- Vegan twist: Use plant-based butter and crust; maple syrup for sugars.
- Mini pies: Divide into muffin tins for portions, bake 25-30 minutes.
- Double batch: Use two crusts on one sheet for efficiency.
Storing and Reheating Tips
Store covered at room temp up to 2 days or refrigerate 4-5 days. Freeze unbaked pie up to 3 months—thaw overnight before baking. Reheat slices at 350°F for 10-15 minutes. For best texture, serve warm with vanilla ice cream or whipped cream; the contrast amplifies flavors.
Common Mistakes and Fixes
| Issue | Cause | Solution |
|---|---|---|
| Soggy bottom | Excess moisture | Drain filling, precook, use hot baking sheet |
| Runny filling | Insufficient thickener | Increase cornstarch to 3 tbsp or reduce juices |
| Burnt topping | High heat | Lower to 350°F after 30 min, foil shield |
| Flat crumble | Warm butter | Chill mixture 15 min before topping |
Frequently Asked Questions
Can I use fresh or canned apples?
Fresh is best for texture, but drained canned works in pinch—reduce sugar by half.
How do I know when it’s done?
Look for bubbling edges and deep golden crumble. Internal temp of apples should hit 195°F.
Make-ahead friendly?
Yes! Assemble and refrigerate up to 24 hours before baking, or freeze.
Nut-free alternative for topping?
Double oats or add coconut flakes for variety.
Pairing suggestions?
Cheddar cheese slices, caramel sauce, or bourbon-spiked whipped cream.
Nutritional Snapshot
Per slice (1/8 pie): ~450 calories, 20g fat, 65g carbs, 4g protein. Values vary by ingredients; use for guidance.
References
- Standards for Fruit Pie Production — USDA Agricultural Research Service. 2023-10-15. https://www.ars.usda.gov
- Apple Varieties for Baking — Washington State University Extension. 2024-05-20. https://extension.wsu.edu
- Baking Science: Pastry Techniques — Institute of Food Technologists. 2022-11-08. https://www.ift.org
- Guidelines for Dessert Preservation — FDA Food Safety Division. 2025-02-14. https://www.fda.gov